
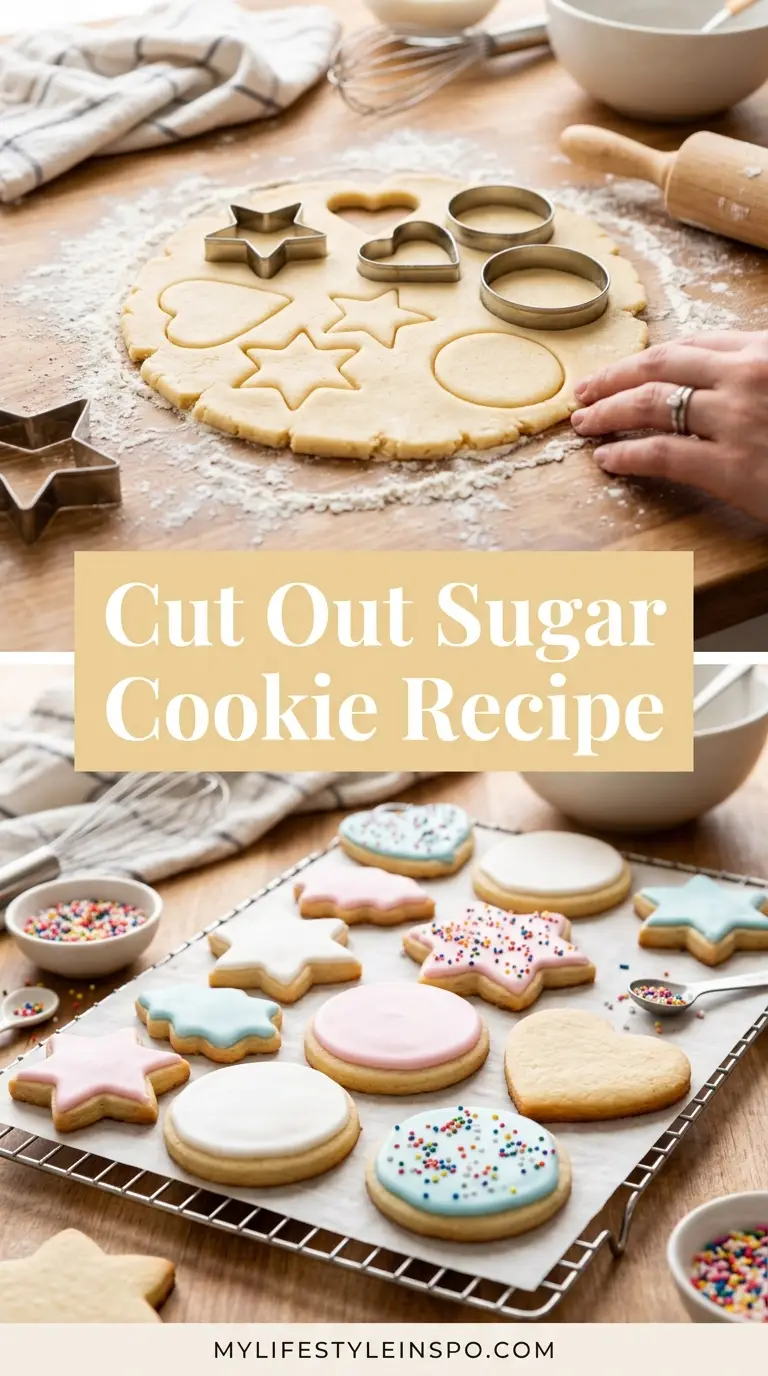
If you have ever dreamed of baking a batch of perfectly shaped, impossibly soft cut out sugar cookies, this recipe is exactly what you need.
These cookies come together with just a handful of pantry staples, hold their shape beautifully in the oven, and provide the ideal canvas for royal icing, buttercream, or even a simple glaze. The secret lies in the right ratio of butter to flour, a proper chill time, and keeping your dough cold as you roll and cut.
This is the kind of recipe that becomes a go-to for every occasion, from Christmas cookie trays to Valentine’s Day treats to birthday celebrations. Once you nail this dough, you will never need to buy pre-made sugar cookie dough again.
This step-by-step guide walks you through every detail, from creaming the butter to decorating with royal icing, so you can pull flawless cookies out of the oven every single time. If you already love baking cookies at home, you might also want to check out our Sugar Cookies and Easy Sugar Cookie Recipe for even more options to explore.
Why You’ll Love This Cut Out Sugar Cookie Recipe
These cookies strike the perfect balance between soft and sturdy. They are tender enough to enjoy plain, yet firm enough to hold intricate cookie cutter shapes without losing their edges in the oven.
The dough is incredibly easy to work with once it has been chilled properly, which means less cracking, less sticking, and a smoother rolling experience overall. A long chill time is the single most important factor in getting clean, picture-perfect shapes.
The flavor is simple but deeply satisfying, thanks to real butter, a touch of vanilla extract, and just a hint of almond extract for that signature bakery-style taste. Almond extract adds a subtle warmth that pairs beautifully with any type of icing you choose to use.
These cookies are also incredibly versatile, making them a crowd favorite at parties and gatherings. They can be decorated to match any theme, season, or color palette you have in mind.
- Soft and tender centers with lightly crisp edges
- Holds cookie cutter shapes perfectly with no spreading
- Simple, pantry-friendly ingredients
- Works beautifully with royal icing, buttercream, or glazes
- Can be made ahead and frozen for up to 3 months
- Perfect for holidays, birthdays, and special celebrations
Our Easy Royal Icing Recipe pairs perfectly with this cookie for stunning decorated results.
Ingredients
The ingredient list for this recipe is short and straightforward, which is one of the best things about classic cut out sugar cookies. Every single item plays a specific role in achieving the right texture and shape.
For the Cookie Dough:
- 2 and 3/4 cups (345g) all-purpose flour, spooned and leveled, plus more for dusting
- 1 teaspoon (5g) baking powder
- 1/2 teaspoon (3g) salt
- 1 cup (226g / 2 sticks) unsalted butter, at room temperature
- 3/4 cup (150g) granulated sugar
- 1 large egg
- 1 teaspoon (5ml) pure vanilla extract
- 1/2 teaspoon (2.5ml) almond extract
For the Royal Icing:
- 3 cups (360g) powdered sugar, sifted
- 2 tablespoons (10g) meringue powder
- 5 to 6 tablespoons (75 to 90ml) warm water
- 1 teaspoon (5ml) vanilla extract or almond extract
- Gel food coloring (optional)
Read Also: Gingerbread Cookie RecipeKitchen Equipment Needed
Having the right tools on hand makes this recipe significantly easier and more enjoyable to work through. You do not need anything too fancy, but a few key items will make a big difference in your results.
- Stand mixer or hand mixer with a paddle attachment
- Large mixing bowl
- Medium mixing bowl
- Whisk
- Measuring cups and spoons
- Rolling pin
- Parchment paper
- Cookie cutters of your choice
- Rimmed baking sheets
- Thin metal spatula or bench scraper
- Plastic wrap or airtight container
- Piping bags and tips (for decorating)
- Wire cooling rack
You might also enjoy baking up a batch of Snickerdoodle Cookies after mastering this recipe.
Recommended Products for This Recipe
These are a few hand-picked products that can genuinely make a difference in the quality of your cut out sugar cookies, from the dough stage all the way through to decorating.
1. KitchenAid Stand Mixer
A stand mixer makes creaming butter and sugar effortless and ensures you get a light, fluffy base every single time. It also frees up your hands so you can scrape down the bowl and add ingredients at the right moments. This is a worthwhile investment for any home baker who plans to bake regularly.
2. Ann Clark Cookie Cutters
These cookie cutters are known for their sharp edges and durable stainless steel construction, which means they cut cleanly through chilled dough without dragging or distorting the shape. They come in a wide variety of sizes and themes, making them perfect for every occasion.
3. Wilton Meringue Powder
Meringue powder is the key ingredient that gives royal icing its signature ability to dry hard and glossy. Wilton is one of the most trusted brands in baking, and their meringue powder blends smoothly without clumping, producing consistent results every time.
4. Ateco Piping Bags and Tips Set
Clean lines and smooth flooding start with quality piping equipment. This set includes a variety of tip sizes that are ideal for both outlining and flooding cookies, and the bags are strong enough to handle thicker icing without bursting.
5. Americolor Gel Food Coloring Set
Gel food coloring delivers vibrant, true-to-life colors without thinning out your icing the way liquid coloring can. This set includes a wide range of shades, and the squeeze bottles make it easy to add just a drop or two at a time for precise color control.
If you enjoy holiday baking and want another crowd pleaser, try making Peanut Butter Blossom Cookies alongside this batch.
Step-by-Step Instructions
1. Prepare Your Dry Ingredients
- In a medium mixing bowl, whisk together the all-purpose flour (2 and 3/4 cups / 345g), baking powder (1 teaspoon / 5g), and salt (1/2 teaspoon / 3g) until everything is evenly combined and there are no visible clumps.
- Set this bowl aside. You will add these dry ingredients to the wet mixture in the next few steps.
- Whisking the dry ingredients together first ensures they distribute evenly throughout the dough, which helps prevent pockets of baking powder or salt.
2. Cream the Butter and Sugar
- Place your room temperature unsalted butter (1 cup / 226g / 2 sticks) into the bowl of your stand mixer fitted with the paddle attachment. If you are using a hand mixer, add the butter to a large mixing bowl instead.
- Add the granulated sugar (3/4 cup / 150g) to the bowl.
- Beat the butter and sugar together on medium-high speed for about 2 to 3 minutes, stopping to scrape down the sides of the bowl at least once.
- The mixture should look noticeably lighter in color and have a fluffy, airy texture when it is properly creamed. This step incorporates air into the dough, which contributes to a softer cookie.
- Do not rush this step. Under-creaming will result in a denser cookie that does not hold its shape as well.
3. Add the Egg and Extracts
- Crack the large egg into the creamed butter mixture and beat on medium speed until fully incorporated, about 20 to 30 seconds.
- Add the vanilla extract (1 teaspoon / 5ml) and almond extract (1/2 teaspoon / 2.5ml) to the bowl.
- Mix on low speed until the extracts are evenly blended in, about 10 to 15 seconds.
- Scrape down the sides and bottom of the bowl with a rubber spatula to make sure nothing is hiding underneath.
- The mixture should look smooth and cohesive at this point, with no visible streaks of egg.
4. Combine Wet and Dry Ingredients
- Add the whisked dry ingredient mixture from Step 1 to the wet mixture in two additions. Start with about half of the dry ingredients and mix on low speed until just combined.
- Add the remaining dry ingredients and continue mixing on low speed until a soft dough forms.
- Be careful not to overmix at this stage. Once the flour has just disappeared and the dough holds together when pressed, stop the mixer.
- If there are a few dry streaks remaining at the bottom of the bowl, use a rubber spatula to gently fold them in by hand. Overworking the dough will make your cookies tough rather than tender.
5. Chill the Dough
- Divide the dough into two equal portions. Shape each portion into a flat disc about one inch thick.
- Wrap each disc tightly in plastic wrap, pressing the wrap closely against the surface of the dough to prevent it from drying out.
- Place the wrapped dough discs in the refrigerator and chill for at least 2 hours, or up to 2 days. Overnight chilling works beautifully if you want to bake the next day.
- Chilling the dough is non-negotiable for cut out sugar cookies. Cold dough holds its shape when cut and resists spreading in the oven. If you skip this step, your cookies will likely lose their crisp edges.
- If you plan to chill for longer than 2 hours, place the wrapped discs in an airtight container or a zip-lock bag to add an extra layer of protection against drying.
6. Preheat the Oven and Prepare Your Baking Sheets
- About 15 to 20 minutes before you are ready to bake, preheat your oven to 350 degrees Fahrenheit (175 degrees Celsius).
- Line your rimmed baking sheets with parchment paper. This prevents sticking and makes cleanup effortless.
- Do not grease the baking sheets. Greasing can cause the cookies to spread more than you want.
7. Roll Out the Dough
- Remove one dough disc from the refrigerator. If it has been chilling for a long time, let it sit at room temperature for about 5 minutes so it is easier to roll, but do not let it get too warm.
- Lightly flour your work surface and place the dough disc on top. You can also roll the dough between two sheets of parchment paper to prevent sticking and reduce the amount of extra flour worked into the dough.
- Using your rolling pin, roll the dough out to an even thickness of about 1/4 inch (6mm). For softer, puffier cookies, roll slightly thicker at about 3/8 inch (9mm). For crispier cookies, aim for closer to 1/8 inch (3mm).
- Rotate the dough a quarter turn every few passes of the rolling pin to ensure even thickness and to prevent sticking.
- If the dough starts to stick or becomes too warm, slide it onto a baking sheet and pop it back into the refrigerator for 10 to 15 minutes before continuing.
8. Cut Out the Cookies
- Press your cookie cutters firmly and straight down into the rolled dough. Avoid twisting the cutters, as this can distort the edges of the cookie shape.
- Carefully lift each cut out cookie using a thin metal spatula or bench scraper and transfer it directly onto your prepared parchment-lined baking sheet.
- Space the cookies about 1 to 2 inches (2.5 to 5cm) apart. They will not spread much, but giving them a little breathing room ensures even baking.
- Gather the dough scraps, press them together into a new disc, wrap in plastic wrap, and refrigerate for at least 15 to 20 minutes before re-rolling. You can re-roll the scraps up to 2 times before the dough becomes too tough.
- Repeat the rolling, cutting, and transferring process with the second dough disc and any chilled scrap dough.
9. Chill the Cut Out Cookies Before Baking (Optional but Recommended)
- Once your cookies are arranged on the baking sheet, place the entire sheet in the refrigerator for an additional 10 to 15 minutes before baking.
- This extra chill helps the cookies hold their shape even more reliably in the oven, especially if your kitchen is warm or your dough softened a bit during rolling.
- This step is particularly helpful for cookies with thin or intricate details that might lose definition if the dough is too warm.
10. Bake the Cookies
- Transfer your chilled baking sheet to the preheated oven and bake at 350 degrees Fahrenheit (175 degrees Celsius) for 8 to 10 minutes.
- The cookies are done when the edges are just barely set and the tops look matte rather than shiny. They should not be golden brown. A slight underbake is intentional, as the cookies will continue to firm up on the hot baking sheet after they come out of the oven.
- Keep a close eye on the first batch to get a feel for how your specific oven runs. Every oven is different, and bake time can vary by a minute or two.
- Remove the baking sheet from the oven and let the cookies cool on the pan for about 5 minutes before transferring them to a wire cooling rack.
11. Cool the Cookies Completely
- Transfer the cookies to a wire cooling rack and allow them to cool completely to room temperature before decorating. This usually takes about 15 to 20 minutes.
- Decorating warm or even slightly cool cookies will cause the icing to melt and run, so patience at this stage pays off in the final result.
- If you are baking in multiple batches, make sure your baking sheets have cooled completely between batches as well. Placing dough on a hot baking sheet can cause uneven baking.
12. Make the Royal Icing
- In a large mixing bowl or the clean bowl of your stand mixer fitted with the paddle attachment, combine the sifted powdered sugar (3 cups / 360g) and meringue powder (2 tablespoons / 10g). Whisk them together until evenly mixed.
- Slowly add the warm water (starting with 5 tablespoons / 75ml) and the vanilla or almond extract (1 teaspoon / 5ml) while mixing on low speed.
- Increase the speed to medium-high and beat for about 2 to 3 minutes until the icing is smooth, glossy, and has a thick, pipeable consistency. If the icing is too thick to pipe comfortably, add water one teaspoon at a time until it flows smoothly out of a piping bag with light pressure.
- Divide the icing into small bowls and add a drop or two of gel food coloring to each bowl, stirring until the color is evenly distributed.
- Keep any icing you are not actively using covered with plastic wrap pressed directly onto the surface, as royal icing dries out very quickly.
13. Decorate the Cookies
- Fill piping bags fitted with your chosen tips with the royal icing. For outlining, use a smaller tip. For flooding (filling in the interior of the cookie), use a slightly larger tip or snip a small hole in the corner of a zip-lock bag.
- Pipe a thin border of icing around the edge of each cookie. Let this outline set for about 2 to 3 minutes.
- Once the outline has firmed up slightly, thin a portion of the icing by adding a few drops of water until it reaches a pourable, flooding consistency. It should flow off a spoon in a thin ribbon that disappears back into the bowl after about 10 seconds.
- Flood the center of each cookie with the thinned icing, using a toothpick or skewer to guide the icing into any corners or tight spots.
- Add sprinkles, colored sugar, or other decorations while the icing is still wet so they adhere properly.
- Allow the decorated cookies to dry completely at room temperature for at least 6 to 8 hours, or overnight, before stacking or packaging.
Our Single Serving Sugar Cookie Recipe is a great option if you want to satisfy a craving without making a full batch.
Tips for Success
A few key habits will make the difference between cookies that spread and cookies that come out perfectly shaped every time. Keep these tips in mind from start to finish.
- Chill your dough thoroughly. At least 2 hours in the refrigerator is the minimum. Cold dough holds its shape and resists spreading during baking. This is the single most important tip in this entire recipe.
- Do not overwork the dough. Once the flour has just been incorporated, stop mixing. Overworking develops gluten in the flour, which makes cookies tough and chewy rather than tender.
- Measure flour correctly. Spoon flour into your measuring cup and level it off with a straight edge. Scooping flour directly from the bag packs it down and can add too much, resulting in a dry, crumbly dough.
- Keep your work surface lightly floured. Too much extra flour worked into the dough during rolling will dry it out and make re-rolled scraps tough. Rolling between sheets of parchment paper is an even better alternative.
- Roll to an even thickness. An adjustable rolling pin or placing dowel rods on either side of your dough can help you achieve a consistent thickness across the entire sheet.
- Re-chill dough that gets too warm. If the dough starts sticking or feels soft while you are rolling and cutting, wrap it back up and refrigerate it for 10 to 15 minutes before continuing.
- Underbake slightly. Pull the cookies out of the oven when the edges are just barely set. They will firm up as they cool on the hot baking sheet.
- Bake similar-sized cookies together. Smaller cookies bake faster than larger ones, so grouping them by size on the baking sheet prevents some from burning while others are still underdone.
For another buttery, tender cookie to add to your baking rotation, try our Shortbread Cookie Recipe.
Serving Suggestions

Cut out sugar cookies are one of the most versatile treats you can bake, and they shine in just about any setting. A little creativity in how you present and serve them goes a long way.
- Arrange decorated cookies on a tiered dessert stand for an impressive holiday or party display
- Package individual cookies in cellophane bags tied with ribbon for charming homemade gifts
- Serve alongside hot chocolate or warm cider for a cozy seasonal pairing, inspired by recipes like Hot Chocolate
- Place them on a cookie platter alongside other favorites like Peanut Butter Cookies and Oatmeal Cookies for a mixed cookie tray
- Use them as edible place cards at a dinner party by writing guest names in royal icing on each cookie
- Set them out on a dessert table at a birthday celebration, themed to match the party colors and decorations
- Ship them in airtight containers layered with parchment paper as thoughtful long-distance gifts
Variations to Try
Once you have mastered the base recipe, there are so many fun directions you can take these cookies. Small ingredient swaps and additions can completely change the flavor profile while keeping the same reliable dough structure.
- Lemon Sugar Cookies: Add 1 tablespoon (15ml) of fresh lemon zest to the dough along with the vanilla extract for a bright, citrusy twist.
- Brown Butter Sugar Cookies: Brown your butter before letting it cool and solidify. This adds a nutty, caramel-like depth of flavor that is absolutely delicious.
- Chocolate Sugar Cookies: Replace 1/4 cup (25g) of the all-purpose flour with unsweetened cocoa powder for rich chocolate cookies that pair beautifully with white chocolate royal icing.
- Cream Cheese Sugar Cookies: Beat 2 ounces (57g) of softened cream cheese into the butter and sugar at the creaming stage. This adds extra tenderness and a very slight tang.
- Spiced Sugar Cookies: Stir in 1 teaspoon (2g) of cinnamon and a pinch of nutmeg with the dry ingredients for a warm, holiday-inspired flavor.
- Orange Sugar Cookies: Add 1 tablespoon (15ml) of fresh orange zest and reduce the almond extract to 1/4 teaspoon (1.25ml) for a fragrant, seasonal variation.
- Vanilla Bean Sugar Cookies: Scrape the seeds from one vanilla bean pod and add them directly to the creamed butter for an intensely aromatic cookie with beautiful flecks throughout.
If you love cookies with bold flavors, our Monster Cookie Recipe is another must-try.
Storage and Reheating
Proper storage keeps your cookies tasting fresh and looking their best for days after baking. The good news is that cut out sugar cookies store exceptionally well, making them ideal for baking ahead.
- Room Temperature: Store plain (undecorated) cookies in an airtight container at room temperature for up to 1 week. Place a sheet of parchment paper between layers to prevent sticking.
- Decorated Cookies: Once the royal icing has fully dried and set, store decorated cookies in an airtight container at room temperature for up to 5 to 7 days. Layer parchment paper between each cookie to protect the icing from smudging.
- Refrigerator: For longer storage, place cookies in an airtight container and refrigerate for up to 10 days. Let them come to room temperature before serving for the best texture.
- Freezing Undecorated Cookies: Plain baked cookies can be frozen in an airtight container or freezer bag for up to 3 months. Allow them to thaw completely at room temperature before decorating or serving.
- Freezing Cookie Dough: Wrap dough discs tightly in plastic wrap and freeze for up to 2 months. Thaw overnight in the refrigerator before rolling and cutting.
- Avoid Freezing Decorated Cookies: Royal icing can become sticky or smeared when thawed, so it is best to freeze cookies before decorating and decorate after thawing.
These tips also apply beautifully when making our Eggnog Cookies during the holiday season.
Nutritional Facts
Per cookie, based on a yield of approximately 24 cookies (3-inch cutters), undecorated:
| Nutrient | Amount |
|---|---|
| Calories | 120 kcal |
| Total Fat | 5g |
| Saturated Fat | 3g |
| Cholesterol | 25mg |
| Sodium | 55mg |
| Total Carbohydrates | 18g |
| Sugars | 6g |
| Protein | 1.5g |
Note: Nutritional values are approximate and will vary depending on cookie size, thickness, and any decorating icing or toppings added.
If you enjoy baking and want to explore more cookie recipes, take a look at our Best Chocolate Chip Cookies Recipe for another beloved classic.
Health Benefits of Key Ingredients
While sugar cookies are certainly a treat, a few of the core ingredients do bring some nutritional value to the table. Understanding what each ingredient contributes can help you appreciate the recipe on a deeper level.
- Eggs: Eggs are an excellent source of high-quality protein and provide essential amino acids that support muscle repair and overall body function. They also contain choline, a nutrient important for brain health and development.
- Butter: Though high in fat, butter contains fat-soluble vitamins A, D, E, and K. It also provides a small amount of butyric acid, which has been linked to gut health benefits in some studies.
- All-Purpose Flour: Flour provides carbohydrates, which are the body’s primary source of energy. It also contains small amounts of B vitamins, iron, and fiber, especially if you opt for a whole wheat variety.
- Vanilla Extract: Pure vanilla extract contains antioxidants that may help protect cells from damage. It has also been traditionally used to support digestive comfort and reduce inflammation in small amounts.
- Almond Extract: Almond extract is derived from almonds, which are well known for being rich in healthy monounsaturated fats, vitamin E, and magnesium, all of which support heart and bone health.
For a heartier baked good with even more nutritional punch, try our Baked Oatmeal Recipe.Frequently Asked Questions
1. Why do my cut out sugar cookies spread in the oven?
Spreading usually comes down to one of three things: the dough was not chilled long enough, there was too much butter relative to flour, or the dough warmed up too much during rolling and cutting. Make sure you chill the dough for at least 2 hours before rolling, and consider popping the cut out cookies back into the refrigerator for 10 to 15 minutes before baking. Keeping everything cold is the best defense against spreading.
2. Can I make the dough ahead of time?
Absolutely. The dough can be made up to 2 days in advance and stored in the refrigerator, wrapped tightly in plastic wrap. For longer storage, freeze the dough discs for up to 2 months and thaw them overnight in the refrigerator before rolling and cutting. Making dough ahead is one of the easiest ways to reduce stress on baking day.
3. What is the best icing for cut out sugar cookies?
Royal icing made with meringue powder is the gold standard for decorating cut out sugar cookies. It dries to a smooth, glossy, hard finish that allows for stacking and gifting. For a simpler option, you can use a glaze-style cookie icing made with powdered sugar, milk, and a touch of corn syrup. Both options taste great and set up beautifully on a well-baked cookie.
4. How thick should I roll the dough?
For soft, puffy cookies that hold up well to decorating, roll the dough to about 1/4 inch (6mm) thick. If you prefer cookies with a bit more crunch at the edges, roll them slightly thinner to about 1/8 inch (3mm). Going thicker than 3/8 inch (9mm) can result in cookies that are underdone in the center, so try to stay within that range.
5. Can I substitute salted butter for unsalted butter?
Yes, you can use salted butter if that is all you have on hand. However, reduce or omit the added salt in the recipe to compensate, since salted butter already contains about 1/4 to 1/2 teaspoon of salt per stick. This small adjustment keeps the overall flavor balanced and prevents the cookies from tasting overly salty.
Read Also: Chewy Chocolate Chip Cookies Recipe

Cut Out Sugar Cookies
Equipment
- Stand mixer or hand mixer with a paddle attachment
- Large mixing bowl
- Medium mixing bowl
- Whisk
- Measuring cups and spoons
- Rolling Pin
- Parchment paper
- Cookie cutters of your choice
- Rimmed baking sheets
- Thin metal spatula or bench scraper
- Plastic wrap or airtight container
- Piping bags and tips - for decorating
- Wire cooling rack
Ingredients
For the Cookie Dough
- 2 3/4 cups all-purpose flour - 345g, spooned and leveled, plus more for dusting
- 1 teaspoon baking powder - 5g
- 1/2 teaspoon salt - 3g
- 1 cup unsalted butter - 226g / 2 sticks, at room temperature
- 3/4 cup granulated sugar - 150g
- 1 large egg
- 1 teaspoon pure vanilla extract - 5ml
- 1/2 teaspoon almond extract - 2.5ml
For the Royal Icing
- 3 cups powdered sugar - 360g, sifted
- 2 tablespoons meringue powder - 10g
- 5 to 6 tablespoons warm water - 75 to 90ml
- 1 teaspoon vanilla extract or almond extract - 5ml
- gel food coloring - optional
Instructions
- In a medium mixing bowl, whisk together the all-purpose flour, baking powder, and salt until evenly combined. Set aside.
- Cream the room temperature butter and granulated sugar on medium-high speed for 2-3 minutes until light and fluffy. Scrape down the bowl as needed.
- Add the egg, vanilla extract, and almond extract. Beat on medium speed until fully incorporated and smooth.
- Add the dry ingredients in two additions on low speed until a soft dough forms. Do not overmix.
- Divide the dough into two discs, wrap tightly in plastic wrap, and chill in the refrigerator for at least 2 hours or up to 2 days.
- Preheat oven to 350°F (175°C). Line baking sheets with parchment paper.
- Roll out one dough disc on a lightly floured surface or between parchment to 1/4 inch thick. Keep dough cold; re-chill if needed.
- Cut out shapes with cookie cutters and transfer to prepared baking sheets, spacing 1-2 inches apart. Re-chill cutouts 10-15 minutes if desired.
- Bake for 8-10 minutes until edges are just set and tops are matte. Cool on the pan 5 minutes, then transfer to a wire rack to cool completely.
- Whisk powdered sugar and meringue powder. Add warm water and extract; beat until smooth and glossy. Adjust consistency and add gel food coloring as desired.
- Pipe borders, flood centers with thinned icing, and add decorations while wet. Allow decorated cookies to dry 6-8 hours or overnight.
Notes
- Chill the dough for at least 2 hours (or overnight) — this is the key to no-spread, sharp-edged cookies.
- Keep dough and cutouts cold during rolling and cutting; return to the refrigerator as needed if it softens.
- Measure flour by spooning into the cup and leveling off to avoid a dry dough.
- Do not overmix the dough once flour is incorporated to keep cookies tender.
- Underbake slightly so cookies remain soft; they firm up as they cool.
- Royal icing dries hard and glossy, perfect for stacking and gifting once fully set.
- Store undecorated cookies up to 1 week at room temperature or freeze up to 3 months.
- Decorated cookies (fully dry) last 5-7 days in an airtight container at room temperature.
- Freeze dough discs up to 2 months; thaw overnight in the refrigerator before using.
- Try variations like lemon zest, brown butter, or spices for different flavors while keeping the same reliable structure.
Final Thoughts
Cut out sugar cookies are one of those timeless baking projects that never gets old, no matter how many times you make them.
This recipe gives you a dough that is genuinely a joy to work with, cookies that come out soft and flavorful, and a blank canvas for all the creative decorating your heart desires. Making them for a holiday, a celebration, or simply because you want something homemade and special, this recipe delivers every single time.
Give it a try and let us know how your cookies turn out. We would love to hear about your experience, so feel free to drop a comment below with your tips, favorite cookie cutter shapes, or any variations you tried.
Recommended:
- Whipped Shortbread Cookies Recipe
- Cranberry Shortbread Cookies Recipe
- Fudge Stripe Cookies Recipe
- No Bake Cookie Recipe
- Oatmeal Raisin Cookie Recipe
- Fig Cookie Recipe
- Cherry Chip Cookie Recipe
- Old Fashioned Chocolate Chip Cookie Recipe
- Almond Macaroon Cookie Recipe
- Chocolate Shortbread Cookies Recipe


