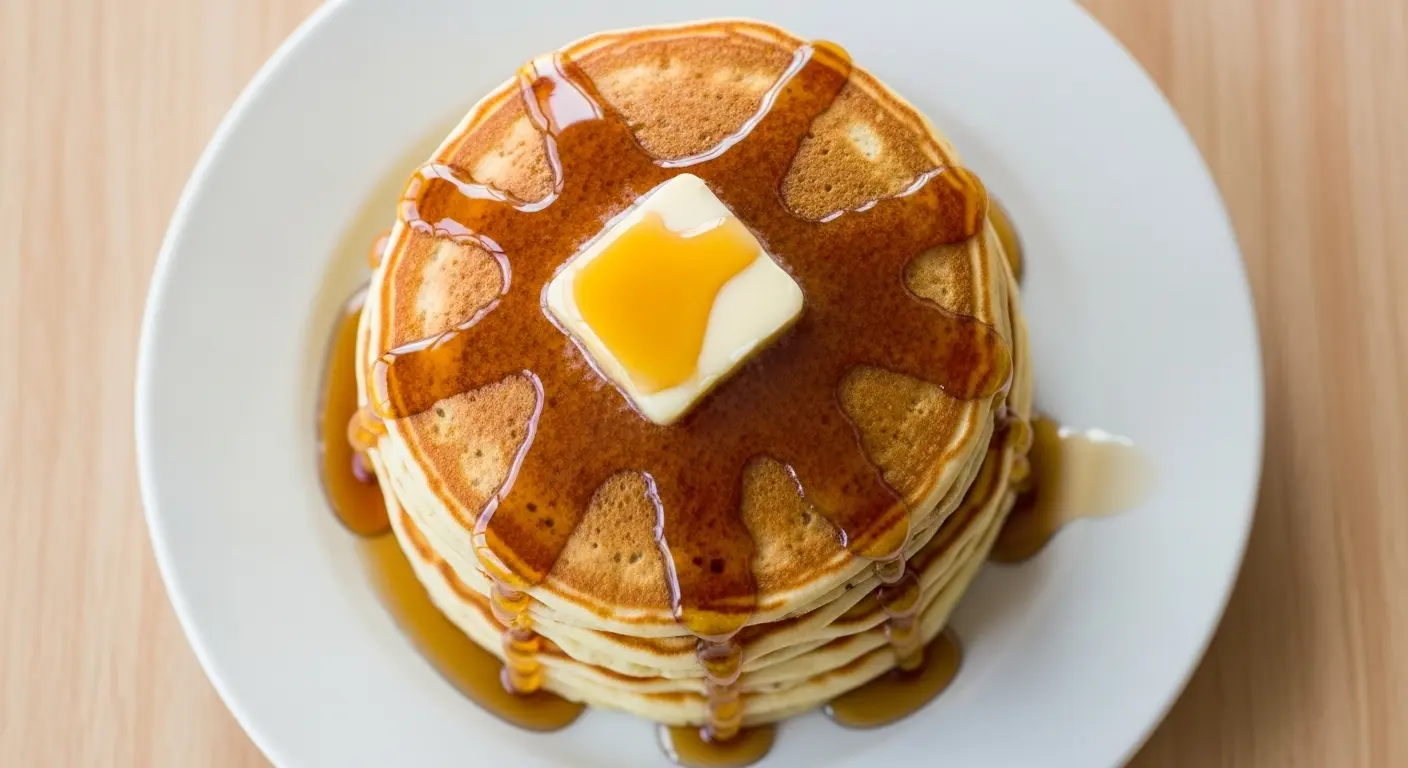
Making a stack of fluffy buttermilk pancake recipe from scratch is one of life’s simple pleasures that never gets old. There’s a reason this classic breakfast has stood the test of time.
The tangy richness of buttermilk transforms ordinary pancakes into something extraordinary. It creates a tender crumb and helps the pancakes rise to impressive heights, thanks to its reaction with baking soda.
These pancakes cook up golden brown on the outside while staying impossibly soft and pillowy on the inside. The subtle tang from the buttermilk adds depth that keeps you coming back for another bite.
I’ve tested this recipe countless times to get the ratios just right. The result is a foolproof method that delivers restaurant-quality pancakes every single time.
This recipe uses basic pantry staples you probably already have on hand. No need for special trips to the grocery store or fancy ingredients.
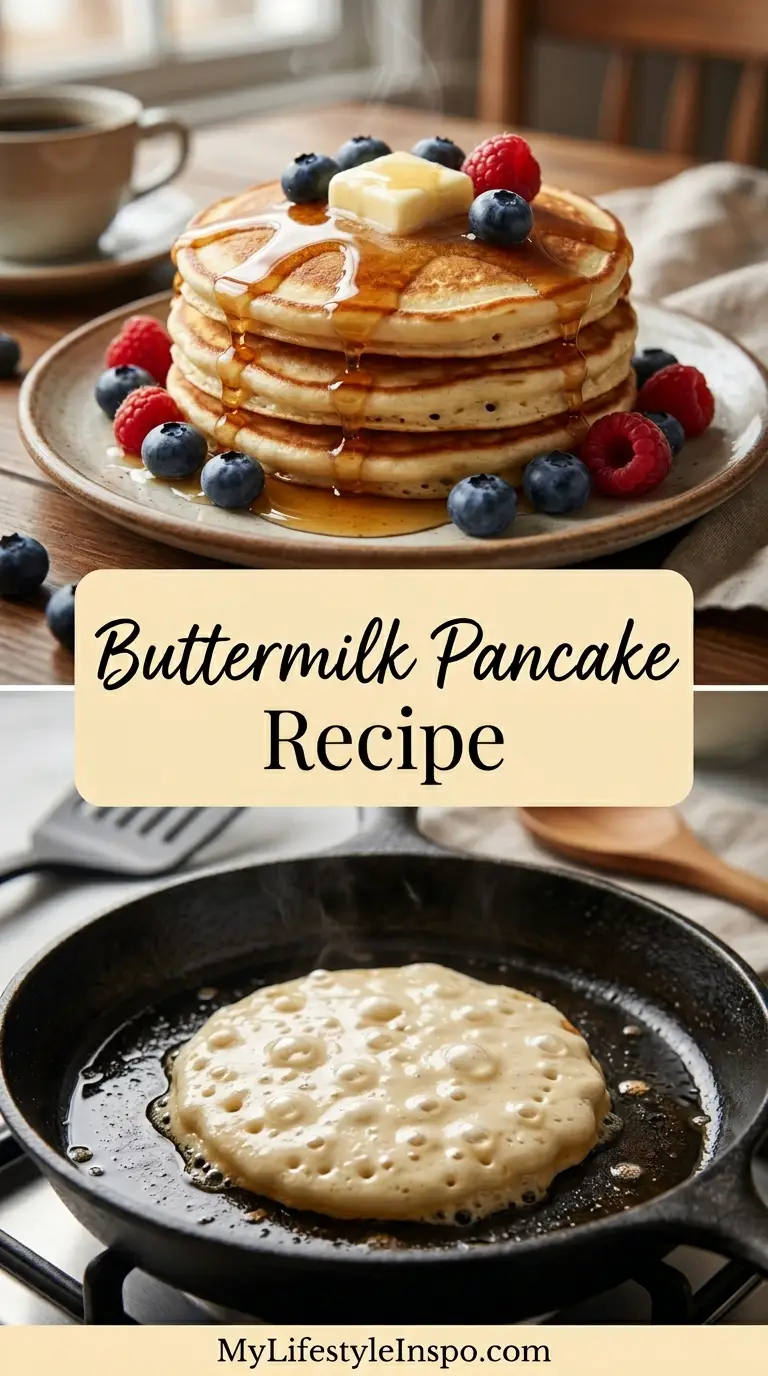
The beauty of homemade buttermilk pancakes is how customizable they are. Add blueberries, chocolate chips, or keep them classic with just butter and maple syrup.
Why You’ll Love This Buttermilk Pancake Recipe
This buttermilk pancake recipe has everything you want in a weekend breakfast.
The batter comes together in minutes with no complicated techniques or special equipment. Even beginners can nail this recipe on the first try.
Here’s what makes these pancakes absolutely irresistible:
- Incredible texture: Light, fluffy, and tender with golden brown edges that add just the right amount of contrast
- Perfect rise: The combination of baking powder and baking soda creates impressive height without any extra effort
- Rich flavor: Real buttermilk adds a subtle tang and depth that box mixes simply cannot replicate
- Consistent results: This tested recipe works every time, so you can count on perfect pancakes for your family
- Easy customization: The base recipe is versatile enough to handle mix-ins or toppings without losing its fluffy texture
- Quick preparation: From mixing bowl to breakfast table in under 20 minutes
Another favorite for breakfast spreads is Breakfast Potatoes.
Ingredients
Each ingredient in this buttermilk pancake recipe plays a specific role in creating the perfect texture and flavor. The buttermilk provides acidity that reacts with the baking soda to create lift, while also adding moisture and tenderness. The combination of baking powder and baking soda ensures maximum fluffiness. Melted butter adds richness, and a touch of sugar balances the tanginess without making the pancakes overly sweet.
- 2 cups (250g) all-purpose flour
- 2 tablespoons (25g) granulated sugar
- 2 teaspoons (10g) baking powder
- 1 teaspoon (5g) baking soda
- 1/2 teaspoon (3g) salt
- 2 cups (480ml) buttermilk
- 2 large eggs
- 4 tablespoons (57g) unsalted butter, melted
- 1 teaspoon (5ml) pure vanilla extract
- Additional butter for greasing the griddle
You might also enjoy: French Toast Casserole
Kitchen Equipment Needed
Having the right tools makes cooking buttermilk pancakes much easier and ensures consistent results. A large griddle allows you to cook multiple pancakes at once, which is helpful when feeding a crowd. If you don’t have a griddle, a heavy-bottomed skillet works just as well. Wire whisks help incorporate ingredients without overmixing, and measuring cups ensure accuracy for the best texture.
- Large mixing bowl
- Medium mixing bowl
- Wire whisk
- Measuring cups and spoons
- Griddle or large non-stick skillet
- Spatula
- 1/4 cup measuring cup or ladle for portioning batter
Read Also: Air Fryer Bacon Recipe
Recommended Products for This Recipe
These carefully selected products will help you make the best buttermilk pancakes possible and make the cooking process more enjoyable.
1. Presto Electric Griddle
An electric griddle with temperature control takes the guesswork out of pancake making. The even heat distribution ensures every pancake cooks uniformly, and the large surface lets you make multiple pancakes at once. This means less time standing at the stove and more time enjoying breakfast with your family.
2. Premium Buttermilk Powder
Keeping buttermilk powder in your pantry means you can make these pancakes anytime without worrying about fresh buttermilk going bad. It reconstitutes easily and delivers the same tangy flavor and tender texture as fresh buttermilk. This is a great backup to have on hand for spontaneous breakfast cravings.
3. OXO Good Grips Whisk
A quality whisk makes mixing the batter effortless without incorporating too much air or creating lumps. The comfortable grip reduces hand fatigue, and the sturdy wires blend ingredients smoothly. This tool makes the difference between overmixed, tough pancakes and perfectly tender ones.
4. Nordic Ware Griddle
This professional-grade griddle heats evenly and has a nonstick surface that makes flipping pancakes a breeze. The low edges allow easy spatula access, and the heavy-gauge aluminum construction ensures consistent heat without hot spots. It’s an investment that will serve you well for years of weekend breakfasts.
If you love breakfast dishes, try this Breakfast Casserole too.
Step-by-Step Instructions
Follow these detailed instructions to make perfect buttermilk pancakes every time. Taking your time with each step ensures the best texture and flavor.
1. Prepare Your Ingredients
- Take the eggs and buttermilk out of the refrigerator and let them sit at room temperature for about 15 minutes. This helps them incorporate more smoothly into the batter.
- Melt the butter in the microwave or on the stovetop, then set it aside to cool slightly. You want it melted but not hot, as adding hot butter directly to the eggs can scramble them.
- Gather all your dry ingredients and measuring tools to streamline the mixing process.
2. Mix the Dry Ingredients
- In a large mixing bowl, combine the flour, sugar, baking powder, baking soda, and salt.
- Use a wire whisk to thoroughly blend these dry ingredients together for about 30 seconds. This ensures even distribution of the leavening agents, which is critical for uniform rise.
- Make a well in the center of the dry ingredients. This technique helps prevent lumps when you add the wet ingredients.
3. Combine the Wet Ingredients
- In a medium bowl, crack the eggs and lightly beat them with a whisk until the yolks and whites are just combined.
- Add the buttermilk to the beaten eggs and whisk together until fully blended.
- Drizzle in the melted butter while whisking continuously. This helps emulsify the butter into the mixture rather than letting it solidify in clumps.
- Stir in the vanilla extract and mix until everything is well incorporated.
4. Create the Batter
- Pour the wet ingredient mixture into the well you created in the dry ingredients.
- Using a whisk or wooden spoon, gently fold the wet and dry ingredients together. Start in the center and work your way outward in a circular motion.
- Mix just until the flour is moistened and no large streaks of flour remain visible. The batter should still be slightly lumpy, and you may see small pockets of flour. This is exactly what you want.
- Do not overmix. Overmixing develops the gluten in the flour, which makes pancakes tough and flat instead of light and fluffy. Stop mixing as soon as you no longer see large flour streaks.
- Let the batter rest for 5 minutes while you preheat your griddle. This resting time allows the flour to fully hydrate and the leavening agents to begin activating.
5. Preheat the Griddle
- Heat your griddle or skillet over medium heat. This usually takes about 3 to 4 minutes.
- Test if the griddle is ready by flicking a few drops of water onto the surface. If the water droplets dance and sizzle before evaporating, the temperature is perfect.
- Lightly grease the griddle with butter or cooking spray. Use a paper towel to spread the butter evenly and remove any excess.
6. Cook the Pancakes
- Use a 1/4 cup measuring cup or ladle to pour batter onto the hot griddle. Leave about 2 inches between each pancake to allow room for spreading and easy flipping.
- Cook the pancakes undisturbed for 2 to 3 minutes. Watch for visual cues: the edges will start to look dry and set, and bubbles will form on the surface.
- Wait until the bubbles begin to pop and leave small holes on the surface. This indicates the pancake is ready to flip. You should also notice the edges are no longer shiny.
- Use a wide spatula to gently slide under the pancake. Flip it in one smooth, confident motion.
- Cook the second side for an additional 1 to 2 minutes until golden brown. The second side always cooks faster than the first.
- Transfer the cooked pancakes to a plate and cover loosely with a clean kitchen towel to keep them warm while you cook the remaining batches.
- Repeat with the remaining batter, adding more butter to the griddle as needed between batches.
This pairs beautifully with Air Fryer French Toast for a complete breakfast spread.
Tips for Success
These proven tips will help you avoid common pancake pitfalls and achieve perfect results every time. Pay attention to these details for the fluffiest, most flavorful buttermilk pancakes.
Here are the key techniques that make all the difference:
- Don’t overmix the batter: Lumps are your friend when it comes to pancake batter. Stop mixing as soon as the wet and dry ingredients are combined, even if you see small lumps. Overmixing develops gluten, which creates tough, flat pancakes instead of light, fluffy ones.
- Let the batter rest: Allowing the batter to sit for 5 to 10 minutes gives the flour time to fully absorb the liquid and lets the leavening agents activate. This short rest makes a noticeable difference in the final texture.
- Use the right heat: Medium heat is ideal for buttermilk pancakes. Too hot, and the outside will burn before the inside cooks through. Too low, and you’ll get pale, dense pancakes. Look for that sweet spot where the pancakes develop a golden brown color in 2 to 3 minutes per side.
- Wait for the bubbles to pop: Don’t flip too early. Wait until you see bubbles forming on the surface, then watch for them to pop and create small holes. The edges should also look dry and set. This ensures the pancake is cooked enough to flip without breaking.
- Keep pancakes warm: If you’re making multiple batches, place cooked pancakes on an oven-safe plate in a 200°F (93°C) oven. Cover them loosely with aluminum foil to prevent drying out while keeping them warm and fluffy.
- Use fresh leavening agents: Baking powder and baking soda lose their potency over time. If your pantry staples are more than six months old, replace them for maximum rise and fluffiness.
- Don’t press down on the pancakes: Resist the urge to flatten pancakes with your spatula while they cook. This squeezes out the air bubbles and makes them dense.
Another favorite breakfast option is Easy French Toast.
Serving Suggestions
Buttermilk pancakes are incredibly versatile and pair well with both classic and creative toppings. The slightly tangy flavor makes them the perfect canvas for sweet additions.
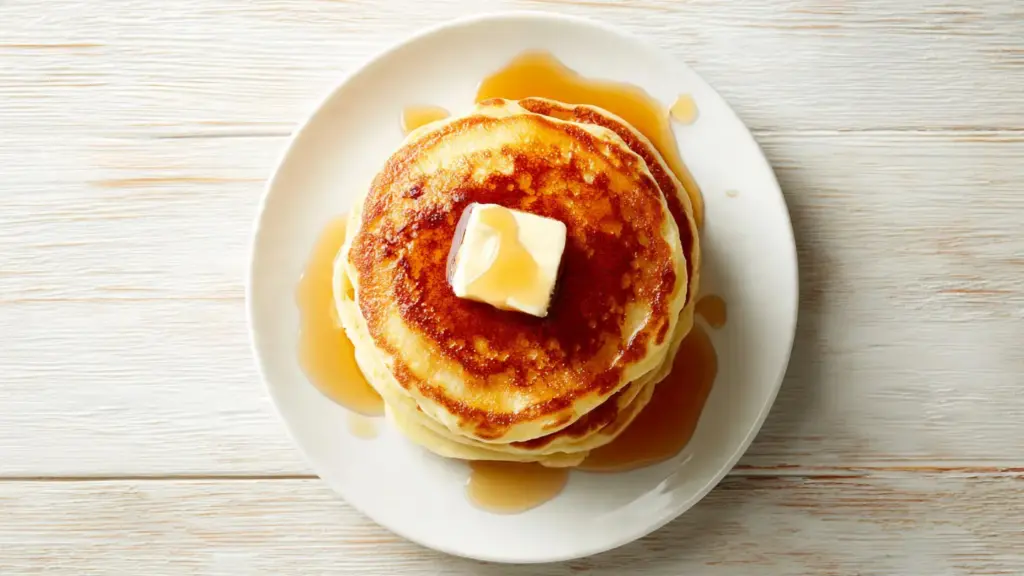
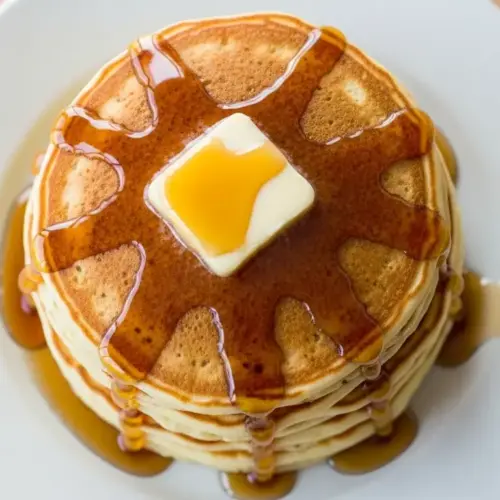
The traditional approach is to serve these pancakes hot off the griddle with a pat of butter melting on top and a generous drizzle of pure maple syrup. This simple combination lets the pancakes’ flavor shine through.
Here are more delicious ways to enjoy your buttermilk pancakes:
- Classic style: Stack 3 to 4 pancakes high, top with a tablespoon of butter, and drizzle with warm maple syrup
- Fresh fruit: Add sliced strawberries, blueberries, bananas, or mixed berries between the layers and on top
- Whipped cream: Dollop freshly whipped cream or whipped coconut cream on top for extra decadence
- Chocolate lovers: Drizzle with chocolate sauce or Nutella, and sprinkle with chocolate chips
- Nut butter: Spread peanut butter, almond butter, or cashew butter between the pancakes for added protein
- Caramelized bananas: Cook banana slices in butter and brown sugar until golden and spoon over the stack
- Berry compote: Simmer fresh or frozen berries with a little sugar until they break down into a thick sauce
- Savory twist: Top with crispy bacon, fried eggs, and a drizzle of honey for a sweet and savory combination
- Yogurt parfait style: Layer pancakes with Greek yogurt, granola, and fresh fruit
- Lemon ricotta: Mix ricotta cheese with lemon zest and a touch of honey, then spread between the pancakes
For a savory breakfast side, try these Cheesy Potatoes.
Variations to Try
Once you master the basic buttermilk pancake recipe, these variations will keep breakfast exciting. Each adaptation brings a unique flavor profile while maintaining the fluffy texture you love.
These creative twists transform the classic recipe into something special:
- Blueberry buttermilk pancakes: Gently fold 1 cup of fresh or frozen blueberries into the batter just before cooking. The berries will burst slightly during cooking, creating pockets of sweet fruit throughout.
- Chocolate chip pancakes: Sprinkle a handful of chocolate chips onto each pancake immediately after pouring the batter on the griddle. This method distributes the chips evenly and prevents them from sinking.
- Banana walnut pancakes: Mash 1 ripe banana and fold it into the batter along with 1/2 cup of chopped walnuts for a nutty, naturally sweet variation.
- Cinnamon sugar pancakes: Add 1 teaspoon of ground cinnamon to the dry ingredients and increase the sugar to 3 tablespoons for a warming spice flavor.
- Lemon poppy seed pancakes: Add 2 tablespoons of lemon zest and 1 tablespoon of poppy seeds to the batter for a bright, citrusy version.
- Pumpkin spice pancakes: Replace 1/2 cup of the buttermilk with pumpkin puree and add 1 teaspoon of pumpkin pie spice to the dry ingredients.
- Whole wheat pancakes: Substitute half of the all-purpose flour with whole wheat flour for added fiber and a nuttier flavor. You may need to add a tablespoon or two more buttermilk to achieve the right consistency.
- Protein-packed pancakes: Add 1/4 cup of protein powder to the dry ingredients and increase the buttermilk by 2 tablespoons to compensate for the extra absorption.
Read Also: Belgian Waffle Recipe
Storage and Reheating
Proper storage keeps your buttermilk pancakes fresh and delicious for several days. You can also freeze them for quick breakfasts down the road.
Follow these guidelines to maintain quality:
- Refrigerator storage: Let the pancakes cool completely to room temperature. Stack them with parchment paper between each pancake to prevent sticking. Store in an airtight container or resealable plastic bag in the refrigerator for up to 4 days.
- Freezer storage: For longer storage, place cooled pancakes in a single layer on a baking sheet and freeze until solid, about 1 hour. This prevents them from sticking together. Transfer the frozen pancakes to a freezer-safe bag or container, separating layers with parchment paper. They’ll keep for up to 2 months.
- Reheating in the microwave: Place 1 to 3 pancakes on a microwave-safe plate. Heat for 20 seconds, flip them over, and heat for another 20 seconds until warmed through.
- Reheating in the oven: Preheat the oven to 350°F (175°C). Arrange pancakes in a single layer on a baking sheet. Cover loosely with aluminum foil and heat for 5 to 7 minutes until warm.
- Reheating in the toaster: Pop frozen or refrigerated pancakes directly into the toaster on a medium setting. This method creates slightly crispy edges while keeping the centers soft.
- Reheating on the stovetop: Heat a skillet over medium-low heat with a small amount of butter. Warm the pancakes for about 1 minute per side until heated through.
For meal prep fans, check out Easy Waffle Recipe which stores similarly well.
Nutritional Facts
Per serving (2 medium pancakes, approximately 4 inches in diameter):
- Calories: 280
- Total Fat: 9g
- Saturated Fat: 5g
- Cholesterol: 85mg
- Sodium: 520mg
- Total Carbohydrates: 40g
- Dietary Fiber: 1g
- Sugars: 8g
- Protein: 9g
- Calcium: 180mg
- Iron: 2mg
- Potassium: 190mg
Note: Nutritional information is approximate and will vary based on specific ingredients used and portion sizes. This calculation does not include toppings like butter or syrup.
You might also like this Gluten Free Pancake Recipe.
Health Benefits of Key Ingredients
While buttermilk pancakes are an indulgent breakfast treat, they do offer some nutritional value. Understanding the benefits of the main ingredients can help you appreciate what you’re eating.
Here’s what makes these pancakes more than just delicious:
- Buttermilk: Despite its rich name, buttermilk is actually low in fat and provides probiotics that support digestive health. It contains calcium for strong bones and teeth, as well as B vitamins that help convert food into energy. The lactic acid in buttermilk also aids in the absorption of minerals.
- Eggs: Each egg contributes high-quality protein that keeps you satisfied longer. Eggs provide choline, which supports brain health and development, and contain lutein and zeaxanthin for eye health. They’re also a natural source of vitamin D.
- Whole grain options: When you substitute some or all of the all-purpose flour with whole wheat flour, you add fiber that aids digestion and helps regulate blood sugar levels. Whole grains also provide more vitamins and minerals than refined flour.
- Moderate sugar content: This recipe uses just enough sugar to enhance flavor without making the pancakes overly sweet. At only 2 tablespoons for the entire batch, the sugar per serving is quite reasonable, especially compared to many commercial pancake mixes.
- Customizable nutrition: You can boost the nutritional profile by adding fresh fruit for vitamins and antioxidants, nuts for healthy fats and protein, or flaxseed meal for omega-3 fatty acids.
This pairs well with Air Fryer Egg Cups for a protein-rich breakfast.
Frequently Asked Questions
1. Can I make buttermilk pancakes without buttermilk?
Yes, you can create a buttermilk substitute if you don’t have the real thing on hand. Add 2 tablespoons of white vinegar or lemon juice to a measuring cup, then fill it with regular milk to reach the 2-cup mark. Stir and let it sit for 5 minutes until it curdles slightly. While this works in a pinch, I highly recommend using real buttermilk for the best flavor and texture, as the substitute won’t provide the same richness and tang.
2. Why are my pancakes flat and not fluffy?
Flat pancakes usually result from one of three issues: overmixing the batter, expired leavening agents, or cooking at too low a temperature. Make sure your baking powder and baking soda are fresh and haven’t been sitting in your pantry for more than six months. Mix the batter just until combined, leaving it slightly lumpy. Finally, ensure your griddle is properly preheated to medium heat before adding the batter.
3. Can I make the batter ahead of time?
You can prepare the batter up to 24 hours in advance and store it in the refrigerator. Keep in mind that the pancakes may not rise quite as high since some of the leavening power will be lost. Before cooking, gently stir the batter and add a tablespoon or two of buttermilk to loosen it if needed, as it will thicken in the refrigerator. For best results, I recommend mixing the dry ingredients ahead of time and adding the wet ingredients just before cooking.
4. How do I know when to flip the pancakes?
Watch for three visual cues that indicate your pancakes are ready to flip. First, bubbles will form on the surface of the batter. Second, these bubbles will begin to pop, leaving small holes. Third, the edges will look dry and set rather than wet and shiny. When you see all three signs, it’s time to flip. This usually takes about 2 to 3 minutes after pouring the batter.
5. Can I freeze buttermilk pancakes?
Absolutely, and they freeze beautifully for quick breakfasts throughout the month. Let the pancakes cool completely, then place them in a single layer on a baking sheet and freeze until solid. Once frozen, transfer them to a freezer-safe bag or container with parchment paper between layers to prevent sticking. They’ll keep for up to 2 months. Reheat them directly from frozen in the toaster, microwave, or oven for a convenient breakfast option.
For another freezer-friendly breakfast, try Old Fashioned Pancake Recipe.
Fluffy Buttermilk Pancakes
Equipment
- Large mixing bowl
- Medium mixing bowl
- Wire whisk
- Measuring cups and spoons
- Griddle - Large griddle preferred; a heavy-bottomed non-stick skillet works too
- Spatula - Wide spatula recommended for easy flipping
- 1/4 cup measuring cup or ladle - For portioning batter evenly
Ingredients
- 2 cups all-purpose flour - 250g
- 2 tablespoons granulated sugar - 25g
- 2 teaspoons baking powder - 10g; must be fresh for best rise
- 1 teaspoon baking soda - 5g; must be fresh for best rise
- 1/2 teaspoon salt - 3g
- 2 cups buttermilk - 480ml; room temperature; see notes for substitute
- 2 large eggs - room temperature
- 4 tablespoons unsalted butter - 57g, melted and slightly cooled
- 1 teaspoon pure vanilla extract - 5ml
For the Griddle
- unsalted butter - for greasing the griddle between batches
Instructions
- Remove the eggs and buttermilk from the refrigerator and let them rest at room temperature for 15 minutes. Melt the butter and set aside to cool slightly.
- In a large bowl, whisk together the flour, sugar, baking powder, baking soda, and salt for about 30 seconds until evenly combined. Make a well in the center.
- In a medium bowl, lightly beat the eggs, then whisk in the buttermilk, melted butter, and vanilla extract until fully combined.
- Pour the wet ingredients into the well of the dry ingredients and gently fold together just until no large flour streaks remain — the batter should still be lumpy. Do not overmix. Let the batter rest for 5 minutes.
- Heat a griddle or skillet over medium heat for 3–4 minutes. Test readiness by flicking water onto the surface — it should sizzle and dance. Lightly grease with butter.
- Pour 1/4 cup of batter per pancake onto the griddle, leaving 2 inches between each. Cook undisturbed for 2–3 minutes until bubbles form and pop on the surface and edges look dry, then flip and cook 1–2 minutes more until golden.
- Transfer cooked pancakes to a plate and cover loosely with a kitchen towel to keep warm. Repeat with remaining batter, greasing the griddle as needed. Serve hot with butter and maple syrup.
Notes
- Don’t overmix: A lumpy batter is the secret to fluffy pancakes. Stop mixing as soon as the flour streaks disappear — overmixing develops gluten and makes pancakes tough and flat.
- No buttermilk? Add 2 tablespoons of white vinegar or lemon juice to a measuring cup, then fill to the 2-cup mark with regular milk. Stir and let sit 5 minutes until slightly curdled. Real buttermilk gives superior flavor and texture.
- Check your leavening agents: Baking powder and baking soda older than 6 months lose potency. Replace them for the best rise and fluffiness.
- Don’t press down: Never flatten pancakes with your spatula while cooking — this squeezes out air bubbles and creates dense results.
- Keep pancakes warm: Place cooked pancakes on an oven-safe plate in a 200°F (93°C) oven, loosely covered with foil, while you finish the remaining batches.
- Make-ahead batter: Mix dry and wet ingredients separately up to 24 hours ahead. Combine just before cooking for best results. Pre-mixed batter can be refrigerated up to 24 hours but may yield slightly less rise.
- Refrigerator storage: Cool completely and stack with parchment paper between layers in an airtight container for up to 4 days.
- Freezer storage: Freeze in a single layer on a baking sheet until solid, then transfer to a freezer bag with parchment between layers. Keeps up to 2 months. Reheat in a toaster, microwave, or 350°F oven.
- Add-ins: Fold in 1 cup of blueberries, a handful of chocolate chips, or a mashed ripe banana just before cooking. Sprinkle chocolate chips directly onto poured batter to keep them evenly distributed.
- Whole wheat variation: Substitute up to half the all-purpose flour with whole wheat flour. Add 1–2 extra tablespoons of buttermilk to maintain the correct batter consistency.
Final Thoughts
Making buttermilk pancakes from scratch is easier than you might think, and the results are so much better than anything from a box. The fluffy texture, golden color, and rich flavor will make these a regular request at your breakfast table.
I hope this recipe becomes a favorite in your home just as it has in mine. Give it a try this weekend and taste the difference that real buttermilk and simple techniques can make.
Feel free to share your pancake creations in the comments below or let me know which variation you tried first. Happy cooking!
Recommended:
- Kodiak Pancake Recipe
- Pancake Recipe Without Milk
- IHOP Pancake Recipe
- German Pancake Recipe
- Betty Crocker Pancake Recipe
- Classic French Toast Recipe
- Filipino Hot Cake Recipe
- Easy Sugar Cookie Recipe
- Homemade Granola Recipe
- Cloud Eggs Recipe


