If you’ve been struggling to get a truly juicy baked chicken breast recipe on the table, you are absolutely not alone. Chicken breast has a reputation for coming out dry and rubbery, but that only happens when a few key steps are skipped. When you nail those steps — proper seasoning, the right oven temperature, and a crucial rest period — the result is something that genuinely surprises people. Tender, flavorful, and satisfying every time.
This recipe uses simple pantry staples: boneless, skinless chicken breasts, olive oil, and a seasoning blend built around smoked paprika, garlic powder, onion powder, and dried oregano. The smoked paprika is particularly important here. It adds a subtle depth and beautiful color that plain paprika simply can’t deliver.
The method is straightforward. Pound the chicken to an even thickness, coat it generously in the spice paste, and bake at a high temperature (425°F / 220°C). High heat is key. It allows the outside to develop a lightly golden crust while the inside stays moist and succulent — something a low-and-slow approach just doesn’t achieve with lean chicken breast.
Pair this with a simple side and you’ve got a complete meal in under 35 minutes.
This pairs wonderfully with Air Fryer Chicken Breast if you’re curious to see how the two cooking methods compare — both produce incredibly juicy results but with their own unique textures.
Why You’ll Love This Baked Chicken Breast Recipe
This recipe is the kind of weeknight workhorse that earns a permanent spot in your meal rotation.
It requires almost no prep, uses pantry staples you already have, and delivers results that genuinely impress.
The seasoning blend creates a flavorful crust without overwhelming the natural taste of the chicken — it’s bold enough to be exciting but balanced enough to pair with almost anything.
It’s also one of the best recipes for meal prep. Cook a batch on Sunday and you’ll have ready-to-use protein for salads, wraps, pasta, grain bowls, and more all week long.
Here’s what makes this baked chicken breast recipe truly stand out:
- Juicy and tender: Pounding the chicken to an even thickness and baking at high heat are the two biggest secrets to avoiding dry chicken.
- Ready in under 35 minutes: From prep to plate, this is a genuinely quick dinner on even the busiest weeknights.
- Made with pantry staples: No specialty ingredients needed — just spices you almost certainly already have.
- Incredibly versatile: Serve it as a standalone protein, slice it for sandwiches, or shred it for tacos and pasta dishes.
- Meal-prep friendly: Stores well in the fridge for up to 4 days, making it one of the smartest things you can cook in advance.
- Customizable: The base seasoning blend works beautifully, but you can swap in any spice combination you love.
Another family favorite you might love is this Chicken Marsala Recipe — if you’re looking to expand your chicken breast repertoire beyond everyday baking.
Ingredients
The ingredient list is short and purposeful. Every item plays a specific role in creating the flavor and texture that makes this recipe so reliable.
The olive oil helps the spice blend adhere to the chicken and promotes even browning. Brown sugar is optional but excellent — it adds just a touch of caramelization to the crust and keeps the breast juicy as it bakes by drawing moisture in. Smoked paprika provides color, mild smokiness, and complexity that regular paprika lacks.
- 4 boneless, skinless chicken breasts (about 6–8 oz / 170–225g each)
- 2 tablespoons (30ml) olive oil
- 1 teaspoon smoked paprika
- 1 teaspoon garlic powder
- ½ teaspoon onion powder
- ½ teaspoon dried oregano
- 1 teaspoon kosher salt (or ¾ teaspoon fine sea salt)
- ½ teaspoon black pepper
- 1 teaspoon brown sugar (optional, but highly recommended)
- Fresh parsley, for garnish (optional)
For a delicious way to use up your cooked chicken later in the week, try this Baked Chicken with Alfredo Sauce — it transforms leftover baked breast into an entirely different meal.
Kitchen Equipment Needed
You don’t need any fancy gadgets for this recipe. The most important piece of equipment is a reliable instant-read meat thermometer — it takes the guesswork completely out of knowing when the chicken is done, and it’s the single best kitchen investment you can make for cooking proteins.
A rimmed baking sheet is preferable to a deep baking dish here because it allows heat to circulate freely around the chicken, which promotes more even cooking and a better exterior texture.
- Rimmed baking sheet (half sheet pan, approximately 18×13 inches / 46×33 cm)
- Parchment paper or aluminum foil (for easy cleanup)
- Instant-read meat thermometer (essential for food safety and perfect doneness)
- Meat mallet or rolling pin (for pounding chicken to even thickness)
- Plastic wrap or a large zip-top bag (for pounding without mess)
- Small mixing bowl
- Measuring spoons
- Cutting board
- Sharp chef’s knife
Read Also: Crack Chicken Recipe
Recommended Products for This Recipe
These are products I genuinely recommend based on quality, durability, and how much they improve the final result when making baked chicken breast.
1. Instant-Read Digital Meat Thermometer
A quality meat thermometer is the single most important tool for perfectly cooked chicken breast. It eliminates guesswork entirely — you’ll pull the chicken from the oven at exactly the right internal temperature every single time, guaranteeing it’s safe to eat without being overcooked and dry.
2. Nordic Ware Natural Aluminum Half Sheet Pan
A heavy-gauge rimmed baking sheet like Nordic Ware’s half sheet distributes heat evenly and prevents warping at high oven temperatures. It’s significantly better than thin, flimsy pans that create hot spots and uneven browning, and it’s the go-to choice of serious home cooks for exactly this reason.
3. OXO Good Grips Meat Tenderizer Mallet
Pounding your chicken breast to an even thickness before baking is one of the most impactful things you can do for the final texture. This OXO meat mallet has a comfortable handle and a flat side that gently evens out the breast without shredding it. It makes a noticeable difference in how evenly the chicken cooks.
4. Smoked Paprika (La Chinata Spanish Smoked Paprika)
Regular paprika and smoked paprika are not interchangeable in this recipe. Spanish smoked paprika from brands like La Chinata has a rich, complex flavor that adds a subtle depth to the chicken’s crust. If you’ve only ever used generic paprika, this upgrade will genuinely change how your baked chicken tastes.
5. Pyrex Glass Baking Dish (3-Quart)
If you prefer baking your chicken in a dish rather than on a sheet pan (particularly useful for thicker breasts or when adding a sauce), a Pyrex glass dish is a reliable, non-reactive option. Glass retains heat well and makes cleanup simple even after seasoning bakes onto the surface.
You might also enjoy: Lemon Chicken Recipe
Step-by-Step Instructions
1. Preheat the Oven and Prepare the Baking Sheet
- Set your oven to 425°F (220°C) and allow it to preheat fully before the chicken goes in. A properly preheated oven is critical for creating that initial blast of heat that produces a flavorful exterior.
- Line your rimmed baking sheet with parchment paper or aluminum foil. This prevents the chicken from sticking and makes cleanup nearly effortless.
- Place the lined baking sheet in the oven while it preheats if you want an even more aggressive sear on the bottom of the chicken (optional, but a great trick for texture).
2. Pound the Chicken to an Even Thickness
- Place each chicken breast between two sheets of plastic wrap or inside a large zip-top bag. This prevents chicken juice from splattering as you work.
- Using a meat mallet or the bottom of a heavy skillet, gently pound the thicker end of each breast until the entire piece is an even thickness — roughly ½ inch (1.25 cm) thick all the way across.
- This step is non-negotiable for even cooking. The thick end takes significantly longer to cook than the thin tapered end, meaning by the time the thick part reaches 165°F, the thin part is already overcooked and dry.
- Pat each chicken breast dry with paper towels after pounding. Removing surface moisture is important because it allows the seasoning to adhere better and encourages browning instead of steaming.
3. Make the Spice Paste
- Combine the smoked paprika, garlic powder, onion powder, dried oregano, salt, black pepper, and brown sugar (if using) in a small bowl.
- Add the olive oil and stir everything together until a thick, spreadable paste forms.
- The olive oil does two jobs here: it helps the spice blend coat the chicken evenly, and it contributes to the lightly golden exterior as the chicken roasts. Make sure the paste is mixed thoroughly so the spices are evenly distributed throughout.
4. Season the Chicken Thoroughly
- Spoon the spice paste over each chicken breast.
- Using your hands or the back of a spoon, rub the paste into both sides of each breast. Make sure to coat the edges too — not just the top and bottom.
- Don’t be shy with the seasoning. Chicken breast is a lean, mild protein, and it needs bold seasoning to deliver real flavor.
- Place the seasoned chicken breasts on your prepared baking sheet, leaving a little space between each breast. Crowding the pan traps steam and prevents browning, so give each piece some room.
5. Bake the Chicken
- Slide the baking sheet into the fully preheated oven on the middle rack.
- Bake for 18 to 22 minutes. The exact time will depend on the size of your chicken breasts.
- At the 18-minute mark, begin checking the internal temperature using an instant-read thermometer. Insert it into the thickest part of the breast, avoiding the underside where it might touch the pan.
- The chicken is done when it reaches an internal temperature of 165°F (74°C). If you pull it at 160°F (71°C), it will continue to rise to 165°F during resting — this carryover cooking is normal and actually leaves the chicken slightly juicier.
- Do not bake it uncovered for longer than necessary just to “make sure.” Overcooking is the number one reason baked chicken breast turns out dry.
6. Rest the Chicken Before Slicing
- Once the chicken comes out of the oven, transfer it to a clean cutting board or plate.
- Tent loosely with foil and allow it to rest for 5 minutes before cutting into it.
- Resting is what keeps the chicken juicy. When meat cooks, the juices migrate toward the center of the protein. Resting gives them time to redistribute throughout the entire breast, so they don’t all rush out the moment you cut into it.
- After resting, slice against the grain for the most tender texture. You should see a clean, juicy cut with no graying around the edges — that’s how you know the chicken is perfectly cooked.
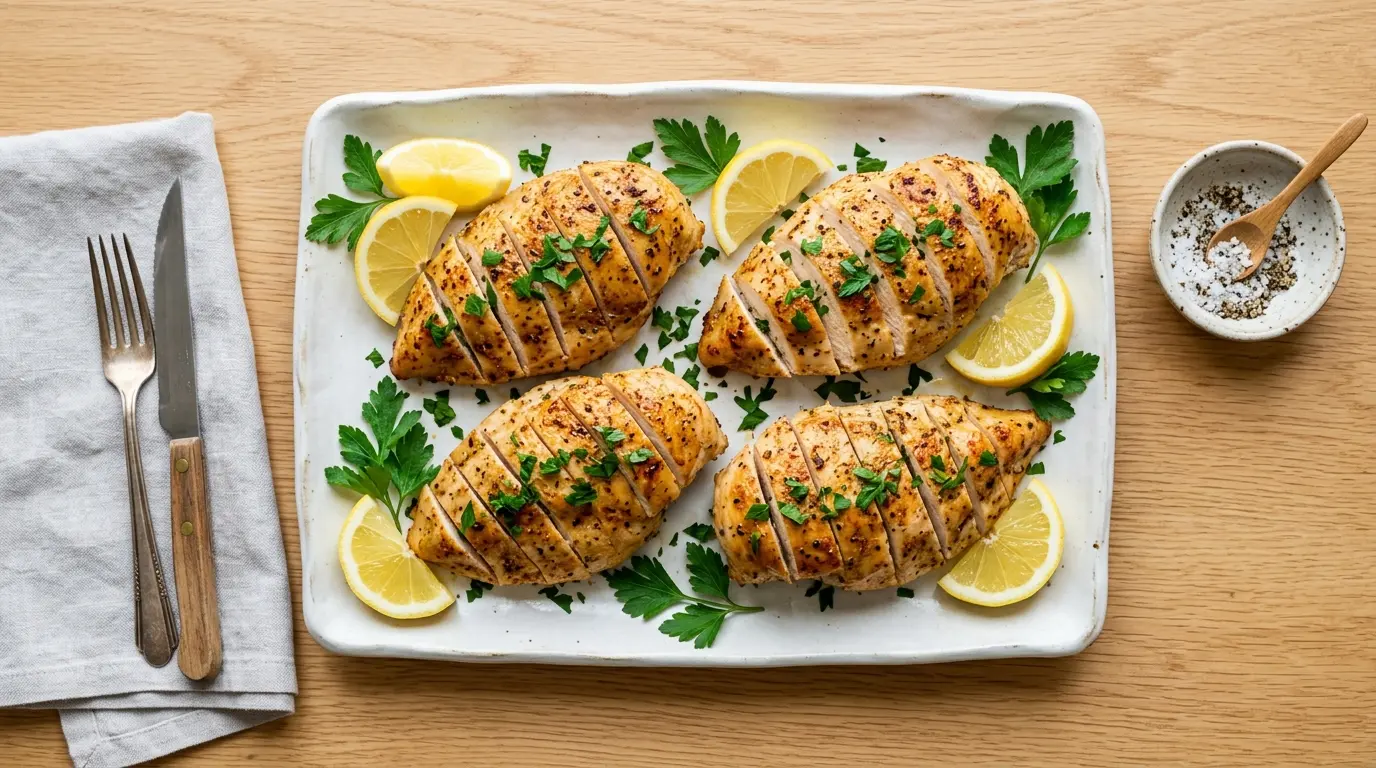
7. Garnish and Serve
- Transfer the sliced or whole chicken breasts to serving plates.
- Garnish with fresh chopped parsley if desired — the green adds a bright color contrast and a fresh flavor note that complements the smoky spice blend beautifully.
- Serve immediately with your favorite sides. The chicken also holds well at room temperature for up to 20 minutes if you need to finish other components of the meal.
This method works just as well in a Chicken Casserole format — use your perfectly seasoned baked chicken as the protein base for a hearty baked casserole on colder nights.
Tips for Success
Small adjustments make a big difference in the final outcome of this recipe. These tips are rooted in the specific challenges that come with cooking lean chicken breast in the oven.
- Always use a meat thermometer. Guessing based on color or cutting into the chicken to check is unreliable. A thermometer is the only way to know for certain that your chicken is both safe and not overdone.
- Pound to even thickness. This is the single most impactful technique tip in the entire recipe. Even a 5-minute pounding session transforms how evenly and reliably the chicken cooks.
- Pat the chicken dry before seasoning. Surface moisture is the enemy of browning. Dry chicken + high heat = golden, flavorful crust.
- Don’t skip the rest. Five minutes might feel like nothing, but skipping this step can mean losing a significant amount of juices the moment you cut into the chicken.
- Use smoked paprika, not regular. The flavor difference is substantial. Smoked paprika has a complexity that regular paprika doesn’t deliver.
- Give the chicken room on the pan. If the breasts are touching, they steam rather than roast, and you lose the exterior texture that makes this recipe so good.
- Bring the chicken closer to room temperature before baking. Letting the seasoned chicken rest at room temperature for 15–20 minutes while the oven preheats helps it cook more evenly from edge to center.
For a different take on weeknight chicken that uses many of the same pantry staples, check out this Chicken Stir Fry Recipe — it’s a great complement to your baked chicken rotation.
Serving Suggestions
This baked chicken breast is one of the most versatile proteins you can have on the table. Its seasoning is flavorful but not overpowering, which means it pairs beautifully with a huge range of side dishes.
Whether you’re keeping dinner simple or building a more elaborate spread, here are some of the best ways to serve it:
- Garlic Mashed Potatoes — creamy, buttery mashed potatoes are a natural companion to baked chicken breast, and the pan juices from the baking sheet make an excellent light drizzle.
- Roasted Broccoli — a simple sheet pan side that roasts at the same oven temperature as the chicken, making it a true set-it-and-forget-it pairing.
- Cilantro Lime Rice — bright and fresh, this rice is particularly good alongside the smoked paprika spice blend.
- Mixed green salad — thinly sliced baked chicken breast is perfect over a simple green salad with vinaigrette for a lighter, meal-prep-style lunch.
- Chicken Tacos — shred the leftover chicken and tuck it into warm tortillas with your favorite toppings for a completely different meal the next day.
- Pasta dishes — dice the chicken and toss with your favorite pasta sauce. It works particularly well in creamy pasta preparations.
Read Also: Chicken and Broccoli Recipe
Variations to Try
The base seasoning blend in this recipe is designed to be a flexible template. Once you’ve made it a few times and feel comfortable with the technique, start experimenting with different flavor directions.
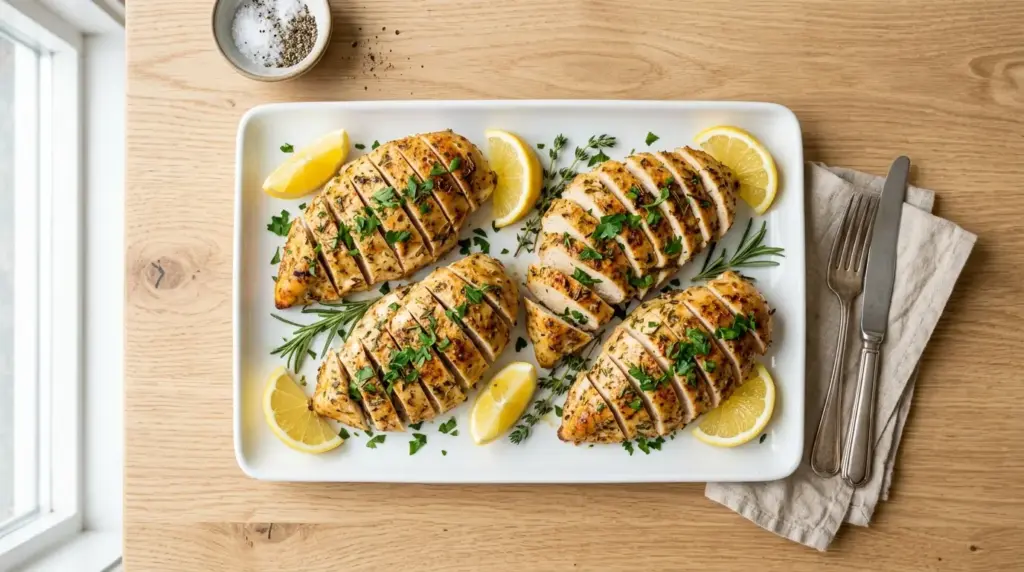
- Lemon herb: Swap the smoked paprika for lemon zest (about 1 teaspoon) and use dried thyme and rosemary instead of oregano. Squeeze fresh lemon juice over the chicken before serving.
- Italian-style: Use Italian seasoning, garlic powder, and a pinch of red pepper flakes. Serve with marinara sauce and a sprinkle of Parmesan for something closer to a deconstructed chicken parm.
- Honey mustard glaze: Combine Dijon mustard, honey, garlic powder, salt, and pepper. Brush this over the chicken in the last 5 minutes of baking for a sweet and tangy finish.
- BBQ-seasoned: Mix chili powder, cumin, brown sugar, garlic powder, and a dash of cayenne. Brush with your favorite BBQ sauce in the final few minutes.
- Tandoori-style: Use ground cumin, coriander, turmeric, and garam masala with a touch of yogurt in the paste. Marinate for 30 minutes before baking for a deeper flavor.
- Garlic butter: After baking, brush the hot chicken with a simple mixture of melted butter, minced garlic, and fresh parsley. This works particularly well when serving the chicken over pasta.
If you love the bold flavors of a spiced, baked chicken preparation, you’ll also enjoy this Chicken Fajita Recipe — it uses similar spice principles but takes the chicken in a completely different direction.
Storage and Reheating
Properly stored baked chicken breast is one of the most useful things you can have in your refrigerator throughout the week. It’s flexible, ready to use, and reheats well when handled correctly.
- Refrigerator: Allow the chicken to cool completely before storing. Place in an airtight container and refrigerate for up to 4 days. Keep the chicken whole or sliced — either way works, but whole tends to stay slightly juicier.
- Freezer: Baked chicken breast freezes extremely well. Wrap individual breasts in plastic wrap, then place in a zip-top freezer bag with as much air removed as possible. Freeze for up to 3 months. Thaw overnight in the refrigerator before using.
- Reheating in the oven: Place the chicken in a baking dish, add a splash of chicken broth or water to the bottom (this creates steam and prevents drying), cover tightly with foil, and heat at 325°F (165°C) for 10–15 minutes until warmed through.
- Reheating in the microwave: Place on a microwave-safe plate and cover with a damp paper towel. Heat in 30-second intervals on medium power to avoid overcooking. This is the quickest method but can reduce the quality of the exterior texture slightly.
- Reheating in a skillet: Add a splash of chicken broth to a skillet over medium-low heat. Add the chicken, cover, and heat for 3–5 minutes, flipping once. This method preserves the exterior texture better than the microwave.
For another delicious way to use leftover baked chicken, check out this Healthy Chicken Salad Recipe — it comes together in minutes with chicken you’ve already cooked.
Nutritional Facts
The following nutritional estimates are based on one serving (one chicken breast, approximately 6 oz / 170g) using olive oil and the full spice blend as listed. Values are approximate and will vary based on the exact size of the chicken breast and specific ingredients used.
| Nutrient | Per Serving |
|---|---|
| Calories | ~265 kcal |
| Protein | 34g |
| Total Fat | 12g |
| Saturated Fat | 2g |
| Carbohydrates | 3g |
| Sugar | 1g |
| Fiber | 0.5g |
| Sodium | 620mg |
| Cholesterol | 100mg |
This recipe is naturally gluten-free, low in carbohydrates, and provides an excellent source of lean protein. It fits comfortably within most calorie-conscious eating plans and is well-suited for high-protein diets.
Another great high-protein meal to add to your rotation is this Baked Salmon Recipe — similar technique, different protein, equally satisfying results.
Health Benefits of Key Ingredients
This baked chicken breast recipe isn’t just delicious — it’s genuinely good for you. Each core ingredient contributes something meaningful to the nutritional profile of the dish.
Here’s a closer look at what each key ingredient brings to the table:
- Boneless, skinless chicken breast: One of the leanest animal proteins available. A single breast provides approximately 30–35g of protein with relatively low fat content, supporting muscle repair, satiety, and metabolic health. It’s also a good source of B vitamins, particularly niacin (B3) and B6, which play key roles in energy metabolism.
- Olive oil: Rich in monounsaturated fats (specifically oleic acid), olive oil is widely associated with cardiovascular health. It also contains vitamin E and plant-based compounds with antioxidant properties, making it a far healthier choice than many other cooking fats.
- Smoked paprika: Made from dried and smoked red peppers, paprika contains capsaicin and antioxidants including beta-carotene and vitamin C. These compounds have anti-inflammatory properties and support immune function.
- Garlic powder: Derived from whole garlic, garlic powder retains many of the health-promoting compounds found in fresh garlic, including allicin precursors associated with cardiovascular and immune benefits.
- Dried oregano: Oregano is one of the most antioxidant-dense herbs available by weight. It contains rosmarinic acid and other polyphenols that have demonstrated antibacterial and anti-inflammatory effects in research settings.
- Black pepper: Contains piperine, a compound that has been shown to enhance the absorption of other nutrients (particularly curcumin from turmeric). It also has mild anti-inflammatory properties.
Read Also: Chicken Soup Recipe
Frequently Asked Questions
1. What temperature should I bake chicken breast at?
425°F (220°C) is the ideal oven temperature for boneless, skinless chicken breast. This high heat creates a flavorful, lightly golden exterior while keeping the interior moist. Lower temperatures (like 350°F) work but tend to dry out the breast before the outside develops any color or texture. The higher temperature shortens the total cooking time, which is actually an advantage — lean meat like chicken breast benefits from faster cooking.
2. How long does it take to bake chicken breast?
At 425°F (220°C), a boneless, skinless chicken breast that has been pounded to an even thickness will take approximately 18 to 22 minutes. Thinner or smaller breasts (under 6 oz) may be done closer to the 18-minute mark, while larger breasts (8 oz and above) may need closer to 25 minutes. The only reliable way to check doneness is with a meat thermometer — the chicken is ready when it reaches 165°F (74°C) internally.
3. How do I keep baked chicken breast from drying out?
Several techniques work together to prevent dry chicken breast. Pounding the chicken to an even thickness ensures every part cooks at the same rate, so nothing is overdone by the time the thickest section reaches the correct temperature. The olive oil in the spice paste helps lock in moisture. Baking at a high temperature shortens the time in the oven. And resting the chicken for 5 minutes after baking allows the internal juices to redistribute before you cut into it. Any one of these steps helps, but doing all of them together consistently produces juicy results.
4. Should I cover the chicken when baking?
No — bake the chicken breast uncovered. Covering it with foil or a lid traps steam, which prevents the exterior from developing any browning or texture. The point of baking at high heat is to create a lightly set, flavorful crust, and covering the pan works against that completely. The exception is if you are reheating leftover baked chicken, in which case covering with foil and adding a splash of liquid helps prevent further drying.
5. Can I use this recipe with frozen chicken breast?
You must thaw the chicken completely before following this recipe. Attempting to bake frozen or partially frozen chicken breast leads to very uneven results — the exterior overcooks by the time the frozen center reaches a safe temperature. The best way to thaw chicken breast safely is overnight in the refrigerator. If you’re short on time, submerge the sealed chicken in cold water and change the water every 30 minutes until fully thawed. Never thaw chicken at room temperature.
For another flexible chicken recipe that also works great for meal prep, try this Chicken Salad Recipe with Rotisserie Chicken — the same concept of prepping chicken ahead and using it multiple ways throughout the week.
Final Thoughts
A perfectly baked chicken breast is one of those cooking skills that pays dividends for years. Once you understand the why behind the technique — even thickness, high heat, proper seasoning, mandatory rest — you’ll never go back to guessing your way through it.
This recipe is proof that simple doesn’t mean boring. With the right approach and a few key pantry ingredients, plain boneless chicken breast becomes something genuinely worth sitting down to enjoy.
Give this baked chicken breast recipe a try this week and see how it changes your weeknight dinner game. If you make it, share your results in the comments below — it’s always wonderful to hear how it turns out in different kitchens!
Recommended:
- Chicken Tikka Masala Recipe
- Chicken Noodle Soup Recipe
- Chicken Teriyaki Recipe
- Chicken Enchiladas Recipe
- Chicken Broccoli Rice Casserole Recipe
- Classic Chicken Parmesan Recipe
- Chicken Shawarma Recipe
- Chicken Tortilla Soup Recipe
- BBQ Chicken Wrap Recipe
- Chicken Lo Mein Recipe


