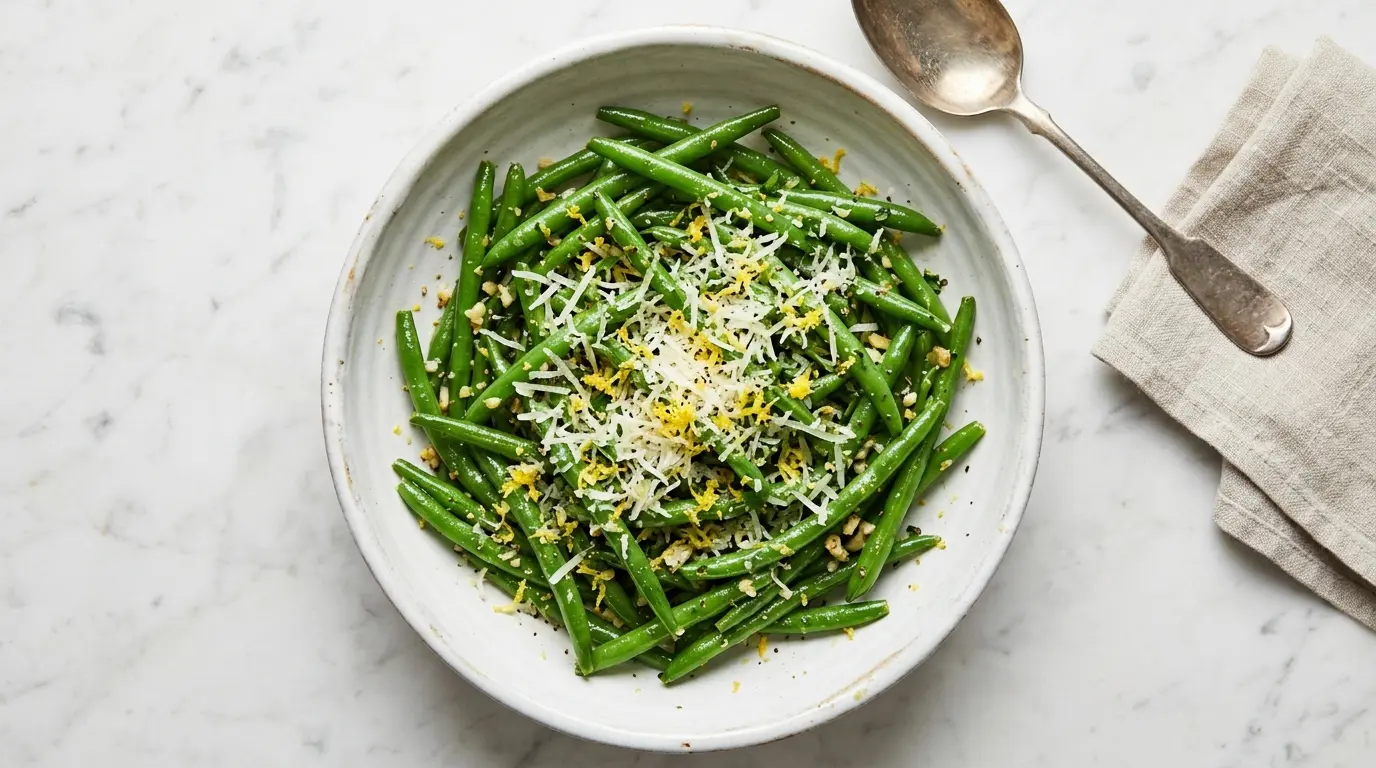
If you’ve been searching for the perfect green beans recipe, your search ends right here. This classic preparation keeps things beautifully simple: fresh green beans blanched until crisp-tender, then sautéed in butter with garlic until fragrant and golden.
It’s the kind of side dish that makes any meal feel complete. The butter adds richness, the garlic brings depth, and a finishing squeeze of lemon lifts everything so the beans taste bright and fresh rather than heavy.
What sets this recipe apart from steaming or boiling alone is that brief time in the skillet. That direct heat contact creates just a hint of caramelization on the beans, adding a layer of flavor you simply can’t get from water-cooked vegetables alone.
This is one of those recipes that works on a regular Tuesday night just as well as it does on a holiday table. Clean, vibrant, and ready in under 20 minutes.
You might also enjoy: Roasted Broccoli Recipe
Why You’ll Love This Green Beans Recipe
This recipe has earned its place as a go-to side dish in kitchens everywhere for good reason.
It comes together in under 20 minutes from start to finish, which means no planning ahead and no complicated prep.
The ingredients are simple and affordable. Fresh green beans, garlic, butter, olive oil, salt, and pepper are all you need to make something that tastes like it came from a restaurant.
The technique is beginner-friendly but produces results that even experienced cooks love. Blanching first locks in that brilliant green color, and the quick sauté builds flavor fast.
It pairs beautifully with nearly any protein. Whether you’re making roasted chicken, grilled steak, baked salmon, or even a simple pasta, garlicky green beans fit right in.
- Works as a weeknight side or an elegant holiday dish
- Naturally gluten-free and vegetarian
- Easily scaled up to feed a crowd
- Ready in about 20 minutes from start to finish
- Uses fresh green beans for maximum texture and flavor
- Finishes with lemon for a bright, restaurant-quality touch
- Minimal cleanup with just one pot and one skillet
If you love simple vegetable sides, you’ll want to check out the Corn on the Cob Recipe for another fresh and easy option.
Ingredients
This recipe uses a short list of everyday ingredients. Fresh green beans really are the key here because they hold their texture through the blanching and sautéing process far better than canned or frozen alternatives.
- 1 1/2 lbs (680g) fresh green beans, ends trimmed
- 2 tablespoons unsalted butter
- 1 tablespoon olive oil
- 4 cloves garlic, minced
- 1/2 teaspoon kosher salt, plus more for the blanching water
- 1/4 teaspoon freshly ground black pepper
- 1/4 teaspoon red pepper flakes (optional, for a little heat)
- 1 tablespoon fresh lemon juice
- Zest of half a lemon (optional, for extra brightness)
- 2 tablespoons grated Parmesan cheese (optional, for serving)
Read Also: Baked Beans Recipe
Kitchen Equipment Needed
You don’t need any special tools for this recipe. A large pot, a skillet with a lid, and a colander are the key pieces of equipment.
- Large pot (for blanching)
- Large skillet or sauté pan (12-inch recommended)
- Colander or strainer
- Large bowl (for ice bath)
- Tongs or a wooden spoon
- Cutting board and knife (for trimming beans and mincing garlic)
- Measuring spoons
- Zester or microplane (optional, for lemon zest)
This pairs beautifully with a side like Creamy Mashed Potatoes.
Recommended Products for This Recipe
These are products selected based on quality and performance, specifically chosen to help you get the best results from this green beans recipe.
1. Lodge Cast Iron Skillet
A well-seasoned cast iron skillet is one of the best tools for this recipe. It distributes heat evenly and retains high temperature so your green beans sear properly rather than steam in the pan. The result is better caramelization and far more flavor than you’d get from a thin nonstick pan.
2. OXO Good Grips Colander
A sturdy, wide-based colander makes draining blanched green beans fast and safe. The OXO design has non-slip feet and large holes that let hot water drain quickly without losing any beans. It’s a small upgrade that makes the blanching step much easier.
3. Microplane Premium Classic Zester
That finishing touch of lemon zest really elevates this dish from good to exceptional. A Microplane zester removes only the fragrant outer zest without digging into the bitter pith, giving you the brightest, most aromatic flavor. It’s also perfect for grating Parmesan finely over the top before serving.
4. OXO Good Grips Locking Tongs
Good tongs make tossing and turning the green beans in the hot skillet much easier and safer than a spoon. Silicone-tipped tongs in particular won’t scratch your pan surface while still giving you a firm grip on the beans.
Another great side dish to add to your rotation: Roasted Potatoes Recipe
Step-by-Step Instructions
Step 1: Prep the Green Beans
- Rinse the green beans thoroughly under cool running water to remove any dirt or residue.
- Pat them dry with a clean kitchen towel or paper towels.
- Snap or trim off the stem ends (the ends that were attached to the plant) by hand or with a knife. You can leave the tail ends on since they’re tender and edible.
- If any beans are unusually long, snap or cut them in half for more even cooking and easier eating.
- Set the trimmed beans aside on a clean cutting board or plate while you prepare the rest.
Step 2: Blanch the Green Beans
- Fill a large pot with water and bring it to a full rolling boil over high heat.
- Add a generous amount of kosher salt to the boiling water, about 1 tablespoon per quart of water. Salting the water is important because this is the only opportunity to season the beans from the inside out.
- While the water heats, fill a large bowl with cold water and a generous handful of ice cubes to create an ice bath. Set it near the stove.
- Add the trimmed green beans to the boiling water. Do not cover the pot.
- Boil the beans for 3 to 4 minutes. They should turn a vivid, bright green color and become just barely tender when pierced with a fork, but still have a firm bite. Do not overcook at this stage.
- Use tongs or a slotted spoon to transfer the beans immediately into the ice bath. Alternatively, drain them through the colander and then plunge them into the ice bath.
- Let the beans sit in the ice bath for 2 to 3 minutes until completely cold. This stops the cooking instantly and locks in that beautiful bright green color.
- Drain the beans through the colander and spread them on a clean kitchen towel or paper towels. Pat them as dry as possible. Removing surface moisture is very important because wet beans will steam in the skillet instead of sautéing, which prevents browning and leads to soggy results.
Step 3: Prepare the Garlic
- Peel and mince 4 cloves of garlic finely. You want small, even pieces so the garlic cooks evenly and distributes throughout the dish.
- If you prefer a milder garlic flavor, slice the garlic thinly instead of mincing it. Sliced garlic is slightly gentler in flavor and also looks attractive in the finished dish.
- Set the prepared garlic aside near the stove because it will be added to the pan shortly after the beans.
Step 4: Sauté the Green Beans
- Place a large skillet over medium-high heat and let it get hot for about 1 minute before adding any fat.
- Add 1 tablespoon of olive oil and 1 tablespoon of unsalted butter to the hot skillet. Using both gives you the best of both worlds: the high smoke point of olive oil prevents the butter from burning, while the butter adds rich, nutty flavor.
- Let the butter melt and foam. Once the foam begins to subside, the pan is ready.
- Add the dried green beans to the skillet in a single layer if possible. If your skillet is crowded, cook in two batches rather than piling them in. Crowding causes the beans to steam rather than sauté.
- Cook the beans without stirring for 2 minutes to let them develop a little color and char on one side.
- Toss or stir with tongs and cook for another 1 to 2 minutes, turning them occasionally so multiple sides get contact with the hot pan.
Step 5: Add the Garlic and Season
- Push the green beans to the edges of the skillet to create an open space in the center of the pan.
- Add the remaining 1 tablespoon of butter to the center of the pan.
- Add the minced garlic directly to the butter in the center of the pan.
- Let the garlic cook in the butter for 30 to 45 seconds, stirring constantly. It should turn fragrant and very lightly golden, but watch it closely because garlic burns quickly and bitter burned garlic can ruin the entire dish.
- If using red pepper flakes, add them now along with the garlic and stir them into the butter for just a few seconds.
- Toss everything together so the garlic and butter coat all of the beans evenly.
- Season with 1/2 teaspoon of kosher salt and 1/4 teaspoon of freshly ground black pepper.
- Taste and adjust the seasoning if needed.
Step 6: Add the Lemon and Finish
- Remove the skillet from the heat.
- Squeeze 1 tablespoon of fresh lemon juice over the beans and toss to coat. Fresh lemon juice is much brighter than bottled, and this finishing acid is what makes the dish taste vibrant rather than heavy.
- If using lemon zest, add it now and toss again. The zest adds fragrance and a deeper citrus flavor beyond what the juice alone provides.
- Transfer the green beans to a serving platter or bowl.
- If desired, sprinkle 2 tablespoons of freshly grated Parmesan cheese over the top just before serving for a savory, salty finish.
- Serve immediately while the beans are hot and the garlic is fragrant.
For more easy vegetable cooking inspiration, check out the Honey Roasted Carrots Recipe.
Tips for Success
Getting green beans right every time comes down to a few key details. These tips will help you nail the recipe on your first try.
- Dry the beans thoroughly after blanching. Excess moisture on the beans creates steam in the skillet, which prevents browning and gives you soft, pale beans instead of vibrant sautéed ones.
- Don’t skip the ice bath. It’s the step that preserves the bright green color and keeps the beans from overcooking before they hit the skillet.
- Use high heat for the sauté. A hot pan is what creates that light char and caramelized flavor. Low heat will just stew the beans in the pan.
- Watch the garlic carefully. It goes from fragrant and golden to bitter and burned in seconds. Keep it moving and pull it off the heat the moment it smells good.
- Taste and season at the end. Different brands of butter and Parmesan vary in saltiness, so always taste before adding extra salt.
- Don’t use pre-minced garlic from a jar if you can avoid it. Fresh garlic has a completely different flavor profile, far more bright and aromatic, which makes a noticeable difference in a simple dish like this.
- If you’re doubling the recipe for a crowd, blanch the beans in two batches to keep the water temperature high, and sauté in two batches to avoid crowding the skillet.
Read Also: Green Bean Casserole Recipe
Serving Suggestions

This green beans recipe is one of the most versatile side dishes you can have in your repertoire. It goes with nearly everything.
Pair it with a simple roasted chicken or turkey breast for a classic Sunday dinner combination. The bright, garlicky flavor of the beans cuts through the richness of the poultry beautifully.
Serve it alongside grilled steak or pan-seared salmon for a light and vibrant dinner that feels complete without being heavy.
It’s also a natural fit for holiday meals alongside mashed potatoes, stuffing, and roasted squash.
- Serve alongside Baked Salmon for a light and healthy weeknight dinner
- Pair with roasted chicken or Chicken Marsala for a comforting restaurant-style meal
- Add to a holiday spread next to Scalloped Potatoes and roasted turkey
- Serve over Cilantro Lime Rice for a simple grain bowl-style meal
- Pair with Corn on the Cob for a full summer vegetable spread
- Use leftovers cold in a salad with feta, cherry tomatoes, and a simple vinaigrette
Another vegetable side perfect for any meal: Bok Choy Recipe
Variations to Try
Once you’ve mastered the classic version of this recipe, there are so many ways to riff on it based on what you have on hand or what you’re craving.
- Bacon green beans: Cook 3 to 4 strips of chopped bacon in the skillet before adding the beans. Remove the bacon, cook the beans in the rendered fat, and crumble the bacon back over the top before serving. This is a Southern-inspired twist that adds smoky depth.
- Green beans amandine: Add 1/4 cup of sliced almonds to the skillet with the garlic. Toast them until golden before adding the beans back in. This is a classic French preparation that adds crunch and nuttiness.
- Sesame ginger green beans: Replace the olive oil and butter with sesame oil, use 1 teaspoon of freshly grated ginger with the garlic, and finish with a drizzle of soy sauce and sesame seeds instead of lemon.
- Balsamic glazed green beans: After sautéing, drizzle 1 tablespoon of balsamic glaze over the beans and toss to coat. The sweet-tart glaze pairs beautifully with the garlic.
- Spicy garlic green beans: Double the red pepper flakes and add a small pinch of cayenne. This version pairs wonderfully with grilled meats and bold flavors.
- Vegan version: Use olive oil only, omit the butter, and skip the Parmesan topping. The result is still flavorful and satisfying.
Read Also: Collard Greens Recipe
Storage and Reheating
Leftover green beans store well and can be repurposed in several ways throughout the week.
Allow the cooked green beans to cool completely to room temperature before storing. Storing hot beans directly in a sealed container creates condensation, which makes them soggy.
- Refrigerator: Store in an airtight container for up to 3 to 4 days.
- Freezer: Green beans that have been blanched and sautéed can be frozen, though the texture softens after thawing. Freeze in a single layer on a baking sheet first, then transfer to a freezer-safe bag. They’ll keep for up to 2 months.
- Reheat in a skillet: This is the best method. Heat a small amount of olive oil or butter in a skillet over medium heat, add the beans, and toss for 2 to 3 minutes until warmed through. This revives some of the original texture.
- Reheat in the microwave: Place in a microwave-safe dish with a splash of water and cover loosely. Heat in 30-second intervals, stirring between each, until warmed through.
- Use leftovers cold: Cold sautéed green beans work wonderfully tossed into salads or grain bowls. No reheating needed.
Another easy side dish for busy weeknights: Sautéed Cabbage Recipe
Nutritional Facts
The following nutritional information is approximate and based on one serving (roughly 1/4 of the recipe), prepared with butter, olive oil, garlic, and lemon juice. Parmesan is not included in these figures.
| Nutrient | Amount per Serving |
|---|---|
| Calories | ~110 kcal |
| Total Fat | 7g |
| Saturated Fat | 3g |
| Cholesterol | 10mg |
| Sodium | 210mg |
| Total Carbohydrates | 10g |
| Dietary Fiber | 4g |
| Total Sugars | 4g |
| Protein | 2.5g |
| Vitamin C | 20mg (22% DV) |
| Vitamin K | 43mcg (36% DV) |
| Folate | 37mcg (9% DV) |
| Iron | 1.2mg (7% DV) |
Note: Nutritional values are estimates only and will vary based on specific ingredients used and serving size.
For a hearty side to serve alongside your meal: Broccoli Salad Recipe
Health Benefits of Key Ingredients
This simple recipe isn’t just delicious. The key ingredients each bring meaningful nutritional value to the table.
Fresh green beans are one of the most nutrient-dense vegetables you can eat, low in calories but rich in vitamins, minerals, and dietary fiber.
Garlic has been studied extensively for its potential health-supporting properties, including its natural antioxidant content and its positive effects on cardiovascular health when consumed regularly.
Olive oil is a cornerstone of the Mediterranean diet for good reason. It is rich in monounsaturated fats that support heart health, and it contains powerful antioxidants.
- Green beans are an excellent source of Vitamins C and K. Vitamin C supports immune function and collagen production, while Vitamin K is essential for proper blood clotting and bone health.
- Green beans provide dietary fiber that supports digestive health and contributes to a feeling of fullness, which can aid in maintaining a healthy weight.
- Garlic contains allicin, a compound that forms when garlic is chopped or crushed, and which has been linked to anti-inflammatory and antimicrobial properties.
- Olive oil provides oleic acid, a monounsaturated fat associated with reduced inflammation and improved heart health.
- Lemon juice adds Vitamin C while also improving the body’s ability to absorb non-heme iron from plant foods like green beans, a process known as iron absorption enhancement.
- Butter (in moderate amounts) provides fat-soluble vitamins A, D, E, and K2, which support vision, bone health, and immune function.
Another nutrient-rich vegetable dish worth exploring: Creamed Spinach Recipe
Frequently Asked Questions
1. Can I use frozen green beans instead of fresh?
Frozen green beans can work in a pinch, but the texture will be noticeably different. Frozen beans have already been blanched before freezing, so they tend to get softer and can become mushy during the sauté step. If using frozen beans, skip the blanching step entirely and go straight to the skillet. Thaw them first and pat them very dry. The dish will still taste good, but the beans won’t have the same crisp-tender texture that fresh beans provide.
2. How do I keep green beans bright green when cooking?
The ice bath is the key. After blanching the beans in boiling salted water for 3 to 4 minutes, plunge them immediately into a bowl of ice water. This process, called “shocking,” stops the cooking instantly and preserves the natural chlorophyll in the beans, which is what creates that vivid green color. Overcooking is the main reason green beans turn dull and olive-colored.
3. Why are my green beans coming out soggy?
The most common cause is excess moisture. If the beans are wet when they go into the skillet, they create steam instead of sautéing, resulting in soft, pale, and unappealing beans. Pat them very thoroughly dry after the ice bath, and use high heat so the pan is hot enough to sear rather than steam. Also, avoid overcrowding the skillet. Cook in batches if needed.
4. Can I make this recipe ahead of time?
Yes, you can blanch the green beans up to a day in advance. After the ice bath, drain and dry them well, then store in the refrigerator in a sealed container or a zip-top bag lined with paper towels. When you’re ready to serve, just do the quick skillet sauté with garlic and butter. This makes it very practical for dinner parties or holiday meals where you want to minimize last-minute cooking.
5. What is the best way to trim green beans?
The most efficient method is to line up a small handful of beans so their stem ends are aligned, then slice all the stem ends off at once with a sharp knife. You can do this with 20 to 30 beans at a time, which is much faster than snapping each one individually. The tail end (the thin, pointed tip) is tender and does not need to be removed unless it’s very long or fibrous.
For another quick and flavorful side dish idea: Maple Glazed Carrots Recipe
Final Thoughts
This green beans recipe proves that the best side dishes don’t have to be complicated. Fresh beans, real garlic, good butter, and a squeeze of lemon are all it takes to create something that genuinely makes people go back for seconds.
The blanch-and-sauté method is the gold standard for a reason. It gives you beans that are vibrant in color, perfectly tender but still have a satisfying bite, and coated in a garlicky butter sauce that makes them irresistible.
Once you make this version, it’s hard to go back to steamed or boiled beans.
Give this green beans recipe a try this week and see for yourself how easy and satisfying it is to cook fresh vegetables well. If you make it, share it with a friend or leave a comment below. Your feedback means the world and helps others discover recipes that actually deliver.
Recommended:
- Squash Casserole Recipe
- Corn Casserole Recipe
- Broccoli Casserole Recipe
- Sweet Potato Casserole Recipe
- Roasted Brussels Sprouts with Bacon
- Fried Cabbage Recipe
- Mexican Street Corn Recipe
- Smashed Potatoes Recipe
- Potato Salad Recipe
- Fruit Salad Recipe


