
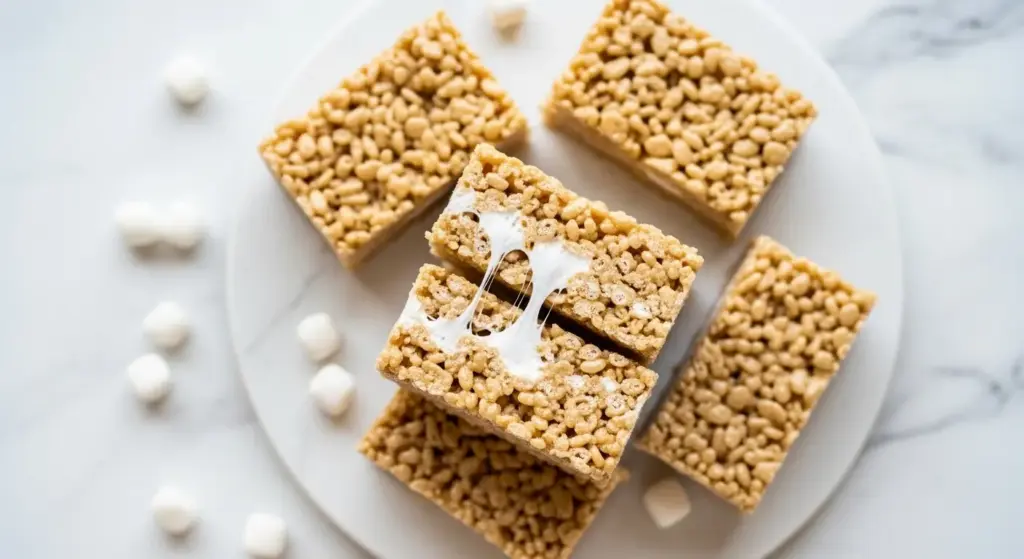
If you’ve been craving a classic childhood snack without the butter and marshmallows, this vegan rice krispie treat recipe is exactly what you need. Made with vegan butter and plant-based marshmallows, these treats come together in just minutes and taste just as irresistibly gooey and crispy as the original.
The secret to nailing this dairy-free version is getting the right products — not all marshmallows are vegan, and not all vegan butters behave the same way in a hot pan.
Once you know what to look for, the whole process is just as quick and foolproof as the classic version you grew up with.
Why You’ll Love This Vegan Rice Krispie Treat Recipe
This recipe proves that going dairy-free doesn’t mean missing out on your favorite nostalgic treats.
Vegan butter melts beautifully and adds that rich, slightly salty flavor that makes rice krispie treats so addictive. Plant-based marshmallows, like Dandies brand, melt down just as smoothly as conventional ones.
You only need three ingredients and one pot to make the whole thing happen. That means minimal prep, minimal cleanup, and maximum payoff.
These bars are also naturally egg-free, making them a great option for households with multiple dietary restrictions. They’re easy to customize with mix-ins like chocolate chips, sprinkles, or nut butter, too.
- Ready in under 20 minutes from start to finish
- No baking required — just melt, stir, and press
- Kid-friendly and allergen-conscious with simple swaps
- Naturally dairy-free and egg-free using everyday plant-based staples
- Tastes just like the original — gooey center, crisp outside, and all
You might also enjoy: Easy Rice Krispie Treat Recipe
Ingredients
For the best results, use vegan butter with a high fat content (at least 78–80%) and a brand of vegan marshmallows that melts smoothly. Dandies is the most widely recommended brand for this recipe because they melt consistently and have a clean, classic marshmallow flavor. This recipe makes one 9×13-inch pan, which yields about 24 bars.
- 6 cups (170g) crispy rice cereal (such as Rice Krispies — check label for vegan certification)
- 4 tablespoons (56g) vegan butter (such as Earth Balance or Miyoko’s)
- 10 oz (283g) vegan marshmallows (such as Dandies brand)
- 1/4 teaspoon fine sea salt
- 1 teaspoon pure vanilla extract (optional, but recommended)
Read Also: Original Rice Krispie Treat Recipe
Kitchen Equipment Needed
Having the right tools makes this recipe even quicker and ensures your treats release cleanly from the pan.
- Large heavy-bottomed pot or non-stick saucepan (at least 5-quart capacity)
- 9×13-inch baking pan
- Silicone spatula or wooden spoon
- Parchment paper
- Measuring cups and spoons
Another favorite: Peanut Butter Rice Krispie Treat Recipe
Recommended Products for This Recipe
These are products I genuinely recommend based on quality and performance — each one makes this recipe easier and the results even better.
1. Dandies Vegan Marshmallows
Dandies are the gold standard for vegan marshmallows. They melt evenly without clumping and have the right amount of sweetness to give your treats that classic flavor. Unlike some other brands, they don’t turn gummy or leave an off-taste as they cool.
2. Miyoko’s Creamery Vegan Butter
Miyoko’s is made from organic cashews and has one of the highest fat contents among vegan butters, which means it behaves almost identically to dairy butter when melting. It adds a rich, slightly nutty flavor that elevates the treats without overpowering them.
3. USA Pan 9×13 Nonstick Baking Pan
This pan has a commercial-grade nonstick coating that makes removing your treats in clean, even pieces much easier. The reinforced steel construction also means it won’t warp under heat. It’s a versatile pan you’ll reach for constantly.
4. GIR Silicone Spatula
A heat-resistant silicone spatula is essential for this recipe because you’re stirring hot melted marshmallow. GIR spatulas are fully bonded (no seams where sticky marshmallow can hide) and rated to 450°F, so they won’t melt or warp in the pot.
Read Also: Gooey Rice Krispie Treat Recipe
Step-by-Step Instructions
Step 1: Prepare Your Pan
- Line your 9×13-inch baking pan with parchment paper, leaving a couple of inches of overhang on each side to make lifting the bars out easier later.
- Lightly spray the parchment with cooking spray or rub a small amount of vegan butter over the surface to prevent sticking.
- Set the pan aside in an accessible spot near your stovetop, because you’ll need to move quickly once the marshmallows are melted.
Step 2: Measure Your Cereal
- Measure out 6 cups (170g) of crispy rice cereal and pour it into a large mixing bowl.
- Set the bowl near the stove so you can add the melted marshmallow mixture without delay. Timing matters here — the longer you wait, the harder the mixture gets to work with.
- If you want to add any mix-ins (like mini chocolate chips or sprinkles), set those nearby too so you can stir them in quickly.
Step 3: Melt the Vegan Butter
- Place a large heavy-bottomed pot over medium-low heat.
- Add 4 tablespoons (56g) of vegan butter and allow it to melt slowly, stirring occasionally. Don’t rush this step with high heat — vegan butter can burn faster than dairy butter, especially lower-fat varieties.
- Once fully melted, reduce the heat slightly to low before adding the marshmallows.
Step 4: Melt the Vegan Marshmallows
- Add all 10 oz (283g) of vegan marshmallows to the pot with the melted vegan butter.
- Stir constantly with a silicone spatula. Vegan marshmallows can take slightly longer to melt than conventional ones, so be patient. Keep the heat on low to medium-low.
- Add 1/4 teaspoon fine sea salt and 1 teaspoon vanilla extract (if using) during this step, stirring them in as the marshmallows melt.
- Continue stirring until the mixture is completely smooth and no lumps remain. The mixture should look glossy and uniform.
Step 5: Combine Cereal and Marshmallow Mixture
- Remove the pot from the heat immediately once the marshmallow mixture is fully melted and smooth.
- Pour the melted marshmallow mixture directly over the cereal in your large mixing bowl.
- Fold and stir quickly using your silicone spatula, working from the bottom of the bowl upward to coat every piece of cereal evenly. Work fast — the mixture firms up quickly as it cools.
- If you’re adding any mix-ins like mini chocolate chips, fold them in now. Note that standard-sized chocolate chips may melt from the heat, so mini chips or chocolate chunks added after a minute or two of cooling work better.
Step 6: Press Into the Pan
- Transfer the mixture to your prepared baking pan as soon as it’s evenly combined.
- Using a piece of parchment paper or a spatula lightly coated in vegan butter, press the mixture firmly and evenly into the pan. Press firmly but don’t compact it too aggressively — you want the treats to have some airiness and chew, not be rock-hard.
- Pressing with slightly damp hands also works well and helps prevent sticking.
Step 7: Cool and Cut
- Allow the treats to cool at room temperature for at least 30 minutes before cutting. This gives them time to set properly so they hold their shape.
- Once set, use the parchment overhang to lift the whole slab out of the pan and onto a cutting board.
- Cut into squares or rectangles using a sharp knife. A light coating of cooking spray on the blade makes cutting much cleaner.
- Serve immediately or store as directed below.
The same great technique for making classic no-bake bars works beautifully for Muddy Buddy Recipe too, if you’re in a no-bake snack mood.
Tips for Success
A few key tricks will take your vegan rice krispie treats from good to genuinely exceptional — and help you avoid the most common pitfalls.
- Use low heat throughout. High heat can scorch vegan butter quickly and create a slightly unpleasant flavor. Low and slow is the way to go.
- Don’t skip the salt. A small amount of salt balances the sweetness and enhances the overall flavor. It’s a small addition with a big impact.
- Work quickly after combining. As soon as you mix the marshmallow into the cereal, you have a narrow window to get it into the pan. Have everything set up and ready before you start melting.
- Don’t pack too hard. Pressing too firmly into the pan creates dense, hard bars instead of the light, chewy texture you’re after.
- Check your marshmallow brand. Dandies are the most reliable vegan marshmallows for melting. Some off-brand options may not melt smoothly or may remain lumpy.
- Grease everything generously. Coat your hands, spatula, and pan with vegan butter or cooking spray to prevent the sticky mixture from clinging to every surface.
For another fantastic no-bake treat, check out the No Bake Cookie Recipe.
Serving Suggestions
These vegan rice krispie treats are delicious on their own, but a few simple serving ideas can make them feel extra special.
They pair wonderfully with a cold glass of oat milk or almond milk for a nostalgic, after-school-snack vibe. For a fun dessert spread, slice them into bite-sized squares and arrange them on a platter alongside other no-bake goodies.
- Serve alongside Muddy Buddies for a crowd-pleasing vegan snack platter
- Drizzle with melted dairy-free dark chocolate for a more indulgent presentation
- Cut into fun shapes using cookie cutters for holiday platters or kids’ parties
- Crumble over scoops of vegan vanilla ice cream for an easy dessert topping
- Pack into individual bags or wrap individually for easy lunchbox snacks or bake sale treats
Variations to Try
Once you’ve mastered the base recipe, there are so many fun directions to take these vegan treats.
- Chocolate version: Stir 2 tablespoons of cocoa powder into the melted marshmallow mixture before combining with the cereal, or drizzle the finished bars with melted vegan dark chocolate.
- Peanut butter: Add 3 tablespoons of peanut butter to the pot along with the vegan butter for a nutty twist.
- Fruity pebbles variation: Replace the crispy rice cereal with vegan fruity pebble cereal for a colorful, fruit-flavored bar.
- Rainbow sprinkle: Fold 1/4 cup of rainbow sprinkles into the mixture just before pressing into the pan for a festive, birthday-cake look.
- S’mores style: Fold in 1/2 cup of vegan mini chocolate chips and 1/4 cup of crushed vegan graham crackers for a campfire-inspired treat.
If you love creative rice krispie treat variations, the Fruity Pebbles Rice Krispie Treat Recipe is well worth a try.
Storage and Reheating
Stored properly, these treats will stay fresh and chewy for several days without any special equipment.
- Room temperature: Store in an airtight container at room temperature for up to 3 days. Place a piece of parchment paper between layers to prevent sticking.
- Refrigerator: You can refrigerate them in an airtight container for up to 1 week, but note they may firm up slightly. Let them come back to room temperature before serving for the best texture.
- Freezer: Wrap individual bars tightly in plastic wrap and store in a zip-top freezer bag for up to 6 weeks. Thaw at room temperature for about 30 minutes before eating.
- Reheating: If your treats have hardened, place a bar on a microwave-safe plate and microwave for 5–10 seconds. This softens them back up without making them too wet or sticky.
Read Also: Microwave Rice Krispie Treat Recipe
Nutritional Facts
The nutritional values below are approximate and based on 1 bar from a batch cut into 24 equal pieces. Values may vary depending on specific brands used.
| Nutrient | Per Bar (1 of 24) |
|---|---|
| Calories | ~110 |
| Total Fat | 2g |
| Saturated Fat | 0.5g |
| Cholesterol | 0mg |
| Sodium | 90mg |
| Total Carbohydrates | 22g |
| Dietary Fiber | 0g |
| Total Sugars | 12g |
| Protein | 1g |
These values are estimates only. For precise nutritional data, input your specific ingredient brands into a nutrition calculator.
This recipe is naturally cholesterol-free and contains no animal products, making it a lighter choice compared to conventional rice krispie treats made with dairy butter.
For another sweet treat with clean, simple ingredients, check out the Monster Cookie Recipe.
Health Benefits of Key Ingredients
While rice krispie treats are undeniably a treat rather than a health food, a few of the ingredients in this vegan version do bring some noteworthy benefits to the table.
Choosing plant-based butter over dairy butter eliminates dietary cholesterol entirely, since all cholesterol in food comes from animal sources. Many vegan butters are also made from heart-healthy oils like avocado or coconut.
- Vegan butter: Contains no dietary cholesterol and is free from dairy proteins like casein and whey, making it suitable for those with dairy allergies
- Crispy rice cereal: Low in fat and often fortified with vitamins and minerals like iron, B vitamins, and folic acid
- Vegan marshmallows: Free from gelatin, which is derived from animal bones and connective tissue, making them suitable for vegans and vegetarians alike
- Vanilla extract: Contains trace antioxidants and has been studied for its mild anti-inflammatory properties
- Sea salt: Provides sodium in a form with trace minerals, and a small amount helps regulate fluid balance in the body
Read Also: Vegan Protein Pancakes Recipe
Frequently Asked Questions
1. Are regular Rice Krispies cereal vegan?
Kellogg’s Rice Krispies cereal is not certified vegan because it contains Vitamin D3, which is derived from lanolin (from sheep’s wool) in some formulations. If strict vegan certification matters to you, look for certified vegan crispy rice cereals from brands like Nature’s Path or 365 by Whole Foods Market. Many people who follow a plant-based diet still use Kellogg’s Rice Krispies, so it ultimately comes down to your personal standards.
2. What vegan marshmallows work best for this recipe?
Dandies brand vegan marshmallows are widely considered the best option for this recipe. They melt smoothly and evenly, have a clean flavor, and produce a texture very similar to conventional marshmallows. Trader Joe’s also sells vegan marshmallows seasonally that work well. Avoid off-brand or homemade marshmallows that may not melt consistently.
3. Why are my vegan rice krispie treats hard instead of chewy?
The most common reason for hard treats is using too high a heat when melting the marshmallows, which causes them to overcook and lose moisture. Another cause is pressing the mixture into the pan too firmly, which compacts the cereal and removes air. Be sure to use low heat throughout and press gently when transferring to the pan.
4. Can I make these without a stove?
Yes! You can melt the vegan butter and marshmallows together in a large microwave-safe bowl. Microwave in 30-second intervals, stirring between each, until the mixture is fully melted and smooth. This usually takes about 2 to 3 minutes total. The Microwave Rice Krispie Treat Recipe method works great for a faster approach.
5. Can I double this recipe?
Absolutely. Simply double all the ingredients and use two 9×13-inch pans or one half-sheet pan (18×13 inches). Just be sure you have a pot large enough to melt the full amount of marshmallows at once — a 6- to 8-quart pot works well for a double batch. Timing and technique remain exactly the same.
This vegan rice krispie treat recipe also happens to make a great base for all kinds of creative bar cookies — take inspiration from Monster Cookie Bars Recipe for more no-bake bar ideas.
Final Thoughts
Making a vegan rice krispie treat recipe at home is one of those small victories that feels surprisingly satisfying. You get all the nostalgia, the gooey pull, and the crispy snap — without any animal products involved.
Whether you’re making these for yourself, your kids, or a friend with dietary restrictions, this recipe is guaranteed to be a hit. The ingredients are simple, the process is fast, and the results are exactly what you’d hope for.
Give this recipe a try and let me know what you think in the comments below! I’d also love to hear about any fun variations or mix-ins you tried.
Recommended:
- Original Rice Krispie Treat Recipe
- Rice Krispie Treat Recipe With Marshmallow Fluff
- Rice Krispie Treat Recipe With Large Marshmallows
- Single Serve Rice Krispie Treat Recipe
- Copycat Starbucks Rice Krispie Treat Recipe
- No Bake Cookie Recipe
- Pumpkin Bar Recipe
- Monster Cookie Protein Balls Recipe
- Dirt Pudding Recipe
- Cake Pop Recipe


