If you’ve been searching for the ultimate peanut butter rice krispie treat recipe, your search ends right here.
This classic no-bake dessert takes everything you love about the original and adds a rich, nutty twist that makes it even more addictive. The combination of creamy peanut butter, melted butter, and gooey marshmallows creates a treat with a flavor that’s deeply satisfying and impossible to stop eating.
These bars come together in under 20 minutes with just a handful of pantry staples. No oven required, no complicated techniques, and no special skills needed.
Whether you’re making these for a bake sale, a weeknight craving, or a party dessert platter, they’re guaranteed to disappear fast. The peanut butter adds moisture and richness to the cereal base, making each bite chewier and more flavorful than a standard Rice Krispie treat.
The secret is in the ratios: enough peanut butter to really taste it, but not so much that the treats lose their signature crispy texture. This recipe nails that balance perfectly.
For more no-bake inspiration, you might also enjoy this Original Rice Krispie Treat Recipe the classic foundation that started it all.
Why You’ll Love This Peanut Butter Rice Krispie Treat Recipe
These treats check every box: quick, easy, delicious, and crowd-pleasing.
The peanut butter flavor is bold but not overwhelming, blending seamlessly with the sweet marshmallow coating on every puffed rice piece.
They hold together beautifully when cut, making them easy to serve at gatherings, pack into lunch boxes, or wrap up as gifts.
The no-bake format means you’re not heating up your kitchen, which makes these a perfect year-round treat.
Kids absolutely love them, and adults who try to grab “just one” usually end up going back for two or three.
Here’s a quick look at why this recipe works so well:
- No oven needed – The whole recipe happens on your stovetop in one pot
- Ready in under 30 minutes – Including cooling time
- 5 simple ingredients – Nothing exotic or hard to find
- Crowd-pleasing flavor – Peanut butter and marshmallow is a universally loved combo
- Customizable – Easy to add chocolate chips, drizzle, or extra toppings
- Great for all ages – Kids and adults both love these treats
- Perfect texture – Chewy, gooey, and satisfyingly crisp all at once
Another fan-favorite you might want to try alongside these is the Gooey Rice Krispie Treat Recipe for an extra-indulgent version.
Ingredients
The ingredient list for this peanut butter rice krispie treat recipe is short, sweet, and to the point. Every item plays a specific role in achieving that perfect gooey-yet-crispy texture.
The butter helps prevent sticking and adds richness; the marshmallows create the binding base; and the peanut butter delivers flavor, moisture, and a slightly denser, chewier bite than the original version.
- 3 tablespoons (42 g) unsalted butter
- 1 bag (10 oz / 283 g) mini marshmallows
- ½ cup (128 g) creamy peanut butter
- ½ teaspoon vanilla extract
- 6 cups (170 g) Rice Krispies cereal
- Optional: ½ cup (85 g) semi-sweet chocolate chips for topping
Read Also: Easy Rice Krispie Treat Recipe
Kitchen Equipment Needed
You don’t need anything fancy to make this recipe. Most of these items are already in your kitchen.
The most important thing is using a large enough pot so the cereal has plenty of room to be mixed without spilling, and a properly greased pan so the treats release cleanly.
- Large saucepan or pot (at least 5-quart capacity)
- 9×13 inch baking pan
- Silicone spatula or wooden spoon
- Measuring cups and spoons
- Parchment paper
- Butter or non-stick cooking spray for greasing
- Sharp knife for cutting
You might also enjoy: Rice Krispie Treat Recipe with Marshmallow Fluff
Recommended Products for This Recipe
These are products chosen for their quality and how much they genuinely improve the final result.
1. Creamy Natural Peanut Butter
A high-quality creamy peanut butter without added oils or excessive sugar gives you a cleaner, more pronounced peanut flavor. It melts more smoothly into the marshmallow mixture and doesn’t make the treats greasy. The consistency makes it easy to stir into the hot marshmallow base.
2. Mini Marshmallows (Large Bag)
Mini marshmallows melt faster and more evenly than large ones, which means less time on the stove and less risk of burning. A quality brand with a fresh, soft texture makes a big difference in how gooey and cohesive your treats turn out.
3. OXO Good Grips Silicone Spatula
A sturdy silicone spatula is essential for folding the cereal into the hot marshmallow mixture without tearing or breaking the puffed rice. The OXO version is heat-resistant up to 600°F and flexible enough to scrape every bit of the pot cleanly.
4. USA Pan 9×13 Baking Pan
This pan is made from aluminized steel and has a light coating that helps treats release cleanly without sticking. It distributes the mixture evenly and the rimmed edge makes pressing the treats down neat and contained.
Read Also: Microwave Rice Krispie Treat Recipe
Step-by-Step Instructions
Step 1: Prepare Your Pan
- Line your 9×13 inch baking pan with parchment paper, leaving some overhang on the sides so you can lift the treats out easily after they set.
- Lightly coat the parchment paper with non-stick cooking spray or a thin layer of softened butter.
- Set the prepared pan aside within easy reach of your stovetop because you’ll need to move quickly once the marshmallow mixture is ready.
Step 2: Measure Out Your Cereal
- Measure 6 cups (170 g) of Rice Krispies cereal and pour them into a very large mixing bowl.
- Set the bowl near your stovetop so you can quickly add the marshmallow mixture once it’s ready.
- Having the cereal pre-measured prevents the marshmallow base from cooling and stiffening before you can mix everything together.
Step 3: Melt the Butter
- Place a large saucepan or pot over low to medium-low heat.
- Add 3 tablespoons (42 g) of unsalted butter to the pot.
- Stir gently as the butter melts to coat the bottom of the pan evenly.
- Don’t let the butter brown or sizzle aggressively; you want a gentle, even melt.
Step 4: Add and Melt the Marshmallows
- Once the butter is fully melted, add the entire bag of mini marshmallows (10 oz / 283 g) to the pot.
- Stir constantly with a silicone spatula to keep the marshmallows moving and prevent them from burning on the bottom.
- Continue stirring over low to medium-low heat for 3 to 4 minutes until the marshmallows are completely melted and smooth with no lumps remaining.
- The mixture will look glossy and slightly thick when it’s fully melted.
Step 5: Stir in the Peanut Butter and Vanilla
- Remove the pot from the heat immediately after the marshmallows are fully melted.
- Add ½ cup (128 g) of creamy peanut butter to the pot all at once.
- Stir vigorously until the peanut butter is completely incorporated and no streaks remain.
- Add ½ teaspoon of vanilla extract and stir again for about 30 seconds to fully blend it in.
- The mixture should look thick, glossy, and uniformly golden-tan in color.
Step 6: Fold in the Cereal
- Working quickly, pour the peanut butter marshmallow mixture over the measured cereal in the bowl.
- Use your silicone spatula to fold everything together, making sure every piece of cereal is coated with the marshmallow mixture.
- Work efficiently because the mixture starts to stiffen as it cools, making it harder to mix evenly after a few minutes.
- Scrape the bottom and sides of the bowl as you fold to catch any uncoated cereal.
Step 7: Press Into the Pan
- Transfer the cereal mixture to your prepared 9×13 inch baking pan.
- Use a lightly buttered spatula, a piece of buttered parchment, or lightly buttered hands to press the mixture firmly and evenly into the pan.
- Press firmly but avoid compacting the treats too aggressively, as over-pressing can make them dense and hard instead of chewy.
- Aim for an even thickness of about 1 to 1.5 inches (2.5 to 4 cm) across the entire pan.
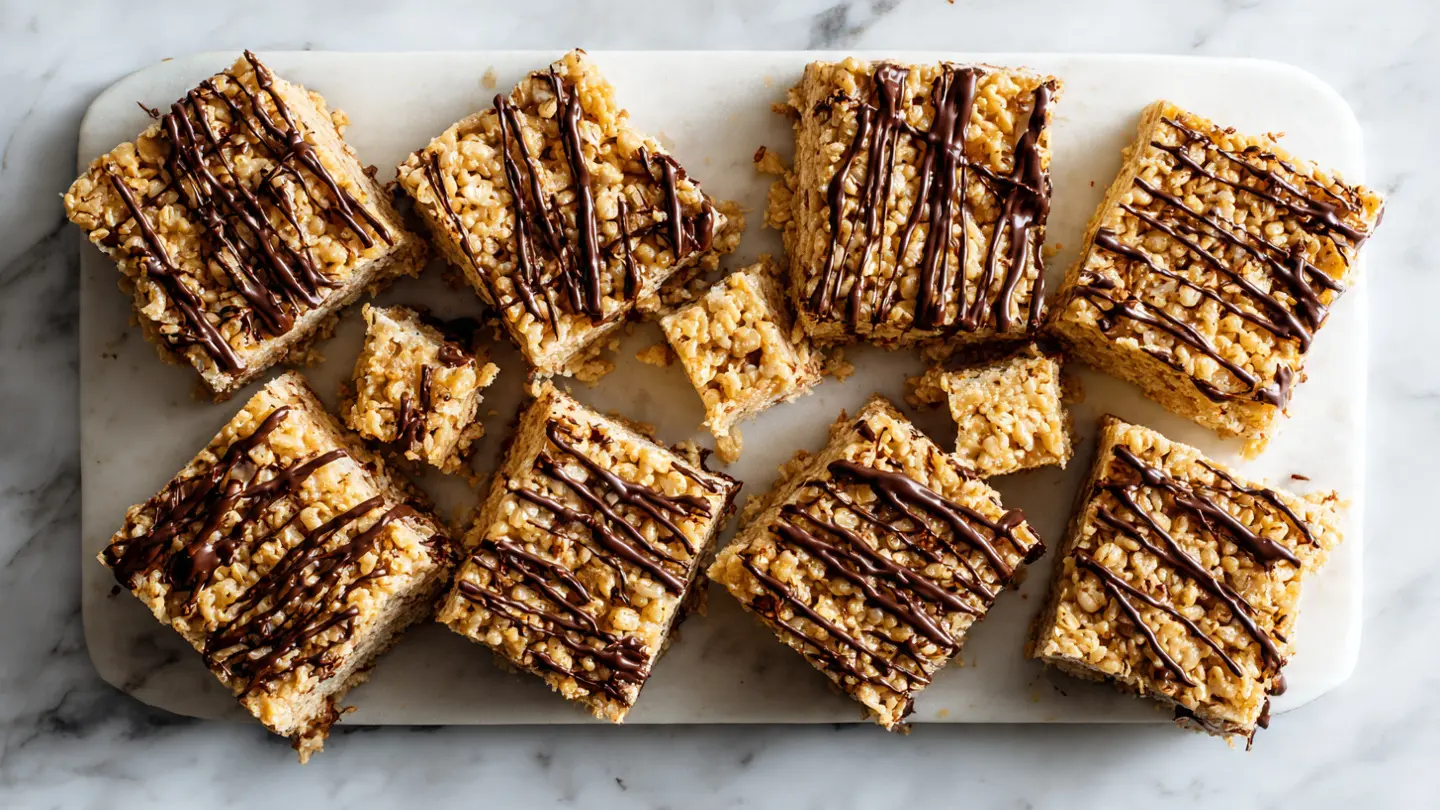
Step 8: Add Optional Chocolate Topping
- If you’re adding the optional chocolate chip topping, sprinkle ½ cup (85 g) of semi-sweet chocolate chips over the surface of the hot treats immediately after pressing them into the pan.
- Wait about 2 minutes, then use a spatula or the back of a spoon to gently spread the softened chips across the surface for a thin chocolate layer.
- Alternatively, leave the chips whole for a dotted, rustic-looking topping.
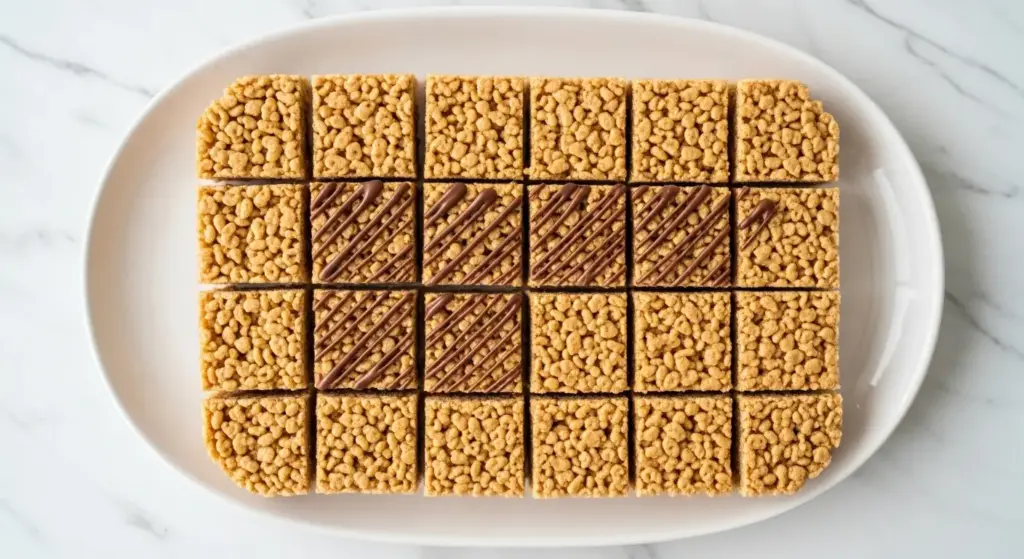
Step 9: Let Set and Cut
- Allow the treats to cool and set at room temperature for at least 30 minutes before cutting.
- Once set, use the parchment paper overhang to lift the entire slab out of the pan and onto a cutting board.
- Use a sharp knife to cut the treats into squares or rectangles of your desired size.
- For clean cuts, lightly coat the knife with cooking spray between each slice to prevent sticking.
This recipe is also great on the stovetop, similar to our Single Serve Rice Krispie Treat Recipe if you ever want to scale way down.
Tips for Success
Getting perfect peanut butter rice krispie treats every time comes down to a few key technique points that make a real difference.
Follow these tips and your treats will be chewy, gooey, well-set, and full of peanut butter flavor from edge to edge.
- Use low heat throughout – High heat scorches marshmallows and creates a stiff, gummy texture that’s hard to mix
- Don’t skip the butter – Butter prevents sticking and gives the treats a slightly richer, more indulgent flavor
- Use fresh marshmallows – Stale marshmallows don’t melt as smoothly and can result in lumpy, uneven treats
- Work fast after melting – The mixture sets quickly; have everything prepped before you start melting
- Don’t over-press the pan – Gentle, even pressure keeps the treats chewy instead of rock-hard
- Use creamy peanut butter – Chunky peanut butter doesn’t incorporate as evenly and can affect texture
- Grease your hands or spatula – Lightly buttered hands make pressing the mixture into the pan much easier
- Let them cool fully – Cutting too early results in crumbly bars that fall apart
For an even faster version, check out this Microwave Rice Krispie Treat Recipe that skips the stovetop entirely.
Serving Suggestions
These treats are fantastic on their own, but they pair beautifully with a few simple accompaniments.
A cold glass of milk is the classic pairing that never fails, cutting through the sweetness with a clean, creamy contrast.
Here are some serving ideas to elevate your peanut butter rice krispie treats:
- Serve alongside a scoop of vanilla or chocolate ice cream for a fun dessert plate
- Drizzle with melted chocolate or a thin stream of honey before cutting for an elevated presentation
- Pair with Hot Chocolate for a cozy winter snack
- Cut into small bite-sized squares and arrange on a dessert platter with other no-bake bars
- Wrap individual squares in cellophane and tie with a ribbon for an easy homemade gift
- Serve at parties alongside fresh fruit to balance the sweetness
Also a great snack table addition: Muddy Buddies for a crunchy, chocolatey complement.
Variations to Try
Once you’ve nailed the base recipe, there are tons of fun ways to customize these treats for different occasions and flavor preferences.
Each of these variations starts with the same core peanut butter marshmallow base but adds a twist that completely changes the experience.
- Chocolate Peanut Butter Version – Add ½ cup of chocolate chips to the hot marshmallow mixture and stir until melted before adding the cereal
- Honey Peanut Butter Treats – Swap ¼ cup of the marshmallows for 3 tablespoons of honey for a slightly less sweet, more complex flavor
- Dark Chocolate Drizzle – Melt dark chocolate and drizzle it over the cooled bars for a sophisticated look and flavor
- Crunchy Peanut Butter Version – Use chunky peanut butter for added texture and whole peanut pieces throughout
- S’mores Style – Mix in mini chocolate chips and crushed graham crackers with the cereal for a campfire-inspired twist
- Peanut Butter Cup Version – Press Reese’s Pieces or chopped peanut butter cups into the surface right after pressing for a candy-studded treat
For another fun no-bake bar variation, take a look at the Monster Cookie Bars Recipe.
Storage and Reheating
Proper storage keeps your peanut butter rice krispie treats fresh, chewy, and delicious for several days after making them.
The biggest enemy of these treats is air exposure, which causes the cereal to go stale and the surface to dry out, so sealing them well is key.
- Room temperature – Store in an airtight container at room temperature for up to 4 days
- Refrigerator – Store in the fridge for up to 1 week, though this can make them slightly harder in texture
- Freezer – Wrap individual bars in plastic wrap and place in a freezer-safe bag for up to 6 weeks
- Separating layers – If stacking treats in a container, place a piece of parchment between each layer to prevent sticking
- Softening refrigerated treats – Let cold treats sit at room temperature for 10 to 15 minutes before eating to restore their chewy texture
- Reheating – Microwave individual bars for 5 to 8 seconds to restore their softness; any longer can make them overly soft and sticky
You might also enjoy: No Bake Cookie Recipe
Nutritional Facts
The following nutritional information is an estimate for one bar, assuming the batch is cut into 24 equal squares.
Values will vary based on specific brands used and exact portion sizes.
| Nutrient | Amount Per Serving |
|---|---|
| Calories | 135 kcal |
| Total Fat | 4.5 g |
| Saturated Fat | 1.5 g |
| Cholesterol | 4 mg |
| Sodium | 95 mg |
| Total Carbohydrates | 22 g |
| Dietary Fiber | 0.4 g |
| Total Sugars | 13 g |
| Protein | 2.5 g |
These treats are an indulgent snack, and the peanut butter adds a small but meaningful protein boost compared to the standard version.
Read Also: Peanut Butter Cookie Recipe
Health Benefits of Key Ingredients
This is an indulgent treat, but a couple of the key ingredients do bring some real nutritional value to the table.
Peanut butter in particular is one of the most nutrient-dense ingredients in this recipe, delivering protein, healthy fats, and several important micronutrients.
Here’s a closer look at what each main ingredient contributes:
- Peanut butter is a good source of protein, healthy monounsaturated fats, niacin, vitamin E, and magnesium, all of which support heart health, energy levels, and muscle function
- Rice Krispies cereal is typically fortified with B vitamins, including thiamine, riboflavin, niacin, and folic acid, as well as iron, which supports energy metabolism and red blood cell production
- Marshmallows are low in fat and while they are mostly sugar, they serve as the binding agent that holds the treat together without the need for eggs, heavy cream, or other higher-calorie binders
- Butter provides fat-soluble vitamins A and D, and the small amount used here adds richness without overwhelming the nutrition profile of the treat
These aren’t a health food, but enjoyed in moderation, the peanut butter component does add meaningful nutrients to what’s otherwise a classic indulgent snack.
For a protein-packed breakfast treat, the Peanut Butter Jelly Smoothie Recipe uses similar flavor profiles in a much lighter format.
Frequently Asked Questions
1. Can I use crunchy peanut butter instead of creamy?
Yes, you can use crunchy peanut butter if you enjoy extra texture. The chunks of peanut will stay embedded in the finished treat and add a nice crunch alongside the Rice Krispies. Just note that it won’t blend as smoothly into the marshmallow base as creamy peanut butter does, so you may see small bits throughout.
2. Why are my rice krispie treats too hard?
Hard treats are almost always the result of cooking the marshmallows over too high heat or pressing the mixture too firmly into the pan. High heat changes the sugar structure in the marshmallows, making the final treats dense and firm rather than soft and chewy. Keep your heat at low to medium-low throughout and press gently.
3. Can I make these ahead of time?
Absolutely. These treats are actually a great make-ahead option because they hold up well for several days. Make them the day before you need them, store in an airtight container at room temperature, and they’ll be just as good the next day. If you’re stacking them, separate layers with parchment to prevent sticking.
4. Can I add chocolate to the peanut butter mixture?
Yes, and it’s delicious. The easiest method is to stir in ½ cup of chocolate chips directly into the hot marshmallow and peanut butter mixture after removing it from the heat. The residual heat will melt the chips as you stir. You can also melt chocolate separately and drizzle it over the finished treats after they’ve cooled.
5. How do I cut these cleanly without them falling apart?
Let the treats cool completely before cutting, at least 30 minutes at room temperature. Use a sharp knife and lightly coat it with non-stick cooking spray between each cut. Applying even, firm downward pressure rather than sawing back and forth gives you cleaner edges without crumbling.
The Peanut Butter Blossom Cookies Recipe is another great peanut butter treat to have in your back pocket for the cookie lovers in your life.
Final Thoughts
This peanut butter rice krispie treat recipe is the kind of thing you make once and then find yourself making on repeat.
It’s simple enough for a weeknight craving but impressive enough to bring to a party or package up as a thoughtful homemade gift.
The peanut butter turns a classic childhood treat into something with a little more depth and a lot more deliciousness. Give it a try this week and see for yourself just how irresistible these bars are.
We’d love to hear how yours turned out! Leave a comment below with your experience, any variations you tried, or questions you have. And if you loved this recipe, share it with a friend who deserves a little peanut butter magic in their day.
Recommended:
- Fruity Pebbles Rice Krispie Treat Recipe
- Vegan Rice Krispie Treat Recipe
- Rice Krispie Treat Recipe with Large Marshmallows
- Copycat Starbucks Rice Krispie Treat Recipe
- Monster Cookie Recipe
- Monster Cookie Protein Balls Recipe
- No Bake Cookie Recipe
- Peanut Butter Pie Recipe
- Bourbon Balls Recipe
- Dirt Pudding Recipe


