If you’ve ever bitten into a perfectly made piece of fudge recipe chocolate candy, you know there’s nothing quite like it. That soft, dense, melt-in-your-mouth texture with a deep cocoa flavor is pure magic in every square.
This classic homemade fudge uses semi-sweet chocolate chips, sweetened condensed milk, butter, and vanilla for a result that’s silky, rich, and genuinely hard to stop eating.
The beauty of this approach is that it skips the candy thermometer and the nerve-wracking soft-ball stage test that trips up so many first-time fudge makers. Instead, you get reliable, consistent results with a straightforward stovetop method.
You’ll have the fudge cooling in its pan within about 15 minutes of active cooking time, and then patience takes over while it sets in the fridge. This recipe makes approximately 36 generous squares, which is ideal for holiday gift trays, bake sales, or simply treating yourself.
The key to great fudge lies in using quality chocolate and not rushing the cooling process. Semi-sweet chocolate chips work well here, but chopped baking bars melt even more smoothly and give you that glossy, professional finish.
If you love homemade confections that look fancy but are genuinely straightforward to pull off, you are absolutely going to adore this one.
For another crowd-pleasing sweet treat, check out this Original Fantasy Fudge Recipe for a marshmallow-based variation that’s been a holiday staple for decades.
Why You’ll Love This Fudge Recipe
Making homemade fudge from scratch is one of those kitchen projects that feels impressive but is secretly very doable.
Here’s why this recipe stands out:
- No candy thermometer required — this method is beginner-friendly and far less stressful than old-fashioned cooked fudge
- Ready in about 15 minutes of cooking, plus chilling time — perfect for last-minute holiday prep
- Only 5 core ingredients — you may already have everything on hand
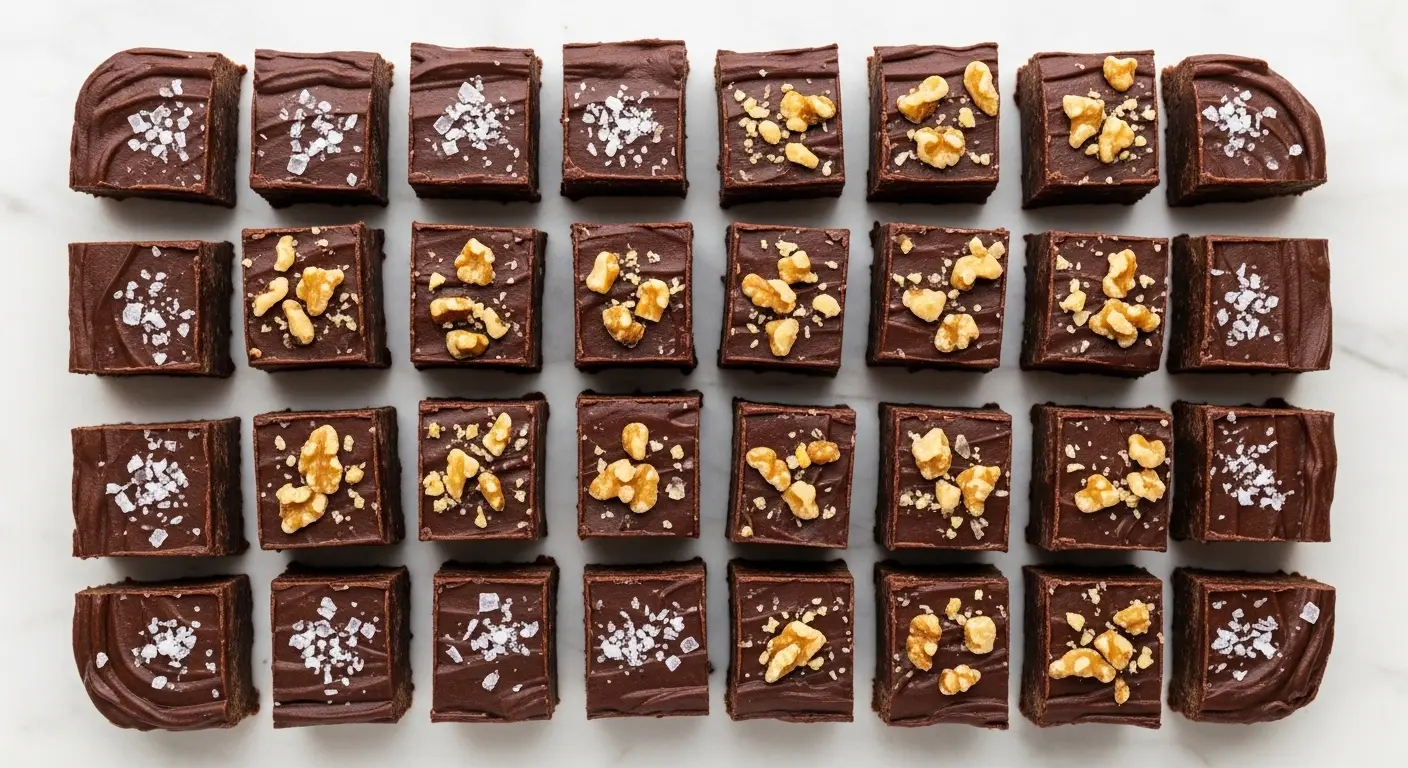
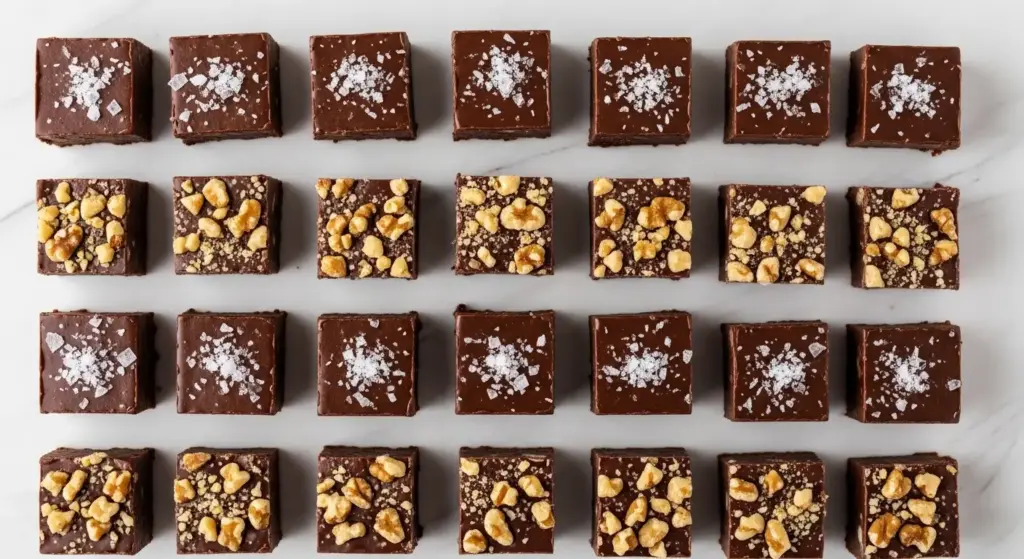
- Incredibly customizable — add nuts, swirl in peanut butter, fold in marshmallows, or sprinkle on sea salt
- Makes 36 squares — plenty to share, gift, or store for later
- Stores beautifully — keeps at room temperature for a week or refrigerated for up to two weeks
- Rich, deep chocolate flavor that tastes like it came from a candy shop
- Perfect texture — dense and creamy without being too soft or too firm
This fudge recipe is a great beginner candy project that delivers impressive results on the first try.
Also try this Hot Fudge Sauce Recipe if you want to use a similar chocolate base for an amazing ice cream topping.
Ingredients
This recipe relies on a handful of pantry staples, with the quality of your chocolate making the biggest difference in the final flavor. Use the best semi-sweet or dark chocolate chips you can find.
- 3 cups (510g) semi-sweet chocolate chips
- 1 can (14 oz / 397g) sweetened condensed milk
- 2 tablespoons (28g) unsalted butter
- 1 teaspoon pure vanilla extract
- 1/4 teaspoon fine sea salt
- 1/2 cup (60g) chopped walnuts or pecans (optional but recommended)
Read Also: Fudge Brownie Recipe
Kitchen Equipment Needed
You won’t need any specialty candy-making tools for this version, which is part of what makes it so approachable. A heavy-bottomed saucepan is the most important piece of equipment here because it distributes heat evenly and prevents scorching.
- Heavy-bottomed saucepan (2–3 quart)
- 8×8-inch square baking pan
- Parchment paper
- Rubber spatula or wooden spoon
- Sharp chef’s knife
- Cutting board
- Measuring cups and spoons
- Mixing bowl (optional, for mix-ins)
This fudge also pairs wonderfully with a scoop of vanilla ice cream, and if you love frozen desserts, the Hot Fudge Sundae page has everything you need to turn your homemade fudge into the ultimate topping.
Recommended Products for This Recipe
These are products I recommend based on quality and performance for getting the best possible results with this fudge recipe.
1. Ghirardelli Semi-Sweet Chocolate Baking Chips
Ghirardelli’s chocolate chips contain a higher cocoa percentage than most grocery store brands, which translates directly into a richer, more complex fudge flavor. They also melt exceptionally smoothly, which helps you achieve that glossy, professional-looking finish. This is the upgrade that genuinely makes a noticeable difference in your final result.
2. All-Clad Stainless Steel Saucepan
A heavy, professional-grade saucepan distributes heat evenly across the base, which is critical when melting chocolate. Thin-bottomed pans create hot spots that can scorch your chocolate before you even realize it’s happening. This pan is a long-term investment that will serve you across dozens of candy and sauce recipes.
3. OXO Good Grips Silicone Spatula
A high-heat silicone spatula lets you stir constantly at the stove without worrying about the heat damaging it. The flexible edge also makes it easy to cleanly scrape every last bit of fudge batter into your pan, so nothing goes to waste.
4. USA Pan 8×8 Square Baking Pan
USA Pan’s square pan has a light coating that makes removing the parchment-lined fudge slab incredibly easy. The reinforced rim keeps the pan from warping in temperature changes, and the straight sides mean you get even, clean-edged squares when you cut the fudge.
You might also love the Toffee Recipe for another classic homemade candy that uses similar pantry staples.
Step-by-Step Instructions
Step 1: Prepare Your Pan
- Line your 8×8-inch square baking pan with two sheets of parchment paper, placing one horizontally and one vertically so the paper extends up and over all four sides.
- Lightly butter the parchment paper with a small amount of softened butter. This prevents any sticking and makes lifting the slab out of the pan much easier once the fudge has fully set.
- Set the prepared pan on a flat, heat-safe surface near your stovetop so it is ready the moment you need it. Fudge can set quickly once it is removed from heat, so having everything nearby is important.
Step 2: Combine Ingredients in the Saucepan
- Measure out your 3 cups (510g) of semi-sweet chocolate chips and add them directly to your heavy-bottomed saucepan.
- Pour the entire 14 oz (397g) can of sweetened condensed milk over the chocolate chips. Do not use evaporated milk or fat-free condensed milk as substitutes — only full-fat sweetened condensed milk will give you the right texture and sweetness.
- Add the 2 tablespoons (28g) of unsalted butter to the pan. The butter adds richness and gives the fudge a glossy, smooth finish.
- Add the 1/4 teaspoon of fine sea salt. Salt is not optional here — it balances the sweetness and deepens the chocolate flavor significantly.
- Do not add the vanilla extract yet. It will be added off the heat to preserve its delicate aroma.
Step 3: Melt Everything Together
- Place the saucepan over medium-low heat. Starting at a low temperature is very important — high heat can cause the chocolate to seize or scorch, which ruins the texture of the fudge entirely.
- Stir the mixture gently and continuously with a rubber spatula or wooden spoon, making sure to scrape the bottom and sides of the pan as you go.
- After about 3–4 minutes, you will begin to see the chocolate chips start to lose their shape. When this happens, reduce the heat to low and continue stirring.
- Keep stirring until the mixture is completely smooth, thick, and glossy with no visible lumps or unmelted chips. This typically takes about 5–7 minutes total from start to finish.
- The finished mixture should pull away slightly from the sides of the pan and have a ribbon-like consistency when you lift the spatula.
Step 4: Add Vanilla and Mix-Ins
- Remove the saucepan from the heat immediately once the mixture is fully smooth.
- Add the 1 teaspoon of pure vanilla extract and stir it in quickly and thoroughly. Adding the vanilla off the heat prevents the alcohol from evaporating too fast, which preserves more of the flavor.
- If you are adding chopped walnuts or pecans, fold in 1/2 cup (60g) now, reserving a small handful for sprinkling on top if desired.
- Work quickly at this stage — the fudge begins to firm up as it cools, and you want it to be pourable when it goes into the pan.
Step 5: Pour and Smooth the Fudge
- Immediately pour the hot fudge mixture into your prepared parchment-lined pan.
- Use your spatula to spread it out evenly into all four corners, smoothing the top as flat as possible. A small offset spatula works especially well here if you have one.
- If you reserved any chopped nuts, sprinkle them over the top now and press them gently into the surface with the back of your spatula so they adhere as the fudge cools.
- If you want to add a sprinkle of flaky sea salt on top, now is the perfect moment.
Step 6: Chill and Set
- Allow the fudge to cool at room temperature for about 20–30 minutes before moving it to the refrigerator. Placing hot fudge directly into the fridge can cause condensation to form on the surface, which affects texture.
- Transfer the pan to the refrigerator and chill for a minimum of 2 hours, or preferably 3–4 hours. Overnight chilling gives you the cleanest, firmest slices.
- The fudge is fully set when it feels firm to the touch and does not jiggle when you gently shake the pan.
Step 7: Cut and Serve
- Once fully set, lift the fudge slab out of the pan using the overhanging parchment paper as handles and place it on a cutting board.
- For the cleanest cuts, use a large, sharp knife. Run the blade under hot water and dry it off between each slice — this prevents dragging and gives you smooth edges.
- Cut the slab into a 6×6 grid for 36 evenly-sized squares, or cut into larger pieces for a more generous serving. You can also cut it into rectangles if you prefer.
- Transfer the cut squares to a serving plate or store in an airtight container with parchment paper between layers.
Another great no-bake chocolate treat to try alongside this is the Buckeyes Recipe — peanut butter balls dipped in chocolate that come together with zero cooking required.
Tips for Success
Getting fudge right on your first attempt comes down to a few key details. Skipping any of these can be the difference between silky squares and a grainy or sticky mess.
- Use full-fat sweetened condensed milk only — fat-free versions do not set correctly and will leave you with a soft, sticky result
- Low and slow heat is everything — never rush the melting process by cranking up the heat, as chocolate seizes easily at high temperatures
- Stir constantly — unlike old-fashioned cooked fudge, this version needs continuous gentle stirring the entire time it is on the heat
- Work quickly once it is off the heat — the mixture firms up fast, so have your pan ready before you start cooking
- Use high-quality chocolate — the chocolate is the star of this recipe, so using better chocolate chips or chopped baking bars directly improves the flavor
- Chill completely before cutting — cutting warm or slightly set fudge will give you crumbly edges and uneven pieces
- Warm your knife — running the blade under hot water before each cut produces clean, professional-looking squares
- Don’t skip the salt — a small amount of salt balances the sweetness and makes the chocolate flavor taste more intense
For another rich, no-bake treat to add to your holiday candy rotation, this No Bake Cookie Recipe is a tried-and-true favorite.
Serving Suggestions
This fudge is delicious entirely on its own, but there are so many fun ways to serve and present it that make it feel even more special.
The classic approach is simply cutting it into neat squares and arranging them on a platter, but a little extra thought goes a long way for gifting or entertaining.
- Arrange squares in a small gift box lined with wax paper for a beautiful homemade holiday gift
- Serve alongside a scoop of vanilla ice cream for an indulgent dessert combination
- Place a few squares on a Hot Fudge Sundae board alongside toppings for an interactive dessert bar
- Layer in a holiday tin with parchment paper between rows for easy transport
- Crumble over ice cream or yogurt as a topping for an elevated dessert
- Serve on a charcuterie-style dessert board with fresh berries, pretzels, and nuts
- Cut into larger rectangles and wrap individually in foil or cellophane with ribbon for a festive presentation
- Pair with a cup of Hot Chocolate for a cozy winter treat
Variations to Try
Once you have the base recipe mastered, there are endless ways to customize your fudge. These are some of the most popular and delicious variations.
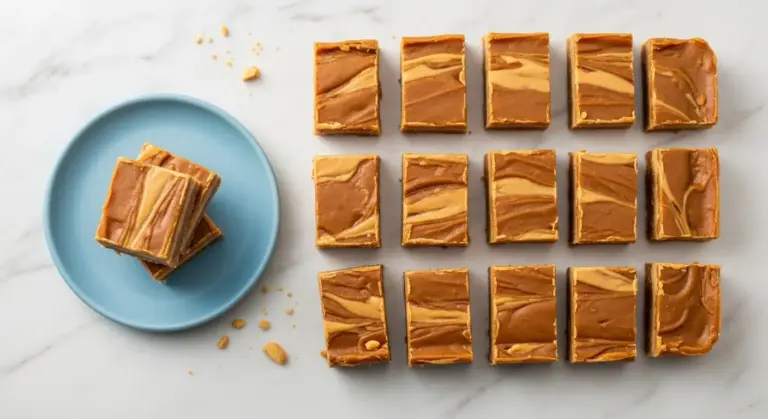
- Peanut butter swirl fudge — drop spoonfuls of creamy peanut butter over the poured fudge and swirl with a toothpick before chilling
- Mint chocolate fudge — replace the vanilla extract with 1/2 teaspoon of pure peppermint extract and top with crushed candy canes
- Rocky road fudge — fold in mini marshmallows and chopped almonds before pouring into the pan
- White chocolate fudge — swap the semi-sweet chips for high-quality white chocolate chips for a sweeter, creamier variation
- S’mores fudge — add crushed graham crackers and mini marshmallows for a campfire-inspired twist
- Sea salt caramel fudge — drizzle warmed caramel sauce over the top before chilling and finish with flaky sea salt
- Espresso fudge — stir in 1 teaspoon of instant espresso powder with the condensed milk to deepen the chocolate flavor
- Double chocolate fudge — fold in 1/2 cup of dark chocolate chips after removing from the heat for extra chocolate intensity
For another indulgent chocolate holiday treat, the Hot Fudge Cake Recipe is a wonderful self-saucing dessert that uses similar flavors.
Storage and Reheating
This fudge stores very well, which makes it ideal for making ahead of time, especially during the holiday season.
- Room temperature: Store fudge in an airtight container at room temperature in a cool, dry spot for up to 1 week. Keep it away from direct sunlight or heat, which can soften it.
- Refrigerator: Wrapped tightly and kept in an airtight container, fudge will stay fresh in the fridge for up to 2 weeks. Allow it to come to room temperature for 10–15 minutes before serving for the best texture.
- Freezer: Fudge freezes beautifully for up to 3 months. Wrap individual squares in parchment paper, then place them in a zip-lock freezer bag or airtight container. Thaw overnight in the fridge or at room temperature for about 30 minutes.
- Layering: Always place parchment paper between layers when stacking fudge squares to prevent them from sticking together.
- Do not microwave to reheat — this can overheat the chocolate and cause the texture to break down. Bring to room temperature naturally instead.
Read Also: Bourbon Balls Recipe
Nutritional Facts
The following values are based on one square (approximately 1 inch x 1 inch) when the batch is cut into 36 pieces, without optional nuts.
| Nutrient | Per Serving |
|---|---|
| Calories | 105 kcal |
| Total Fat | 5g |
| Saturated Fat | 3g |
| Cholesterol | 7mg |
| Sodium | 30mg |
| Total Carbohydrates | 15g |
| Dietary Fiber | 0.5g |
| Total Sugar | 13g |
| Protein | 1.5g |
| Calcium | 40mg |
| Iron | 0.5mg |
Nutritional values are estimates and may vary depending on specific brands and ingredient substitutions used.
You might also enjoy: Cake Pop Recipe
Health Benefits of Key Ingredients
While fudge is absolutely a treat and should be enjoyed in moderation, a few of its core ingredients do offer some nutritional value worth noting.
Dark or semi-sweet chocolate contains naturally occurring compounds that have been linked to several positive health outcomes when consumed in reasonable amounts.
- Semi-sweet chocolate is a source of flavonoids, a type of antioxidant found in cocoa that has been associated with supporting cardiovascular health and reducing oxidative stress in the body
- Dark chocolate varieties contain iron, magnesium, copper, and manganese — minerals that support energy production, bone health, and immune function
- Cocoa contains small amounts of caffeine and theobromine, natural compounds that may support mental alertness and mood
- Walnuts (optional add-in) are an excellent plant-based source of omega-3 fatty acids, which support brain health, heart health, and inflammation reduction
- Pecans (optional add-in) provide vitamin E, thiamine, and zinc, along with heart-healthy monounsaturated fats
- Sweetened condensed milk contributes calcium and protein, supporting bone density and muscle function, though it is also high in sugar and should be enjoyed in moderation
- Vanilla extract contains trace amounts of vanillin, a compound with mild antioxidant properties
This Caramel Sauce Recipe uses a similar dessert-sauce approach and makes a wonderful pairing with this fudge.
Frequently Asked Questions
1. Why did my fudge not set properly?
The most common reason fudge fails to firm up is using fat-free or reduced-fat sweetened condensed milk instead of full-fat. The fat content is what gives fudge its structure and texture. Another culprit is not chilling it long enough — two hours is the minimum, but overnight is ideal for a truly firm result.
2. Can I make this fudge without a microwave?
Yes, and in fact this recipe is entirely stovetop-based. Everything is melted together in a saucepan on the stove over low heat. If you prefer to use a microwave, you can melt the chocolate chips and condensed milk together in 30-second intervals, stirring between each one until fully smooth, then stir in the butter, vanilla, and salt.
3. How do I prevent my fudge from being grainy?
Grainy fudge is usually the result of the sugar in the condensed milk crystallizing during cooking. This can happen if the mixture gets too hot too quickly or if you stop stirring while it is on the heat. Keeping the temperature consistently low and stirring gently and continuously prevents crystallization from occurring.
4. Can I use dark chocolate instead of semi-sweet?
Absolutely. Dark chocolate chips with 60–70% cocoa content work beautifully in this recipe and produce a slightly more intense, less sweet fudge. If you prefer a milder flavor, milk chocolate chips can be substituted, though the result will be sweeter and slightly softer in texture.
5. How long does homemade fudge last?
Stored in an airtight container at room temperature, this fudge will stay fresh for up to one week. In the refrigerator, it keeps for up to two weeks. For longer storage, you can freeze it for up to three months, wrapped well in parchment and stored in a sealed freezer bag or container.
For another festive homemade confection to make alongside this, the Fudge Stripe Cookies Recipe is a crowd-pleaser that combines crisp shortbread with a chocolate fudge coating.
Final Thoughts
This fudge recipe has everything going for it: a short ingredient list, a quick cooking process, and results that genuinely taste like something from a specialty candy shop.
Whether you are making it for a holiday gift tin, a bake sale, or simply because a chocolate craving hit hard on a Tuesday afternoon, this is the recipe that will not let you down.
The method is forgiving enough for beginners but produces results that will impress anyone who takes a bite.
Give it a try this weekend, and do not be surprised when a single batch disappears faster than you expected.
If you make this recipe, leave a comment below and let me know how it turned out. I would love to hear about the variations you tried and any tips you discovered along the way.
Recommended:
- The Original Fantasy Fudge Recipe
- Hot Fudge Cake Recipe
- Fudge Brownie Recipe
- Toffee Recipe
- Muddy Buddy Recipe
- Chocolate Pudding Recipe
- Peanut Butter Cookie Recipe
- Monster Cookie Recipe
- No Bake Cookie Recipe
- Baklava Recipe

