If you’ve been searching for the perfect easy vanilla cake recipe, you’ve landed in the right place. This cake is the kind you want for birthdays, Sunday dinners, casual celebrations, or just because you feel like baking something wonderful.
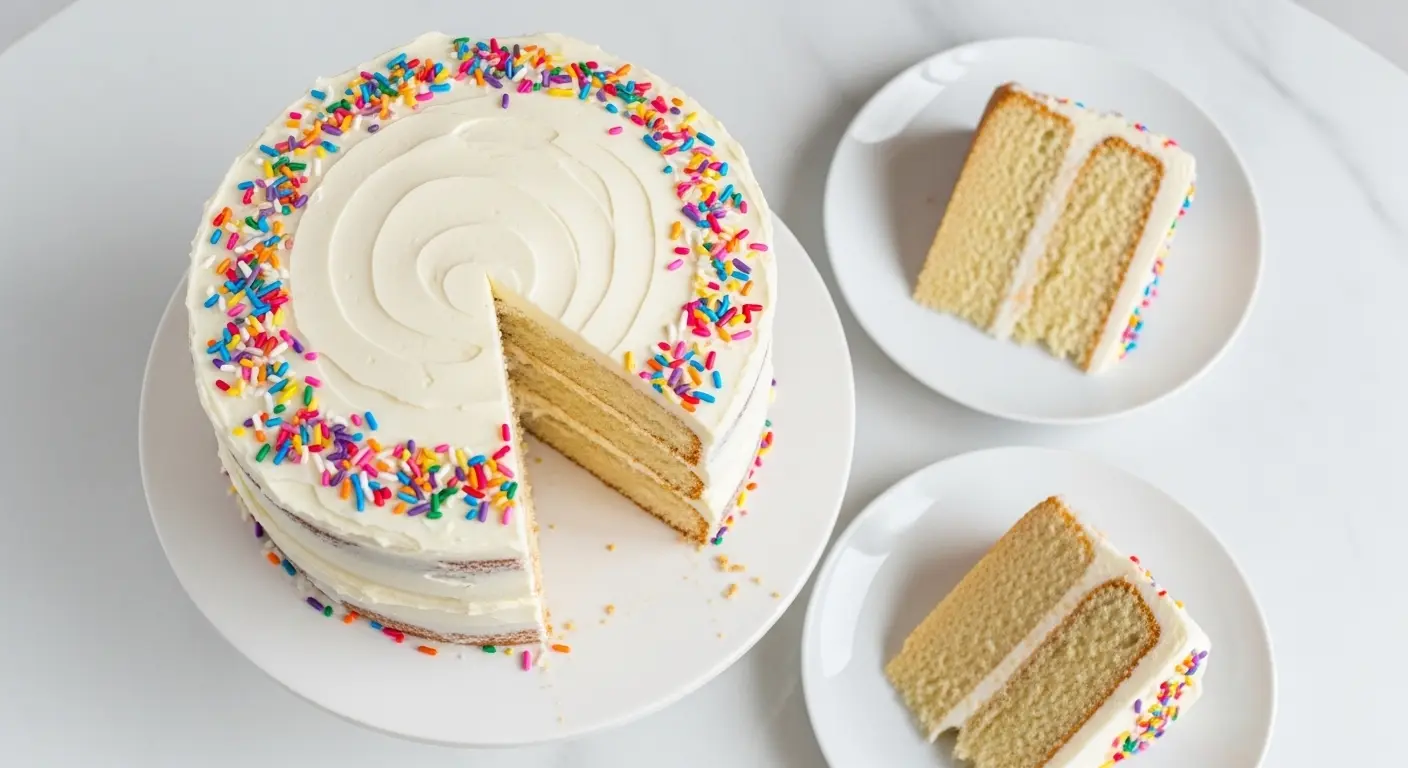
It’s soft, fluffy, and packed with that warm vanilla flavor we all love, with a tender crumb that slices beautifully.
What makes this recipe truly special is how approachable it is. No fancy techniques, no obscure equipment, and no complicated steps that leave you second-guessing yourself.
Even if you’ve never baked a cake from scratch before, you’ll find this recipe completely manageable and deeply satisfying to make.
If you love simple but elegant bakes, you’ll also enjoy this Classic Vanilla Cake Recipe for a slightly more traditional spin on the same idea.
Why You’ll Love This Easy Vanilla Cake Recipe
This recipe has everything going for it, starting with ingredients you almost certainly already have in your pantry.
It comes together in under an hour from start to finish, making it a genuinely realistic weeknight or weekend project.
The texture is exactly what a vanilla cake should be: fine-crumbed, moist, and light without being airy to the point of falling apart.
It holds up beautifully under frosting, which means you can layer it, frost it, and decorate it without the layers sliding or crumbling.
It’s also incredibly versatile. Dress it up with buttercream and sprinkles for a birthday, or keep it simple with a light dusting of powdered sugar for a casual afternoon treat.
Here’s a quick look at why bakers keep coming back to this recipe:
- Made with simple pantry staples you already own
- Reliably moist and fluffy thanks to the creaming method and room-temperature ingredients
- Perfect for any occasion, from birthdays to casual weeknight desserts
- Easily customizable with different frostings, fillings, and mix-ins
- Beginner-friendly with clear, detailed steps that leave nothing to guesswork
- Freezer-friendly so you can bake ahead and frost later
Read Also: Easy Chocolate Cake Recipe
Ingredients
The key to a successful vanilla cake is using room-temperature butter and eggs. Cold butter won’t cream properly with sugar, and cold eggs can cause the batter to curdle. Pull everything out of the refrigerator about 45 minutes to 1 hour before you begin.
For the Cake:
- 2 ½ cups (315g) all-purpose flour
- 2 ½ tsp baking powder
- ½ tsp salt
- 1 cup (226g / 2 sticks) unsalted butter, softened to room temperature
- 1 ¾ cups (350g) granulated sugar
- 4 large eggs, room temperature
- 1 tbsp pure vanilla extract
- 1 cup (240ml) whole milk, room temperature
For the Classic Vanilla Buttercream Frosting:
- 1 cup (226g / 2 sticks) unsalted butter, softened to room temperature
- 4 cups (480g) powdered sugar, sifted
- 3–4 tbsp heavy cream or whole milk
- 1 tsp pure vanilla extract
- Pinch of salt
You might also enjoy: Vanilla Pudding Recipe
Kitchen Equipment Needed
You don’t need a professional kitchen to pull off this cake. A good-quality stand mixer or hand mixer makes the creaming process much easier, but neither is strictly required if you’re willing to put in some arm work. Parchment paper is a must, though; it’s the difference between cakes that release cleanly and cakes that stick.
- Stand mixer or electric hand mixer for creaming butter and sugar
- Two 9-inch round cake pans (or three 8-inch pans for thinner layers)
- Parchment paper for lining pans
- Large mixing bowls (at least two)
- Rubber spatula for folding and scraping the bowl
- Measuring cups and spoons
- Wire cooling rack for cooling the layers
- Offset spatula for spreading frosting
- Cake turntable (optional, but highly recommended for smooth frosting)
- Sifter or fine mesh strainer for sifting dry ingredients
Read Also: Moist Chocolate Cake Recipe
Recommended Products for This Recipe
These are products I genuinely recommend based on their quality and performance. They’ll make your baking experience noticeably smoother.
1. Nielsen-Massey Pure Vanilla Extract
High-quality vanilla extract is the single ingredient that will most dramatically affect the flavor of this cake. Nielsen-Massey uses a proprietary cold extraction process that preserves hundreds of natural flavor compounds, resulting in a rich, complex vanilla flavor you simply can’t get from imitation extract. A tablespoon of the real stuff makes the cake taste bakery-quality.
2. Fat Daddio’s Round Cake Pans
Baking pans matter more than most home bakers realize. Fat Daddio’s anodized aluminum pans distribute heat incredibly evenly, which means no burnt edges and no undercooked centers. They’re a favorite among professional bakers for a reason, and they’ll last you for years.
3. Ateco Offset Spatula
Spreading frosting evenly is nearly impossible without an offset spatula. This Ateco model has a flexible blade that gives you full control over the angle and pressure, making it easy to get clean, professional-looking sides and a smooth top. It’s inexpensive and completely indispensable.
4. Wilton Rotating Cake Turntable
If you’ve never used a turntable to frost a cake, you’re missing out. It lets you spin the cake while you hold the offset spatula steady, which is the trick professional decorators use to get perfectly smooth sides. This Wilton model is sturdy, spins smoothly, and won’t break the bank.
Another favorite: Best Carrot Cake Recipe
Step-by-Step Instructions
1. Prepare Your Equipment and Preheat the Oven
- Preheat your oven to 350°F (175°C) and position the rack in the center of the oven.
- Grease two 9-inch round cake pans generously with butter or non-stick spray, making sure to coat the sides as well as the bottom.
- Cut two circles of parchment paper to fit the bottom of each pan, press them in, then grease the parchment as well.
- Lightly dust the pans with all-purpose flour, tapping out any excess. This belt-and-suspenders approach ensures the cakes will release cleanly every time.
- Set the prepared pans aside on a clean surface near your work area.
2. Sift and Mix the Dry Ingredients
- Measure out 2 ½ cups (315g) of all-purpose flour using the spoon-and-level method: spoon the flour into your measuring cup, then level it off with a straight edge. Scooping directly from the bag packs in too much flour and makes the cake dense.
- Add the flour to a large bowl along with 2 ½ tsp of baking powder and ½ tsp of salt.
- Whisk the dry ingredients together until they’re evenly combined, about 30 seconds. This acts as a preliminary sift and ensures the baking powder and salt are evenly distributed throughout the flour.
- Set the dry ingredient bowl aside.
3. Cream the Butter and Sugar
- Place 1 cup (226g) of softened, room-temperature butter into the bowl of your stand mixer fitted with the paddle attachment, or into a large bowl if using a hand mixer.
- Add 1 ¾ cups (350g) of granulated sugar to the butter.
- Beat on medium-high speed for 4 to 5 full minutes, scraping down the sides and bottom of the bowl with a rubber spatula at least once halfway through.
- Don’t rush this step. You’re looking for the mixture to turn noticeably pale (almost white), significantly increase in volume, and look light and fluffy. This process incorporates air into the batter, which is what gives the cake its lift and tender crumb.
- The mixture is properly creamed when it looks almost whipped and there are no visible butter chunks.
4. Add the Eggs and Vanilla
- Add the 4 room-temperature eggs one at a time, beating on medium speed for about 30 seconds after each addition before adding the next.
- Adding eggs one at a time gives the emulsion time to form properly. If you add all four at once, the batter may break and look curdled.
- After all eggs are incorporated, add 1 tablespoon of pure vanilla extract and beat for another 30 seconds until everything is well combined.
- Scrape down the sides and bottom of the bowl to make sure everything is evenly incorporated.
5. Alternate Adding the Dry Ingredients and Milk
- Reduce the mixer speed to low. This is important; high speed at this stage will overdevelop the gluten and make the cake tough.
- Add one-third of the dry ingredient mixture (about ⅔ cup) and mix on low just until the flour disappears, about 15 seconds.
- Pour in half of the 1 cup (240ml) of room-temperature whole milk and mix on low until just combined.
- Add another third of the flour mixture, mix until just incorporated.
- Pour in the remaining half of the milk and mix until just combined.
- Add the final third of the flour mixture and mix on low until just incorporated. Stop as soon as you no longer see streaks of flour; do not overmix.
- This alternating technique prevents the batter from curdling by keeping the liquid-to-fat ratio balanced throughout.
- Give the batter one or two final folds by hand with a rubber spatula to make sure the very bottom of the bowl is fully incorporated.
6. Divide the Batter and Bake
- Divide the batter evenly between the two prepared cake pans. For the most even layers, weigh the batter using a kitchen scale; each pan should hold roughly the same amount.
- Use an offset spatula or the back of a spoon to smooth the top of each pan so the batter is level.
- Bake at 350°F (175°C) for 28 to 33 minutes. Start checking at 28 minutes. The cakes are done when the tops are lightly golden, the edges have begun to pull slightly away from the sides of the pans, and a toothpick inserted into the center comes out clean or with just a few moist crumbs (no wet batter).
- Avoid opening the oven door before the 25-minute mark, as the sudden change in temperature can cause the cakes to sink in the center.
7. Cool the Cake Layers
- Remove the pans from the oven and place them on a wire cooling rack.
- Let the cakes cool in their pans for exactly 10 minutes. Don’t leave them much longer or condensation can build up under the parchment and make the bottoms sticky.
- After 10 minutes, run a thin knife or offset spatula around the edge of each pan to loosen the cake.
- Invert each pan onto the wire rack, lift away the pan, and carefully peel off the parchment circle.
- Allow the cake layers to cool completely on the wire rack before frosting, at least 1 hour. Frosting a warm cake will melt the buttercream and cause it to slide.
8. Make the Vanilla Buttercream Frosting
- Place 1 cup (226g) of room-temperature butter in the bowl of your stand mixer or a large bowl.
- Beat on medium-high speed for 2 to 3 minutes until the butter is very light, pale, and fluffy.
- Reduce the speed to low and gradually add the 4 cups (480g) of sifted powdered sugar, about ½ cup at a time, mixing between each addition. Adding it all at once creates a powdered sugar cloud and can cause clumping.
- Once all the powdered sugar is incorporated, add 1 tsp of vanilla extract, a pinch of salt, and 3 tablespoons of heavy cream or milk. The salt balances the sweetness; don’t skip it.
- Increase the speed to medium-high and beat for 3 to 4 minutes until the frosting is very light, white, and fluffy. Add the 4th tablespoon of cream only if you’d like a slightly softer frosting.
- Scrape down the sides and bottom of the bowl to ensure everything is evenly mixed.
9. Assemble and Frost the Cake
- Place one cooled cake layer on a cake board, plate, or turntable. If the layers have domed slightly on top, use a serrated knife to level them by slicing off the rounded portion so the top is flat. This ensures a stable, even stack.
- Scoop about 1 cup of frosting onto the center of the first layer and spread it in an even layer all the way to the edges using an offset spatula.
- Carefully place the second cake layer on top, flat side up (so the bottom of the layer faces upward, giving you a perfectly flat top surface).
- Apply a thin “crumb coat” of frosting all over the cake: spread a very thin layer of frosting over the top and sides to seal in any loose crumbs. Refrigerate the crumb-coated cake for 15 to 20 minutes until the frosting sets.
- Apply the final, generous coat of frosting, smoothing the sides with your offset spatula while spinning the turntable (if using).
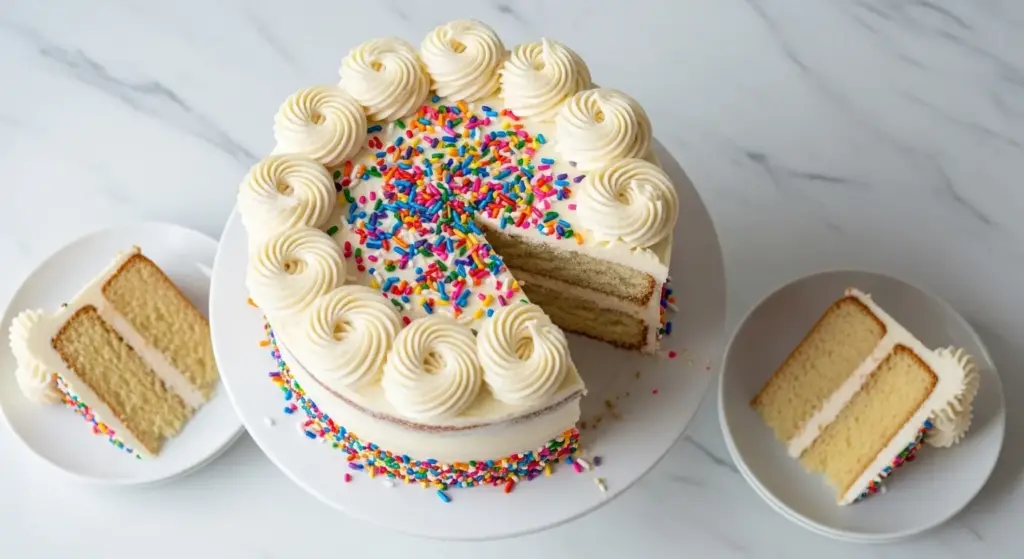
- Decorate as desired with sprinkles, fresh fruit, edible flowers, or piped rosettes.
This technique also works beautifully when making a Coconut Cake with Cream of Coconut if you want to try a tropical variation.
Tips for Success
Small adjustments and mindful technique make the difference between a cake that’s just fine and one that’s genuinely spectacular. These tips address the most common points where home bakers run into trouble.
- Room temperature really matters. Butter that’s too cold won’t cream properly, and cold eggs can make the batter look broken. Let everything sit out for at least 45 minutes to an hour before you begin.
- Use the spoon-and-level method for flour. Packed flour is the number one reason cakes turn out dense. Spoon the flour into the measuring cup and level it off; don’t scoop directly from the bag.
- Don’t overmix once the flour goes in. As soon as you add the flour, switch to low speed and mix only until the streaks disappear. Overmixing develops gluten, which makes cakes tough and chewy.
- Sift the powdered sugar for the frosting. Unsifted powdered sugar can result in lumpy buttercream. A quick sift ensures silky smooth frosting.
- Don’t frost a warm cake. Patience pays off here; wait until the layers are completely cool or your beautiful buttercream will melt right off the sides.
- Level your layers. Even modest domes can make a finished cake look lopsided. A long serrated knife and a steady hand are all you need.
- The crumb coat is not optional. This thin initial layer of frosting seals in crumbs so they don’t end up visible in your final frosting coat. It takes only 15 minutes to chill and makes a huge difference in the appearance.
Read Also: Tres Leches Cake Recipe
Serving Suggestions
This easy vanilla cake is a canvas, and it pairs beautifully with a range of accompaniments. Serve it as the centerpiece of a dessert table or as a simple afternoon treat with coffee or tea.
The flavor is classic and elegant enough to suit any occasion, from a decorated birthday party cake to a casual slice served on a plain plate.
Here are some of the best ways to serve this vanilla cake:
- With fresh berries: Sliced strawberries, raspberries, or a mixed berry compote alongside a slice adds freshness and a slight tartness that balances the richness of the buttercream.
- With a scoop of vanilla ice cream: The contrast of the cold, creamy ice cream against the soft cake is absolutely wonderful.
- Drizzled with Caramel Sauce: A warm drizzle of caramel over each slice adds depth and a touch of indulgence.
- Topped with Strawberry Sauce: Fresh strawberry sauce transforms this into a beautiful strawberry shortcake-style dessert.
- With a cup of coffee or tea: The subtle, warm flavor of vanilla pairs naturally with both a strong cup of coffee or a delicate herbal tea.
- Layered with lemon curd: Spread a thin layer of store-bought or homemade lemon curd between the layers instead of (or in addition to) buttercream for a bright, citrusy twist.
For another stunning dessert to round out a special occasion spread, this Fruit Tart Recipe pairs beautifully alongside a slice of vanilla cake.
Variations to Try
One of the best things about this recipe is how naturally it lends itself to customization. The base batter is neutral and versatile, which means you can take it in almost any direction you like.
These variations keep the same core method while adding new flavors, fillings, or finishing touches.
- Chocolate chip vanilla cake: Fold 1 cup of mini semi-sweet chocolate chips into the finished batter just before dividing it between the pans. Toss the chips in a tablespoon of flour first to prevent them from sinking to the bottom.
- Lemon vanilla cake: Add 2 tablespoons of fresh lemon zest to the batter with the vanilla, and use a lemon buttercream frosting (swap the heavy cream for fresh lemon juice).
- Strawberry filled vanilla cake: Add a layer of fresh strawberry jam or macerated strawberries between the cake layers along with the buttercream filling.
- Brown butter vanilla cake: Brown the butter before allowing it to re-solidify to room temperature for use in the batter. Brown butter adds a rich, nutty, caramel-like depth that takes this cake to another level.
- Almond vanilla cake: Replace half of the vanilla extract with almond extract for a subtly nutty, floral flavor that pairs beautifully with cherry or raspberry fillings.
- Coconut vanilla cake: Fold ½ cup of toasted shredded coconut into the batter and use coconut milk in place of whole milk for a tropical spin. It has a light, fragrant flavor that’s hard to resist.
- Funfetti style: Fold ⅓ cup of rainbow sprinkles (jimmies work best, as they don’t bleed color) into the batter just before baking for a festive confetti effect.
You might also enjoy: Classic Pineapple Upside Down Cake
Storage and Reheating
Proper storage keeps your vanilla cake tasting fresh for several days, and the cake actually benefits from an overnight rest as the crumb softens and the flavors meld.
Here’s everything you need to know about storing and serving leftovers.
- Room temperature (unfrosted): Store cake layers well-wrapped in plastic wrap at room temperature for up to 2 days.
- Room temperature (frosted): A fully frosted cake can be kept under a cake dome or covered at room temperature for up to 3 days. The frosting acts as a seal and keeps the crumb moist.
- Refrigerator: Store frosted cake covered in the refrigerator for up to 5 days. Before serving, let slices sit at room temperature for 20 to 30 minutes; cold butter-based frosting firms up in the fridge and the cake tastes much better when it’s not cold.
- Freezer (layers): Wrap individual, unfrosted cake layers tightly in two layers of plastic wrap, then in foil. Freeze for up to 2 months. Thaw overnight in the refrigerator before frosting.
- Freezer (frosted): Freeze the whole frosted cake (or individual slices) on a baking sheet until the frosting is solid, then wrap tightly in plastic and foil. Freeze for up to 2 months. Thaw overnight in the refrigerator, then bring to room temperature before serving.
- Reheating individual slices: If you prefer a slightly warm slice, microwave for 10 to 15 seconds. More than that and the cake begins to dry out.
Read Also: Coffee Cake Recipe Without Sour Cream
Nutritional Facts
The values below are approximate and based on a 2-layer 9-inch cake cut into 12 equal servings, including the vanilla buttercream frosting.
| Nutrient | Per Serving (1 slice) |
|---|---|
| Calories | ~520 kcal |
| Total Fat | 25g |
| Saturated Fat | 15g |
| Cholesterol | 110mg |
| Sodium | 180mg |
| Total Carbohydrates | 70g |
| Dietary Fiber | 0.5g |
| Total Sugars | 52g |
| Protein | 5g |
| Calcium | 65mg |
| Iron | 1.2mg |
Note: Nutritional information is an estimate and will vary based on specific brands used, exact portion sizes, and any modifications made to the recipe.
Another favorite: Checkerboard Cake Recipe
Health Benefits of Key Ingredients
While vanilla cake is an indulgent treat rather than a health food, a couple of the core ingredients do bring some genuine nutritional value to the table.
Baking occasionally with quality ingredients is something to enjoy without guilt.
Here’s a look at some noteworthy benefits from the key components in this recipe:
- Eggs: Whole eggs are a complete protein source, providing all nine essential amino acids. They also contain choline, which supports brain health, and vitamins A, D, E, and B12.
- Butter: Real butter from grass-fed cows contains fat-soluble vitamins (A, D, E, K2) and conjugated linoleic acid (CLA). In baking, butter also adds structure and moisture that keeps the crumb tender.
- Whole milk: Provides calcium, vitamin D, phosphorus, and a small amount of protein. Using whole milk (rather than low-fat) gives the cake a noticeably more tender, rich crumb.
- Pure vanilla extract: Beyond its incredible flavor, vanilla contains vanillin, which has been studied for its antioxidant and anti-inflammatory properties. The real stuff (not imitation) is where you get the full spectrum of these compounds.
- All-purpose flour: While refined flour isn’t a standout nutritional star, it provides the carbohydrate energy that makes cake satisfying and provides the structural backbone for the crumb.
You might also enjoy: Easy Tiramisu Recipe
Frequently Asked Questions
1. Can I make this easy vanilla cake recipe in advance?
Yes, and it actually bakes well ahead of time. The unfrosted cake layers can be baked up to 2 days in advance and stored tightly wrapped in plastic wrap at room temperature, or up to 2 months in the freezer.
The buttercream frosting can also be made ahead and stored in an airtight container in the refrigerator for up to a week. Before using, bring it back to room temperature and re-whip it briefly to restore the fluffy texture.
2. Why did my cake turn out dense instead of fluffy?
The most common culprits are using cold butter, too much flour (from scooping instead of spooning and leveling), or overmixing the batter once the flour was added.
Make sure your butter is genuinely soft and room temperature before creaming, measure flour carefully, and stop mixing as soon as the flour just disappears into the batter.
3. Can I use this recipe to make cupcakes?
Absolutely. This batter makes approximately 24 to 28 standard cupcakes. Fill each lined cupcake cup about two-thirds full and bake at 350°F (175°C) for 18 to 21 minutes.
Check for doneness at 18 minutes by inserting a toothpick into the center of a cupcake; it should come out clean or with a couple of moist crumbs.
4. Can I substitute the butter with oil?
You can use vegetable oil instead of butter, but the flavor and texture will be noticeably different. Oil-based cakes tend to be slightly more moist and stay fresh a bit longer, but they lack the rich, creamy flavor that butter provides.
If you do swap in oil, use ¾ cup of a neutral oil like canola or vegetable oil in place of the 1 cup of butter, and reduce the mixing time significantly since you won’t be creaming.
5. My frosting is too stiff or too runny. How do I fix it?
If your buttercream is too stiff, add heavy cream or milk one teaspoon at a time, beating well after each addition until you reach the right consistency.
If it’s too runny (which usually happens if the butter was too warm), refrigerate the frosting for 10 to 15 minutes to firm it up, then re-whip. A pinch of extra powdered sugar can also help thicken it slightly.
Read Also: Easy Royal Icing Recipe
Final Thoughts
This easy vanilla cake recipe is one of those recipes that earns a permanent place in your repertoire. It’s simple enough to make on a whim, beautiful enough to serve to guests, and reliable enough to trust for someone’s birthday.
Once you’ve made it a couple of times, the steps will feel like second nature.
The real joy of a great vanilla cake is how endlessly you can adapt it. Different frostings, different fillings, different toppings; the base is always there, solid and delicious.
If you give this recipe a try, I’d love to hear how it turned out! Drop a comment below with your experience, or share a photo if you made it your own with a fun variation.
Recommended:
- Amish Apple Cake Recipe
- Carrot Cake with Cream Cheese Frosting
- Rum Cake Recipe with Cake Mix
- Mug Cake Recipe
- Hot Fudge Cake Recipe
- Cake Pop Recipe
- Easy Creme Brulee Recipe
- Classic Tiramisu Recipe
- Best Chocolate Chip Cookies Recipe
- Eggnog Cake Recipe


