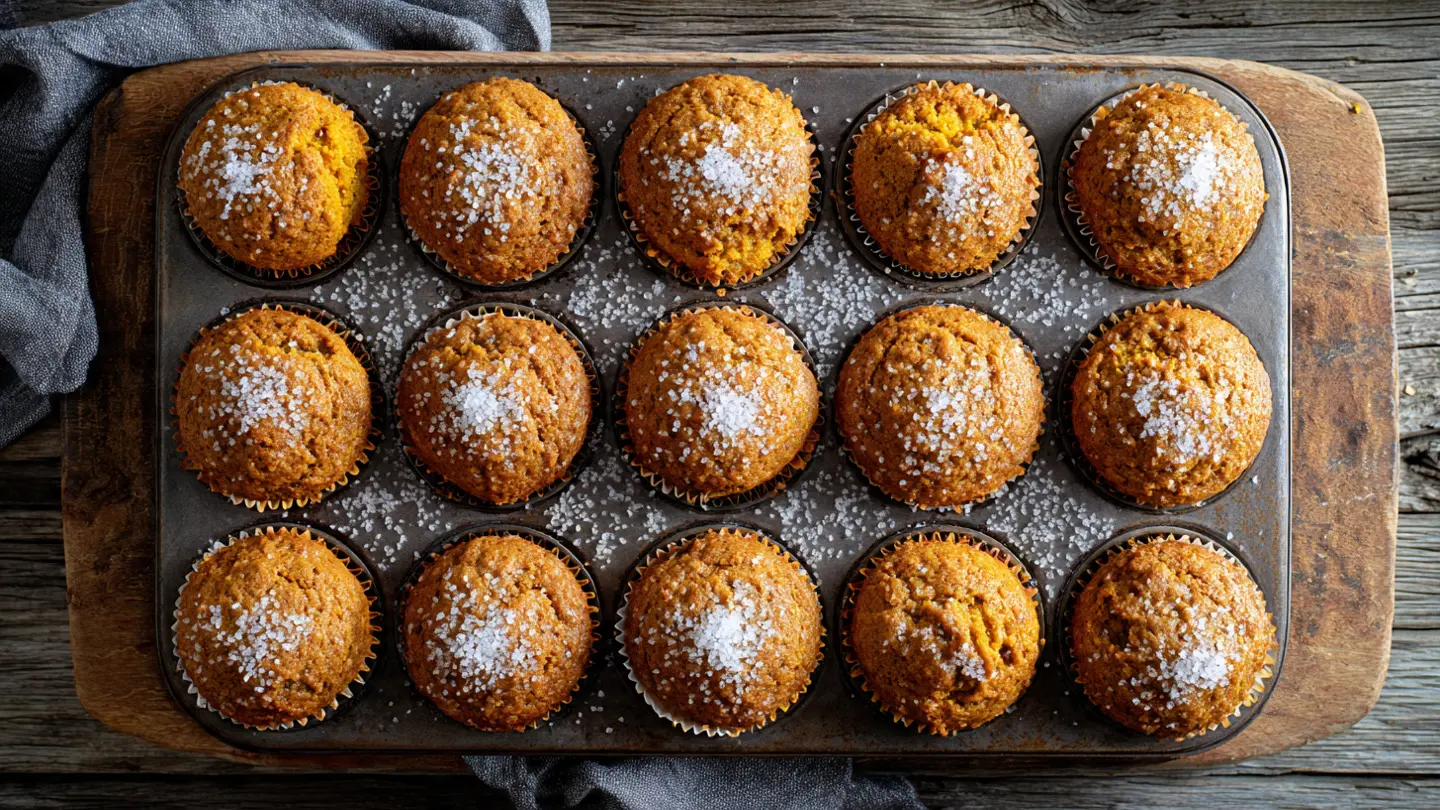
If you’ve been searching for the ultimate pumpkin muffin recipe, your search ends here. These muffins are everything a fall bake should be: incredibly moist, warmly spiced, and crowned with a golden-domed top that makes them look like they came straight from your favorite bakery.
The secret is simple but powerful. Using a full can of pumpkin puree keeps the crumb tender and rich without being heavy. A combination of vegetable oil and both granulated and brown sugar creates the perfect balance of sweetness and depth, while layering individual spices alongside pumpkin pie spice gives you that complex, cozy flavor that store-bought muffins can never quite replicate.
These are a no-mixer, one-bowl wonder that come together in about 10 minutes of prep time.
Whether you’re baking for a weekend brunch, a school bake sale, or just want your kitchen to smell like a fall dream, this recipe delivers every single time.
If you love classic fall baking, you’ll also want to try this Old Fashioned Pumpkin Bread for another cozy way to use up that can of pumpkin puree.
Why You’ll Love This Pumpkin Muffin Recipe
These muffins hit every note a great fall bake should. They’re not just good for pumpkin muffins, they’re genuinely among the best muffins you’ll ever pull out of your oven.
Here’s what makes them so special:
- Bakery-style domed tops: The combination of a hot oven start and properly filled muffin cups gives you those gorgeous tall, rounded tops without any special techniques or equipment.
- Stays moist for days: The high oil and pumpkin content means these muffins stay soft and tender for up to 5 days at room temperature, which is rare for homemade baked goods.
- No mixer required: Just two bowls, a whisk, and a spatula are all you need to pull this batter together. Minimal cleanup, maximum reward.
- Made with pantry staples: The ingredient list is straightforward. You likely have most of it on hand already, aside from the canned pumpkin.
- Completely customizable: The base recipe is a blank canvas. You can fold in chocolate chips, chopped walnuts, or a streusel topping, and it all works beautifully.
- Kid-friendly and crowd-pleasing: The spice level is warm and cozy without being overwhelming, which makes these a hit with every age group.
Fall baking gets no better than this. Once you try these, they’ll become an annual tradition in your kitchen.
You might also enjoy: Pumpkin Pancake Recipe
Ingredients
The ingredient list for these pumpkin muffins is intentionally simple, but every item plays a key role. Using oil instead of butter keeps the crumb moist even after a few days, while the double dose of sugar adds complexity that straight granulated sugar alone can’t achieve.
- 1 and 3/4 cups (219g) all-purpose flour
- 1 teaspoon baking soda
- 1/2 teaspoon baking powder
- 1 and 1/2 teaspoons ground cinnamon
- 1 teaspoon pumpkin pie spice
- 1/4 teaspoon ground ginger
- 1/4 teaspoon ground nutmeg
- 1/2 teaspoon fine salt
- 1/2 cup (120ml) vegetable oil (or melted coconut oil)
- 1/2 cup (100g) granulated sugar
- 1/2 cup (110g) packed light brown sugar
- 1 and 1/2 cups (340g) 100% pure canned pumpkin puree (not pumpkin pie filling)
- 2 large eggs, at room temperature
- 1/4 cup (60ml) whole milk (or any dairy-free milk)
- 1 teaspoon pure vanilla extract
- 2 tablespoons coarse sugar (such as turbinado or Sugar in the Raw), for topping (optional but recommended)
Makes: 12 standard muffins Prep time: 10 minutes Bake time: 20–22 minutes Total time: About 35 minutes
Read Also: Pumpkin Roll Recipe
Kitchen Equipment Needed
You don’t need any fancy gadgets for this recipe. The tools below are everything required to get from ingredients to perfectly baked muffins.
- 12-cup standard muffin tin
- Cupcake liners / muffin liners
- Two mixing bowls (one large, one medium)
- Whisk
- Rubber spatula or wooden spoon
- Kitchen scale (recommended for accurate flour measurement)
- Ice cream scoop or large cookie scoop (for evenly filling the muffin cups)
- Wire cooling rack
- Oven mitts
- Toothpick (for doneness testing)
The ice cream scoop is more useful than it sounds. It helps you distribute batter evenly across all 12 cups, which means every muffin bakes at the same rate and comes out the same size.
This technique also works wonderfully when making Pumpkin Bars for an equally easy fall dessert.
Recommended Products for This Recipe
These are handpicked products that I genuinely think will improve your pumpkin muffin baking experience, based on quality and performance.
1. Libby’s 100% Pure Pumpkin Puree
Libby’s is the gold standard for canned pumpkin, and for good reason. It has a thick, consistent texture and a clean, mild pumpkin flavor that doesn’t taste watery or overly earthy. Using a good-quality puree makes a noticeable difference in the final texture of your muffins.
2. Wilton Standard Muffin and Cupcake Pan
A good quality, nonstick muffin pan is one of those tools that pays for itself over time. This Wilton pan heats evenly, releases muffins easily, and is built to last for years. Cheap pans can create hot spots that lead to uneven baking and overbrowning on the bottom.
3. If You Care Unbleached Baking Cups
Parchment-lined or unbleached muffin liners are far superior to the standard paper kind for one important reason: the muffins release cleanly every time. No stuck bottoms, no torn muffin sides. These are a small upgrade that makes a big difference at serving time.
4. OXO Good Grips Large Cookie Scoop
Using a large scoop to portion your batter is one of the easiest ways to get consistently sized, evenly risen muffins. This OXO model has a comfortable grip and a reliable spring release that holds up to regular use. It takes the guesswork out of filling muffin cups.
5. McCormick Pumpkin Pie Spice
McCormick’s pumpkin pie spice blend is one of the most balanced and aromatic on the market. It delivers a clean, warm spice profile without any off notes. When a recipe already calls for individual spices like cinnamon and ginger, adding this blend on top creates a deeper, more layered flavor.
Another favorite: Pumpkin Cheesecake Recipe
Step-by-Step Instructions
Follow these steps carefully and you’ll have 12 beautifully domed, moist pumpkin muffins ready to enjoy.
Step 1: Preheat Your Oven and Prepare the Muffin Pan
- Preheat your oven to 425°F (218°C). Starting the muffins at a higher temperature creates a burst of initial heat that causes the batter to rise rapidly, giving you those tall, bakery-style domes.
- Line a 12-cup standard muffin tin with paper liners or parchment muffin cups. This prevents sticking and makes cleanup much easier.
- Set the pan aside on your counter so it’s ready to fill as soon as your batter is done.
Step 2: Measure and Mix the Dry Ingredients
- In a large mixing bowl, add 1 and 3/4 cups (219g) of all-purpose flour.
- Add 1 teaspoon of baking soda and 1/2 teaspoon of baking powder directly to the flour. Using both leaveners helps the muffins rise tall without falling flat or tasting metallic.
- Add 1 and 1/2 teaspoons of ground cinnamon, 1 teaspoon of pumpkin pie spice, 1/4 teaspoon of ground ginger, and 1/4 teaspoon of ground nutmeg. Layering individual spices alongside the pumpkin pie spice creates a richer, more complex flavor than using either alone.
- Add 1/2 teaspoon of fine salt. Don’t skip this — salt balances the sweetness and makes the spices pop.
- Whisk all the dry ingredients together until thoroughly combined, with no visible flour pockets or clumps of spice. Set this bowl aside.
Step 3: Combine the Wet Ingredients
- In a separate medium bowl, pour in 1/2 cup (120ml) of vegetable oil or melted coconut oil. Oil is used instead of butter here because it creates a moister, more tender crumb that stays soft for longer.
- Add 1/2 cup (100g) of granulated sugar and 1/2 cup (110g) of packed light brown sugar. Whisk these with the oil until the mixture looks slightly thickened and uniform. The brown sugar adds a subtle molasses depth that granulated sugar alone doesn’t provide.
- Measure out 1 and 1/2 cups (340g) of canned pumpkin puree — not pumpkin pie filling, which contains added sugars and spices that will throw off your flavor balance. Spoon this into the wet ingredients and whisk until smooth and fully incorporated.
- Crack in 2 large eggs and add 1 teaspoon of vanilla extract. Whisk together until the eggs are fully blended and the mixture looks cohesive.
- Pour in 1/4 cup (60ml) of whole milk and whisk again until everything is smooth.
Step 4: Combine Wet and Dry Ingredients
- Pour the wet ingredient mixture into the bowl containing the dry ingredients.
- Using a rubber spatula, fold the two together gently. Stir with slow, sweeping strokes from the bottom of the bowl upward. Do not use a whisk at this stage, and do not beat or stir vigorously.
- Stop mixing the moment the last visible flour streak disappears into the batter. A few small lumps are completely fine and normal. Overmixing activates the gluten in the flour, which leads to tough, dense, chewy muffins rather than the soft, tender crumb you’re aiming for.
Step 5: Fill the Muffin Cups
- Using a large ice cream scoop or a spoon, divide the batter evenly among the 12 prepared muffin cups. Fill each cup about 3/4 to nearly full. This generous filling is intentional — it’s what creates that high-domed top.
- If you’re using coarse sugar on top (highly recommended for a sparkly, bakery-style crunch), sprinkle about 1/2 teaspoon of turbinado or Sugar in the Raw over each filled muffin cup right before they go into the oven.
Step 6: Bake the Muffins
- Place the muffin pan in your preheated 425°F (218°C) oven and bake for exactly 5 minutes. This blast of high heat is what causes the muffins to spring upward rapidly, forming the dome before the batter sets.
- After 5 minutes, without opening the oven door, reduce the oven temperature to 350°F (175°C). Continue baking for another 15 to 17 minutes, for a total bake time of 20 to 22 minutes.
- The muffins are done when a toothpick or cake tester inserted into the center of one comes out clean or with just a couple of moist crumbs attached. If you see wet batter, give them another 2 minutes and test again.
Step 7: Cool the Muffins
- Remove the pan from the oven and let the muffins cool in the pan for exactly 5 minutes. This brief resting time allows the structure of the muffins to firm up slightly so they don’t fall apart when you remove them.
- After 5 minutes, gently transfer the muffins from the pan to a wire cooling rack. Allow them to cool for at least 10 to 15 more minutes before eating. The interior continues to cook and set during this time, so pulling them apart too soon can leave the center underdone and gummy.
For another cozy fall baking project, try this Pumpkin Spice Latte Recipe to enjoy alongside your fresh muffins.
Tips for Success
Even a simple recipe has a few techniques that separate good results from great ones. These tips will make your pumpkin muffins consistently perfect every single time.
- Weigh your flour. Measuring flour by volume is notoriously inconsistent. A cup of flour can range from 120g to 160g depending on how you scoop it. Too much flour makes dense, dry muffins. Use a kitchen scale if you have one, or spoon the flour into your measuring cup and level it off with a knife rather than scooping directly.
- Use room temperature eggs. Cold eggs don’t emulsify into batter as smoothly as room temperature ones. Set them out on the counter 30 minutes before you start. If you forget, submerge them in warm (not hot) water for 5 minutes.
- Don’t open the oven during the first 5 minutes. This is the critical rising window. Opening the oven door releases heat and can cause the muffins to sink rather than dome.
- Never overmix. This is the number one mistake people make with muffins. Mix only until no dry flour streaks remain. Some lumps in the batter are fine and will bake out.
- Use the high-heat start method. The initial blast at 425°F (218°C) followed by reducing to 350°F (175°C) is the bakery trick for impressive domed tops. Don’t skip it.
- Check for doneness, don’t just go by time. All ovens vary. A toothpick is your most reliable guide.
Read Also: Iced Pumpkin Spice Latte Recipe
Serving Suggestions
These muffins are incredibly satisfying on their own, but pairing them thoughtfully makes them feel even more special.
Here are some of the best ways to serve and enjoy your pumpkin muffins:
- Slathered with honey butter: A generous spread of Honey Butter melted into a warm muffin is one of the simplest, most satisfying ways to serve them. The sweetness of the honey plays beautifully against the warm spices.
- With a hot drink: Serve alongside a mug of coffee, black tea, or apple cider for a classic fall breakfast or afternoon snack.
- As part of a brunch spread: These muffins hold their own next to savory breakfast dishes and add a beautiful warm color to any spread.
- With cream cheese: A dollop of softened plain or maple cream cheese on top turns these into something closer to a pastry. It’s simple but feels a little luxurious.
- As an afternoon snack: Pack them in lunchboxes or slice them in half for a mid-afternoon snack with a cup of hot tea.
- Slightly warmed: A 15-second blast in the microwave brings these back to just-out-of-the-oven warmth. They smell incredible when warm.
Read Also: Easy Apple Crisp Recipe
Variations to Try
Once you’ve mastered the base recipe, the possibilities are genuinely endless. These muffins are a fantastic starting point for creative variations.
- Chocolate chip pumpkin muffins: Fold 3/4 cup (135g) of semi-sweet or dark chocolate chips into the batter just before portioning. The chocolate and pumpkin spice combination is one of fall’s great flavor pairings.
- Streusel-topped pumpkin muffins: Mix together 1/4 cup (50g) of brown sugar, 3 tablespoons (24g) of flour, 1/4 teaspoon of cinnamon, and 2 tablespoons (28g) of cold butter cut into small cubes. Use your fingers to work the butter in until crumbly. Sprinkle over the filled muffin cups before baking for a crisp, crumbly topping.
- Pumpkin muffins with cream cheese filling: Fill each cup halfway, place a teaspoon of sweetened cream cheese (softened cream cheese mixed with 1 tablespoon of sugar and a drop of vanilla) in the center, then cover with more batter. Bake as directed.
- Maple glazed pumpkin muffins: Whisk together 1/2 cup (60g) of powdered sugar with 2 tablespoons of real maple syrup and drizzle over completely cooled muffins for a gorgeous finishing touch.
- Nut and seed mix-in: Fold in 1/2 cup (60g) of chopped pecans or walnuts and 2 tablespoons of pepitas for added texture and a nuttier flavor profile.
- Dairy-free version: Swap the whole milk for any unsweetened plant-based milk such as oat, almond, or coconut milk. The results are nearly identical.
- Mini pumpkin muffins: Divide the batter into a 24-cup mini muffin tin. Fill each cup about 3/4 full and bake at 350°F (175°C) for 12 to 14 minutes total (skip the high-heat start for minis).
This Classic Zucchini Bread Recipe uses a similar quick-bread method and is another easy fall bake to add to your rotation.
Storage and Reheating
These muffins store exceptionally well, which makes them perfect for baking ahead.
- Room temperature: Store cooled muffins in an airtight container at room temperature for up to 4 to 5 days. Adding a sheet of paper towel to the bottom of the container helps absorb any excess moisture and keeps the muffins from getting soggy on the bottom.
- Refrigerator: You can refrigerate them in an airtight container for up to 7 days, though they may dry out slightly over time. Let them come to room temperature or warm them briefly before eating.
- Freezer: These muffins freeze beautifully. Arrange them in a single layer on a baking sheet and freeze until solid (about 2 hours), then transfer to a zip-top freezer bag or airtight container. They’ll keep well for up to 3 months.
- To reheat from refrigerator: Microwave a single muffin for 15 to 20 seconds. For a crispier top, wrap in foil and warm in a 300°F (150°C) oven for about 10 minutes.
- To reheat from frozen: Thaw overnight in the refrigerator, then reheat as above. Alternatively, microwave a frozen muffin on 50% power for 60 to 90 seconds, checking every 30 seconds.
This same storage method works well for the Sweet Potato Bread Recipe if you want another make-ahead fall bread.
Nutritional Facts
The following is an estimate per serving (1 standard muffin, without coarse sugar topping) based on the recipe as written.
| Nutrient | Per Muffin |
|---|---|
| Calories | ~230 kcal |
| Total Fat | 10g |
| Saturated Fat | 1g |
| Carbohydrates | 33g |
| Dietary Fiber | 1.5g |
| Total Sugars | 19g |
| Protein | 3g |
| Sodium | 185mg |
| Vitamin A | ~70% DV |
| Potassium | ~120mg |
Nutritional values are estimates and will vary based on specific brands and ingredient substitutions.
You might also enjoy: From Scratch Pumpkin Pie Recipe
Health Benefits of Key Ingredients
While these muffins are absolutely a treat, several of the core ingredients bring genuine nutritional value to every bite.
Here are some of the key health benefits in this recipe:
- Pumpkin puree: Pumpkin is one of the most nutrient-dense vegetables you can add to baked goods. It’s exceptionally high in beta-carotene, the precursor to vitamin A, which supports eye health and immune function. A single serving of canned pumpkin delivers well over 100% of your daily vitamin A needs. It also provides potassium, vitamin C, and fiber, all while adding moisture to the muffin rather than calories from fat.
- Eggs: Whole eggs are a complete protein source, containing all nine essential amino acids. They provide choline, which supports brain health, as well as fat-soluble vitamins including A, D, and E. They’re also what gives the muffins their structure and lift.
- Cinnamon: Beyond its warming flavor, cinnamon has been studied for its potential role in supporting blood sugar regulation. It also contains small amounts of calcium, iron, and manganese, and contributes a meaningful amount of antioxidants to the recipe.
- Ginger: Ground ginger has long been used to support digestive health and reduce nausea. It also contains gingerols, which are compounds with anti-inflammatory properties.
- Nutmeg: While used in small amounts, nutmeg contains trace antioxidants and has traditionally been used to support digestion and sleep quality.
This Best Carrot Cake Recipe is another fall bake that sneaks in some vegetable-based nutrition without sacrificing flavor.
Frequently Asked Questions
1. Can I use fresh pumpkin instead of canned?
You can, but it requires a bit more preparation. Fresh pumpkin puree tends to be much more watery than canned, which can affect the texture of your muffins and make them dense or gummy.
If you want to use fresh pumpkin, roast a sugar pumpkin at 375°F (190°C) until tender, scoop out the flesh, and then blend it smooth. After blending, drain the puree through a cheesecloth or fine mesh strainer for at least 30 minutes to remove excess moisture. Measure after draining.
2. Why did my muffins sink in the middle?
Sunken muffins are almost always caused by one of three things: overmixing the batter, underbaking, or opening the oven door too early during the initial high-heat phase.
Overmixing incorporates too much air into the batter, which causes the muffins to rise dramatically and then collapse. Follow the method of mixing only until the flour disappears, and use the toothpick test to confirm they’re fully baked before removing from the oven.
3. Can I make these muffins without eggs?
Yes, eggs can be substituted in this recipe. A flax egg works well here: mix 1 tablespoon of ground flaxseed with 3 tablespoons of water and let it sit for 5 minutes until gel-like, then use as a 1-for-1 egg replacement.
Keep in mind that egg-free muffins may be slightly denser and may not dome quite as impressively, but they’ll still taste delicious and have a good texture overall.
4. What’s the difference between pumpkin puree and pumpkin pie filling?
This is one of the most common mistakes when baking with canned pumpkin. Pumpkin puree contains only 100% cooked, pureed pumpkin with no added ingredients. Pumpkin pie filling is pre-sweetened and pre-spiced, with sugar, cinnamon, cloves, and other seasonings already mixed in.
Using pumpkin pie filling in this recipe would make the muffins overly sweet and leave you with no control over the spice balance. Always reach for the can labeled “100% pure pumpkin” or “pumpkin puree.”
5. Why do the muffins start at 425°F and then reduce to 350°F?
This technique is borrowed from professional bakery practice. The initial burst of high heat causes the batter to expand rapidly before the outer crust sets, which is what creates the tall, domed top.
Once the dome has formed and the exterior is just beginning to set (after about 5 minutes), you lower the temperature so the center of the muffins can bake through gently without the exterior burning. This two-temperature method is the most reliable way to get bakery-quality muffins at home.
Read Also: Pumpkin Soup Recipe
Final Thoughts
A great pumpkin muffin recipe is one of those things worth having in your back pocket for all of fall.
This one delivers everything you could want: moist, tender crumbs, warm layered spices, gorgeous domed tops, and a flavor that improves as the day goes on.
The fact that it comes together in one bowl with no mixer and minimal cleanup makes it even better.
Give these a try and let us know how they turned out in the comments below! We’d love to hear if you added any mix-ins or tried a variation. And if you snap a photo, tag us so we can see your gorgeous muffins.
Recommended:
- Pumpkin Bar Recipe
- Classic Pumpkin Pie Recipe
- Pumpkin Cheesecake Recipe
- Baked Oatmeal Recipe
- Easy Overnight Oats Recipe
- Mulled Apple Cider Recipe
- Roasted Butternut Squash Soup Recipe
- Coffee Cake Recipe Without Sour Cream
- Easy Banana Bread Recipe with Self Rising Flour
- Pineapple Quick Bread Recipe


