If you’ve been searching for the perfect peanut butter blossom cookies recipe, you’re in the right place.
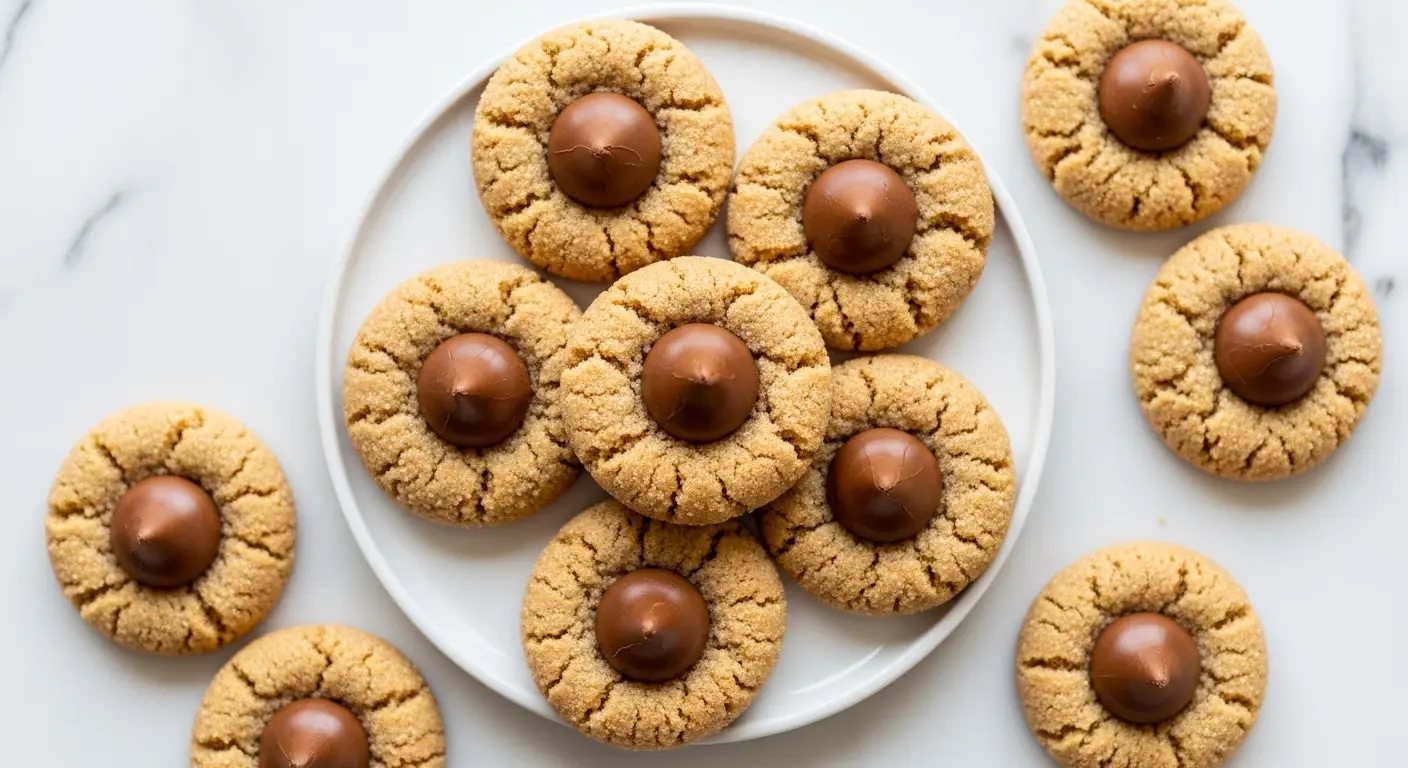
These iconic little treats have been a staple on holiday cookie trays since 1957, and for good reason. Every bite delivers a soft, chewy peanut butter cookie with a sweet, sparkly sugar crust, all crowned with a Hershey’s Kiss pressed right into the center.
What makes them so special is the balance. The peanut butter cookie base is rich, slightly salty, and perfectly tender. The chocolate kiss on top melts ever so slightly against the warm cookie, creating that classic combination that millions of people have grown up loving.
The technique matters more than most people realize. Rolling the dough balls in granulated sugar before baking creates a gorgeous crinkled exterior, while pressing the Hershey’s Kiss into the center immediately after baking ensures it stays perfectly nestled without turning into a puddle of chocolate.
These cookies come together with pantry staples you likely already have on hand. No fancy techniques, no unusual equipment, and the results look like something from a bakery window.
Why You’ll Love This Peanut Butter Blossom Cookies Recipe
This recipe consistently delivers the most soft, chewy centers with lightly crisp, sparkly edges that everyone raves about.
There’s a reason this cookie has been a beloved classic for nearly 70 years. The combination of creamy peanut butter and milk chocolate is genuinely one of the most crowd-pleasing flavor pairings in baking.
The sugar crust isn’t just for looks. Rolling each dough ball in granulated sugar before it hits the oven creates a slightly caramelized, crinkly exterior that contrasts beautifully with the soft interior.
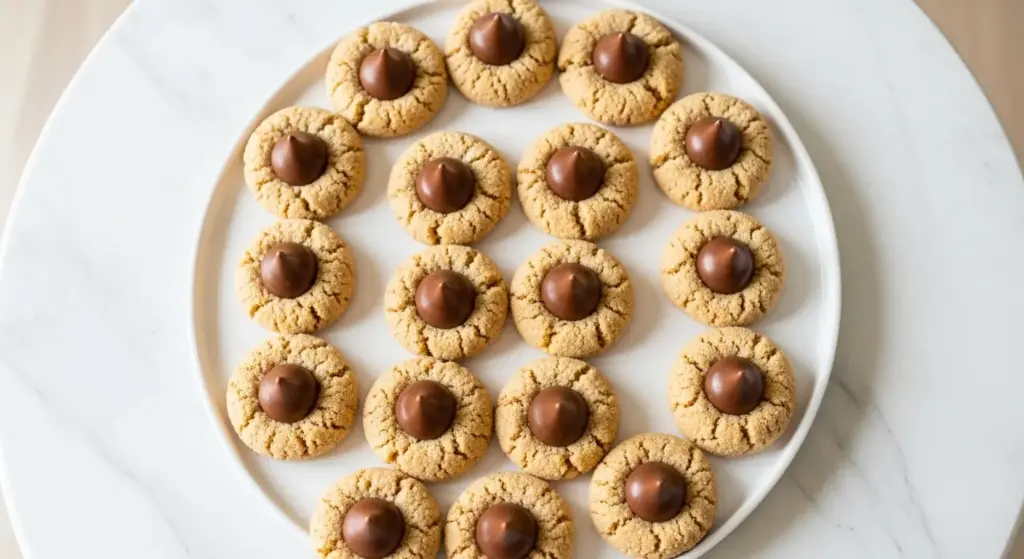
One batch yields about 40 cookies, which makes them ideal for holiday cookie exchanges, bake sales, or gifting.
They’re a hit with every age group. Kids love pressing the kisses into the centers, making this a fun baking activity for the whole family.
The dough can be made ahead and refrigerated overnight, which saves serious time during busy holiday prep.
- Soft, chewy, and perfectly tender peanut butter cookie base
- Sparkly granulated sugar crust for added texture and sweetness
- Classic Hershey’s Kiss topping that melts slightly into the warm cookie
- Ready in under an hour from start to finish
- Makes about 40 cookies, perfect for gifting or sharing
- Uses simple pantry ingredients with no specialty items required
- Crowd-pleasing for all ages and occasions
You might also enjoy: Peanut Butter Cookie Recipe
Ingredients
The classic peanut butter blossom uses a short, simple list of ingredients that work together to create a perfectly balanced cookie. Creamy, shelf-stable peanut butter (like Jif or Skippy) is key here because natural peanut butter tends to separate and makes the dough oily and difficult to work with.
- 1 3/4 cups (220g) all-purpose flour
- 1 teaspoon baking soda
- 1/2 teaspoon baking powder
- 1/2 teaspoon salt
- 1/2 cup (115g) unsalted butter, softened to room temperature
- 3/4 cup (190g) creamy peanut butter (Jif or Skippy recommended)
- 1/3 cup (65g) granulated sugar, plus extra 1/2 cup (100g) for rolling
- 1/3 cup (70g) packed light brown sugar
- 1 large egg, at room temperature
- 2 tablespoons whole milk
- 1 teaspoon pure vanilla extract
- 40 Hershey’s Kisses (approximately 1 standard 10 oz / 280g bag), unwrapped
Read Also: No Bake Cookie Recipe
Kitchen Equipment Needed
Having the right tools makes this process smooth and easy. A stand mixer or electric hand mixer is especially helpful because peanut butter cookie dough is quite stiff, and hand-mixing can be tiring.
- Stand mixer or electric hand mixer
- Large mixing bowl (if using a hand mixer)
- Medium mixing bowl (for dry ingredients)
- Whisk
- Rubber spatula
- Cookie scoop (1 tablespoon size)
- Baking sheets (at least 2)
- Parchment paper or silicone baking mats
- Wire cooling rack
- Small bowl (for rolling sugar)
- Plastic wrap or airtight container (for chilling dough)
The Snickerdoodle Cookie Recipe uses a very similar equipment list if you’re planning to bake a variety of cookies in one session.
Recommended Products for This Recipe
These product picks are based on what genuinely makes a difference in the final outcome of this recipe, from flavor to texture to ease of baking.
1. Hershey’s Kisses Milk Chocolates (Large Bag)
The Hershey’s Kiss is the signature finishing touch on these cookies, and using the standard milk chocolate variety delivers the classic sweet, creamy flavor most people know and love. A larger bag gives you extras to snack on while you bake. Buying a bulk or party-size bag ensures you won’t run short.
2. KitchenAid Stand Mixer
A stand mixer makes this stiff peanut butter dough significantly easier to handle. It frees up your hands and ensures even, thorough mixing without overworking the dough. This is especially helpful if you plan to double the batch for holiday baking.
3. USA Pan Baking Sheet (Half Sheet)
A quality, heavy-gauge baking sheet distributes heat evenly and prevents the bottoms of your cookies from overbrowning. USA Pan is a professional-grade option that home bakers absolutely love for consistent results across every batch.
4. OXO Good Grips Cookie Scoop (Small, 1 Tablespoon)
Uniformly sized cookie dough balls mean every cookie bakes evenly. A spring-loaded cookie scoop speeds up the portioning process and helps you roll consistently sized balls, which is important for even baking times.
5. Reynolds Kitchens Parchment Paper Roll
Parchment paper is a non-negotiable for cookie baking. It prevents sticking, promotes even baking, and makes cleanup effortless. Reynolds Kitchens is a reliable, widely trusted brand that delivers no-fuss, no-stick baking every time.
For more sweet inspiration, check out this Gingerbread Cookie Recipe to round out your holiday cookie platter.
Step-by-Step Instructions
1. Unwrap the Hershey’s Kisses
- Open the bag of Hershey’s Kisses and begin unwrapping them one by one, removing the foil wrappers and the paper pull-tab inside.
- You’ll need approximately 40 unwrapped kisses for this recipe.
- Place them in a small bowl or plate and set aside at room temperature. You want them to be accessible quickly once your cookies come out of the oven.
- Do not refrigerate the kisses at this stage; room-temperature chocolate will adhere better to the warm cookies without cracking.
2. Whisk Together the Dry Ingredients
- In a medium mixing bowl, add 1 3/4 cups (220g) of all-purpose flour.
- Add 1 teaspoon of baking soda, 1/2 teaspoon of baking powder, and 1/2 teaspoon of salt to the flour.
- Whisk the dry ingredients together until evenly combined. This step ensures the leavening agents are evenly distributed so every cookie rises uniformly.
- Set the bowl aside while you prepare the wet ingredients.
3. Cream the Butter, Peanut Butter, and Sugars
- Place 1/2 cup (115g) of softened butter into the bowl of your stand mixer fitted with the paddle attachment, or into a large mixing bowl if using a hand mixer.
- Add 3/4 cup (190g) of creamy peanut butter, 1/3 cup (65g) of granulated sugar, and 1/3 cup (70g) of packed light brown sugar to the bowl.
- Beat on medium speed for 2 to 3 minutes until the mixture is light, fluffy, and slightly pale in color. Scrape down the sides of the bowl once or twice during mixing to ensure everything is evenly incorporated.
- This step is important: properly creamed butter and sugar creates air pockets in the dough that give the cookies a tender, soft texture.
4. Add the Egg, Milk, and Vanilla
- Add 1 large egg (at room temperature) to the creamed mixture.
- Pour in 2 tablespoons of whole milk and 1 teaspoon of pure vanilla extract.
- Beat on medium speed for about 30 to 45 seconds until the egg is fully incorporated and the mixture looks smooth and creamy.
- Scrape the bowl down again to make sure nothing is sticking to the sides or bottom.
5. Combine Dry and Wet Ingredients
- With the mixer on low speed, gradually add the dry ingredient mixture to the wet ingredients in two or three additions.
- Mix just until the flour is incorporated and a soft dough forms. Do not overmix; overworking the dough can lead to tough, dense cookies rather than tender, chewy ones.
- The dough will be soft but should not feel wet or sticky. If it feels too soft to handle, that’s normal at this stage.
6. Chill the Dough
- Cover the mixing bowl tightly with plastic wrap, or transfer the dough to an airtight container.
- Refrigerate the dough for at least 1 hour, or up to 24 hours. Chilling firms up the fat in the dough, which helps the cookies hold their shape in the oven instead of spreading too much.
- While the dough chills, this is a great time to preheat your oven and prepare your baking sheets.
7. Preheat the Oven and Prepare the Baking Sheets
- Preheat your oven to 375°F (190°C) and set the oven rack to the middle position for the most even heat distribution.
- Line two large baking sheets with parchment paper or silicone baking mats. Lining the sheets prevents sticking and promotes even browning on the bottoms.
- Pour about 1/2 cup (100g) of granulated sugar into a small bowl. This is the sugar you’ll roll the dough balls in before baking.
8. Scoop and Roll the Dough Balls
- Remove the chilled dough from the refrigerator. Using a 1-tablespoon cookie scoop or a measuring spoon, scoop out portions of dough and roll them between your palms to form smooth, round balls approximately 1 inch (2.5cm) in diameter.
- Drop each dough ball into the bowl of granulated sugar and roll it around until it is fully coated on all sides.
- Place the sugar-coated dough balls onto the prepared baking sheets, spacing them about 2 inches (5cm) apart to allow room for spreading.
- You should be able to fit about 12 to 14 cookies per large baking sheet.
9. Bake the Cookies
- Place one baking sheet in the preheated oven on the middle rack.
- Bake for 8 to 10 minutes, until the edges of the cookies are set and the tops look slightly underdone. Fine cracks may start to form on the surface, which is perfectly normal.
- Do not overbake. The cookies will continue to firm up as they cool. Pulling them out when they look just barely done is the secret to that soft, chewy center.
- While the first batch bakes, continue rolling and coating the remaining dough balls on the second baking sheet.
10. Press in the Hershey’s Kisses
- As soon as you remove the cookies from the oven, immediately and firmly press one unwrapped Hershey’s Kiss straight down into the center of each cookie. The cookie will crack slightly around the edges, and that is completely expected and part of the classic appearance.
- Work quickly because you want the warmth of the cookie to help the chocolate adhere. You have about 60 to 90 seconds before the cookies begin to cool too much.
- If the chocolate kiss slips or falls over, gently press it back upright while the cookie is still warm.
11. Cool the Cookies
- Allow the cookies to cool on the baking sheet for 5 minutes before transferring them to a wire cooling rack.
- For the firmest, most beautiful results, place the cookies in the freezer for 10 to 15 minutes after pressing in the kisses. This prevents the chocolate from melting too much and helps the kiss retain its pointed shape.
- Allow the cookies to cool completely before stacking or storing them, as the chocolate will still be soft immediately after baking.
This same careful pressing-and-cooling technique is what makes buckeyes such a crowd-pleaser too, if you’re looking for another peanut butter and chocolate combination to add to your dessert table.
Tips for Success
Small details make a big difference when it comes to getting perfect peanut butter blossom cookies every single time. These tips are based on what consistently trips bakers up and how to avoid those pitfalls.
- Use room-temperature butter. Butter that is too cold won’t cream properly, and melted butter will make the dough greasy. Properly softened butter (when you press it, your finger leaves an indent without resistance) is essential.
- Stick with commercial creamy peanut butter. Brands like Jif or Skippy have a stabilized consistency that works perfectly in cookie dough. Natural peanut butter separates and introduces too much oil, which makes the dough unpredictable.
- Don’t skip chilling the dough. The chill step is what prevents the cookies from spreading into flat, thin discs. Even 30 minutes makes a difference, though 1 hour is ideal.
- Roll generously in sugar. A thorough coating of granulated sugar creates that signature sparkly, slightly crinkly exterior. Don’t rush through this step.
- Pull cookies from the oven slightly underdone. They will look soft and barely set, but they firm up as they cool. Overbaked peanut butter blossoms are dry and crumbly rather than chewy and tender.
- Press the kisses in immediately. The moment the cookies come out of the oven is your window. A warm cookie grips the chocolate kiss and holds it in place as it cools.
- Freeze briefly after pressing the kisses. 10 to 15 minutes in the freezer helps the chocolate set quickly so it keeps its shape without melting or slumping.
- Unwrap kisses before you start baking. Having them ready saves precious seconds when you need to press them into hot cookies immediately after baking.
For another classic cookie that benefits from these same precision techniques, the Oatmeal Raisin Cookie Recipe is a wonderful bake-along option.
Serving Suggestions
Peanut butter blossom cookies are incredibly versatile. They shine on their own, but pairing them thoughtfully makes them even more enjoyable.
A cold glass of milk is the all-time classic pairing. The creamy dairy flavor balances the richness of both the peanut butter and the chocolate in a way that nothing else quite replicates.
For a festive dessert platter, arrange peanut butter blossoms alongside Snickerdoodle Cookies and Gingerbread Cookies for a beautiful variety of colors, flavors, and textures.
- Serve alongside a mug of hot chocolate for a cozy winter pairing
- Arrange on a cookie exchange platter with 3 to 4 other varieties for visual impact
- Pair with a scoop of vanilla ice cream for a simple but impressive dessert
- Package in cellophane bags tied with ribbon for holiday gifting
- Set out on a tiered cake stand for a stunning dessert table centerpiece
- Crush and sprinkle over vanilla ice cream as a cookie topping
Variations to Try
Once you’ve mastered the classic version, there are so many fun ways to put a new spin on this iconic cookie. Each variation keeps the same beloved structure but changes the flavor profile in exciting ways.
- Dark Chocolate Kisses. Swap milk chocolate kisses for dark chocolate varieties for a more intense, less sweet chocolate flavor that pairs beautifully with the salty peanut butter base.
- Peanut Butter Cup Version. Replace the Hershey’s Kiss with a mini Reese’s peanut butter cup for a double dose of peanut butter flavor.
- Almond Butter Blossoms. Substitute almond butter for the peanut butter for a slightly lighter, nuttier flavor. The texture and technique remain the same.
- Turbinado Sugar Coating. Roll the dough balls in coarse turbinado sugar instead of granulated sugar for a crunchier exterior and a more rustic, sparkly appearance.
- Seasonal Kisses. Use holiday-themed Hershey’s Kisses, like caramel-filled, peppermint, or white chocolate varieties, to match the season.
- Sunflower Butter Blossoms. Use sunflower seed butter in place of peanut butter for a nut-free version that’s safe for those with peanut allergies.
- Chocolate-Dipped Base. Dip the bottom of each finished cookie into melted dark chocolate and let set on parchment for an extra indulgent layer.
Another fun cookie to add to your collection is this Cut Out Sugar Cookie Recipe, which is perfect for decorating alongside a batch of blossoms.
Storage and Reheating
Peanut butter blossom cookies store beautifully, which makes them an excellent make-ahead option for the holidays or any time you want fresh cookies on hand.
- Room temperature: Store in an airtight container at room temperature for up to 1 week. Place a layer of parchment paper between stacked cookies to prevent the chocolate kisses from being knocked loose.
- Refrigerator: Cookies can be stored in the refrigerator in an airtight container for up to 2 weeks. Bring them to room temperature before serving for the best texture.
- Freezer (baked cookies): Baked and fully cooled cookies can be frozen in an airtight, freezer-safe container for up to 3 months. Separate layers with parchment paper to prevent sticking. Thaw at room temperature for about 30 minutes before serving.
- Freezer (unbaked dough balls): Roll the dough into balls and coat in sugar, then freeze on a baking sheet until solid. Transfer to a zip-top freezer bag and freeze for up to 2 months. Bake straight from frozen, adding 1 to 2 extra minutes to the baking time. Press in the kisses as soon as they come out of the oven.
- Reheating: These cookies are not typically reheated, but if you want a warm cookie, microwave a single cookie for 8 to 10 seconds. Be aware the chocolate will soften significantly.
Read Also: Chewy Oatmeal Chocolate Chip Cookie Recipe
Nutritional Facts
The following nutritional information is an estimate for one cookie (based on a batch of approximately 40 cookies).
| Nutrient | Amount Per Cookie |
|---|---|
| Calories | ~115 kcal |
| Total Fat | 6g |
| Saturated Fat | 2.5g |
| Cholesterol | 12mg |
| Sodium | 75mg |
| Total Carbohydrates | 13g |
| Dietary Fiber | 0.5g |
| Total Sugars | 9g |
| Protein | 2.5g |
Nutritional values are approximate and may vary based on specific brands and ingredient measurements used.
Another favorite: Old Fashioned Chocolate Chip Cookie Recipe
Health Benefits of Key Ingredients
While peanut butter blossom cookies are certainly a treat, some of the core ingredients do offer genuine nutritional value worth noting.
Peanut butter is a notable source of plant-based protein and healthy monounsaturated fats. A 2-tablespoon serving provides around 7 to 8 grams of protein along with magnesium, potassium, and vitamin E, all of which support heart health and sustained energy.
Eggs contribute essential amino acids, B vitamins, and choline, a nutrient important for brain function and metabolism. They also play a structural role in the cookie, helping bind the dough and create a tender crumb.
Dark chocolate, when used as an alternative to milk chocolate kisses, contains flavonoids, which are antioxidants associated with improved cardiovascular health and reduced inflammation.
- Peanut butter: Good source of protein, healthy fats, magnesium, and potassium
- Eggs: Provide complete protein, B vitamins, and choline for brain health
- Butter: Delivers fat-soluble vitamins A, D, E, and K in small amounts
- Dark chocolate kisses (variation): Contains flavonoids and antioxidants linked to heart health
- All-purpose flour: Provides carbohydrates for energy and small amounts of iron and B vitamins
- Whole milk: Adds calcium, vitamin D, and protein to the dough
This pairs beautifully with the nutritional profile of peanut butter pie if you want to explore more peanut butter-forward desserts.
Frequently Asked Questions
1. Can I make peanut butter blossom cookies without chilling the dough?
You can, but it’s not recommended. Chilling the dough for at least an hour solidifies the fat, which prevents the cookies from spreading too thin in the oven. If you skip chilling, your cookies may bake up flat and greasy rather than thick and chewy. If you’re short on time, even 30 minutes in the freezer will help.
2. What kind of peanut butter works best for this recipe?
Creamy, commercially processed peanut butter like Jif or Skippy is the best choice for baking. These products have a stabilized consistency that delivers predictable, reliable results in cookie dough. Natural peanut butter tends to have an oily, separated consistency that can throw off the dough’s texture, making cookies greasy or crumbly.
3. When should I press the Hershey’s Kiss into the cookie?
Press the Hershey’s Kiss into the center of each cookie immediately after the cookies come out of the oven. You have a short window of about 60 to 90 seconds while the cookies are still hot enough to hold the kiss firmly. If the cookie cools too much before you press in the chocolate, the kiss won’t adhere properly and may fall off after the cookie sets.
4. How do I keep the Hershey’s Kiss from melting too much?
After pressing the kisses into the freshly baked cookies, place the entire baking sheet in the freezer for 10 to 15 minutes. The freezer chill quickly sets the chocolate, ensuring the kiss retains its signature pointed shape. The refrigerator also works, though it takes slightly longer. This step is worth doing, especially if you want picture-perfect cookies.
5. Can I freeze peanut butter blossom cookies?
Yes! Baked cookies freeze beautifully in an airtight, freezer-safe container for up to 3 months. Separate layers with parchment paper to protect the chocolate kisses. You can also freeze the unbaked, sugar-coated dough balls for up to 2 months. Bake them directly from frozen, adding 1 to 2 minutes to the baking time, and press in the kisses immediately as they come out of the oven.
Read Also: Best Chocolate Chip Cookies Recipe
Final Thoughts
Peanut butter blossom cookies are one of those recipes that never goes out of style. They’ve been gracing holiday cookie trays for nearly 70 years, and each new generation discovers them for the first time and falls in love all over again.
What makes them so enduring is the simplicity. A soft, chewy peanut butter cookie, a coating of sparkly sugar, and a single chocolate kiss pressed right into the center. That’s all it takes.
Once you try this recipe, you’ll understand why it’s been a holiday tradition in so many households for decades. The dough comes together quickly, the technique is beginner-friendly, and the results look like they came from a professional bakery.
Give this peanut butter blossom cookies recipe a try and let us know how they turned out. Leave a comment below with your experience, share your photos, or tag us on social media. We’d love to see your batch!
Recommended:
- Peanut Butter Cookie Recipe
- Gingerbread Cookie Recipe
- Easy Sugar Cookie Recipe
- Oatmeal Cookie Recipe
- Fudge Stripe Cookies Recipe
- Almond Macaroon Cookie Recipe
- Sugar Cookies Recipe
- Hot Chocolate Bombs Recipe
- Fig Cookie Recipe
- Chewy Chocolate Chip Cookies Recipe


