Fall baking season calls for exactly one thing: a soft, spiced pumpkin bar recipe that fills your kitchen with the most incredible aroma and disappears from the pan before you can even cut all the squares.
These bars are thick, tender, and packed with warm pumpkin flavor from a full can of pumpkin puree. The batter comes together in two bowls with no electric mixer required, which keeps the prep simple and the cleanup minimal.
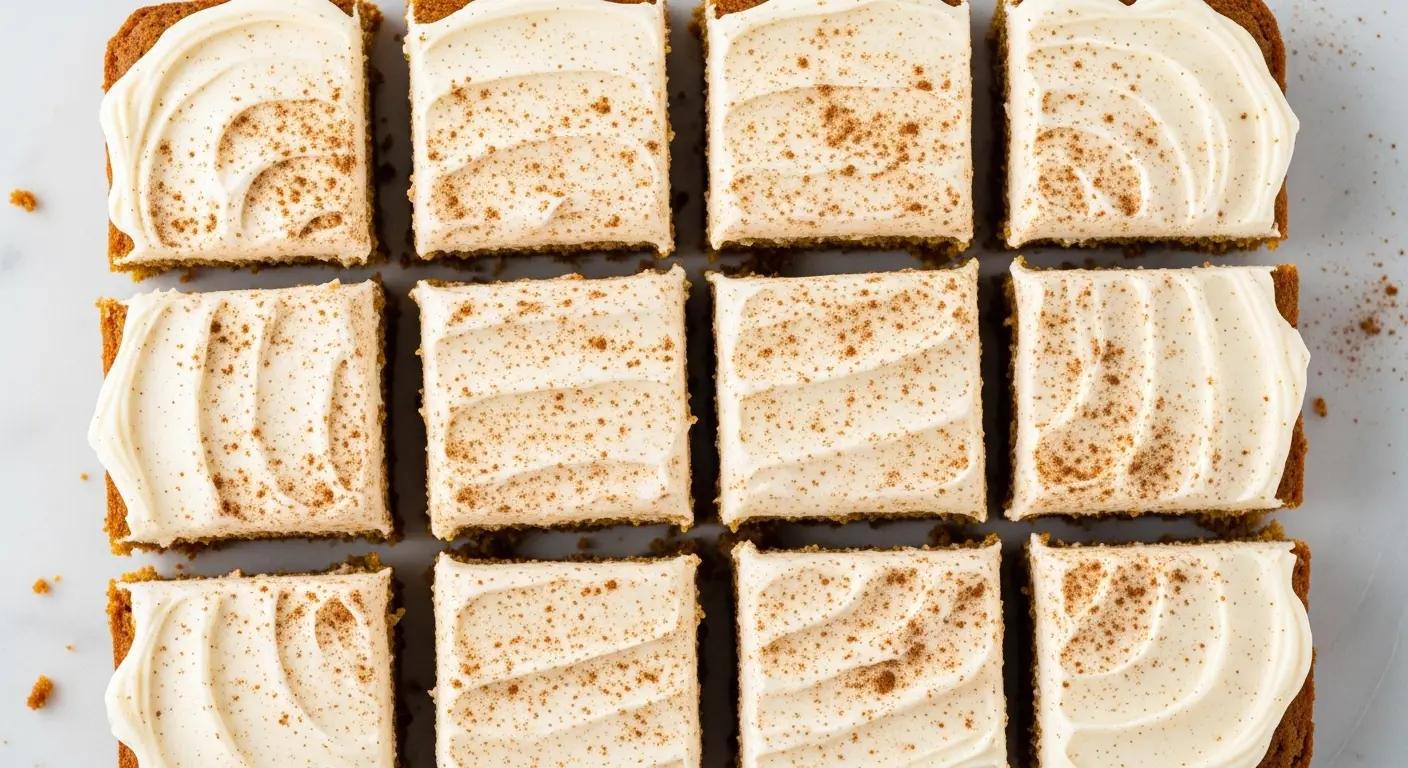
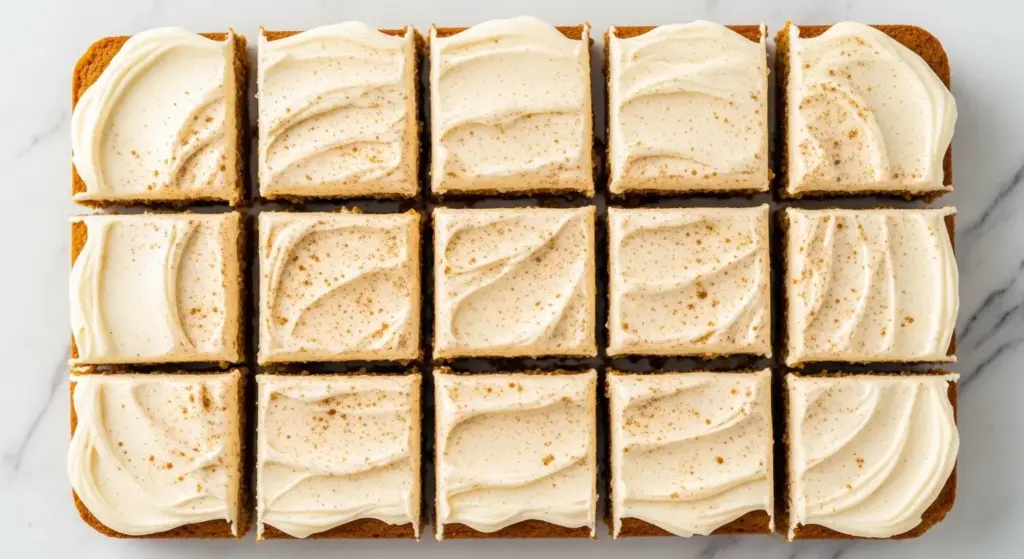
The real magic happens at the end when you top the cooled bars with a generous layer of tangy cream cheese frosting. That combination of sweet, spiced pumpkin cake and creamy, slightly tangy frosting is what makes this dessert an absolute crowd-pleaser year after year.
This recipe uses a standard 9×13-inch baking pan and produces about 24 bars, making it the perfect option for potlucks, Thanksgiving spreads, holiday cookie exchanges, or any time you need to feed a group without a ton of fuss.
You might also love these equally festive treats: the Pumpkin Roll Recipe delivers a beautiful spiral of cream cheese filling inside a thin pumpkin sponge that looks far more impressive than the effort it actually requires.
Why You’ll Love This Pumpkin Bar Recipe
This recipe has earned a permanent spot on fall baking lists for very good reason.
First, the texture is truly exceptional. Unlike dense, gummy pumpkin bars that fall apart when you pick them up, these come out with a soft, moist, and slightly cakey crumb that holds together beautifully when sliced.
Second, they are genuinely easy to make. You do not need a stand mixer, specialty flour, or any complicated technique to pull these off.
Third, they are made in a single pan, which means no individual portioning, no rotating baking sheets, and no fussing over perfect rounds or drop shapes.
The cream cheese frosting is thick, smooth, and just tangy enough to balance the sweetness of the bars themselves without overpowering the spice.
These are also incredibly versatile. You can dress them up for a holiday table or keep them casual for an afternoon treat alongside other cozy pumpkin bakes.
Here is a quick summary of why readers keep coming back to this recipe:
- Soft, moist texture that holds up beautifully when sliced
- Made in one 9×13-inch pan with no special equipment
- Uses a full can of pumpkin puree with zero waste
- Cream cheese frosting that is perfectly balanced, not overly sweet
- Ready from start to finish in under one hour
- Serves a crowd with about 24 generous bars
- Freezes beautifully for make-ahead meal prep
Another fall baking favorite that uses the same cozy spice profile: Pumpkin Pancake Recipe
Ingredients
You will need pantry staples for the pumpkin bars themselves plus a few fridge items for the frosting. Make sure to use plain canned pumpkin puree and not pumpkin pie filling, which contains added sugar and spices that will throw off the balance of this recipe.
For the Pumpkin Bars:
- 2 cups (250g) all-purpose flour
- 2 teaspoons baking powder
- 1 teaspoon baking soda
- 2 teaspoons pumpkin pie spice
- 1 teaspoon ground cinnamon
- 1/2 teaspoon fine salt
- 4 large eggs, room temperature
- 1 2/3 cups (330g) granulated sugar
- 1 cup (240ml) vegetable oil
- 1 can (15 oz / 425g) canned pumpkin puree
- 2 teaspoons pure vanilla extract
For the Cream Cheese Frosting:
- 8 oz (225g) full-fat block cream cheese, softened to room temperature
- 1/2 cup (115g) unsalted butter, softened to room temperature
- 3 cups (360g) powdered sugar, sifted
- 1 teaspoon pure vanilla extract
- Pinch of fine salt
For a gorgeous finishing touch, you can add a light dusting of cinnamon or a few candy pumpkins on top once the frosting is spread.
Read Also: Old Fashioned Pumpkin Bread Recipe
Kitchen Equipment Needed
You do not need any fancy equipment to make these bars. The items below are standard tools found in most home kitchens, and a few small investments can make the process even smoother.
Here is what you will need:
- 9×13-inch baking pan (glass or metal both work)
- Parchment paper (for easy bar removal, optional but recommended)
- Two large mixing bowls
- One medium mixing bowl
- Whisk
- Rubber spatula or wooden spoon
- Electric hand mixer or stand mixer (for the cream cheese frosting)
- Offset spatula (highly recommended for spreading frosting smoothly)
- Wire cooling rack
- Measuring cups and spoons
- Sharp knife for cutting bars
Another favorite for fall baking: Pumpkin Muffin Recipe
Recommended Products for This Recipe
The products below have been selected based on quality, performance, and how much they can genuinely improve your results when making this recipe.
1. USA Pan 9×13-Inch Baking Pan
This commercial-grade aluminized steel pan distributes heat evenly from edge to edge, which means your pumpkin bars bake uniformly without over-browning the sides or leaving the center underdone. The nonstick coating makes clean release easy, and the reinforced rim prevents warping.
2. Libby’s 100% Pure Pumpkin Puree
Libby’s is the gold standard for canned pumpkin puree and the most widely used brand among home bakers and professional pastry chefs alike. It has a thick, consistent texture and a clean pumpkin flavor that lets your spices shine without any excess moisture thinning out the batter.
3. KitchenAid Artisan Stand Mixer
A stand mixer makes whipping the cream cheese frosting to a perfectly smooth, fluffy consistency effortless. The paddle attachment thoroughly incorporates the cream cheese and butter without leaving any lumps, which makes a noticeable difference in frosting texture.
4. Ateco Offset Spatula
An offset spatula is one of the most useful baking tools you can own, and it is especially important here. Because pumpkin bars are soft and delicate, a regular straight spatula can tear the surface when spreading frosting. The angled blade of an offset spatula lets you glide frosting across the bars with gentle, even pressure.
5. McCormick Pumpkin Pie Spice
McCormick’s pumpkin pie spice blend is well-balanced and consistently flavored, making it a reliable choice for this recipe. Using a quality pre-mixed spice blend saves time and ensures you get the right ratio of cinnamon, ginger, nutmeg, and allspice every single time.
Another fall classic worth trying: Pumpkin Cheesecake Recipe
Step-by-Step Instructions
Step 1: Preheat the Oven and Prepare Your Pan
- Preheat your oven to 350°F (177°C) and allow it to fully come to temperature before you begin mixing. An oven that has not fully preheated can affect how the bars rise and set.
- Grease your 9×13-inch baking pan generously with cooking spray or softened butter, making sure to coat the corners and sides thoroughly.
- For easier removal, line the pan with parchment paper, leaving a 1-2 inch overhang on the two long sides. This creates handles that let you lift the entire slab of bars out after cooling for cleaner, more even cuts.
Step 2: Mix the Dry Ingredients
- In a medium mixing bowl, combine 2 cups (250g) of all-purpose flour, 2 teaspoons baking powder, 1 teaspoon baking soda, 2 teaspoons pumpkin pie spice, 1 teaspoon ground cinnamon, and 1/2 teaspoon fine salt.
- Whisk everything together for about 30 seconds until evenly distributed. This step is important because it ensures the leavening agents and spices are spread uniformly throughout the batter, so every bite has consistent flavor and lift.
- Set the dry ingredient bowl aside.
Step 3: Mix the Wet Ingredients
- In a large mixing bowl, add 4 large eggs (room temperature), 1 2/3 cups (330g) granulated sugar, 1 cup (240ml) vegetable oil, the full 15 oz (425g) can of pumpkin puree, and 2 teaspoons of pure vanilla extract.
- Whisk vigorously by hand for about 60-90 seconds, or until the mixture is well combined, smooth, and slightly lighter in color. You do not need an electric mixer for this step.
- Room temperature eggs blend more smoothly into the batter and help produce a more even crumb, so take them out of the refrigerator about 30 minutes before starting if possible.
Step 4: Combine Wet and Dry Ingredients
- Pour the dry ingredient mixture into the large bowl containing the wet ingredients.
- Using a rubber spatula or wooden spoon, fold the two together with gentle, sweeping motions. Stir just until no dry streaks of flour remain.
- Do not overmix. Overmixing activates the gluten in the flour, which leads to dense, tough bars instead of the soft, tender texture you are aiming for. A few small lumps in the batter are perfectly fine.
Step 5: Spread the Batter and Bake
- Pour the batter into your prepared 9×13-inch baking pan.
- Use your rubber spatula or offset spatula to spread the batter in an even layer all the way to the corners and edges.
- Place the pan on the center rack of your preheated oven. The center rack ensures the most even heat distribution.
- Bake for 25-30 minutes. Start checking at the 25-minute mark by inserting a toothpick into the center of the bars. If it comes out clean or with just a few moist crumbs (not wet batter), the bars are done.
- Alternatively, gently press the center of the bars with your fingertip. If it springs back rather than leaving an indent, they are ready to come out.
Step 6: Cool the Bars Completely
- Remove the pan from the oven and set it on a wire cooling rack.
- Allow the bars to cool completely in the pan before frosting. This is a non-negotiable step. Frosting warm bars will cause the cream cheese frosting to melt and slide right off.
- For the fastest results, let the bars cool at room temperature for about 45-60 minutes, then transfer the pan to the refrigerator for another 20-30 minutes to speed up the process.
Step 7: Make the Cream Cheese Frosting
- Take your 8 oz (225g) block of cream cheese and 1/2 cup (115g) of unsalted butter out of the refrigerator well in advance. Both need to be at room temperature (around 68-70°F / 20-21°C) before you begin. Cold cream cheese or butter will result in lumpy, uneven frosting.
- In a large mixing bowl, beat the softened cream cheese and softened butter together using an electric hand mixer or stand mixer on medium-high speed for about 2-3 minutes, until the mixture is completely smooth, fluffy, and uniform with no visible lumps.
- With the mixer running on low, add the sifted powdered sugar a few tablespoons at a time. Adding it all at once can cause a powdered sugar cloud and an uneven mix.
- Once all 3 cups (360g) of powdered sugar are incorporated, add 1 teaspoon of vanilla extract and a pinch of fine salt.
- Increase the mixer speed to medium-high and beat for another 2 minutes until the frosting is light, fluffy, and silky smooth. If the frosting seems too thick, add 1 teaspoon of milk at a time until the consistency is spreadable.
Step 8: Frost and Serve the Pumpkin Bars
- Once the bars are completely cool, spoon all of the cream cheese frosting onto the surface of the bars.
- Using your offset spatula, spread the frosting in even, sweeping strokes from the center outward toward the edges. An offset spatula makes this significantly easier than a flat knife because the angled blade lets you apply gentle, even pressure without dragging the top of the bars.
- For extra clean slices, refrigerate the frosted bars for 30 minutes before cutting. This firms up the frosting so it does not smear when you run the knife through.
- When you are ready to slice, use a sharp knife and wipe the blade clean with a damp cloth between each cut for the neatest edges.
- Cut into approximately 24 bars (6 rows by 4 rows) and serve cold or at room temperature.
This recipe uses very similar technique to making Carrot Cake with Cream Cheese Frosting, so if you love one, you will absolutely love the other.
Tips for Success
These simple tips will help you get perfect results on your very first batch.
Follow these guidelines for the best outcome:
- Use room temperature ingredients for the frosting. Cold cream cheese and butter will not blend smoothly and leave lumps in the frosting even after extended mixing.
- Do not substitute pumpkin pie filling for pumpkin puree. Pumpkin pie filling contains added sugar, spices, and thickeners that will make the bars too sweet and alter the texture significantly.
- Measure your flour correctly. Use the spoon-and-level method: spoon flour into your measuring cup, then sweep a straight edge across the top. Scooping directly from the bag packs in too much flour and can make your bars dry.
- Check for doneness at 25 minutes. Ovens vary, and overbaked pumpkin bars lose their moist, tender quality. Start checking early and pull them out as soon as the toothpick test passes.
- Cool completely before frosting. No shortcuts here. Even slightly warm bars will melt the frosting.
- Use an offset spatula for frosting. It gives you far more control than a flat knife or the back of a spoon and prevents tearing the delicate surface of the bars.
- Chill before cutting. Even 20-30 minutes in the fridge after frosting makes slicing dramatically cleaner and neater.
You might also enjoy: Best Carrot Cake Recipe
Serving Suggestions
Pumpkin bars are incredibly versatile and pair well with a wide range of fall-inspired drinks and accompaniments.
They are wonderful on their own at room temperature or served slightly chilled straight from the refrigerator. The cream cheese frosting firms up beautifully when cold and gives the bars a satisfying, almost cheesecake-like richness.
Here are some of the best ways to serve and enjoy them:
- Pair with a warm Pumpkin Spice Latte for the ultimate fall afternoon treat
- Serve alongside the Iced Pumpkin Spice Latte for a refreshing contrast
- Add them to a Thanksgiving dessert spread next to Sweet Potato Pie
- Plate individual bars with a small scoop of vanilla ice cream and a drizzle of caramel sauce for an elevated dessert
- Arrange on a tiered serving platter with other fall baked goods for a holiday cookie exchange
- Pack them into lunchboxes or wrap individually for easy grab-and-go treats
- Serve as a weekday breakfast treat alongside coffee (we will not judge)
For a savory fall side dish that pairs beautifully with these bars at a holiday spread: Squash Casserole Recipe
Variations to Try
The classic version of this recipe is pretty close to perfect, but there are several easy ways to customize it to suit your preferences or the occasion.
Here are some popular variations worth exploring:
- Maple Cream Cheese Frosting: Replace the vanilla extract in the frosting with 1 teaspoon of pure maple extract for a richer, more complex flavor that complements the pumpkin beautifully.
- Cinnamon Cream Cheese Frosting: Add 1 1/2 teaspoons of ground cinnamon to the frosting along with the powdered sugar for a warmly spiced topping that amplifies the fall flavor.
- Chocolate Chip Pumpkin Bars: Fold 3/4 cup (130g) of semisweet or dark chocolate chips into the batter before spreading it in the pan. Chocolate and pumpkin spice are a surprisingly wonderful combination.
- Nutty Pumpkin Bars: Stir 1/2 cup (55g) of toasted chopped walnuts or pecans into the batter for a delightful crunch in every bite.
- Gluten-Free Version: Substitute a quality 1-to-1 gluten-free flour blend for the all-purpose flour. Many readers report excellent results with this swap, and no one can tell the difference.
- Pumpkin Bars with Caramel Drizzle: Skip the cream cheese frosting and top the baked bars with a generous drizzle of homemade or store-bought caramel sauce for a simpler but equally delicious finish.
- Brown Butter Frosting Variation: Brown the butter before beating it into the frosting for a deeply nutty, caramel-like flavor that takes the whole dessert to another level.
If you enjoy bar-style desserts, the Monster Cookie Bars Recipe is another crowd-pleasing option that is easy to make and hard to stop eating.
Storage and Reheating
Because the cream cheese frosting contains dairy, these bars need to be stored properly to stay fresh and safe to eat.
Follow these storage guidelines to keep your bars at their best:
- Refrigerator: Store frosted bars in an airtight container or cover the pan tightly with plastic wrap. They will keep well in the refrigerator for up to 5-7 days.
- Room Temperature (short term): If your kitchen is cool (under 70°F / 21°C), frosted bars can sit at room temperature for up to 24 hours covered loosely. Beyond that, refrigerate them.
- Freezer (without frosting): Unfrosted pumpkin bars freeze extremely well. Wrap individual bars in plastic wrap, place them in a zip-top freezer bag, and freeze for up to 3 months. Thaw overnight in the refrigerator before frosting and serving.
- Freezer (with frosting): Frosted bars can also be frozen. Place them in a single layer on a baking sheet to freeze individually first (about 2 hours), then transfer to an airtight container with parchment paper between layers. Freeze for up to 2 months. Thaw in the refrigerator overnight.
- Reheating: These bars are best enjoyed cold or at room temperature. If you want to serve them warm, remove the frosting first and microwave an individual bar for 10-15 seconds. Re-frosting after warming is not recommended.
Read Also: From Scratch Pumpkin Pie Recipe
Nutritional Facts
The following estimates are based on the recipe as written, divided into 24 bars. Actual values will vary depending on specific brands and exact measurements used.
| Nutrient | Per Bar (approx.) |
|---|---|
| Calories | ~290 kcal |
| Total Fat | 15g |
| Saturated Fat | 5g |
| Cholesterol | 50mg |
| Sodium | 200mg |
| Total Carbohydrates | 38g |
| Dietary Fiber | 1g |
| Total Sugars | 28g |
| Protein | 3g |
Please note: These are estimates for general guidance only. For precise dietary information, use a nutrition calculator with your exact brands and measurements.
Another delicious fall bake you might want to try: Pumpkin Soup Recipe
Health Benefits of Key Ingredients
While these pumpkin bars are absolutely a dessert treat, several of the core ingredients bring genuine nutritional value to the table.
Here is a closer look at what makes some of the key ingredients worth appreciating:
- Pumpkin Puree: Pumpkin is one of the most nutrient-dense vegetables you can eat. It is exceptionally high in beta-carotene, the precursor to vitamin A, which supports eye health, immune function, and skin health. A single cup of pumpkin puree also provides a solid hit of potassium, vitamin C, and dietary fiber.
- Eggs: Eggs are a complete protein source, meaning they contain all nine essential amino acids your body needs. They also supply choline, which supports brain health and function, as well as lutein and zeaxanthin, two antioxidants linked to eye health.
- Cinnamon: Cinnamon is more than just a flavoring agent. It has well-documented antioxidant and anti-inflammatory properties and has been studied for its potential role in supporting healthy blood sugar levels. Even small amounts used in baking contribute these benefits.
- Pumpkin Pie Spice Blend: Beyond cinnamon, pumpkin pie spice typically contains ginger, nutmeg, cloves, and allspice. Each of these spices carries its own antioxidant compounds and has been used in traditional wellness practices for centuries.
- Vegetable Oil: Using oil rather than butter in the bars keeps the texture moist and tender because oil remains a liquid at room temperature. Many vegetable oils also supply vitamin E, a fat-soluble antioxidant.
- Cream Cheese: While certainly a treat ingredient, cream cheese provides a source of calcium and fat-soluble vitamins including vitamins A and D.
For another nutrient-packed fall vegetable dish, the Stuffed Acorn Squash is a beautifully seasonal option.
Frequently Asked Questions
1. Can I use pumpkin pie filling instead of pumpkin puree?
No. Pumpkin pie filling is not a substitute for pumpkin puree in this recipe.
Pumpkin pie filling contains added sugar, thickeners, and a pre-mixed blend of spices. Using it would make the bars far too sweet, alter the texture of the batter, and produce an entirely different flavor profile than what this recipe is designed for. Always read the label carefully at the store, as the two products are often shelved right next to each other and the packaging looks similar.
2. Why did my pumpkin bars come out too dense?
Dense bars are almost always the result of one of two things: overmixing the batter or using too much flour.
Overmixing develops the gluten in the flour, making the bars tough instead of tender. Once you combine the wet and dry ingredients, stir just until no dry streaks remain and stop immediately. For flour, always use the spoon-and-level method rather than scooping directly from the bag, which packs in excess flour.
3. Can I make pumpkin bars ahead of time?
Yes, and they actually benefit from a little time in the refrigerator.
You can bake the bars one to two days ahead, cool them completely, wrap the uncut slab tightly in plastic wrap, and refrigerate until you are ready to frost and serve. The bars hold up beautifully, and the extra time allows the spice flavors to deepen slightly. You can also frost them up to 24 hours in advance and keep them covered in the refrigerator until serving time.
4. How do I get clean, even cuts?
The key is to chill the frosted bars for at least 30 minutes before slicing.
Cold frosting does not smear when you cut through it, and the bars themselves firm up enough to hold their shape cleanly. Use a long, sharp knife and wipe the blade with a clean, damp cloth between each cut. Pulling the knife straight down through the bars rather than dragging it across the surface also helps produce cleaner edges.
5. Can I double this recipe?
Yes, and it works beautifully at double the quantity.
Use a half sheet pan (18×13 inches) to double the batch. The batter spreads just as evenly and bakes in the same temperature range, though you may need to add 5-10 extra minutes to the baking time. Start testing for doneness at 30 minutes with the toothpick test, and double the frosting recipe proportionally as well.
Read Also: Classic Pumpkin Pie Recipe
Final Thoughts
This pumpkin bar recipe checks every single box for what a great fall dessert should be: easy to make, big enough to share, deeply flavorful, and absolutely irresistible with that thick layer of cream cheese frosting on top.
Once you make these once, they will become a fall tradition you look forward to every single year.
If you give this recipe a try, leave a comment below and let me know how they turned out. Sharing your photos and tips with the community makes this corner of the internet such a warm and fun place to be, and your feedback helps so many other bakers who are making this recipe for the first time.
Recommended:
- Sweet Potato Casserole Recipe
- German Chocolate Cake Bars Recipe
- Snickerdoodle Cookie Recipe
- Classic Apple Crisp Recipe
- Gingerbread Cookie Recipe
- Best Chocolate Chip Cookies Recipe
- Roasted Butternut Squash Soup Recipe
- Oatmeal Cookie Recipe
- Easy Pecan Pie Recipe
- Easy Apple Crisp Recipe