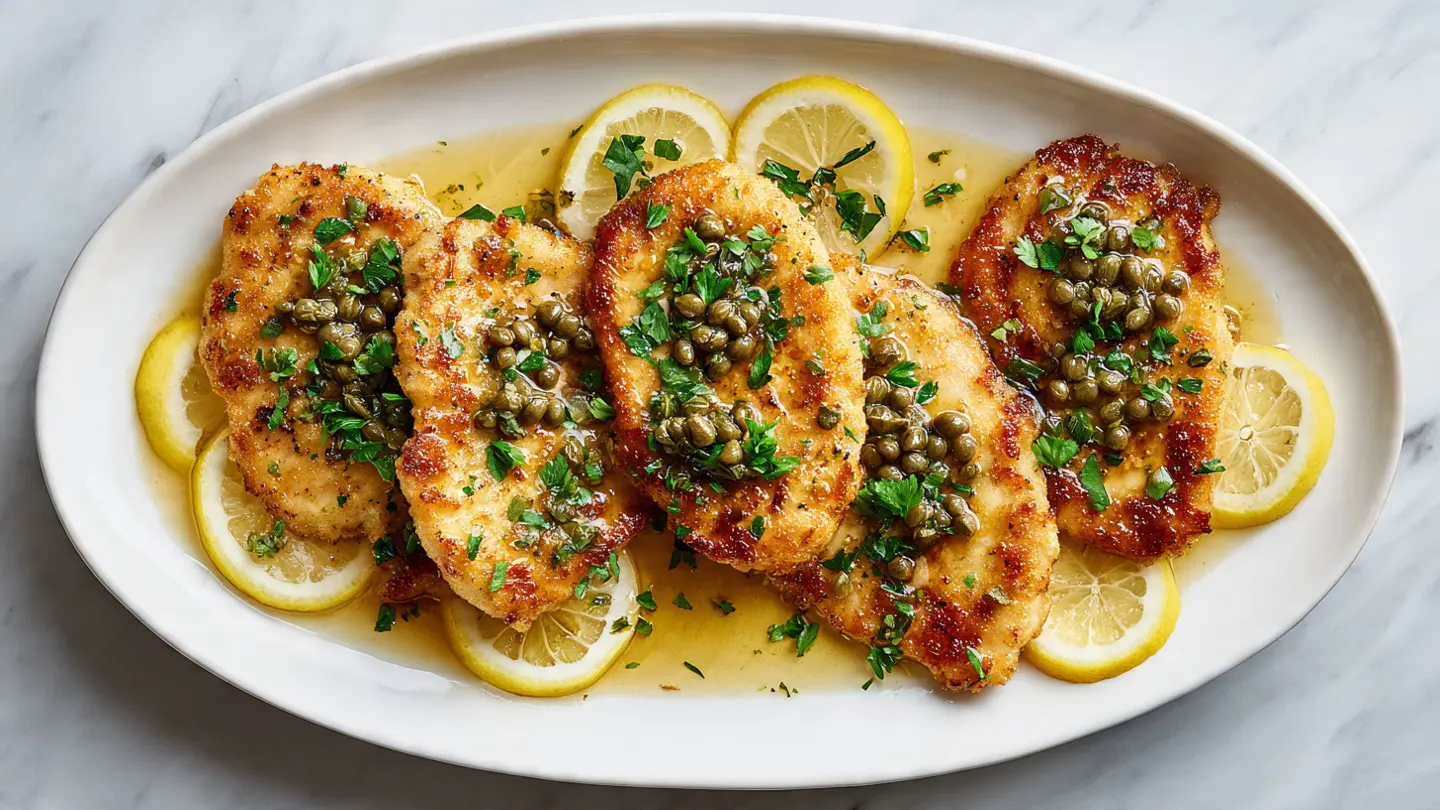
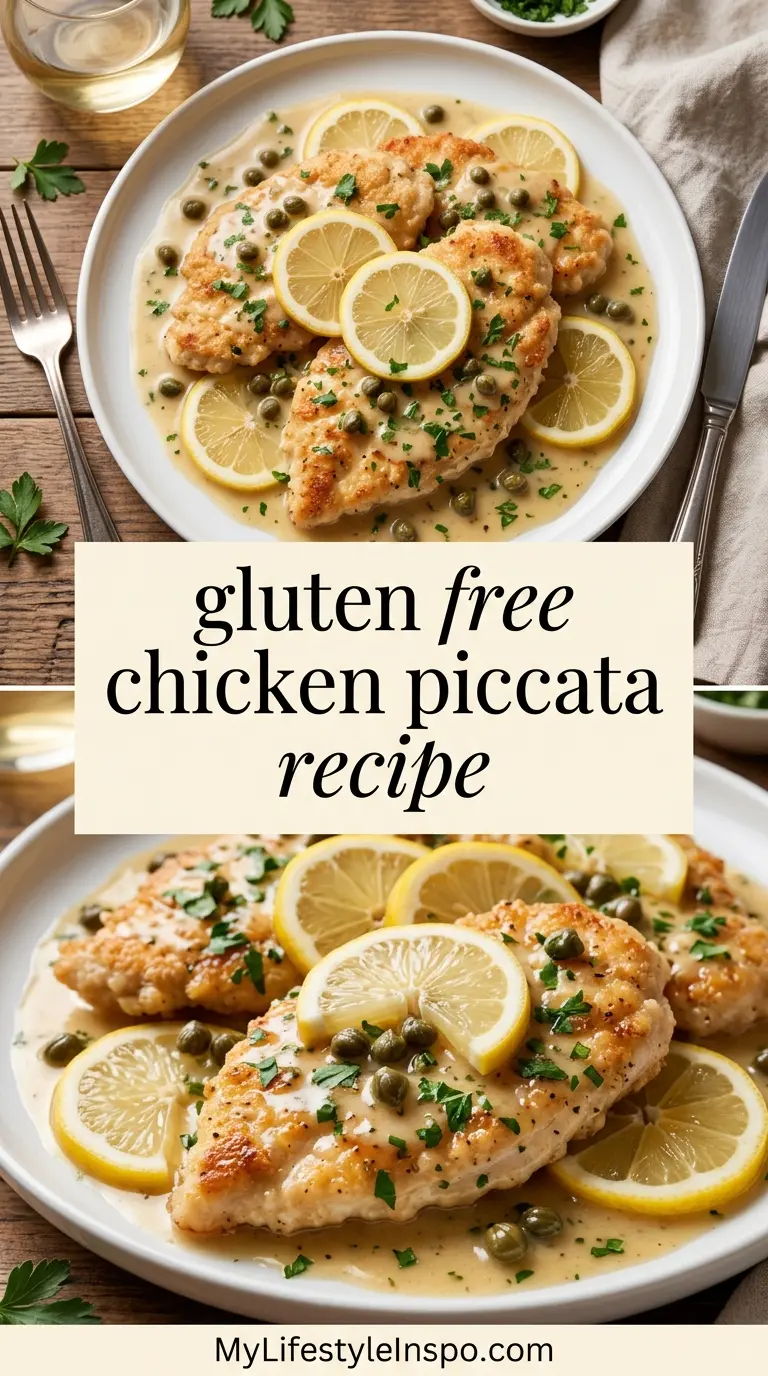
If you’ve been craving a restaurant-quality Italian dish that’s completely wheat-free, this gluten free chicken piccata recipe is exactly what you need. It delivers everything you love about the classic — golden, pan-fried chicken cutlets, a glossy lemon-caper butter sauce, and a silky finish that coats every bite — without a single speck of regular flour.
The secret to getting that beautiful golden crust without wheat flour is using a combination of fine white rice flour and a touch of arrowroot starch. These two gluten-free alternatives mimic the texture of all-purpose flour remarkably well, giving the chicken a light, crisp coating that holds up in the pan and doesn’t turn gummy when the sauce hits it.
This dish comes together in about 30 minutes, which makes it just as easy on a Wednesday night as it is impressive for a dinner party. The bright lemon juice, briny capers, and rich butter sauce hit all the right notes — savory, tangy, and just a little decadent.
You might also enjoy the Copycat CPK Chicken Piccata if you love a restaurant-style spin on this classic dish.

Why You’ll Love This Gluten Free Chicken Piccata Recipe
This dish is the kind of weeknight dinner that feels special without demanding a culinary degree.
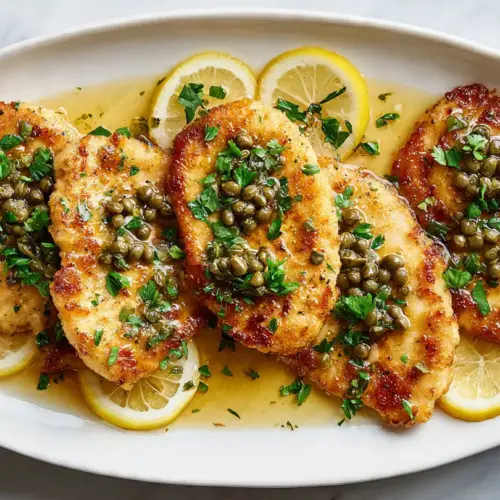
The sauce is the star here — made from pan drippings, fresh lemon juice, white wine, briny capers, and finished with cold butter for a restaurant-worthy silky texture.
Every component is naturally gluten-free without any weird substitutions or compromises.
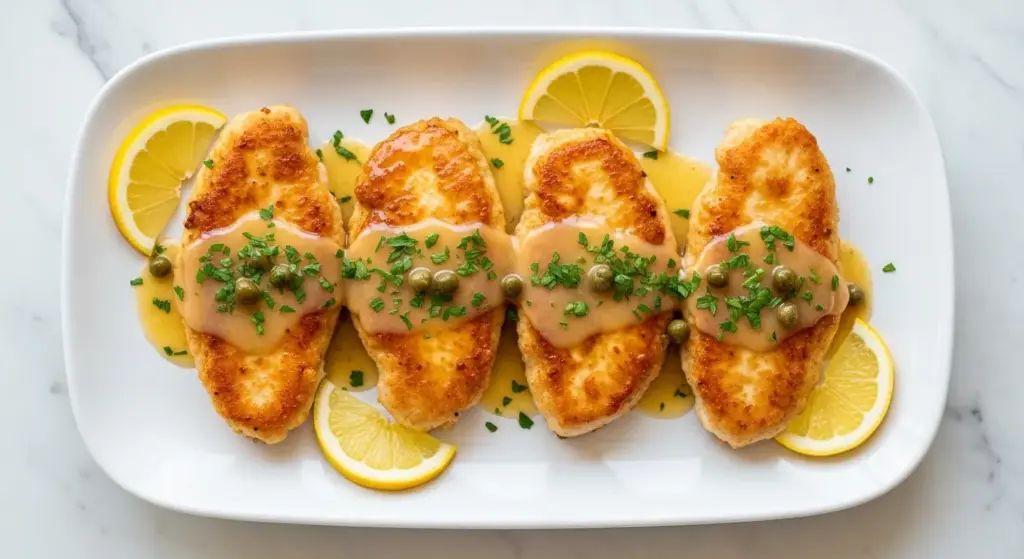
The rice flour coating crisps up beautifully in the pan, giving the chicken that golden, delicate crust that makes piccata so satisfying to eat.
It’s fast enough for a busy Tuesday and elegant enough to serve to guests on a Saturday.
- Naturally gluten-free using rice flour and arrowroot starch — no gummy coatings or off-flavors
- Ready in 30 minutes from start to finish
- Restaurant-quality sauce made with real lemon juice, dry white wine, capers, and cold butter
- Great for meal prep — the chicken reheats well and the sauce can be made ahead
- Simple pantry ingredients that you likely already have on hand
For another satisfying gluten-free chicken dinner, check out this Healthy Chicken Piccata Recipe that keeps things light and clean.
Ingredients
All of the ingredients in this recipe are naturally gluten-free or easily sourced in certified gluten-free versions. Always check labels if cross-contamination is a concern, especially with chicken broth and capers.
- 4 boneless, skinless chicken breasts (about 6 oz / 170g each), pounded to ½ inch / 1.2 cm thickness
- ½ cup (65g) fine white rice flour
- 2 tablespoons arrowroot starch (or cornstarch)
- 1 teaspoon kosher salt, divided
- ½ teaspoon freshly ground black pepper
- 3 tablespoons extra-virgin olive oil, divided
- 3 tablespoons unsalted butter, divided
- 4 garlic cloves, thinly sliced
- ½ cup (120ml) dry white wine (such as Pinot Grigio or Sauvignon Blanc)
- ½ cup (120ml) gluten-free chicken broth
- 3 tablespoons freshly squeezed lemon juice (about 1½ lemons)
- 1 tablespoon lemon zest
- 3 tablespoons capers, drained and rinsed
- 2 tablespoons fresh flat-leaf parsley, chopped, for garnish
- Lemon slices, for serving
Read Also: Creamy Chicken Piccata Recipe
Kitchen Equipment Needed
You don’t need any specialty equipment for this recipe — just standard kitchen tools that most home cooks already own.
- Large skillet (12-inch / 30 cm), preferably stainless steel or a well-seasoned cast iron — avoid nonstick for the best sear
- Meat mallet or rolling pin for pounding the chicken
- Shallow dish or plate for dredging
- Cutting board and sharp knife
- Whisk
- Citrus juicer or reamer
- Measuring cups and spoons
- Tongs
- Stainless steel 12-inch skillet
- Meat mallet
Another fan favorite for weeknights: Chicken Marsala — another Italian pan sauce classic you’ll love.
Recommended Products for This Recipe
These are products that genuinely make a difference in this recipe, selected for quality and performance.
1. Bob’s Red Mill Superfine White Rice Flour
Bob’s Red Mill Super-Fine White Rice Flour grinds the rice to an exceptionally fine texture that closely mimics all-purpose flour. This is critical for getting a smooth, golden crust on the chicken rather than a grainy coating. It’s certified gluten-free and widely available.
2. Stainless Steel Skillet with Heavy Bottom
A good stainless steel skillet with a thick, heavy base is essential for achieving a proper golden-brown sear without hot spots. It also deglazes beautifully when you add white wine, pulling up all those caramelized bits that make the sauce extraordinary.
3. Roland Capers in Brine
Capers are one of the defining flavors in chicken piccata, and quality matters. Roland Capers in Brine are firm, briny, and consistently sized — perfect for this dish. Their clean, pungent flavor balances the butter and lemon without overpowering the chicken.
4. OXO Good Grips Citrus Juicer
Fresh lemon juice is non-negotiable in chicken piccata — bottled juice simply doesn’t have the same brightness. The OXO Good Grips Citrus Juicer is easy to use, catches seeds, and gets every drop out of the lemon. It’s a small tool that makes a noticeable difference.
For another delicious Italian-inspired chicken dish, try this Classic Chicken Parmesan — also easy to adapt for gluten-free cooking.
Step-by-Step Instructions
Step 1: Pound the Chicken
- Place one chicken breast inside a zip-top bag or between two sheets of plastic wrap on a sturdy cutting board.
- Using a meat mallet or the bottom of a heavy skillet, pound the chicken to an even ½-inch (1.2 cm) thickness, working from the center outward.
- Repeat with the remaining three breasts.
- Even thickness is critical here — it ensures the chicken cooks through evenly without the thinner edges drying out before the thicker center is cooked.
- Season both sides of each pounded breast lightly with kosher salt and black pepper.
Step 2: Set Up the Dredging Station
- In a shallow bowl or plate, whisk together the rice flour, arrowroot starch, ½ teaspoon kosher salt, and ½ teaspoon black pepper until evenly combined.
- The arrowroot starch is the key addition here — it helps the coating achieve a light, crisp texture and reduces gumminess when the sauce is added.
- Line a clean plate or sheet pan with paper towels to rest the coated chicken before cooking.
Step 3: Dredge the Chicken
- Working one breast at a time, press each chicken breast firmly into the flour mixture, coating both sides thoroughly.
- Shake off the excess flour — a light, even coating is what you want, not a thick layer, which would create a paste rather than a crisp crust.
- Place the dredged chicken on the prepared plate while you heat the skillet.
Step 4: Sear the Chicken
- Heat a large 12-inch stainless steel skillet over medium-high heat for about 2 minutes until hot.
- Add 2 tablespoons of olive oil and 1 tablespoon of butter to the pan. The butter adds flavor and helps with browning; the oil raises the smoke point so the butter doesn’t burn.
- When the butter begins to foam and the foam subsides (a sign that the water has cooked out), add the chicken breasts in a single layer. Do not crowd the pan — work in two batches if needed.
- Cook the chicken without moving it for 3 to 4 minutes, until the bottom is deep golden brown and the chicken releases easily from the pan.
- Flip and cook the other side for another 3 to 4 minutes, until the internal temperature reaches 165°F (74°C).
- Transfer the cooked chicken to a clean plate and tent loosely with foil to keep warm. Repeat with the remaining chicken if cooking in batches, adding a little more olive oil as needed.
Step 5: Build the Sauce Base
- Reduce the heat to medium. Add the remaining 1 tablespoon of olive oil to the pan.
- Add the sliced garlic to the pan and cook, stirring frequently, for about 60 seconds until fragrant and just lightly golden at the edges. Do not let the garlic brown fully or it will turn bitter.
- The garlic slices will soften in the sauce and provide a mellow, savory backbone to the bright lemon flavor.
Step 6: Deglaze with White Wine
- With the heat at medium, carefully pour the dry white wine into the hot skillet. It will sizzle vigorously — this is exactly what you want.
- Using a wooden spoon or heat-safe spatula, scrape up all the browned bits stuck to the bottom of the pan (this is called fond, and it’s packed with flavor).
- Allow the wine to reduce by half, which should take about 2 minutes, stirring occasionally. You’ll notice the sharp alcohol smell mellow into a softer, richer aroma.
Step 7: Add Broth, Lemon, and Capers
- Pour in the gluten-free chicken broth and stir to combine with the reduced wine.
- Add the freshly squeezed lemon juice, lemon zest, and drained capers to the pan.
- Stir everything together and bring the sauce to a gentle simmer. Cook for 2 to 3 minutes until slightly reduced and the flavors have melded together.
- Taste the sauce at this point — it should be brightly lemony with a savory, briny edge. If it’s too tart, add a pinch of sugar or a small knob of extra butter.
Step 8: Finish with Butter
- Remove the skillet from the heat entirely (this step is important — adding cold butter to a boiling sauce will cause it to break and become greasy rather than silky).
- Add the remaining 2 tablespoons of cold unsalted butter to the sauce, one tablespoon at a time, swirling the pan in a circular motion or whisking gently as each piece melts.
- This technique is called “mounting with butter” (monter au beurre) and it creates the glossy, emulsified texture that makes restaurant sauces taste so luxurious.
Step 9: Combine and Serve
- Return the cooked chicken breasts to the skillet, nestling them into the sauce.
- Spoon the lemon-caper sauce generously over each piece of chicken.
- Warm everything over low heat for about 1 minute — just long enough to reheat the chicken through without continuing to cook the sauce.
- Transfer the chicken to a serving platter or individual plates, pour the remaining sauce over the top, and garnish with fresh chopped parsley and thin lemon slices.
This recipe pairs beautifully with Garlic Mashed Potatoes for a satisfying and complete gluten-free dinner.
Tips for Success
A few small details can make a big difference in how this dish turns out, so keep these in mind before you start cooking.
- Use superfine rice flour. Regular rice flour can leave a slightly grainy texture on the chicken. Bob’s Red Mill Superfine or an equivalent product gives a much smoother crust.
- Pound the chicken evenly. An uneven thickness means one end will dry out before the other is cooked through. Take the extra 2 minutes to pound it properly.
- Let the pan get hot before adding oil. A properly preheated stainless steel pan helps prevent the chicken from sticking and ensures a proper sear rather than a steam.
- Don’t skip the cold butter finish. Adding cold butter off the heat is what creates that silky, restaurant-style sauce. Warm or room-temperature butter will not emulsify properly.
- Use dry wine, not sweet. Sweet wine will make the sauce cloying. Pinot Grigio, Sauvignon Blanc, or unoaked Chardonnay all work perfectly.
- Taste and adjust. The balance of lemon, capers, and butter is personal — taste the sauce before adding the chicken back and adjust with more lemon juice, a pinch of salt, or an extra tablespoon of butter.
- Don’t overcrowd the pan. Crowding lowers the pan temperature and causes the chicken to steam rather than sear, resulting in a pale, soft coating.
You might also love this Lemon Chicken Recipe if you enjoy bright citrus-forward chicken dishes.
Serving Suggestions
Chicken piccata is endlessly versatile — the bright, buttery sauce pairs well with a wide variety of sides.
The light lemon-caper sauce shines against neutral, starchy sides that can soak it up without competing with the bright flavors.
For a fully gluten-free spread, opt for rice-based or potato-based accompaniments over pasta — though certified gluten-free pasta is a wonderful option too.
- Garlic Mashed Potatoes — rich and creamy, perfect for soaking up every drop of that sauce
- Roasted Broccoli — the caramelized, slightly crispy edges hold up well alongside the bright sauce
- Roasted Potatoes — simple and satisfying with good olive oil and herbs
- Chicken Fried Rice — a hearty gluten-free grain option alongside the piccata
- Steamed jasmine rice — a clean, simple base that lets the sauce be the star
- Gluten-free angel hair or spaghetti — if you want the classic Italian restaurant presentation
- A simple green salad with lemon vinaigrette to echo the flavors of the sauce
- Steamed asparagus tossed with a little olive oil and salt
For a lighter, more refreshing starter before this main dish, try this Broccoli Salad.
Variations to Try
Once you’ve made the classic version, there are plenty of delicious ways to change things up.
- Creamy version: After finishing the sauce with butter, stir in 3 to 4 tablespoons of heavy cream or full-fat coconut cream for a dairy-inclusive or dairy-free creamy twist. This is especially good over pasta.
- Shrimp piccata: Replace the chicken with large peeled and deveined shrimp. The shrimp only need 2 minutes per side, so the cooking process is much faster.
- Veal piccata: This is actually the original Italian version of the dish. Use pounded veal cutlets in place of chicken and follow the same method exactly.
- Add artichoke hearts: Stir in a handful of quartered canned artichoke hearts to the sauce along with the capers for an extra layer of savory flavor.
- With white beans: Add a can of drained, rinsed cannellini beans to the sauce for a heartier, more filling dish that still feels light and bright.
- Dairy-free version: Substitute the butter with a high-quality dairy-free butter alternative or use extra-virgin olive oil for the sauce finish. The texture will be slightly different but still delicious.
- Herb-forward version: Add a tablespoon of fresh thyme leaves and a handful of baby spinach to the sauce just before finishing with butter for a more complex, herbaceous flavor profile.
For another fun twist on Italian-American chicken, take a look at the Copycat Giada Chicken Piccata for a celebrity-inspired version of this dish.
Storage and Reheating
Leftovers store well and the flavors actually deepen overnight, making this a great dish to make ahead.
- Refrigerate: Store the chicken and sauce together in an airtight container in the refrigerator for up to 3 days.
- Freeze: Chicken piccata can be frozen for up to 2 months. The sauce may separate slightly upon thawing but will come back together with gentle stirring while reheating.
- Reheat on the stovetop: Place the chicken and sauce in a skillet over low to medium-low heat. Add a splash of chicken broth or water to loosen the sauce if it has thickened in the fridge. Heat gently for 4 to 5 minutes until warmed through.
- Reheat in the microwave: Cover the dish with a microwave-safe lid or damp paper towel and heat in 30-second intervals on medium power, stirring the sauce between intervals, until hot throughout.
- Avoid high heat when reheating: High heat will cause the butter sauce to break and become greasy rather than silky. Low and slow is the key for leftovers.
- Store the sauce separately if possible: If you’re planning ahead, storing the sauce in a separate container from the chicken helps preserve the crispness of the coating during refrigeration.
Read Also: Chicken Piccata Recipe with Pasta
Nutritional Facts
The following nutritional information is an estimate based on one serving (one chicken breast with sauce), calculated using standard ingredients. Exact values will vary depending on the specific brands used.
| Nutrient | Per Serving |
|---|---|
| Calories | ~385 kcal |
| Total Fat | 22g |
| Saturated Fat | 8g |
| Cholesterol | 115mg |
| Sodium | 610mg |
| Total Carbohydrates | 12g |
| Fiber | 0.5g |
| Sugars | 1g |
| Protein | 36g |
This recipe is naturally gluten-free, low in sugar, and a good source of lean protein. Using olive oil in place of some of the butter can reduce saturated fat if desired.
For a lighter take that still satisfies, you might enjoy the Healthy Chicken Piccata Recipe which trims the calories without losing the bright flavor.
Health Benefits of Key Ingredients
This recipe isn’t just delicious — it’s packed with ingredients that offer real nutritional value.
The combination of chicken, lemon, capers, olive oil, and garlic makes this dish a genuinely nourishing meal.
- Chicken breast is one of the leanest animal proteins available, providing roughly 36 grams of protein per serving with minimal saturated fat — essential for muscle maintenance, satiety, and metabolic function.
- Lemon juice is rich in vitamin C, a powerful antioxidant that supports immune function, skin health, and iron absorption. The citric acid in lemon also supports digestive enzyme activity.
- Capers are a surprisingly nutritious ingredient — they contain quercetin, a natural antioxidant and anti-inflammatory compound. They’re also a source of vitamin K, which supports bone health and proper blood clotting.
- Garlic has well-documented antimicrobial and cardiovascular benefits. It contains allicin, a sulfur compound that supports immune function and has been linked to reduced blood pressure in some studies.
- Extra-virgin olive oil is the cornerstone of the Mediterranean diet for good reason. It’s rich in monounsaturated fats and contains oleocanthal, a natural compound with anti-inflammatory properties similar to ibuprofen.
- Rice flour is a naturally gluten-free grain flour that is easy to digest and lower in fiber than whole wheat — making it a good choice for those with gluten sensitivity or celiac disease without sacrificing the satisfying texture of a dredged chicken cutlet.
This dish makes a beautifully balanced meal with a side of Roasted Brussels Sprouts with Bacon for an extra hit of fiber and antioxidants.
Frequently Asked Questions
1. What is the best gluten-free flour for chicken piccata?
Fine white rice flour is the best substitute for all-purpose flour in chicken piccata. It creates a light, golden crust that doesn’t turn gummy when it hits the sauce. Adding 2 tablespoons of arrowroot starch or cornstarch to the rice flour further improves the crispness of the coating. Avoid almond flour or coconut flour for this recipe, as they brown too quickly and have strong flavors that compete with the delicate piccata sauce.
2. Can I make gluten free chicken piccata without wine?
Yes, absolutely. Simply substitute the white wine with an equal amount of additional gluten-free chicken broth and add an extra tablespoon of lemon juice to replace the acidity the wine provides. The sauce won’t have quite the same depth, but it will still be delicious. A small splash of white wine vinegar (about 1 teaspoon) can also help replicate some of that wine acidity.
3. How do I keep the coating from falling off the chicken?
A few things help: first, make sure the chicken is patted completely dry before dredging — moisture is the main enemy of a good crust. Second, shake off all the excess flour before adding the chicken to the pan. Third, make sure the oil and butter are properly hot (shimmering) before adding the chicken, and resist the urge to move it before it naturally releases from the pan. If you try to flip it before it’s ready, the coating will tear.
4. Is chicken piccata traditionally gluten-free?
The classic Italian-American version of chicken piccata uses all-purpose wheat flour for dredging, so it is not traditionally gluten-free. However, the rest of the sauce — lemon, capers, butter, wine — is naturally gluten-free. The adaptation with rice flour and arrowroot starch is so seamless that most people cannot tell the difference from the original.
5. Can I use chicken thighs instead of breasts?
Yes, boneless, skinless chicken thighs work beautifully in this recipe. They are slightly fattier than breasts, which makes them more forgiving if slightly overcooked, and they have a deeper, more savory flavor. Pound them to an even ½-inch thickness just as you would the breasts. The cooking time will be similar — about 4 to 5 minutes per side depending on thickness — and they should still reach an internal temperature of 165°F (74°C).
Read Also: White Wine Chicken Piccata
Gluten Free Chicken Piccata
Equipment
- Large skillet (12-inch / 30 cm) - Preferably stainless steel or well-seasoned cast iron
- Meat mallet or rolling pin - For pounding chicken to even thickness
- Shallow dish or plate - For dredging
- Cutting board
- Sharp knife
- Whisk
- Citrus juicer or reamer
- Measuring cups and spoons
- Tongs
Ingredients
- 4 boneless, skinless chicken breasts - about 6 oz / 170g each, pounded to ½ inch / 1.2 cm thickness
- ½ cup fine white rice flour - 65g
- 2 tablespoons arrowroot starch - or cornstarch
- 1 teaspoon kosher salt - divided
- ½ teaspoon freshly ground black pepper
- 3 tablespoons extra-virgin olive oil - divided
- 3 tablespoons unsalted butter - divided
- 4 cloves garlic - thinly sliced
- ½ cup dry white wine - 120ml, such as Pinot Grigio or Sauvignon Blanc
- ½ cup gluten-free chicken broth - 120ml
- 3 tablespoons freshly squeezed lemon juice - about 1½ lemons
- 1 tablespoon lemon zest
- 3 tablespoons capers - drained and rinsed
- 2 tablespoons fresh flat-leaf parsley - chopped, for garnish
- Lemon slices - for serving
For Serving (Suggested)
- Garlic Mashed Potatoes - or steamed jasmine rice
- Roasted broccoli or asparagus - or simple green salad with lemon vinaigrette
Instructions
- Pound chicken breasts to even ½-inch thickness, then season both sides with salt and pepper.
- Whisk rice flour, arrowroot starch, ½ teaspoon salt, and pepper in a shallow dish. Dredge each chicken breast, shaking off excess flour.
- Heat olive oil and 1 tablespoon butter in a large skillet over medium-high heat. Sear chicken for 3-4 minutes per side until golden brown and cooked through. Transfer to a plate and tent with foil.
- Reduce heat to medium, add remaining olive oil and sliced garlic. Cook for 60 seconds until fragrant and lightly golden.
- Add white wine to deglaze the pan, scraping up browned bits. Simmer until reduced by half, about 2 minutes.
- Add chicken broth, lemon juice, lemon zest, and capers. Bring to a gentle simmer for 2-3 minutes to meld the flavors.
- Remove from heat and swirl in remaining 2 tablespoons cold butter until emulsified and glossy.
- Return chicken to the skillet, spoon sauce over the top, and warm over low heat for 1 minute. Garnish with parsley and lemon slices before serving.
Notes
- Use superfine rice flour for the smoothest, least grainy coating on the chicken.
- Pound the chicken to an even thickness to ensure it cooks uniformly without drying out thinner edges.
- Make sure your skillet is properly preheated before adding oil and chicken to prevent sticking and achieve a good sear.
- Add cold butter off the heat for a silky, emulsified restaurant-style sauce (monter au beurre).
- For a dairy-free version, substitute the butter with a high-quality dairy-free butter alternative or olive oil for the sauce finish.
- To make this creamy, stir in 3-4 tablespoons of heavy cream or coconut cream after finishing with butter.
- If you don’t have wine, substitute with additional chicken broth and a splash of white wine vinegar.
- Store leftovers in an airtight container in the refrigerator for up to 3 days. Reheat gently over low heat to avoid breaking the sauce.
- This dish is excellent over gluten-free pasta, rice, or with roasted vegetables.
Final Thoughts
This gluten free chicken piccata recipe proves that going wheat-free doesn’t mean giving up the dishes you love most. The bright lemon-caper butter sauce, the golden crispy coating, the tender chicken — it’s all here, fully intact, and ready in about 30 minutes.
Once you make this at home, you’ll understand why chicken piccata has been a beloved Italian-American staple for decades. The simplicity of the technique combined with the bold, vibrant flavors of the sauce makes it endlessly satisfying.
Give it a try this week, and let me know in the comments how it turned out! Did you serve it over pasta? Try a variation? I’d love to hear your take — and if you loved it, share it with a friend who eats gluten-free.
Recommended:
- Authentic Italian Chicken Piccata
- Copycat Ina Garten Chicken Piccata
- Copycat Cheesecake Factory Chicken Piccata
- The Best Easy Chicken Piccata
- Copycat Geoffrey Zakarian Chicken Piccata
- Chicken Marsala
- Classic Chicken Parmesan
- Chicken Cacciatore
- Chicken Skillet Recipe
- Lemon Chicken Orzo Soup


