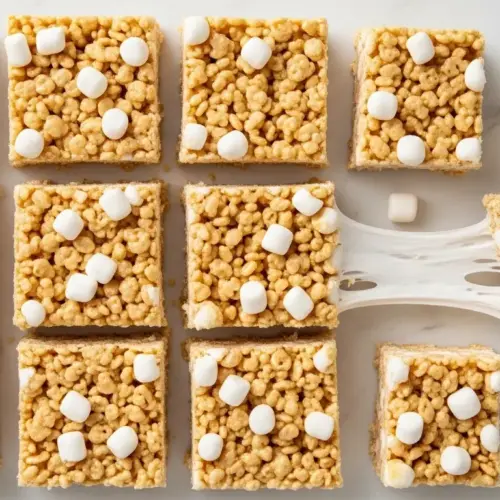
If you’ve ever grabbed a copycat Starbucks rice krispie treat recipe to recreate those dreamy marshmallow-studded bars at home, you already know the obsession is real. Starbucks called them Marshmallow Dream Bars, and for good reason. They’re thicker, softer, and loaded with gooey pockets of whole mini marshmallows that regular homemade treats just don’t have.
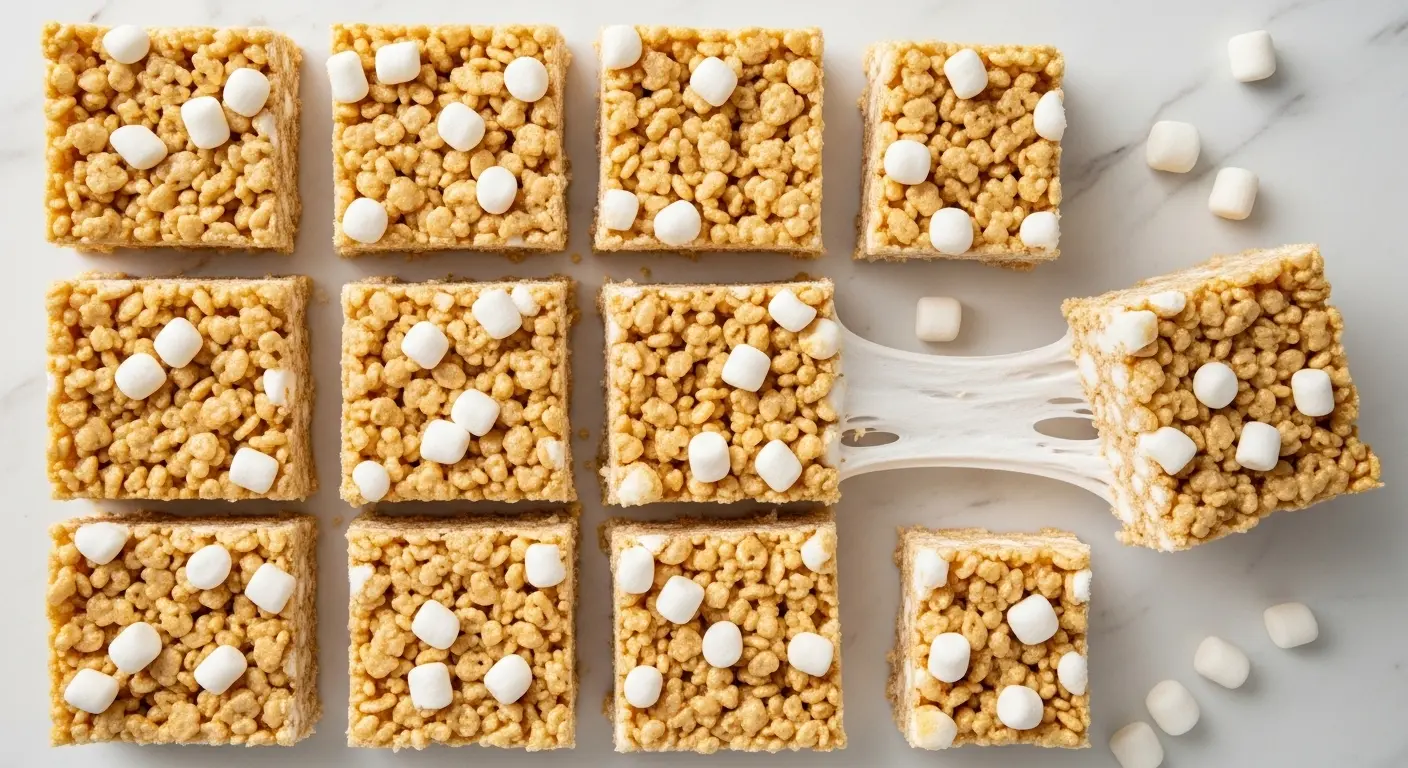
The secret is a two-part marshmallow strategy: you melt one portion into the base to create that rich, sticky coating, then fold in a second portion of unmelted mini marshmallows right at the end. Those unmelted marshmallows barely warm through, leaving soft, cloud-like pockets in every single bite.
The other thing that sets this recipe apart from a standard treat? Light corn syrup. It’s the ingredient most home bakers skip, but it’s what keeps these bars soft and chewy for days instead of turning stiff and crumbly by the next morning.
No baking required, just five simple ingredients, and you’ll have a pan of these on your counter in about 20 minutes flat.
If you love this kind of thick, gooey treat, you’ll want to bookmark the Gooey Rice Krispie Treat Recipe too.
Why You’ll Love This Copycat Starbucks Rice Krispie Treat Recipe
This recipe delivers everything that made the original Starbucks version so irresistible, and you can make a full pan at home for a fraction of the price.
The extra marshmallows are the star of the show. Unlike a standard rice krispie treat where all the marshmallows get fully melted, this recipe reserves a big handful to fold in at the end, creating soft, pillowy bursts of marshmallow in every square.
The addition of corn syrup is a total texture upgrade. It keeps the bars flexible and chewy instead of dense and hard, which means they stay delicious well into day two and day three.
You only need five pantry-staple ingredients, and the whole recipe comes together in about 20 minutes with zero oven time.
- No baking required
- Thick, satisfying bars just like the Starbucks original
- Extra marshmallows folded in for gooey pockets throughout
- Corn syrup keeps them soft and chewy for days
- Kid-friendly, crowd-pleasing, and endlessly customizable
- Ready in 20 minutes from start to finish
- Makes a generous batch perfect for parties, bake sales, or gifting
Read Also: Original Rice Krispie Treat Recipe
Ingredients
You only need five ingredients to nail this recipe, but quality matters. Use fresh marshmallows for the best results. Stale or opened marshmallows will make the treats dense and hard instead of soft and gooey.
- 6 cups (168g) Rice Krispies cereal (or any puffed rice cereal)
- 3 tablespoons (42g) unsalted butter
- 1 tablespoon (15ml) light corn syrup
- 15 oz (425g) mini marshmallows, divided (reserve 5 oz / 140g for folding in at the end)
- 1 teaspoon pure vanilla extract
Another favorite treat: Peanut Butter Rice Krispie Treat Recipe
Kitchen Equipment Needed
You don’t need any special equipment for this recipe, but a good heavy-bottomed pot makes a huge difference. It distributes heat evenly so the marshmallows melt gently without scorching.
- 9×9 inch baking pan (for thicker bars like the Starbucks original) or 9×13 inch pan for thinner bars
- Large heavy-bottomed pot or Dutch oven
- Rubber spatula (heat-resistant, lightly greased)
- Non-stick cooking spray
- Parchment paper or wax paper (optional, for easy removal)
- Measuring cups and spoons
Read Also: Easy Rice Krispie Treat Recipe
Recommended Products for This Recipe
These are products I genuinely recommend based on quality and how much they improve the final result.
1. Lodge Enameled Cast Iron Dutch Oven
A heavy Dutch oven distributes heat incredibly evenly, which is key for gently melting marshmallows without burning. Scorched marshmallows give the treats a bitter, caramelized flavor that throws off the whole batch. This is the pot I reach for every single time I make these.
2. USA Pan 9×9 Inch Baking Pan
The squared edges on this pan create beautifully neat bar shapes, and the non-stick surface releases the treats cleanly every time. Cheap pans can warp slightly, making it hard to cut even squares.
3. Jet-Puffed Mini Marshmallows
Fresh, name-brand mini marshmallows melt more smoothly and stay softer than store-brand alternatives. The reserved unmelted marshmallows also stay fluffier in the finished bar, which is exactly what you want.
4. Nielsen-Massey Pure Vanilla Extract
Pure vanilla extract (not imitation) makes a noticeable difference in the flavor of these bars. Nielsen-Massey is a consistently excellent brand with a clean, rich vanilla flavor that really shines through.
You might also enjoy: Rice Krispie Treat Recipe with Marshmallow Fluff
Step-by-Step Instructions
Step 1: Prepare Your Pan and Measure Everything Out
- Spray your 9×9 inch baking pan thoroughly with non-stick cooking spray, making sure to coat the bottom and sides completely. You can also line it with parchment paper and then spray the paper for the easiest removal.
- Measure out 6 cups (168g) of Rice Krispies cereal and add them to a large mixing bowl. Set aside.
- Divide your mini marshmallows: place approximately 10 oz (285g) in one bowl for melting, and reserve the remaining 5 oz (140g) in a separate bowl. The reserved marshmallows go in at the end and stay whole, creating those signature gooey pockets.
- Have your butter, corn syrup, and vanilla extract measured and ready before you start melting, because things move quickly once the heat goes on.
Step 2: Melt the Butter and Corn Syrup
- Add the 3 tablespoons (42g) of unsalted butter to your large heavy-bottomed pot.
- Pour in 1 tablespoon (15ml) of light corn syrup.
- Place the pot over medium heat. Stir occasionally as the butter melts.
- Allow the butter and corn syrup to come together into a combined, smooth liquid, about 1 to 2 minutes. Do not let the butter brown at this stage. You want a golden-yellow mixture, not a nutty brown one (save browning for another variation).
- Keep the heat at medium, not medium-high. High heat is the enemy of smooth marshmallow melting.
Step 3: Add the Marshmallows and Melt Gently
- Pour the 10 oz (285g) of marshmallows reserved for melting into the pot with the butter and corn syrup.
- Stir constantly with your greased rubber spatula, using gentle, sweeping motions that scrape the bottom of the pot.
- Continue stirring until the marshmallows are almost completely melted, about 3 to 5 minutes. A few small lumps are completely fine and will smooth out when you mix in the cereal.
- Remove the pot from the heat immediately once the marshmallows are mostly melted. Do not let them continue to bubble on the heat. Overcooked marshmallows become sticky and dense instead of soft and fluffy.
- Stir in the 1 teaspoon of pure vanilla extract. The mixture will be very thick and glossy.
Step 4: Combine the Cereal and Marshmallow Base
- Working quickly (the mixture starts to set as it cools), pour the entire contents of the cereal bowl into the pot with the marshmallow mixture.
- Use your greased spatula to fold and stir, making sure every piece of cereal gets coated with the marshmallow base.
- This takes about 60 to 90 seconds of vigorous stirring. Scrape the sides and bottom of the pot to incorporate all the marshmallow mixture.
- The cereal should look evenly coated and sticky throughout.
Step 5: Fold In the Reserved Marshmallows
- Add the reserved 5 oz (140g) of unmelted mini marshmallows to the pot.
- Gently fold them into the cereal mixture with just a few strokes of the spatula. You want them distributed throughout but not fully mixed in to the point of melting.
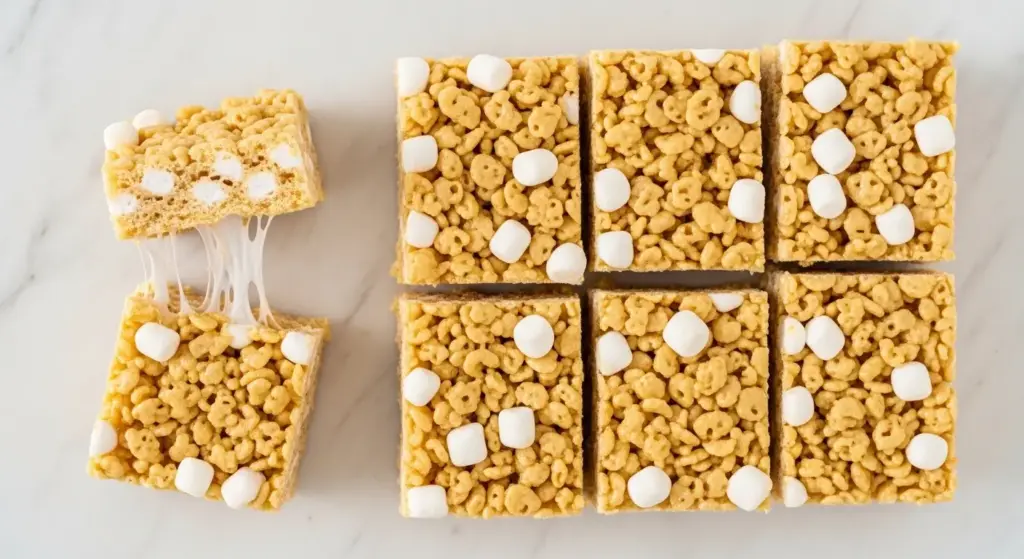
- The residual heat will soften them slightly on the outside, but the interior will stay pillowy and whole. This is the most important step for replicating the Starbucks texture. Those soft marshmallow pockets are what set this recipe apart.
Step 6: Transfer to the Pan and Set
- Scrape the mixture into your prepared 9×9 inch pan.
- Use your spatula to spread the mixture so it fills the pan evenly.
- Do NOT press down on the mixture. This is the single most common mistake people make. Pressing compacts the treats and makes them dense and hard to eat. Just gently spread and lightly smooth the top. It doesn’t have to look perfect.
- Allow the treats to sit at room temperature for at least 1 hour before cutting. Cutting too early means the bars won’t hold their shape.
- Once set, lift the parchment paper (if used) out of the pan and place on a cutting board. Cut into squares using a sharp knife lightly sprayed with cooking spray.
The Microwave Rice Krispie Treat Recipe is a great shortcut option if you’re short on time.
Tips for Success
A few small details make the difference between good rice krispie treats and exceptional ones that taste exactly like the Starbucks version.
- Use fresh marshmallows. This cannot be overstated. Old, dried-out marshmallows will make the treats stiff and crumbly. If you can pinch your marshmallows together and they spring back slightly, they’re fresh enough.
- Grease your spatula. Spray your rubber spatula with non-stick spray before stirring. This prevents the marshmallow from sticking to the spatula and making a mess, and it helps you work faster.
- Don’t skip the corn syrup. It’s just one tablespoon, but it creates a noticeably softer, chewier texture and prevents the bars from hardening overnight.
- Work quickly once the marshmallows are melted. The mixture sets fast. Have all your ingredients ready to go before you turn on the heat.
- Don’t press the bars down. Spread gently and leave them light and airy. Pressing = dense, tough bars.
- Let them cool for the full hour. It’s tempting to cut them early, but they need time to set properly or they’ll fall apart.
- Lightly spray your knife. Coat your knife blade with non-stick spray before cutting for clean, smooth edges.
You might also enjoy: Fruity Pebbles Rice Krispie Treat Recipe
Serving Suggestions
These bars are perfectly satisfying on their own, but there are so many fun ways to serve them.
Pair them with your morning coffee or afternoon latte exactly like you would at Starbucks. The sweetness of the bars balances beautifully with the bitterness of espresso.
Try drizzling the top of the bars with melted white chocolate or dark chocolate before the treats set for an elegant finishing touch.
- Serve alongside a Pumpkin Spice Latte for the ultimate Starbucks-at-home experience
- Package individual bars in cellophane bags tied with ribbon for bake sales or party favors
- Stack them on a dessert platter next to other no-bake treats for a party spread
- Cut them into small bite-sized pieces for a dessert grazing board
- Serve warm (microwave for 10 seconds) with a scoop of vanilla ice cream for an easy dessert
Read Also: Iced Pumpkin Spice Latte Recipe
Variations to Try
Once you master the base recipe, it’s easy to customize these treats with different flavors and mix-ins.
The corn syrup base and extra marshmallow method work beautifully with all kinds of tweaks, so feel free to experiment.
- Brown Butter Version: Let the butter cook for 2 to 3 extra minutes until it smells nutty and turns golden brown before adding the corn syrup. This adds a deep, caramel-like flavor to the bars.
- Chocolate Drizzle: Melt 1/2 cup of semi-sweet or white chocolate chips and drizzle over the set bars before slicing.
- Fruity Pebbles Swap: Replace half or all of the Rice Krispies cereal with Fruity Pebbles for a colorful, fruity version.
- Sprinkles: Fold 2 to 3 tablespoons of rainbow sprinkles into the mixture along with the reserved marshmallows for a festive birthday version.
- S’mores Style: Stir 1/2 cup of mini chocolate chips and 1/2 cup of crushed graham crackers into the cereal mixture for a s’mores-inspired treat.
- Peanut Butter: Add 2 tablespoons of creamy peanut butter to the melting butter and corn syrup stage for a nutty twist.
- Vegan Version: Use vegan butter, vegan marshmallows, and pure maple syrup instead of corn syrup.
Also try: Vegan Rice Krispie Treat Recipe
Storage and Reheating
These treats stay at their absolute best for about three days, but with proper storage they’ll last up to five days. The corn syrup is what keeps them from drying out the way traditional treats do.
- Room temperature: Store in an airtight container or wrap tightly with plastic wrap. Keeps well for 3 to 5 days. Do not refrigerate, as cold air makes the treats become hard and stiff.
- Layer with parchment: If stacking bars in a container, place a piece of parchment paper or wax paper between layers to prevent sticking.
- Freezing: Wrap individual bars tightly in plastic wrap, then place in a zip-top freezer bag. Freeze for up to 3 months. Thaw at room temperature for about 30 minutes before eating.
- Reheating: Microwave individual bars for 8 to 10 seconds to restore that soft, gooey texture. Don’t overheat or the marshmallows will melt and make the bars sticky and flat.
- Do not refrigerate: This point is worth repeating. The fridge is the enemy of rice krispie treats. Always store at room temperature.
Read Also: Single Serve Rice Krispie Treat Recipe
Nutritional Facts
Based on a 9×9 pan cut into 9 equal squares. Values are approximate.
| Nutrient | Per Serving (1 bar) |
|---|---|
| Calories | ~220 kcal |
| Total Fat | 4g |
| Saturated Fat | 2.5g |
| Cholesterol | 10mg |
| Sodium | 115mg |
| Total Carbohydrates | 45g |
| Sugars | 28g |
| Protein | 1g |
Nutritional information is an estimate only and will vary based on exact ingredient brands and portion sizes.
You might also enjoy: Rice Krispie Treat Recipe with Large Marshmallows
Health Benefits of Key Ingredients
These treats are definitely a dessert, not a health food, but a couple of the core ingredients do offer some modest nutritional value.
Enjoying these in moderation as an occasional treat is a perfectly balanced approach to a happy relationship with food.
- Rice Krispies cereal is fortified with several B vitamins including niacin, folic acid, and riboflavin, which support energy metabolism and cell function.
- Unsalted butter contains fat-soluble vitamins A, D, E, and K2, which support immune function and bone health.
- Mini marshmallows are primarily sugar and gelatin. Gelatin is a source of glycine, an amino acid that plays a role in gut health and sleep quality.
- Corn syrup provides a quick source of energy from carbohydrates and helps keep the texture soft and chewy, meaning you use less overall sugar compared to recipes that compensate with more marshmallows.
- Pure vanilla extract contains small amounts of antioxidants and has been studied for its potential anti-inflammatory properties, though the amounts in baking are quite small.
Read Also: No Bake Cookie Recipe
Frequently Asked Questions
1. What are Starbucks rice krispie treats called?
Starbucks sold these treats under the name “Marshmallow Dream Bars.” They were a popular grab-and-go snack item, beloved for being thicker and gooier than standard homemade rice krispie treats. They were available at Starbucks locations for years and inspired countless copycat recipes.
2. What makes this copycat recipe different from regular rice krispie treats?
The biggest differences are the addition of corn syrup and the two-part marshmallow method. Corn syrup keeps the bars soft and chewy for days instead of getting hard by the next morning. The reserved unmelted marshmallows folded in at the end create soft, cloud-like pockets throughout the bars, which is the signature texture of the Starbucks version.
3. Can I make these without corn syrup?
Yes, you can omit the corn syrup and the treats will still taste great. However, they will firm up faster and may lose their soft, chewy texture more quickly, especially by the next day. If you prefer to skip corn syrup, you can substitute honey, though it will add a slightly floral flavor to the bars.
4. Why are my rice krispie treats hard and dense?
The two most common culprits are pressing the mixture down into the pan and cooking the marshmallows over too high a heat. Pressing compresses the air out of the mixture, making the bars dense and tough. Overheating the marshmallows causes them to break down and create a stiff, sticky coating instead of a soft, fluffy one. Also check that your marshmallows were fresh and not stale, as old marshmallows will produce hard treats.
5. Can I double this recipe to make a larger batch?
Absolutely. To make a larger batch, double all the ingredients and use a 9×13 inch pan instead of a 9×9 inch pan. The bars will be slightly thinner but will still have that gooey, marshmallow-studded texture. You can also keep the same amounts and use a 9×9 pan for extra-thick bars, just expect them to take a little longer to set.
Read Also: Monster Cookie Bars Recipe
Copycat Starbucks Rice Krispie Treats (Marshmallow Dream Bars)
Equipment
- 9×9 inch baking pan - for thicker bars like the Starbucks original
- Large heavy-bottomed pot or Dutch oven - distributes heat evenly to prevent scorching
- Heat-resistant rubber spatula - lightly greased with non-stick spray
- Non-stick cooking spray
- Parchment paper or wax paper - optional, for easy removal
- Measuring cups and spoons
- Sharp knife - lightly sprayed with cooking spray for clean cuts
Ingredients
- 6 cups Rice Krispies cereal - 168g, or any puffed rice cereal
- 3 tablespoons unsalted butter - 42g
- 1 tablespoon light corn syrup - 15ml
- 15 oz mini marshmallows, divided - 425g total; 10 oz (285g) for melting, 5 oz (140g) reserved for folding in at the end
- 1 teaspoon pure vanilla extract
Instructions
- Spray a 9×9 inch baking pan thoroughly with non-stick spray. Measure 6 cups of Rice Krispies into a large bowl. Divide marshmallows: 10 oz for melting, 5 oz reserved.
- In a large heavy-bottomed pot over medium heat, melt the butter and corn syrup together, stirring occasionally, until smooth and combined, about 1-2 minutes. Do not let the butter brown.
- Add the 10 oz of marshmallows to the pot. Stir constantly with a greased spatula until almost completely melted, 3-5 minutes. Remove from heat immediately. Stir in vanilla extract.
- Working quickly, pour the cereal into the marshmallow mixture. Fold and stir vigorously for 60-90 seconds until every piece is evenly coated, scraping the sides and bottom.
- Add the reserved 5 oz of unmelted mini marshmallows. Gently fold with a few strokes, just until distributed. Do not overmix or the marshmallows will melt.
- Scrape the mixture into the prepared pan. Gently spread and smooth the top without pressing down. Let set at room temperature for at least 1 hour before cutting.
- Lift the parchment paper out of the pan. Cut into squares with a lightly sprayed sharp knife for clean edges.
Notes
- Use fresh marshmallows for the best results. Stale or opened marshmallows will make the treats dense and hard instead of soft and gooey.
- Grease your spatula with non-stick spray before stirring to prevent the marshmallow from sticking.
- Don’t skip the corn syrup! It’s just one tablespoon, but it creates a noticeably softer, chewier texture and prevents the bars from hardening overnight.
- Work quickly once the marshmallows are melted. The mixture sets fast, so have all your ingredients ready before turning on the heat.
- Do NOT press down on the mixture when transferring to the pan. Pressing compacts the treats and makes them dense and hard.
- Let them cool for the full hour before cutting. Cutting too early means the bars won’t hold their shape.
- Store in an airtight container at room temperature for 3-5 days. Do not refrigerate, as cold air makes the treats become hard and stiff.
- Freeze individual bars wrapped tightly in plastic wrap and placed in a zip-top freezer bag for up to 3 months. Thaw at room temperature for about 30 minutes.
- Microwave individual bars for 8-10 seconds to restore that soft, gooey texture. Don’t overheat or the marshmallows will melt and make the bars sticky.
- Try variations like browning the butter for a nutty flavor, drizzling with chocolate, or swapping in Fruity Pebbles for a colorful twist.
Final Thoughts
These copycat Starbucks rice krispie treats are one of those recipes that delivers far more than its short ingredient list suggests.
Two types of marshmallows, a tablespoon of corn syrup, and the rule about not pressing down are the three things standing between you and the best rice krispie treat you’ve ever had.
Make a batch this weekend and see for yourself. They come together in 20 minutes and disappear even faster.
If you try this recipe, leave a comment below and let us know how it turned out. Drop any fun variations you tried too, because this community always has the best ideas.
Recommended:
- Rice Krispie Treat Recipe with Marshmallow Fluff
- Easy Rice Krispie Treat Recipe
- Best Chocolate Chip Cookies Recipe
- Chewy Chocolate Chip Cookies Recipe
- No Bake Cookie Recipe
- Monster Cookie Recipe
- Peanut Butter Cookie Recipe
- Oatmeal Cookie Recipe
- Snickerdoodle Cookie Recipe
- Cake Pop Recipe


