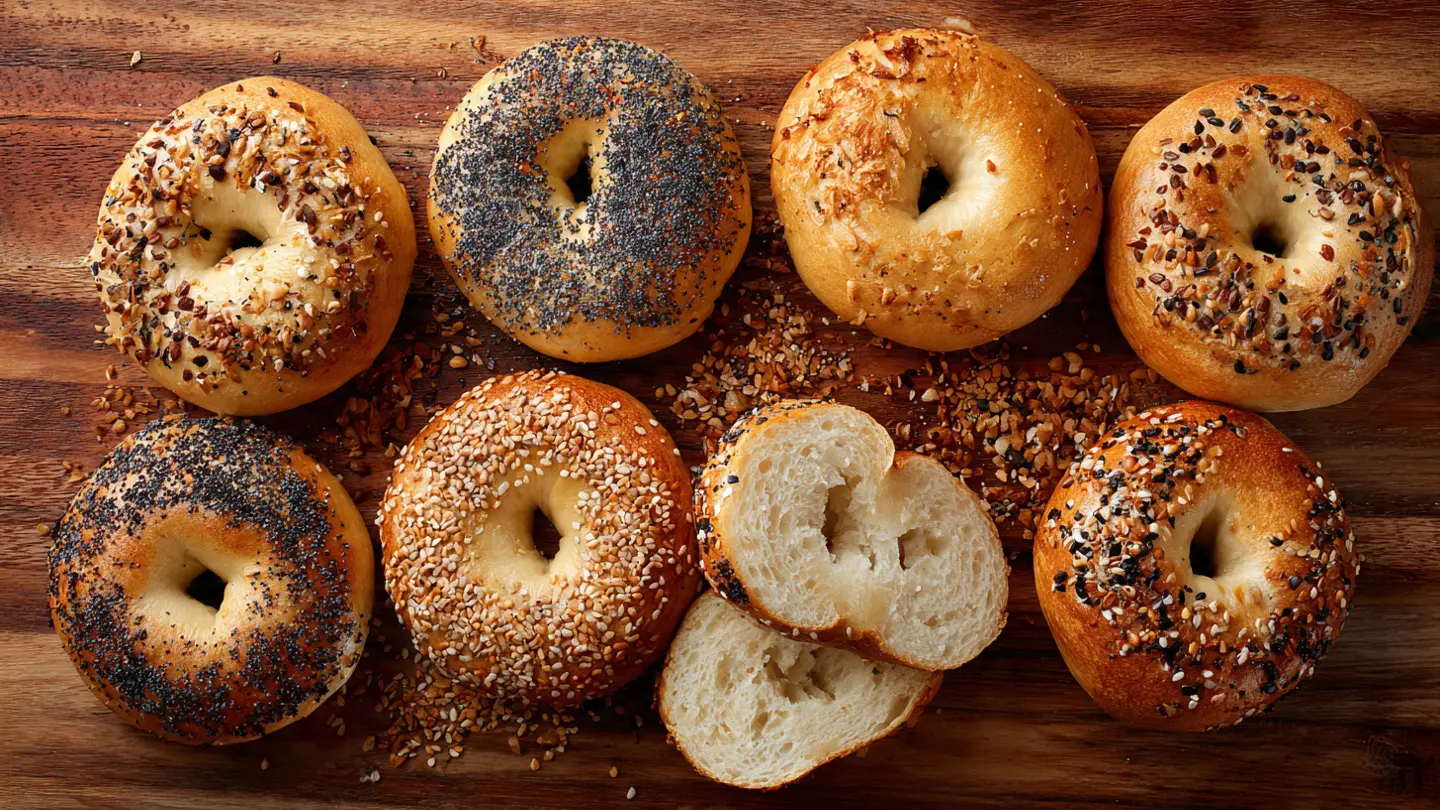
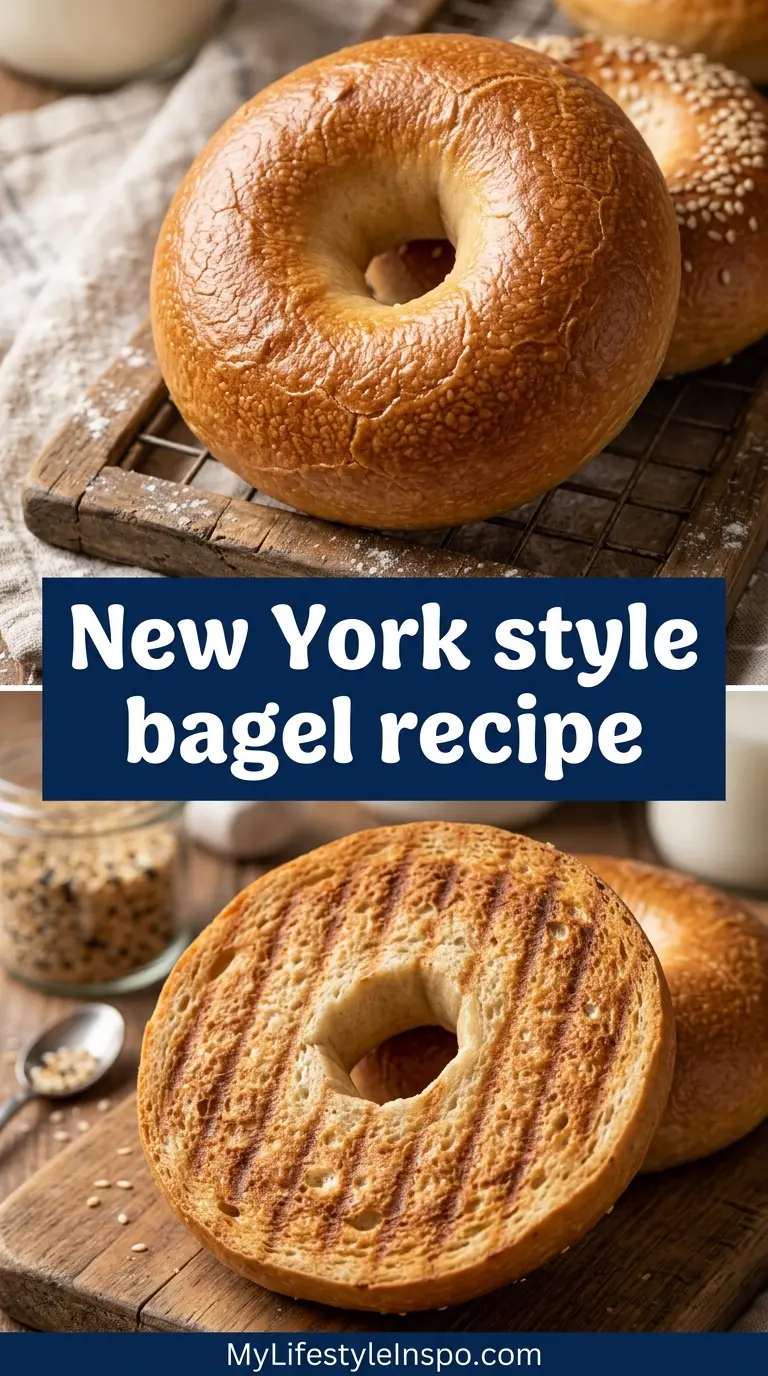
Nothing beats biting into a fresh New York style bagel recipe with that signature crispy exterior and satisfying chewy interior. These homemade bagels bring authentic deli quality straight to your kitchen with simple ingredients and a rewarding process.
Making bagels at home might sound intimidating, but this recipe breaks everything down into manageable steps. The secret lies in the traditional boiling technique, which creates that distinctive shiny crust and dense texture that sets New York bagels apart from ordinary bread rolls.
The beauty of this recipe is its flexibility. You can prepare the dough the same day for fresh bagels in just a few hours, or let it rest overnight in the refrigerator for even deeper flavor development.
What makes these bagels truly special is the combination of bread flour and a proper boiling step. The high protein content in bread flour creates the characteristic chewiness, while the quick water bath gelatinizes the exterior starches, resulting in that gorgeous glossy finish everyone loves.
I’ve tested this recipe dozens of times to perfect the ratio of ingredients and timing. The dough should be firm but pliable, and shaping the bagels by hand gives you complete control over their size and thickness.

Why You’ll Love This New York Style Bagel Recipe
This recipe delivers bakery-quality results without requiring any specialty equipment or hard-to-find ingredients. You’ll achieve that authentic New York bagel texture using items already in your pantry.
The boiling process is what sets these apart from regular bread. It creates a protective shell that keeps the interior dense and chewy while developing that signature shiny crust. Once you taste the difference, you’ll never go back to store-bought bagels.
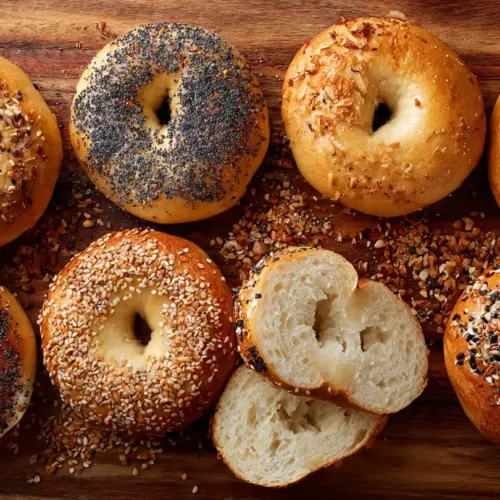
- Authentic texture: Dense, chewy interior with a thin crispy crust
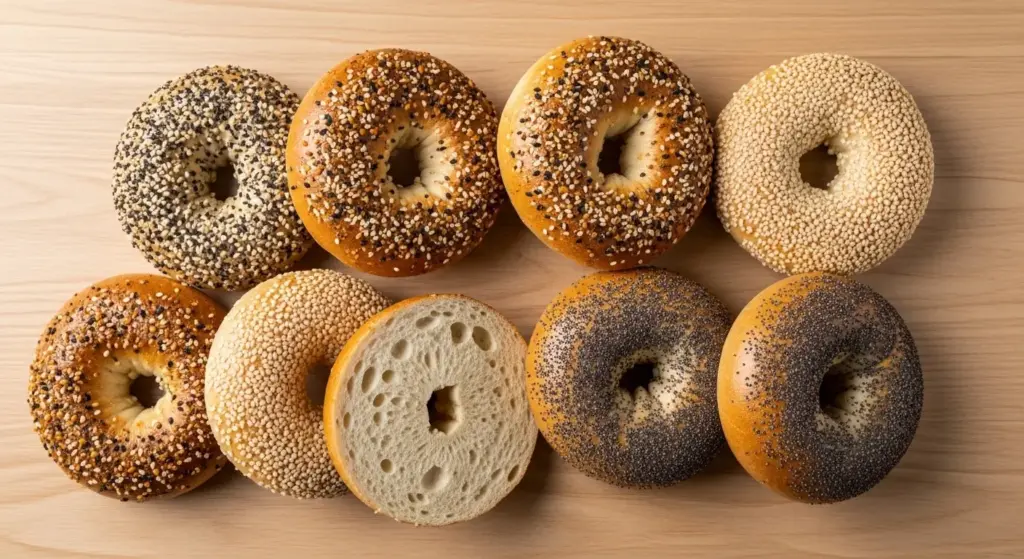
- Customizable toppings: Everything seasoning, sesame seeds, poppy seeds, or plain
- Make-ahead friendly: Prepare dough the night before and bake fresh in the morning
- Cost-effective: Makes 8 large bagels for a fraction of bakery prices
- Freezer-friendly: Bake a big batch and freeze for quick breakfasts
- Impressively delicious: Friends and family will think you ordered from a New York deli
Another favorite: Air Fryer French Toast Recipe
Ingredients
This recipe uses straightforward ingredients that work together to create the perfect bagel texture. Bread flour is essential here because its higher protein content develops the gluten structure needed for that characteristic chew.
For the Dough:
- 1 1/3 cups (315ml) warm water (110°F/43°C)
- 2 1/4 teaspoons (7g) active dry yeast (1 standard packet)
- 1 tablespoon granulated sugar
- 4 cups (500g) bread flour, plus extra for dusting
- 2 teaspoons kosher salt
- 1 tablespoon honey or brown sugar
For Boiling:
- 8 cups (1.9L) water
- 2 tablespoons brown sugar or honey
- 1 tablespoon baking soda
For Topping:
- 1 egg beaten with 1 tablespoon water (egg wash)
- Everything bagel seasoning, sesame seeds, poppy seeds, coarse salt, or leave plain
You might also enjoy: Breakfast Casserole Recipe
Kitchen Equipment Needed
Having the right tools makes the bagel-making process smoother and more enjoyable. Most of these items are standard kitchen equipment, but a few key pieces will help you achieve professional results.
- Stand mixer with dough hook attachment (or mix by hand)
- Large mixing bowl
- Kitchen scale for accurate measurements (optional but helpful)
- Clean kitchen towels or plastic wrap
- Large stockpot or Dutch oven for boiling
- Slotted spoon or spider strainer
- Two large baking sheets
- Parchment paper or silicone baking mats
- Pastry brush for egg wash
- Cooling rack
Read Also: Cloud Eggs Recipe
Recommended Products for This Recipe
These carefully selected products will help you achieve the best possible results with your homemade bagels. Each recommendation addresses a specific need in the recipe and enhances the final product.
1. King Arthur Bread Flour
This premium bread flour contains 12.7% protein, which is ideal for developing the strong gluten network bagels need. The consistent quality ensures your bagels turn out perfectly chewy every time. Many professional bakers swear by this brand for all their bread-making needs.
2. Large Stainless Steel Stockpot
A quality stockpot with at least 8-quart capacity gives you plenty of room to boil multiple bagels at once without crowding. The stainless steel construction distributes heat evenly and won’t react with the baking soda in your boiling water.
3. Nordic Ware Natural Aluminum Baking Sheets
These half-sheet pans heat evenly and won’t warp in high oven temperatures. The natural aluminum finish promotes excellent browning on the bottom of your bagels without any hot spots that could cause uneven baking.
4. Everything Bagel Seasoning Blend
This popular seasoning combines sesame seeds, poppy seeds, dried garlic, dried onion, and salt flakes for that classic everything bagel flavor. Having a pre-mixed blend saves time and ensures consistent results.
This pairs beautifully with Air Fryer Egg Bites Recipe for a complete breakfast.
Step-by-Step Instructions
Follow these detailed steps to create authentic New York style bagels at home. Each phase builds on the previous one, so take your time and don’t rush the process.
1. Activate the Yeast
- Add warm water (110°F/43°C) to the bowl of your stand mixer or a large mixing bowl
- Sprinkle the yeast over the water surface
- Add 1 tablespoon sugar to the water
- Stir gently and let sit for 5-7 minutes until foamy and bubbly
- If the mixture doesn’t foam, your yeast is dead and you’ll need to start over with fresh yeast
- The water temperature is critical; too hot kills the yeast, too cold won’t activate it
2. Mix the Dough
- Add bread flour and salt to the yeast mixture
- Drizzle honey over the flour
- Using the dough hook attachment on low speed, mix until ingredients come together (about 2 minutes)
- Increase to medium speed and knead for 8-10 minutes until dough is smooth and elastic
- The dough should be quite stiff and pull away from the bowl sides
- If mixing by hand, combine ingredients with a wooden spoon, then knead on a floured surface for 10-12 minutes
- Add small amounts of flour if dough is too sticky, but keep it slightly tacky
3. First Rise
- Lightly oil a clean large bowl
- Form the dough into a smooth ball and place it in the oiled bowl
- Turn the dough to coat all sides with oil
- Cover tightly with plastic wrap or a damp kitchen towel
- Let rise in a warm, draft-free spot for 60-90 minutes until nearly doubled in size
- A good warm spot is an oven with just the light on
- The dough is ready when you can poke it with your finger and the indentation remains
4. Divide and Shape the Dough
- Line two baking sheets with parchment paper and lightly dust with flour
- Punch down the risen dough to release air bubbles
- Turn dough onto a lightly floured surface
- Divide into 8 equal pieces (about 110g each for consistent sizing)
- Take one piece and roll it into a smooth ball
- Poke your finger through the center of the ball to create a hole
- Gently stretch and rotate the dough around your fingers to create a 2-inch (5cm) diameter hole
- The hole will shrink during rising and baking, so make it larger than you think necessary
- Place shaped bagel on the prepared baking sheet
- Repeat with remaining dough pieces, spacing them 2 inches apart
5. Second Rise
- Cover shaped bagels loosely with plastic wrap or a clean kitchen towel
- Let rest for 15-20 minutes at room temperature
- For overnight bagels, place the covered baking sheets in the refrigerator for 8-12 hours
- If refrigerating, remove bagels 30 minutes before boiling to take off the chill
- Bagels are ready when they feel slightly puffy but not fully doubled
6. Prepare the Boiling Water
- Fill your large stockpot with 8 cups of water
- Add brown sugar or honey and baking soda
- Bring to a rolling boil over high heat
- Reduce heat to maintain a steady simmer
- The baking soda helps the bagels develop a darker, shinier crust
- The sugar or honey adds subtle flavor and promotes browning
7. Boil the Bagels
- Preheat oven to 425°F (220°C) while water comes to a boil
- Gently lower 2-3 bagels into the simmering water using a slotted spoon
- Don’t overcrowd the pot; bagels need room to float freely
- Boil for 60-90 seconds on the first side
- Flip with the slotted spoon and boil for another 60-90 seconds on the second side
- Longer boiling times create a thicker, chewier crust
- Remove with slotted spoon and let excess water drain
- Place boiled bagels back on the parchment-lined baking sheets
- Repeat with remaining bagels
8. Apply Egg Wash and Toppings
- Beat one egg with 1 tablespoon water in a small bowl
- Brush the top and sides of each boiled bagel with egg wash
- The egg wash creates a shiny, golden crust and helps toppings adhere
- Immediately sprinkle your chosen toppings over the egg-washed surface
- Press toppings gently into the surface so they stick well
- For everything bagels, apply a generous coating of seasoning
- For plain bagels, skip the toppings but still use the egg wash
9. Bake the Bagels
- Place baking sheets on the middle rack of your preheated oven
- Bake for 20-25 minutes, rotating pans halfway through
- Bagels are done when deeply golden brown on top and bottom
- The internal temperature should reach 200°F (93°C)
- For extra-crispy bottoms, bake directly on the oven rack for the last 5 minutes
- Watch carefully in the final minutes to prevent over-browning
10. Cool and Serve
- Remove bagels from oven and transfer to a cooling rack immediately
- Let cool for at least 10 minutes before slicing
- Cutting into hot bagels creates a gummy texture inside
- For best flavor, let bagels cool completely to room temperature
- The texture continues to improve as they cool
- Slice horizontally with a serrated knife for serving
The same cheese blend works great in Baked Mac and Cheese Recipe too.
Tips for Success
These tested tips will help you avoid common pitfalls and achieve professional bakery results every time you make this recipe.
Flour Matters
Bread flour is strongly recommended over all-purpose flour. The higher protein content (around 12-14%) develops more gluten, creating the signature chewy texture. If you must use all-purpose flour, reduce the water by 2 tablespoons, as it absorbs less liquid.
Additional Success Tips:
- Measure accurately: Use a kitchen scale for the most consistent results, especially with flour
- Don’t skip the boil: This step is non-negotiable for authentic texture and appearance
- Make the holes big: Stretch the center hole to at least 2 inches; it will shrink significantly
- Check water temperature: Use a thermometer to ensure yeast-activating water is 110°F (43°C)
- Rotate while baking: Turn pans halfway through baking for even browning
- Fresh yeast matters: Check the expiration date; old yeast won’t give proper rise
- Rest the dough: Don’t rush the rising times; proper fermentation develops flavor
- Keep dough cool: If your kitchen is very warm, refrigerate during the second rise
Read Also: Easy Waffle Recipe
Serving Suggestions
New York style bagels are incredibly versatile and can be enjoyed in countless ways. The traditional schmear of cream cheese is just the beginning.
Classic Combinations
Toast your bagel and spread with cream cheese, top with smoked salmon, capers, thinly sliced red onion, and fresh dill for a traditional lox bagel. This combination is quintessentially New York and showcases the bagel’s flavor without overwhelming it.
More Delicious Ways to Enjoy:
- Toasted with butter and a fried egg for a hearty breakfast sandwich
- Cream cheese and Easy Egg Salad for lunch
- Peanut butter and banana slices for a quick snack
- Avocado, tomato, and bacon for a California-style twist
- Turkey, Swiss cheese, and mustard for a deli-style sandwich
- Schmear with flavored cream cheese like scallion, strawberry, or veggie
- Plain with butter and jam for a simple sweet treat
- As burger buns for a unique texture combination
- Cut into chips, brushed with olive oil, and baked for bagel crisps
You might also enjoy: Classic Deviled Eggs Recipe
Variations to Try
Once you’ve mastered the basic recipe, experimenting with different flavors and styles keeps things interesting. Each variation offers a unique taste experience while maintaining that classic bagel texture.
Cinnamon Raisin Bagels
Add 1 tablespoon ground cinnamon to the dry ingredients and fold in 3/4 cup raisins after the first kneading. Brush with egg wash and sprinkle with cinnamon sugar before baking for a sweet breakfast option.
Other Flavor Ideas:
- Whole Wheat: Replace 1 cup bread flour with whole wheat flour for nuttier flavor
- Asiago Cheese: Knead in 1 cup shredded Asiago cheese before shaping
- Jalapeño Cheddar: Add diced jalapeños and sharp cheddar to the dough
- Blueberry: Gently fold in 1 cup fresh or frozen blueberries after kneading
- Chocolate Chip: Mix in 3/4 cup chocolate chips for a dessert bagel
- Onion: Top with dried minced onion before baking
- Garlic Herb: Add dried herbs and garlic powder to the dough
- Pretzel Style: Use only baking soda in the boiling water and top with coarse salt
For a lighter option, try: Belgian Waffle Recipe
Storage and Reheating
Proper storage keeps your homemade bagels fresh and delicious for days. These techniques help maintain that ideal texture between the crispy exterior and chewy interior.
Short-Term Storage
Store cooled bagels in a paper bag at room temperature for up to 2 days. Paper bags allow the crust to breathe and prevent sogginess that plastic creates. Never refrigerate bagels, as this dries them out and makes them stale faster.
Additional Storage Tips:
- Freezing: Slice bagels before freezing for easier toasting; freeze in airtight bags for up to 3 months
- Thawing: Remove from freezer and let sit at room temperature for 1 hour, or toast directly from frozen
- Refreshing: Sprinkle slightly stale bagels with water and bake at 350°F (175°C) for 5 minutes
- Best texture: Day-old bagels are actually better toasted than fresh ones
- Avoid microwaving: This makes bagels rubbery; always use a toaster or oven
- Individual wrapping: Wrap each bagel separately before freezing to prevent freezer burn
This technique works wonderfully in Air Fryer Egg Toast Recipe as well.
Nutritional Facts
Per bagel (based on 8 servings, plain bagel without toppings):
- Calories: 245
- Total Fat: 1g
- Saturated Fat: 0g
- Cholesterol: 23mg
- Sodium: 585mg
- Total Carbohydrates: 50g
- Dietary Fiber: 2g
- Sugars: 4g
- Protein: 8g
Note: Nutritional values are approximate and will vary based on specific ingredients used and portion sizes. Adding toppings, cream cheese, or other spreads will significantly increase the calorie and fat content.
Read Also: Breakfast Potatoes Recipe
Health Benefits of Key Ingredients
While bagels are often considered an indulgent breakfast, the ingredients in this recipe offer several nutritional advantages. Understanding these benefits helps you appreciate what you’re eating beyond just the delicious taste.
Bread Flour’s Protein Content
Bread flour provides more protein than all-purpose flour, supporting muscle maintenance and promoting satiety. The protein also helps stabilize blood sugar levels better than refined flours with lower protein content.
Additional Health Benefits:
- Yeast: Contains B vitamins that support energy metabolism and nervous system function
- Honey: Provides antioxidants and has antimicrobial properties that support immune health
- Whole grain option: Using whole wheat flour increases fiber intake for better digestive health
- Complex carbohydrates: Provide sustained energy release throughout the morning
- Low fat: Made without butter or oil in the dough, naturally lower in fat than many breads
- Customizable nutrition: Control sodium, sugar, and add-ins unlike store-bought versions
Another favorite: Air Fryer French Fries Recipe
Frequently Asked Questions
1. Can I make bagels without a stand mixer?
Absolutely. Mix the ingredients with a wooden spoon until combined, then turn the dough onto a floured surface. Knead by hand for 10-12 minutes until smooth and elastic. The dough will be quite stiff, so this requires some arm strength, but it’s entirely doable and many traditionalists prefer this method.
2. Why do my bagels come out dense and hard instead of chewy?
This usually happens from over-boiling the bagels or baking them too long. Stick to 60-90 seconds per side in the boiling water, and remove them from the oven as soon as they’re golden brown. Also check that your oven temperature is accurate with an oven thermometer.
3. Can I skip the boiling step?
The boiling step is essential for authentic New York style bagels. It gelatinizes the starches on the surface, creating that characteristic shiny, chewy crust. Without boiling, you’ll essentially have bagel-shaped bread rolls with a completely different texture.
4. My bagel holes closed up during baking. What went wrong?
The holes need to be much larger than you think before boiling and baking. Stretch the center hole to at least 2 inches in diameter. As the bagels rise and bake, the holes naturally shrink, sometimes closing completely if they weren’t big enough to start.
5. How do I get that really shiny crust like bakery bagels?
The shine comes from three factors: boiling in water with sugar or honey, using an egg wash before baking, and baking at the right temperature. Make sure you brush the entire surface with egg wash immediately after boiling, and don’t skip the sugar in the boiling water.
For more breakfast ideas, try: French Toast Casserole Recipe
New York Style Bagels
Equipment
- Stand mixer with dough hook attachment - or mix by hand
- Large mixing bowl
- Kitchen scale - optional but helpful for accurate measurements
- Clean kitchen towels - or plastic wrap
- Large stockpot or Dutch oven - at least 8-quart capacity
- Slotted spoon or spider strainer
- Two large baking sheets
- Parchment paper - or silicone baking mats
- Pastry brush
- Cooling rack
- Oven thermometer - optional but recommended for accurate temperature
Ingredients
- 1 1/3 cup warm water - 315ml, 110°F / 43°C
- 2 1/4 teaspoon active dry yeast - 7g, 1 standard packet
- 1 tablespoon granulated sugar
- 4 cup bread flour - 500g, plus extra for dusting
- 2 teaspoon kosher salt
- 1 tablespoon honey - or brown sugar
For Boiling
- 8 cup water - 1.9L
- 2 tablespoon brown sugar - or honey
- 1 tablespoon baking soda
For Topping
- 1 egg - beaten with 1 tablespoon water for egg wash
- everything bagel seasoning - or sesame seeds, poppy seeds, coarse salt, or leave plain
Instructions
- Activate the yeast by adding warm water (110°F/43°C) to your mixing bowl, sprinkling the yeast over the surface, adding 1 tablespoon sugar, and letting it sit for 5-7 minutes until foamy and bubbly.
- Add bread flour, salt, and honey to the yeast mixture and mix with the dough hook on low speed for 2 minutes, then increase to medium and knead for 8-10 minutes until the dough is smooth, elastic, and pulls away from the bowl sides.
- Place the dough in a lightly oiled bowl, cover tightly with plastic wrap or a damp towel, and let rise in a warm spot for 60-90 minutes until nearly doubled in size.
- Punch down the risen dough, divide into 8 equal pieces (about 110g each), roll each piece into a smooth ball, poke a finger through the center to create a hole, then gently stretch and rotate to create a 2-inch (5cm) diameter hole.
- Place shaped bagels on parchment-lined baking sheets, cover loosely with plastic wrap or a towel, and let rest for 15-20 minutes at room temperature. For overnight bagels, refrigerate for 8-12 hours and remove 30 minutes before boiling.
- Fill a large stockpot with 8 cups of water, add brown sugar (or honey) and baking soda, and bring to a rolling boil, then reduce to a steady simmer.
- Preheat oven to 425°F (220°C), gently lower 2-3 bagels into the simmering water and boil for 60-90 seconds on each side, flipping with a slotted spoon, then drain and return to the prepared baking sheets.
- Brush the top and sides of each boiled bagel with egg wash, immediately sprinkle with your chosen toppings, and press gently to adhere.
- Place baking sheets on the middle oven rack and bake for 20-25 minutes, rotating pans halfway through, until deeply golden brown on top and bottom and the internal temperature reaches 200°F (93°C).
- Remove bagels from the oven, transfer to a cooling rack immediately, and let cool for at least 10 minutes before slicing and serving.
Notes
- Flour matters: Bread flour is strongly recommended over all-purpose flour due to its higher protein content (12-14%) which develops more gluten and creates the signature chewy texture. If using all-purpose flour, reduce water by 2 tablespoons.
- Don’t skip the boil: The boiling step is non-negotiable for authentic New York style bagels. It gelatinizes the starches on the surface, creating that characteristic shiny, chewy crust and dense interior.
- Make the holes big: Stretch the center hole to at least 2 inches (5cm) in diameter before boiling and baking. The holes naturally shrink significantly during rising and baking, so making them larger than you think necessary is essential.
- Check water temperature: Use a thermometer to ensure the yeast-activating water is exactly 110°F (43°C). Water that’s too hot will kill the yeast while water that’s too cold won’t activate it properly.
- Overnight option: Prepare the dough the night before and let it rest in the refrigerator for 8-12 hours after shaping. This develops deeper flavor and makes for an easier morning baking session.
- Storage: Store cooled bagels in a paper bag at room temperature for up to 2 days. Never refrigerate bagels as this dries them out and accelerates staling. For longer storage, slice and freeze in airtight bags for up to 3 months.
- Reheating: To refresh slightly stale bagels, sprinkle with water and bake at 350°F (175°C) for 5 minutes. Always use a toaster or oven for reheating; microwaving makes bagels rubbery.
- Customizable toppings: Feel free to experiment with different toppings including everything bagel seasoning, sesame seeds, poppy seeds, coarse salt, dried minced onion, or even cinnamon sugar for a sweet variation.
- Flavor variations: Add 1 tablespoon ground cinnamon and 3/4 cup raisins to the dough for cinnamon raisin bagels, or incorporate 1 cup shredded Asiago cheese, diced jalapeños, or fresh blueberries before shaping.
Final Thoughts
Making your own New York style bagel recipe at home is more rewarding than you might expect. The process requires patience, but the result is worth every minute spent kneading, shaping, and waiting for the dough to rise.
These bagels rival anything you’d find at a New York deli, with that perfect combination of crispy crust and dense, chewy interior. The satisfaction of pulling a tray of golden, fragrant bagels from your oven is hard to beat.
Give this recipe a try this weekend and experience the joy of fresh, homemade bagels. I’d love to hear how they turn out for you, so drop a comment below and let me know your favorite way to top them!
Recommended:
- Air Fryer Bacon Recipe
- Classic French Toast Recipe
- Classic Egg Salad Recipe
- Homemade Granola Recipe
- Air Fryer Egg Cups Recipe
- Classic Chicken Salad Recipe
- Buttermilk Pancake Recipe
- Air Fryer Cloud Eggs Recipe
- Easy Hummus Recipe
- Classic Guacamole Recipe


