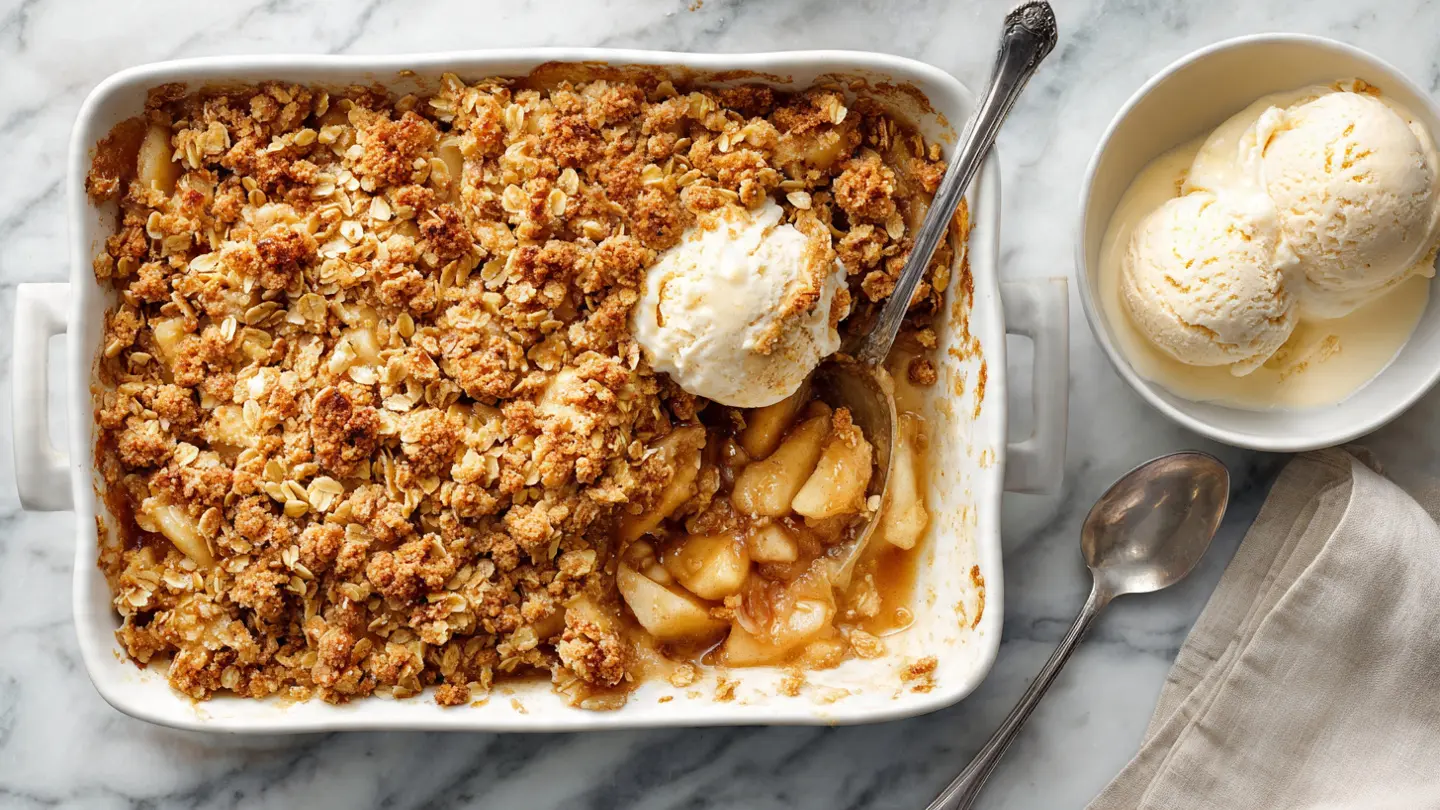
This classic apple crisp recipe brings together tender, cinnamon-spiced apples and a golden, buttery oat topping that bakes to crispy perfection.
It’s the dessert that fills your kitchen with the warm scent of fall and makes everyone gather around the table with anticipation.
I love how this recipe transforms simple ingredients into something that feels both comforting and special. The soft apples contrast beautifully with the crunchy topping, and a scoop of vanilla ice cream on top makes it absolutely irresistible.
This dessert comes together in about 15 minutes of prep time, then the oven does the rest of the work while you relax.
The best part is how forgiving it is. Even if you’re new to baking, you’ll find this recipe straightforward and foolproof.
You might also enjoy: Dutch Apple Pie Recipe

Why You’ll Love This Classic Apple Crisp Recipe
This dessert requires no pie crust, which means less time in the kitchen and more time enjoying warm baked apples with your loved ones.
The topping gets perfectly crispy while the apples become tender and sweet, creating that ideal texture combination. Using a mix of apple varieties gives you layers of flavor that a single type can’t achieve.
This recipe works beautifully for casual weeknight dinners, holiday gatherings, or potluck contributions. The ingredients are pantry staples you likely already have on hand.
Here’s what makes this recipe shine:
- No complicated techniques or special equipment needed
- Comes together in just 15 minutes of active prep time
- Uses simple, affordable ingredients you probably already have
- Feeds a crowd with minimal effort
- Tastes even better the next day
- Pairs perfectly with vanilla ice cream or whipped cream
Ingredients
The beauty of classic apple crisp lies in its simplicity. You need fresh apples, basic pantry staples, and just a few spices to create this crowd-pleasing dessert.
For the Apple Filling:
- 6 to 7 medium apples (about 2.5 pounds or 1.1 kg), peeled, cored, and sliced into 1/4-inch (6 mm) pieces
- 1/4 cup (50 g) granulated sugar
- 2 tablespoons (16 g) all-purpose flour
- 1 teaspoon (3 g) ground cinnamon
- 1 tablespoon (15 ml) fresh lemon juice
- 1/4 teaspoon (1 g) ground nutmeg
- 1/4 cup (60 ml) water
For the Oat Topping:
- 1 cup (90 g) old-fashioned rolled oats
- 1 cup (125 g) all-purpose flour
- 3/4 cup (165 g) packed light brown sugar
- 1/2 teaspoon (3 g) ground cinnamon
- 1/4 teaspoon (1.5 g) salt
- 1/2 cup (113 g) unsalted butter, melted and slightly cooled
- 1/2 teaspoon (2.5 ml) vanilla extract
Read Also: Classic Apple Pie Recipe
Kitchen Equipment Needed
Having the right tools makes this recipe even easier. You don’t need anything fancy, just basic baking essentials that most home kitchens already have.
- 9×13-inch (23×33 cm) baking dish
- Large mixing bowl
- Medium mixing bowl
- Vegetable peeler
- Sharp knife
- Cutting board
- Measuring cups and spoons
- Wooden spoon or spatula
- Small saucepan for melting butter
Recommended Products for This Recipe
These carefully selected products will help you achieve the best results and make the baking process smoother and more enjoyable.
1. Le Creuset Stoneware Baking Dish
This high-quality baking dish distributes heat evenly, ensuring your apple crisp bakes perfectly without hot spots or burnt edges. The beautiful presentation means you can take it straight from oven to table. It’s durable enough to last for years of holiday baking.
2. OXO Good Grips Swivel Peeler
A quality vegetable peeler makes quick work of preparing the apples. This one has a comfortable grip and sharp blade that glides through apple skins effortlessly. The swivel action follows the contours of the fruit, removing just the peel and minimizing waste.
3. Progressive International Apple Slicer and Corer
This apple slicer cuts your prep time dramatically by slicing and coring apples in one motion. You’ll get uniform slices that cook evenly, and the sturdy construction handles even firm Granny Smith apples. It’s a game-changer when you’re making desserts for a crowd.
Another favorite: Amish Apple Cake Recipe
Step-by-Step Instructions
Following these detailed steps ensures your apple crisp turns out perfectly every time. Take your time with the preparation, and you’ll be rewarded with a dessert that looks as good as it tastes.
1. Preheat the Oven and Prepare the Baking Dish
- Set your oven to 350°F (175°C) and position the rack in the center of the oven for even heat distribution.
- Lightly grease your 9×13-inch (23×33 cm) baking dish with butter or non-stick cooking spray.
- Set the prepared baking dish aside while you work on the filling and topping.
2. Prepare the Apples
- Wash the apples thoroughly under cool running water and pat them dry with a clean kitchen towel.
- Use a vegetable peeler to remove the skin from each apple, working in smooth, downward strokes.
- Cut each apple in half from top to bottom, then use a spoon or melon baller to scoop out the core and seeds.
- Place each apple half flat-side down on your cutting board and slice into 1/4-inch (6 mm) thick pieces for even cooking.
- Transfer the sliced apples to the prepared baking dish as you work to prevent browning.
3. Make the Apple Filling Mixture
- In a large mixing bowl, whisk together the granulated sugar, 2 tablespoons of flour, ground cinnamon, and ground nutmeg until well combined and no lumps remain.
- Drizzle the lemon juice over the sliced apples in the baking dish to prevent oxidation and add a subtle brightness to the flavor.
- Sprinkle the sugar and spice mixture evenly over the apples.
- Using clean hands or a large spoon, gently toss the apples until every slice is coated with the sweet, spiced mixture.
- Spread the apples into an even layer in the baking dish.
- Pour the water evenly over the apple mixture, which helps create a light syrup as the apples bake and prevents them from drying out.
4. Prepare the Oat Crumble Topping
- In a medium mixing bowl, combine the old-fashioned oats, 1 cup of flour, brown sugar, cinnamon, and salt.
- Stir the dry ingredients together with a fork or whisk until evenly distributed and no clumps of brown sugar remain.
- Melt the butter in a small saucepan over low heat, then remove from heat and let it cool for 2 to 3 minutes so it won’t cook the other ingredients.
- Add the vanilla extract to the melted butter and stir to combine.
- Pour the melted butter and vanilla mixture over the dry ingredients in the bowl.
- Using a fork or your fingers, mix the ingredients together until the mixture forms coarse, clumpy crumbs that hold together when pressed.
- The mixture should look crumbly and moist, not wet or pasty, so avoid overmixing which would make it dense.
5. Assemble and Bake the Apple Crisp
- Sprinkle the oat crumble topping evenly over the prepared apples, making sure to cover them completely from edge to edge.
- Use your fingers to gently press some of the larger crumbs together to create clusters that will bake up extra crispy.
- Place the baking dish on the center rack of the preheated oven.
- Bake for 45 to 55 minutes, until the topping is golden brown and crispy, and you can see the apple filling bubbling around the edges.
- If the topping starts to brown too quickly before the apples are tender, loosely cover the dish with aluminum foil for the remaining baking time.
6. Cool and Serve
- Remove the baking dish from the oven and place it on a heat-safe surface or wire cooling rack.
- Let the apple crisp cool for at least 15 minutes before serving, which allows the filling to thicken slightly and makes it easier to scoop.
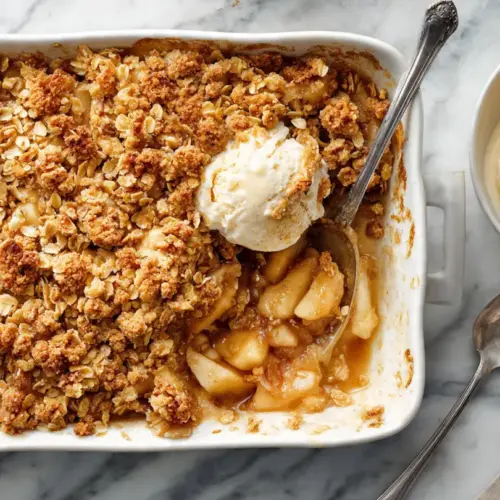
- Serve warm in bowls, topped with vanilla ice cream, whipped cream, or a drizzle of caramel sauce for an extra indulgent treat.
- Use a large serving spoon to scoop portions that include both the crispy topping and the tender apples underneath.
This pairs beautifully with Classic Tiramisu Recipe for a dessert spread.
Tips for Success
These tried-and-true tips come from making this recipe countless times. They’ll help you avoid common pitfalls and achieve bakery-quality results at home.
Here are my best tips:
- Use a mix of tart and sweet apples like Granny Smith and Honeycrisp for the most complex, balanced flavor
- Slice the apples uniformly so they cook at the same rate and create an evenly textured filling
- Don’t skip the lemon juice, as it brightens the flavor and prevents the apples from turning brown
- Let the melted butter cool slightly before adding it to the oat mixture to prevent the topping from becoming greasy or pasty
- Press the topping gently to create clusters that bake up extra crispy and add textural interest
- Check the crisp after 40 minutes and cover with foil if the top is browning too quickly
- Let it cool for at least 15 minutes before serving so the juices thicken and don’t run everywhere
- Make the topping while the apples are being prepared to streamline your workflow
Read Also: From Scratch Pumpkin Pie Recipe
Serving Suggestions
This classic apple crisp is incredibly versatile and pairs well with many accompaniments. How you serve it can transform it from a simple dessert to an impressive finale.
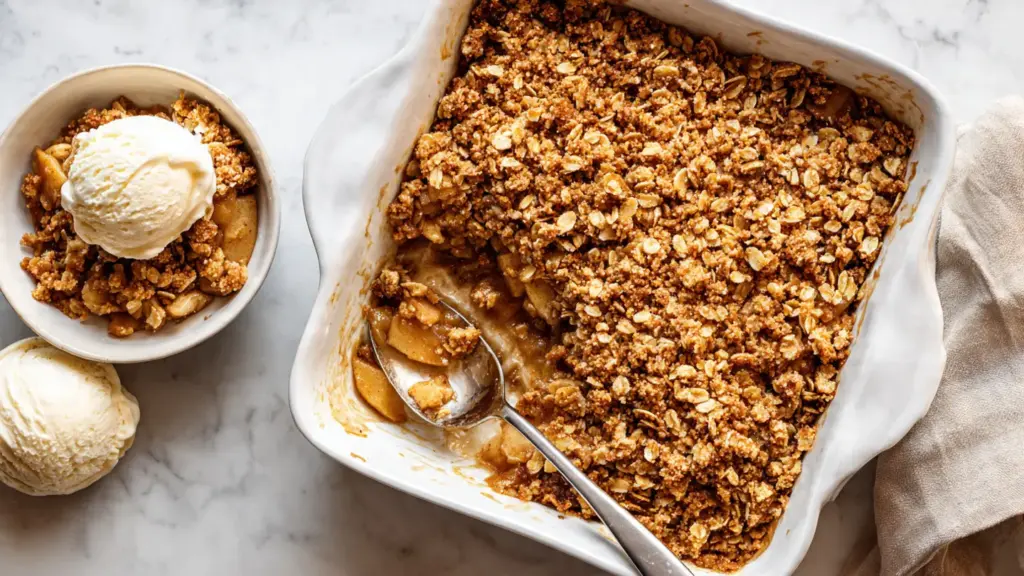
The traditional way to enjoy apple crisp is warm with a generous scoop of vanilla ice cream melting over the top. The contrast between hot and cold, crispy and creamy, is simply divine.
Try these delicious serving ideas:
- Top with Homemade Granola for extra crunch
- Serve alongside Classic French Toast for a decadent brunch spread
- Add a dollop of freshly whipped cream sweetened with vanilla
- Drizzle with warm caramel sauce or butterscotch for extra richness
- Pair with sharp cheddar cheese for a sweet-savory combination popular in New England
- Serve with Greek yogurt for a lighter, tangier contrast to the sweet apples
- Add a scoop of cinnamon ice cream to double down on the warm spice flavors
- Sprinkle toasted pecans or walnuts on top for added crunch
Variations to Try
Once you’ve mastered the classic version, these creative variations keep the recipe exciting. Each one brings a unique twist while maintaining the comforting essence of apple crisp.
Experiment with these ideas:
- Mixed Berry Apple Crisp: Add 1 cup (150 g) of fresh or frozen blueberries, raspberries, or blackberries to the apple mixture for a fruity twist
- Nutty Apple Crisp: Stir 1/2 cup (60 g) of chopped pecans, walnuts, or almonds into the oat topping for extra crunch and richness
- Maple Apple Crisp: Replace half the brown sugar with pure maple syrup and add it to the topping with the melted butter
- Spiced Chai Apple Crisp: Add 1/4 teaspoon each of ground ginger, cardamom, and cloves to the apple filling for warm, complex flavors
- Cranberry Apple Crisp: Mix in 1 cup (100 g) of fresh or dried cranberries for a tart, festive variation perfect for holidays
- Salted Caramel Apple Crisp: Drizzle caramel sauce over the apples before adding the topping, and sprinkle sea salt over the finished crisp
- Apple Pear Crisp: Replace 2 to 3 apples with ripe pears for a softer, more delicate fruit flavor
- Gluten-Free Apple Crisp: Use gluten-free all-purpose flour and certified gluten-free oats in place of regular versions
You might also enjoy: Starbucks Banana Bread Recipe
Storage and Reheating
Proper storage keeps your apple crisp tasting fresh for days. These methods ensure you can enjoy leftovers without sacrificing quality or texture.
Storage and reheating guidelines:
- Store cooled apple crisp covered tightly with plastic wrap or aluminum foil at room temperature for up to 2 days
- Refrigerate leftovers in an airtight container for up to 5 days, though the topping will soften slightly from the apple moisture
- Freeze individual portions wrapped in plastic wrap and foil in a freezer-safe container for up to 3 months
- Reheat single servings in the microwave for 30 to 45 seconds on high power until warmed through
- Reheat the entire dish covered with foil at 350°F (175°C) for 15 to 20 minutes until heated through
- For a crispier topping after refrigeration, reheat uncovered in a 375°F (190°C) oven for 10 to 15 minutes
- Let frozen portions thaw overnight in the refrigerator before reheating for best results
- Avoid reheating more than once, as this can make the apples mushy and the topping soggy
Read Also: Easy Pecan Pie Dump Cake Recipe
Nutritional Facts
Understanding the nutritional content helps you make informed choices. Keep in mind these values are approximate and can vary based on specific ingredients and portion sizes.
Per serving (based on 12 servings):
- Calories: 265
- Total Fat: 9 g
- Saturated Fat: 5 g
- Cholesterol: 20 mg
- Sodium: 52 mg
- Total Carbohydrates: 46 g
- Dietary Fiber: 3 g
- Sugars: 30 g
- Protein: 2 g
- Vitamin A: 6% DV
- Vitamin C: 8% DV
- Calcium: 2% DV
- Iron: 5% DV
Health Benefits of Key Ingredients
While apple crisp is certainly a dessert, the ingredients offer some nutritional benefits worth noting. Enjoying treats in moderation is part of a balanced lifestyle.
Apples are rich in fiber, particularly pectin, which supports digestive health and helps you feel satisfied. They also contain vitamin C, an antioxidant that supports immune function and skin health.
Key nutritional highlights:
- Apples provide quercetin, a flavonoid that may reduce inflammation and support heart health
- Oats are a whole grain that offers beta-glucan fiber, which can help lower cholesterol levels
- Cinnamon contains antioxidants and may help regulate blood sugar levels when consumed regularly
- Nutmeg provides trace minerals including manganese and copper that support enzyme function
- Brown sugar retains small amounts of molasses, which contains iron and calcium
- Lemon juice adds vitamin C and helps the body absorb iron from plant-based foods
- Butter provides vitamin A for vision and immune health, as well as fat-soluble nutrients
This pairs wonderfully with Classic Hummus Recipe for a complete spread.
Frequently Asked Questions
1. What are the best apples for apple crisp?
A combination of tart and sweet apples creates the most balanced flavor profile. Granny Smith apples hold their shape beautifully during baking and provide tartness that contrasts with the sweet topping. Honeycrisp, Fuji, or Gala apples add natural sweetness and tender texture. Using 3 to 4 Granny Smith apples and 3 to 4 sweeter apples gives you the perfect mix.
2. Can I make apple crisp ahead of time?
Yes, you can prepare apple crisp up to 24 hours in advance. Assemble the dish completely with the topping, cover it tightly with plastic wrap, and refrigerate. When ready to bake, remove it from the refrigerator and let it sit at room temperature for 20 minutes, then bake as directed, adding 5 to 10 extra minutes to the baking time since it’s starting cold.
3. Why is my apple crisp topping not crispy?
The most common cause is too much moisture from the apples seeping into the topping. Make sure to spread the topping evenly and avoid pressing it down too firmly, which can compact it. Using melted butter instead of cold butter creates a lighter, crispier texture. If your topping seems wet after baking, increase the oven temperature to 400°F (200°C) for the last 5 to 10 minutes to crisp it up.
4. Do I need to peel the apples for apple crisp?
Peeling the apples is recommended for the best texture and appearance. Apple skins can become tough and chewy during baking, which contrasts unpleasantly with the tender cooked fruit. However, if you prefer to leave the skins on for extra fiber and nutrients, wash the apples thoroughly and slice them thinly so the skins soften more during baking.
5. Can I use quick oats instead of old-fashioned oats?
Old-fashioned rolled oats work best for apple crisp because they maintain their texture and create a heartier, chunkier topping. Quick oats are more finely cut and absorb moisture faster, which can result in a mushy topping rather than a crispy one. If you only have quick oats available, they’ll work in a pinch, but the texture won’t be quite as satisfying.
You might also enjoy: Old Fashioned Pumpkin Bread Recipe
Classic Apple Crisp
Equipment
- 9×13-inch (23×33 cm) baking dish - lightly greased
- Large mixing bowl
- Medium mixing bowl
- Vegetable peeler
- Sharp knife
- Cutting board
- Measuring cups and spoons
- Wooden spoon or spatula
- Small saucepan - for melting butter
Ingredients
For the Apple Filling
- 7 medium apples - about 2.5 pounds or 1.1 kg, peeled, cored, and sliced into 1/4-inch (6 mm) pieces
- 0.25 cup granulated sugar - 50g
- 2 tablespoons all-purpose flour - 16g
- 1 teaspoon ground cinnamon - 3g
- 1 tablespoon fresh lemon juice - 15ml
- 0.25 teaspoon ground nutmeg - 1g
- 0.25 cup water - 60ml
For the Oat Topping
- 1 cup old-fashioned rolled oats - 90g
- 1 cup all-purpose flour - 125g
- 0.75 cup packed light brown sugar - 165g
- 0.5 teaspoon ground cinnamon - 3g
- 0.25 teaspoon salt - 1.5g
- 0.5 cup unsalted butter - 113g, melted and slightly cooled
- 0.5 teaspoon vanilla extract - 2.5ml
For Serving (Optional)
- vanilla ice cream - for serving
- whipped cream - for serving
- caramel sauce - for serving
- sharp cheddar cheese - optional, for New England-style serving
Instructions
- Preheat the oven to 350°F (175°C) and position the rack in the center. Lightly grease a 9×13-inch baking dish with butter or non-stick cooking spray.
- Wash and peel the apples, then cut each in half and remove the core. Slice into 1/4-inch thick pieces and transfer to the prepared baking dish.
- In a small bowl, whisk together granulated sugar, 2 tablespoons flour, cinnamon, and nutmeg. Drizzle lemon juice over the apples, then sprinkle with the sugar-spice mixture. Toss to coat evenly, spread in an even layer, and pour water over the top.
- In a medium bowl, combine oats, 1 cup flour, brown sugar, cinnamon, and salt. Stir melted butter and vanilla together, then pour over dry ingredients. Mix with a fork until coarse, clumpy crumbs form.
- Sprinkle the oat topping evenly over the apples, covering completely from edge to edge. Gently press some crumbs together to form clusters.
- Bake on the center rack for 45 to 55 minutes, until the topping is golden brown and the apple filling is bubbling around the edges. Cover with foil if the topping browns too quickly.
- Let the apple crisp cool for at least 15 minutes before serving. Serve warm in bowls with vanilla ice cream, whipped cream, or caramel sauce.
Notes
- Apple selection: Use a mix of tart (Granny Smith) and sweet (Honeycrisp, Fuji, Gala) apples for the most complex, balanced flavor.
- Slice uniformly: Cutting apples into even 1/4-inch slices ensures they cook at the same rate and creates an evenly textured filling.
- Don’t skip the lemon juice: It brightens the flavor and prevents the apples from turning brown while you prepare the topping.
- Cool butter slightly: Let melted butter cool for 2-3 minutes before adding to the oat mixture to prevent the topping from becoming greasy or pasty.
- Make ahead: Assemble the crisp completely up to 24 hours in advance, cover, and refrigerate. Add 5-10 minutes to baking time when starting from cold.
- Storage: Store covered at room temperature for up to 2 days or refrigerate for up to 5 days. The topping will soften slightly in the refrigerator.
- Reheat for crispness: For a crispy topping after refrigeration, reheat uncovered at 375°F (190°C) for 10-15 minutes.
- Freezing: Freeze individual portions wrapped in plastic wrap and foil for up to 3 months. Thaw overnight in the refrigerator before reheating.
- Nutty variation: Stir 1/2 cup of chopped pecans or walnuts into the oat topping for extra crunch and richness.
- Quick oats note: Old-fashioned rolled oats work best. Quick oats can make the topping mushy because they absorb moisture faster.
Final Thoughts
This classic apple crisp recipe is one of those desserts that brings people together. The warm spices, tender apples, and crispy topping create a combination that feels like a hug in dessert form.
I hope this recipe becomes a favorite in your home, just as it has in mine. Give it a try this week and let me know how it turns out in the comments below!
Recommended:
- Keto Banana Bread Recipe
- Eggless Banana Bread Recipe
- Banana and Apple Bread Recipe
- Easy Banana Bread Recipe with Self Rising Flour
- Amish Banana Bread Recipe
- Paula Deen Banana Bread Recipe
- Banana Bread Recipe with Walnuts and Chocolate Chips
- Maui Banana Bread Recipe
- Banana Nut Bread Recipe with Pecans
- Snickerdoodle Banana Bread Recipe


