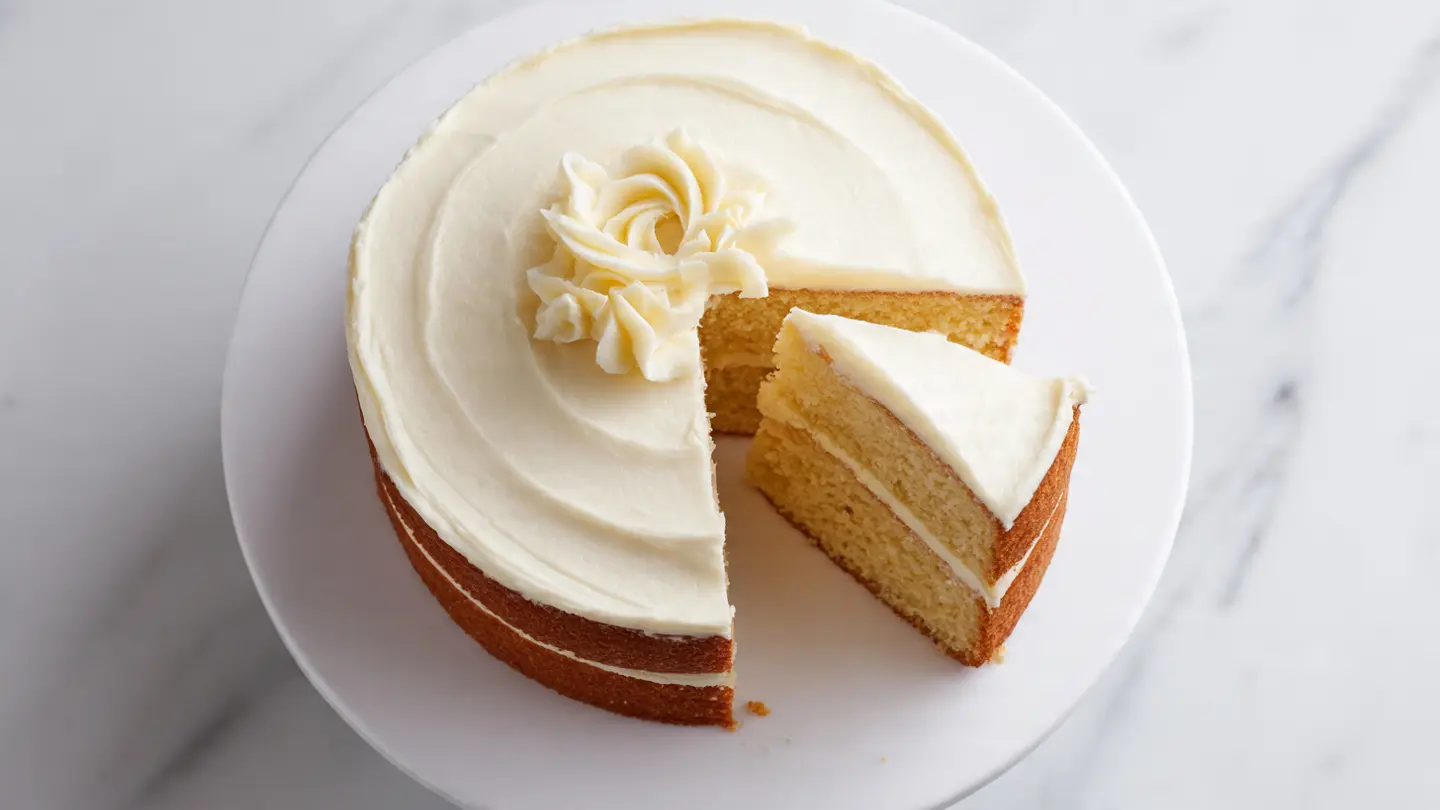
A classic vanilla cake recipe delivers soft, buttery layers with the perfect crumb. This traditional butter cake stays moist for days and works beautifully for birthdays, celebrations, or any time you crave something sweet.
Making a vanilla cake from scratch is simpler than you might think. The secret lies in room temperature ingredients, which help everything blend smoothly and create that light, fluffy texture everyone loves. This recipe uses whole eggs and butter for richness, along with buttermilk to keep the crumb tender and moist.
The beauty of this cake is its versatility. You can pair it with chocolate frosting, vanilla buttercream, fresh berries, or even a simple dusting of powdered sugar. It’s sturdy enough to hold up under layers of frosting, yet soft enough to melt in your mouth with each bite.
One key technique that sets this recipe apart is alternating wet and dry ingredients when mixing the batter. This method prevents overmixing while ensuring everything combines evenly, resulting in a cake with consistent texture throughout.
If you enjoy making cakes from scratch, you’ll also love trying my best carrot cake recipe for another crowd-pleasing option.
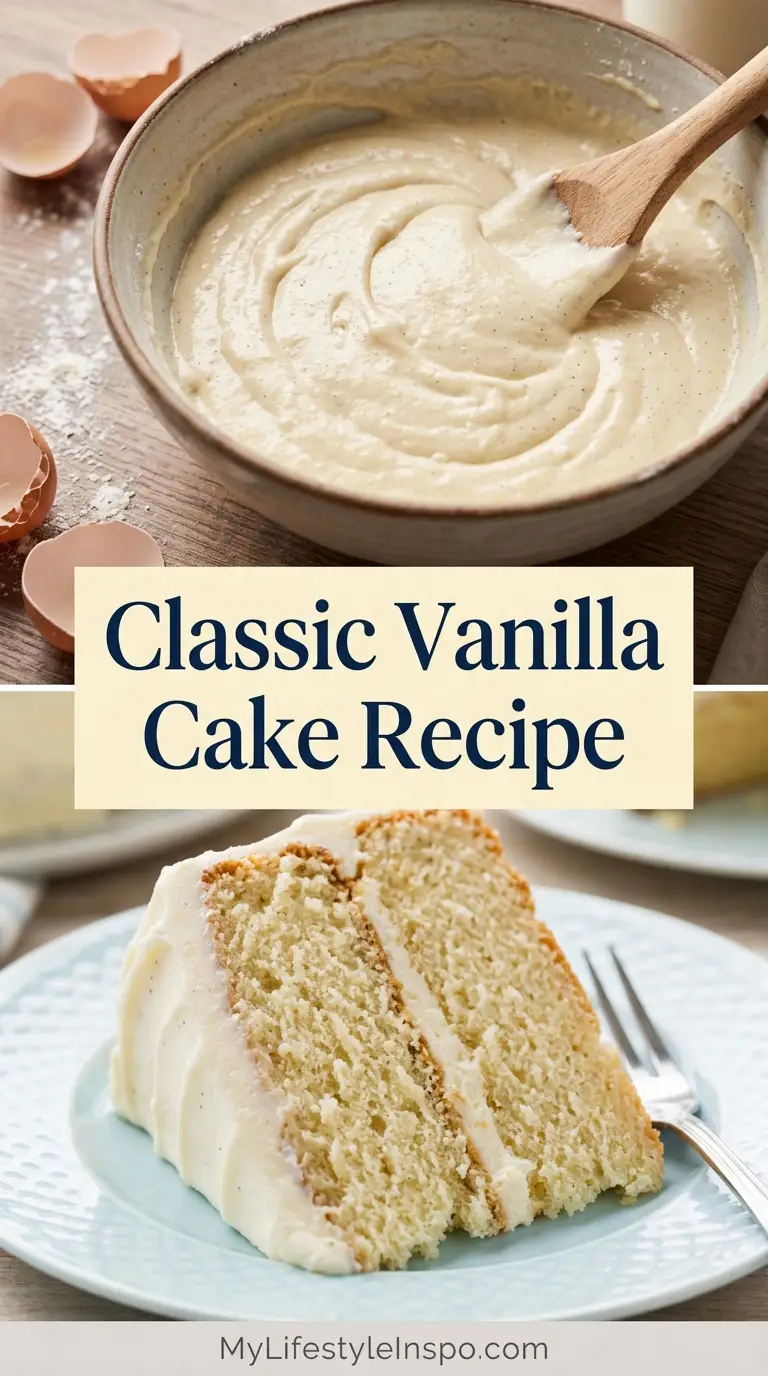
Why You’ll Love This Classic Vanilla Cake Recipe
This vanilla cake delivers everything you want in a homemade dessert without any fussy techniques or hard-to-find ingredients.
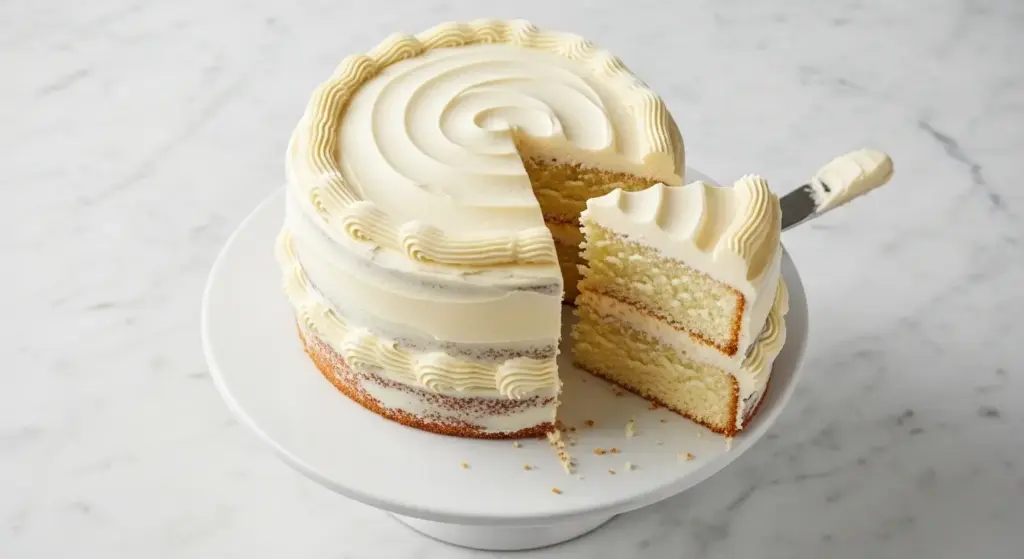
The texture is perfectly balanced: soft and tender but sturdy enough to stack into layers. You won’t deal with dense, heavy cake or one that crumbles apart when you try to frost it. This recipe gets the structure just right.
Here’s what makes this recipe special:
- Stays fresh and moist for up to 4 days when stored properly
- Uses simple pantry ingredients you probably already have
- Creates perfectly flat cake layers without needing to level them
- Takes less than an hour of active work
- Bakes evenly without tunnels or large air pockets
- Rich vanilla flavor that isn’t overly sweet
- Works for cupcakes, layer cakes, or sheet cakes
- Strong enough to hold fondant or heavy frosting
The buttermilk adds a subtle tang that balances the sweetness, while quality vanilla extract gives the cake its signature flavor. Unlike boxed mixes, this scratch-made version tastes like real butter and has a tender crumb that doesn’t leave a greasy coating in your mouth.
For another classic dessert option, my carrot cake with cream cheese frosting recipe is equally beloved by readers.
Ingredients
This recipe calls for basic baking ingredients that come together to create something truly special. Each component plays a specific role in the cake’s texture and flavor.
For the Cake:
- 2¾ cups (345g) all-purpose flour
- 2 cups (400g) granulated sugar
- 1 tablespoon baking powder
- 1 teaspoon salt
- ¾ cup (170g) unsalted butter, at room temperature
- ½ cup (120ml) vegetable oil
- 4 large eggs, at room temperature
- 1 cup (240ml) buttermilk, at room temperature
- 2 tablespoons pure vanilla extract
- 1 tablespoon vanilla bean paste (optional, for extra vanilla flavor)
For Simple Vanilla Buttercream:
- 1 cup (226g) unsalted butter, softened
- 4 cups (480g) powdered sugar, sifted
- 2 to 3 tablespoons whole milk
- 1 tablespoon vanilla extract
- ¼ teaspoon salt
Kitchen Equipment Needed
Having the right tools makes this recipe come together smoothly and helps ensure your cake bakes evenly. Here’s what you’ll need to gather before you start.
- Two 9-inch (23cm) round cake pans
- Parchment paper
- Stand mixer with paddle attachment or hand mixer
- Large mixing bowls
- Medium mixing bowl
- Whisk
- Rubber spatula
- Measuring cups and spoons
- Cooling rack
- Offset spatula for frosting
- Cake leveler or serrated knife (optional)
Recommended Products for This Recipe
These carefully selected products will help you achieve bakery-quality results at home. Each recommendation addresses a specific challenge in cake baking.
1. Nielsen-Massey Madagascar Bourbon Vanilla Extract
Quality vanilla makes a noticeable difference in vanilla cake since it’s the primary flavor. Nielsen-Massey uses real vanilla beans and creates a rich, complex taste that cheap imitation extracts can’t match. This bottle will last through many baking projects.
2. Fat Daddio’s Anodized Aluminum Round Cake Pans
These professional-grade pans distribute heat evenly, preventing dark edges and ensuring your cakes bake uniformly. The anodized aluminum won’t react with acidic ingredients like buttermilk, and the straight sides give you perfectly shaped layers every time.
3. Wilton Large Offset Spatula
An offset spatula makes frosting cakes exponentially easier. The angled blade lets you spread frosting smoothly without your hand getting in the way, and it’s essential for creating clean, professional-looking finishes.
4. OXO Good Grips 3-Piece Stainless Steel Mixing Bowl Set
Quality mixing bowls with non-slip bases keep everything stable while you cream butter and sugar or fold in dry ingredients. The stainless steel won’t absorb odors or stain, and these bowls are large enough to prevent flour from flying everywhere.
Looking for more classic desserts? Try my classic tiramisu recipe for an elegant Italian treat.
Step-by-Step Instructions
Follow these detailed steps to create your perfect vanilla cake. Taking your time with each stage ensures the best texture and flavor.
1. Prepare Your Pans and Preheat the Oven
- Preheat your oven to 350°F (175°C) and position a rack in the center.
- Grease the bottom and sides of two 9-inch round cake pans generously with butter or baking spray.
- Cut parchment paper circles to fit the bottom of each pan, place them inside, and grease the parchment as well.
- Lightly dust the pans with flour, tapping out any excess. This double protection ensures the cakes release cleanly.
2. Mix the Dry Ingredients
- In a medium bowl, whisk together the flour, baking powder, and salt until well combined.
- Make sure there are no lumps in the flour before setting the bowl aside.
- Whisking aerates the flour and distributes the leavening agents evenly, which helps your cake rise uniformly.
3. Cream the Butter, Oil, and Sugar
- Place the softened butter and vegetable oil in the bowl of your stand mixer fitted with the paddle attachment (or use a large bowl with a hand mixer).
- Beat on medium speed for about 1 minute until the mixture becomes smooth and well combined.
- Add the granulated sugar and continue beating on medium-high speed for 3 to 4 minutes.
- The mixture should become light, fluffy, and pale in color. This step incorporates air, which makes your cake tender.
- Scrape down the sides and bottom of the bowl with a rubber spatula to ensure everything mixes evenly.
4. Add the Eggs
- Reduce the mixer speed to medium-low.
- Add the eggs one at a time, beating well after each addition before adding the next one.
- Each egg should be fully incorporated before you add another. This takes about 30 seconds per egg.
- Adding eggs gradually helps them emulsify properly with the butter and prevents the batter from curdling.
- After all eggs are added, the mixture should look smooth and creamy.
5. Mix in the Vanilla
- Add the vanilla extract and vanilla bean paste (if using) to the batter.
- Beat on medium speed for about 30 seconds until the vanilla is evenly distributed throughout.
- The batter will smell amazing at this point!
6. Alternate Adding Dry Ingredients and Buttermilk
- With the mixer on low speed, add about one-third of the flour mixture to the batter.
- Mix just until the flour is mostly incorporated, about 10 to 15 seconds. A few streaks are fine.
- Add half of the buttermilk and mix on low speed until just combined, about 10 seconds.
- Add another third of the flour mixture, mix briefly, then add the remaining buttermilk.
- Finish by adding the last of the flour mixture and mix on low speed just until no dry flour remains visible.
- Stop mixing as soon as everything comes together. Overmixing develops gluten, which makes cakes tough and dense.
- Use your rubber spatula to scrape the bottom and sides of the bowl, gently folding to catch any unmixed ingredients.
7. Divide and Bake
- Divide the batter evenly between your prepared pans. Each pan should get about 2½ cups of batter.
- Use a kitchen scale for precise measurements if you want perfectly even layers.
- Smooth the tops gently with a spatula, spreading the batter to the edges.
- Tap each pan firmly on the counter two or three times to release any large air bubbles.
- Place the pans on the center rack of your preheated oven, spacing them a few inches apart for proper air circulation.
- Bake for 28 to 32 minutes, or until a toothpick inserted into the center comes out clean or with just a few moist crumbs.
- The cake should spring back when you press the center gently, and the edges should just start pulling away from the pan sides.
- Avoid opening the oven door during the first 25 minutes, as temperature fluctuations can cause the cakes to sink.
8. Cool the Cakes
- Remove the pans from the oven and place them on a cooling rack.
- Let the cakes cool in the pans for exactly 10 to 15 minutes. This allows them to set without becoming stuck.
- Run a thin knife or offset spatula around the edge of each pan to loosen the cakes.
- Place a cooling rack over the top of one pan, then carefully flip both the rack and pan together.
- Gently lift the pan off, then peel away the parchment paper.
- Flip the cake again so it’s right-side up on the cooling rack.
- Repeat with the second cake.
- Allow the cakes to cool completely, at least 1 hour, before frosting. Warm cakes will melt buttercream.
9. Make the Vanilla Buttercream
- In a clean mixing bowl, beat the softened butter on medium speed for about 2 minutes until smooth and creamy.
- Reduce the speed to low and gradually add the sifted powdered sugar, one cup at a time.
- After each cup of sugar, increase the speed to medium and beat for 15 to 20 seconds before adding more.
- Once all the sugar is incorporated, add the vanilla extract, salt, and 2 tablespoons of milk.
- Beat on medium-high speed for 3 to 4 minutes until the frosting becomes light and fluffy.
- If the frosting seems too thick, add the remaining tablespoon of milk, one teaspoon at a time, until you reach your desired consistency.
- For piping, you want the frosting to hold stiff peaks. For spreading, it should be slightly softer and easier to work with.
10. Assemble and Frost the Cake
- If your cakes have domed tops, use a cake leveler or serrated knife to carefully trim them flat.
- Place one cake layer on your serving plate or cake stand.
- Spread about ¾ cup of buttercream evenly over the top of the first layer, going right to the edges.
- Gently place the second cake layer on top, pressing down very lightly to secure it.
- Apply a thin layer of frosting all over the cake (top and sides). This is called a crumb coat and seals in any loose crumbs.
- Refrigerate the cake for 15 to 20 minutes to let the crumb coat set.
- Remove from the fridge and apply the remaining frosting, creating smooth sides and a decorative top if desired.
- Use your offset spatula to create swirls, rosettes, or keep it simple with smooth sides and a textured top.
Another delicious option for celebrations is my cut out sugar cookie recipe, perfect for decorating.
Tips for Success
These proven tips will help you avoid common pitfalls and achieve bakery-quality results every time you make this cake.
Key techniques to remember:
- Bring all refrigerated ingredients to room temperature before starting. Cold ingredients won’t blend properly and can cause the batter to curdle. Set eggs, butter, and buttermilk out 1 to 2 hours before baking.
- Measure flour correctly by spooning it into measuring cups and leveling with a knife. Scooping directly from the bag packs the flour, giving you too much and resulting in a dry cake.
- Don’t overmix the batter once you add the flour. Mix just until you no longer see dry flour streaks. Overmixing develops gluten, making the cake tough instead of tender.
- Use an oven thermometer to verify your oven temperature. Many ovens run hot or cold, which affects baking time and texture.
- Avoid opening the oven door during the first 25 minutes of baking. Temperature drops can cause cakes to sink in the middle.
- Test for doneness with a toothpick inserted in the center. It should come out clean or with a few moist crumbs, not wet batter.
- Let cakes cool completely before frosting. Warm cake will melt buttercream and cause layers to slide.
- For extra moist cake, brush each layer with simple syrup (equal parts sugar and water, boiled and cooled) before frosting.
Read Also: Easy Sugar Cookie Recipe
Serving Suggestions
This versatile vanilla cake pairs beautifully with countless accompaniments. The neutral vanilla flavor makes it the perfect canvas for both simple and elaborate presentations.
Classic serving ideas:
- Fresh berries and whipped cream for a light, refreshing finish
- Chocolate ganache drizzled over vanilla buttercream
- Classic deviled eggs as a savory side for birthday parties
- Sliced strawberries between layers with cream cheese frosting
- Caramel sauce and chopped pecans for extra richness
- Rainbow sprinkles for kid-friendly celebrations
- Lemon curd filling with vanilla buttercream frosting
- Fresh flowers for elegant wedding cakes
- Crushed cookies on top for added texture
- A simple dusting of powdered sugar for minimalist presentation
Serve slices with a cold glass of milk, hot coffee, or sparkling water with fresh mint. The cake tastes best at room temperature, which allows the buttery flavor to come through fully.
For a complete party spread, pair this cake with easy nachos for savory balance.
Variations to Try
Once you’ve mastered the basic recipe, these variations let you customize the cake for different occasions and flavor preferences.
Popular flavor combinations:
- Almond vanilla cake: Replace 1 tablespoon of vanilla extract with almond extract for a subtle nutty flavor
- Lemon vanilla cake: Add 2 tablespoons lemon zest and 1 tablespoon lemon juice to the batter
- Chocolate chip vanilla cake: Fold ¾ cup mini chocolate chips into the finished batter
- Coconut vanilla cake: Replace ½ cup buttermilk with coconut milk and add ½ cup shredded coconut
- Berry swirl cake: Swirl ½ cup berry puree into the batter before baking for a marbled effect
- Brown butter vanilla cake: Brown the butter before using it, then cool to room temperature
- Espresso vanilla cake: Add 1 tablespoon instant espresso powder dissolved in 1 tablespoon hot water
- Vanilla bean cake: Use 2 whole vanilla beans (scraped) instead of extract for intense vanilla flavor
- Orange vanilla cake: Add 2 tablespoons orange zest and 1 tablespoon orange juice
- Funfetti cake: Stir ⅓ cup rainbow sprinkles into the batter at the end
You might also enjoy: Best Chocolate Chip Cookies Recipe
Storage and Reheating
Proper storage keeps this cake fresh and delicious for several days after baking. Follow these guidelines to maintain the best texture and flavor.
Storage instructions:
- Store unfrosted cake layers wrapped tightly in plastic wrap at room temperature for up to 3 days
- Fully frosted cake can sit at room temperature under a cake dome for 2 days if using buttercream
- Refrigerate any cake with cream cheese frosting or fresh fruit fillings, storing for up to 5 days
- Wrap individual slices in plastic wrap for grab-and-go portions
- Freeze unfrosted cake layers wrapped in plastic wrap and aluminum foil for up to 3 months
- Freeze frosted cake by chilling until firm, then wrapping tightly and freezing for up to 1 month
- Thaw frozen cake overnight in the refrigerator, still wrapped
- Bring refrigerated cake to room temperature 1 hour before serving for the best flavor and texture
- Store leftover buttercream in an airtight container in the fridge for up to 1 week or freeze for 3 months
This cake actually tastes better on day two after the flavors have had time to develop and the crumb settles. It stays remarkably moist for 4 days when stored properly in an airtight container.
Another favorite make-ahead dessert is my classic pumpkin pie recipe.
Nutritional Facts
Here’s the approximate nutritional information per serving (one slice, assuming 12 servings per cake with frosting):
- Calories: 520
- Total Fat: 24g
- Saturated Fat: 12g
- Cholesterol: 105mg
- Sodium: 310mg
- Total Carbohydrates: 72g
- Dietary Fiber: 1g
- Sugars: 54g
- Protein: 5g
These values are estimates and will vary based on specific brands used and serving sizes. The frosting contributes approximately 200 calories per serving. For a lighter option, serve the cake with whipped cream instead of buttercream, or reduce the frosting amount.
Read Also: Chewy Chocolate Chip Cookies Recipe
Health Benefits of Key Ingredients
While cake is certainly a treat, some ingredients do offer nutritional value beyond pure indulgence.
Eggs provide high-quality protein and essential nutrients like choline, which supports brain health. The egg yolks contain vitamin D, vitamin B12, and healthy fats that help your body absorb fat-soluble vitamins.
Nutritional highlights:
- Butter contains vitamin A for eye health and immune function, plus conjugated linoleic acid that may support heart health
- Buttermilk offers probiotics that aid digestion and provides calcium for strong bones
- Real vanilla extract contains antioxidants and has been shown to have calming properties
- Eggs deliver all nine essential amino acids your body needs for tissue repair
- Whole milk in the frosting provides protein, calcium, and vitamin D
- Flour contributes B vitamins and iron when enriched
This cake works well for special occasions and celebrations. Balance it with nutrient-dense meals throughout the day, and savor each bite mindfully rather than rushing through dessert.
For a healthier breakfast option, try my easy waffle recipe.
Frequently Asked Questions
1. Can I make this vanilla cake ahead of time?
Yes, this cake is perfect for advance preparation. Bake the layers up to 2 days ahead, let them cool completely, then wrap tightly in plastic wrap and store at room temperature. You can also freeze unfrosted layers for up to 3 months. Thaw them overnight in the refrigerator, still wrapped, before frosting. For fully assembled cakes, prepare them 1 day ahead and store at room temperature under a cake dome or in the refrigerator if using perishable fillings.
2. Why did my vanilla cake turn out dense instead of fluffy?
Dense cake usually results from overmixing the batter once you add the flour, which develops too much gluten. It can also happen if you use cold ingredients that don’t incorporate properly, or if you measure flour incorrectly by packing it into measuring cups. Make sure to mix just until no dry flour remains visible, bring all ingredients to room temperature, and measure flour by spooning it into cups and leveling. Expired baking powder can also cause cakes to be dense, so check the date on your leavening agents.
3. Can I substitute cake flour for all-purpose flour?
Yes, cake flour will give you an even more tender, delicate crumb. To substitute, use 3 cups (300g) of cake flour in place of the 2¾ cups all-purpose flour called for in this recipe. Cake flour has less protein than all-purpose flour, which means less gluten development and a softer texture. The trade-off is that cake flour produces a slightly more delicate cake that may be harder to handle when stacking layers. For most home bakers, all-purpose flour provides the best balance of tenderness and structure.
4. How do I make this recipe into cupcakes?
Line standard muffin tins with paper liners and fill each cup about two-thirds full with batter. This recipe makes approximately 24 cupcakes. Bake at 350°F (175°C) for 18 to 22 minutes, checking at 18 minutes with a toothpick. Cupcakes bake faster than full cake layers because they’re smaller, so watch them carefully to avoid overbaking. Let them cool in the pan for 5 minutes, then transfer to a cooling rack to cool completely before frosting.
5. What’s the best way to get flat cake layers without doming?
Several techniques help prevent domed cakes. First, use baking strips around your pans, which you can buy or make by wrapping wet paper towels in aluminum foil around the pan exterior. This insulates the edges and helps the cake bake more evenly. Second, reduce your oven temperature by 25°F and bake slightly longer. Third, avoid overfilling pans, fill them only two-thirds full. Finally, you can always trim domed tops with a serrated knife or cake leveler after cooling. Doming is normal and doesn’t mean you did anything wrong.
For another delicious treat, check out my classic hummus recipe.
Classic Vanilla Cake
Equipment
- 9-inch round cake pans - 2 pans needed
- Parchment paper
- Stand mixer with paddle attachment - or hand mixer
- Large mixing bowls
- Medium mixing bowl
- Whisk
- Rubber spatula
- Measuring cups
- Measuring spoons
- Cooling rack
- Offset spatula - for frosting
- Cake leveler - or serrated knife (optional)
- Kitchen scale - optional – for precise measurements
- Oven thermometer - optional – recommended for accuracy
Ingredients
- 2.75 cups all-purpose flour - 345g
- 2 cups granulated sugar - 400g
- 1 tablespoon baking powder
- 1 teaspoon salt
- 0.75 cup unsalted butter - 170g, at room temperature
- 0.5 cup vegetable oil - 120ml
- 4 large eggs - at room temperature
- 1 cup buttermilk - 240ml, at room temperature
- 2 tablespoons pure vanilla extract
- 1 tablespoon vanilla bean paste - optional, for extra vanilla flavor
For Simple Vanilla Buttercream
- 1 cup unsalted butter - 226g, softened
- 4 cups powdered sugar - 480g, sifted
- 2 tablespoons whole milk - plus 1 tablespoon if needed
- 1 tablespoon vanilla extract
- 0.25 teaspoon salt
Instructions
- Preheat oven to 350°F (175°C). Grease two 9-inch round cake pans, line with parchment paper, grease the parchment, and dust with flour.
- Whisk flour, baking powder, and salt together in a medium bowl until combined.
- Beat softened butter and vegetable oil in stand mixer until smooth. Add sugar and beat on medium-high for 3-4 minutes until light and fluffy.
- Reduce speed to medium-low. Add eggs one at a time, beating well after each addition until fully incorporated.
- Add vanilla extract and vanilla bean paste if using. Beat on medium speed for 30 seconds until evenly distributed.
- With mixer on low, add one-third of flour mixture and mix briefly. Add half the buttermilk and mix. Repeat with another third of flour, remaining buttermilk, then final flour. Mix just until no dry flour remains.
- Divide batter evenly between prepared pans. Smooth tops and tap pans on counter to release air bubbles.
- Bake for 28-32 minutes until toothpick inserted in center comes out clean or with few moist crumbs. Cool in pans for 10-15 minutes, then transfer to cooling rack to cool completely.
- Beat softened butter for 2 minutes until smooth. Gradually add powdered sugar, one cup at a time, beating well after each addition. Add vanilla, salt, and 2 tablespoons milk. Beat on medium-high for 3-4 minutes until light and fluffy.
- Trim cake tops if domed. Place one layer on serving plate, spread with ¾ cup buttercream. Top with second layer. Apply thin crumb coat, refrigerate 15-20 minutes, then frost with remaining buttercream.
Notes
- Bring all refrigerated ingredients to room temperature before starting. Set eggs, butter, and buttermilk out 1-2 hours before baking.
- Measure flour correctly by spooning into measuring cups and leveling with a knife. Scooping directly from the bag packs the flour and results in a dry cake.
- Do not overmix once you add the flour. Mix just until no dry flour streaks remain to prevent a tough, dense cake.
- Use an oven thermometer to verify your oven temperature, as many ovens run hot or cold.
- Avoid opening the oven door during the first 25 minutes of baking to prevent the cakes from sinking.
- Store unfrosted cake layers wrapped tightly in plastic wrap at room temperature for up to 3 days or freeze for up to 3 months.
- Fully frosted cake can sit at room temperature under a cake dome for 2 days. Refrigerate any cake with cream cheese frosting or fresh fruit fillings.
- For extra moist cake, brush each layer with simple syrup (equal parts sugar and water, boiled and cooled) before frosting.
- To make cupcakes: divide batter among 24 lined muffin cups, bake at 350°F for 18-22 minutes.
- This cake tastes even better on day two after the flavors have developed and the crumb settles.
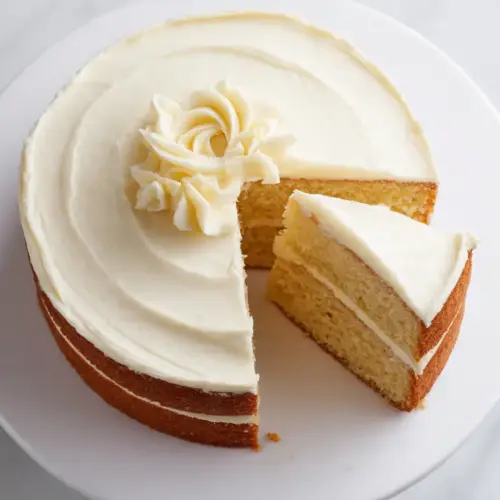
Final Thoughts
This classic vanilla cake recipe deserves a permanent place in your baking collection. The tender crumb, buttery flavor, and reliable results make it perfect for both novice bakers and experienced ones looking for a foolproof recipe.
Making cake from scratch takes a bit more time than opening a box mix, but the difference in taste and texture is remarkable. You’ll love knowing exactly what goes into your dessert, and your friends and family will notice the upgrade immediately. Save this recipe for birthdays, holidays, or simply when you need something sweet to brighten your day.
I’d love to hear how your vanilla cake turns out! Leave a comment below with your favorite way to enjoy it, any variations you tried, or questions you might have. If you make this recipe, tag me on social media so I can see your beautiful creations.
Recommended:
- Belgian Waffle Recipe
- Old Fashioned Pancake Recipe
- Buttermilk Pancake Recipe
- Classic French Toast Recipe
- Easy French Toast Recipe
- Homemade Granola Recipe
- Easy Granola Recipe
- Almond Macaroon Cookie Recipe
- Old Fashioned Chocolate Chip Cookie Recipe
- Basic Crepe Recipe