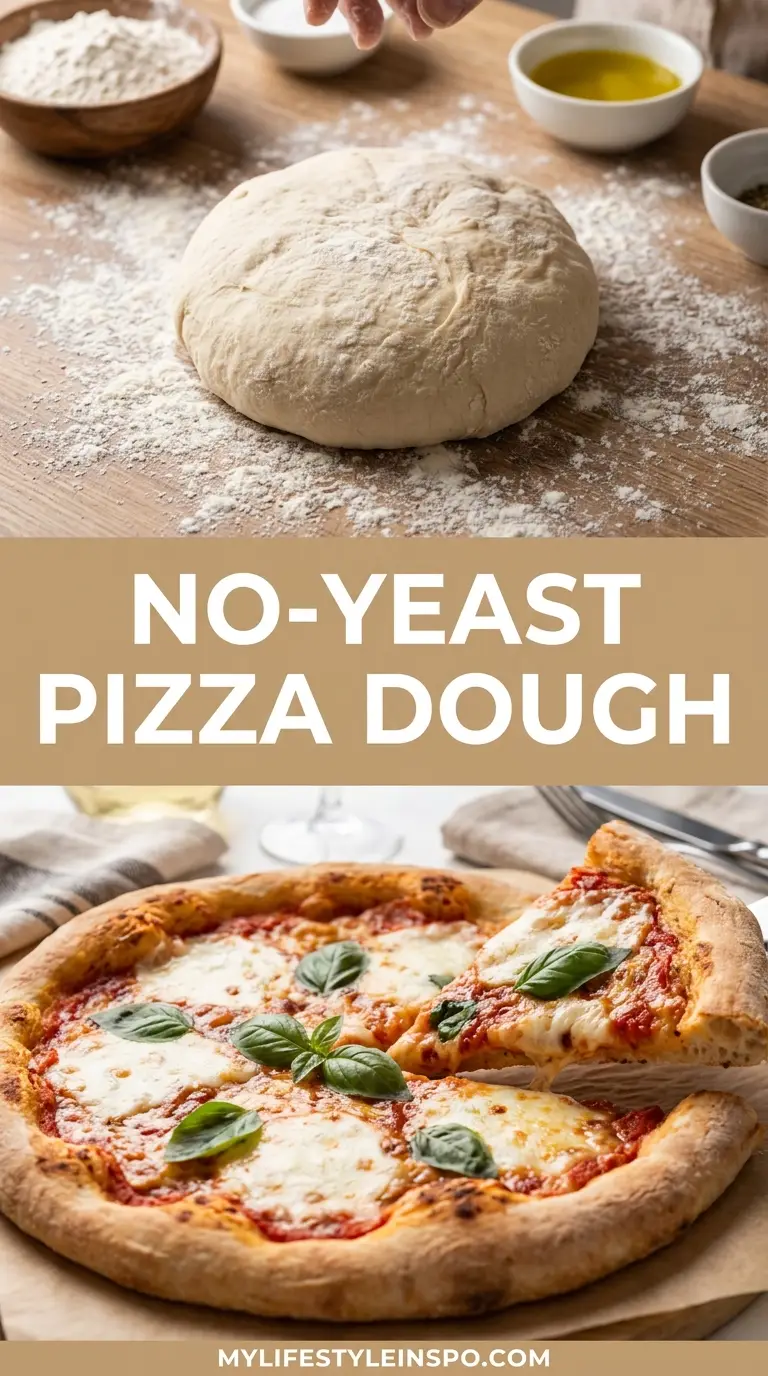
Craving homemade pizza but don’t have any yeast on hand? This no-yeast pizza dough recipe is about to become your new favorite weeknight solution.
With just a handful of pantry staples and zero rising time, you can have fresh, homemade pizza on the table in less than 30 minutes. The secret lies in using baking powder as the leavening agent instead of yeast, which means no waiting around for dough to rise and no worrying about whether your yeast is still active.
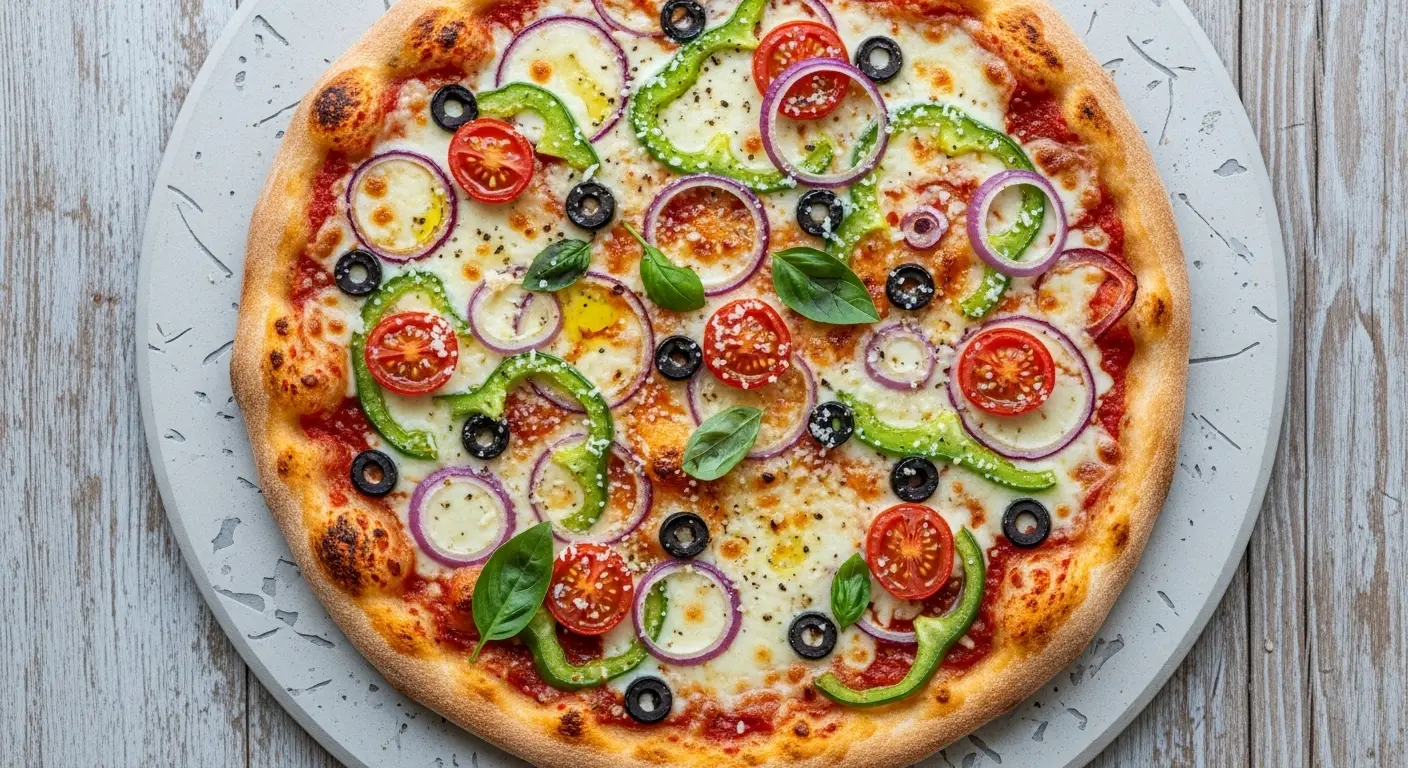
The texture is different from traditional yeasted dough but in the best possible way. It’s tender, slightly chewy, and has a pleasant breadlike quality that holds toppings beautifully. The crust gets golden and crispy on the edges while staying soft in the center, making it perfect for everything from classic pepperoni to loaded veggie pizzas.
What makes this recipe so practical is its flexibility. You can mix it by hand in a bowl or use a food processor for even faster prep. The dough is forgiving and easy to work with, making it ideal for beginner bakers or anyone looking to get dinner on the table quickly.
This Easy Pizza Dough Recipe alternative uses baking powder to create those essential air pockets that give pizza crust its structure.
Why You’ll Love This No-Yeast Pizza Dough Recipe
This recipe solves one of the biggest obstacles to making homemade pizza: time. Traditional pizza dough requires at least an hour of rising time, and often longer for the best results.
With this version, you eliminate that waiting period entirely. The baking powder starts working as soon as it comes into contact with moisture, so you can go from mixing bowl to oven in about 15 minutes of active prep time.
Here’s what makes this recipe so appealing:
- Ready in under 30 minutes: From start to finish, including baking time, you’ll have fresh pizza faster than delivery would arrive
- Simple pantry ingredients: No special purchases required, just flour, baking powder, salt, water, and oil
- Beginner-friendly: The dough is forgiving and doesn’t require any special kneading techniques or temperature control
- Versatile texture: Works beautifully for both thin-crust and slightly thicker pizzas depending on how you roll it
- Consistent results: Unlike yeast dough, you don’t have to worry about proofing conditions or whether your yeast is fresh enough
- Great for meal prep: While best made fresh, you can prepare components ahead of time for even faster weeknight dinners
- Kid-approved: The slightly softer, bread-like texture appeals to children who might find traditional pizza crust too chewy
The best part? You won’t feel like you’re settling for a substitute. This dough creates a genuinely delicious pizza crust that stands on its own merits.
For a completely different pizza experience, try this Air Fryer French Bread Pizza Recipe using store-bought bread.
Ingredients
This recipe comes together with just five basic ingredients you likely already have in your pantry. The simplicity is part of what makes it so reliable.
Each ingredient plays a specific role in creating the perfect texture and flavor:
- 2 cups (250g) all-purpose flour: The foundation of the dough, providing structure and that classic pizza crust chew
- 1 tablespoon (12g) baking powder: This is what gives the crust its rise, creating those essential air pockets that yeast would normally provide
- 3/4 teaspoon (4g) salt: Enhances all the flavors and helps strengthen the gluten network in the flour
- 2/3 cup (160ml) warm water: Hydrates the flour and activates the baking powder, bringing everything together into a cohesive dough
- 2 tablespoons (30ml) olive oil: Adds moisture, tenderness, and a subtle richness to the crust
Optional additions for extra flavor:
- 1 teaspoon Italian seasoning
- 1/2 teaspoon garlic powder
- 1 teaspoon sugar or honey (helps with browning)
Kitchen Equipment Needed
You don’t need any specialized equipment to make this pizza dough successfully. Most of these items are basic kitchen essentials.
The right tools make the process smoother and help you achieve better results:
- Large mixing bowl: For combining ingredients and initial mixing
- Measuring cups and spoons: Accurate measurements ensure consistent results every time
- Whisk or fork: To combine dry ingredients thoroughly
- Wooden spoon or spatula: For mixing the dough before kneading
- Clean work surface: A countertop or large cutting board for kneading and rolling
- Rolling pin: Essential for rolling the dough to your desired thickness (a wine bottle works in a pinch)
- Pizza pan, baking sheet, or pizza stone: Your baking surface of choice
- Parchment paper (optional but helpful): Prevents sticking and makes transferring the dough easier
- Kitchen towel: For covering the dough during its brief rest period
Recommended Products for This Recipe
These carefully selected products can elevate your pizza-making experience and help you achieve professional-quality results at home.
1. King Arthur Baking Company Unbleached Bread Flour
While all-purpose flour works perfectly well, upgrading to bread flour gives your crust a better chew and slightly more structure. The higher protein content creates a superior texture that more closely mimics traditional yeasted pizza crust.
2. Le Creuset Stoneware Pizza Stone
A quality pizza stone distributes heat evenly across the entire crust, preventing soggy centers and ensuring that perfect golden-brown bottom. This one preheats beautifully and can handle the high temperatures needed for crispy pizza.
3. OXO Good Grips Silicone Rolling Pin
This non-stick rolling pin makes rolling out pizza dough effortless, with comfortable handles that give you excellent control. The silicone surface means you’ll use less flour for dusting, keeping your dough from becoming too dry.
4. California Olive Ranch Extra Virgin Olive Oil
Quality olive oil makes a noticeable difference in both the dough and as a finishing touch. This California-produced oil has a fresh, fruity flavor that enhances the crust without overpowering other ingredients.
Another quick option for pizza night is this Taco Skillet Recipe, which delivers similar convenience with different flavors.
Step-by-Step Instructions
Follow these detailed steps to create perfect no-yeast pizza dough every time. Even complete beginners will find success with this straightforward method.
1. Prepare Your Workspace and Preheat the Oven
- Clear and clean your countertop, ensuring you have plenty of room to work
- Preheat your oven to 425°F (220°C), giving it at least 15 minutes to reach the proper temperature
- If using a pizza stone, place it in the oven now to preheat along with the oven for maximum heat retention
- Line a baking sheet with parchment paper if not using a pizza stone, or lightly dust your pizza pan with flour or cornmeal to prevent sticking
- Gather all your ingredients and equipment so everything is within easy reach
2. Mix the Dry Ingredients
- Add the 2 cups of flour to your large mixing bowl
- Measure the baking powder carefully (too much creates a bitter taste, too little means less rise) and add it to the flour
- Add the salt to the bowl
- If using any optional seasonings like Italian herbs or garlic powder, add them now
- Use a whisk or fork to combine these dry ingredients thoroughly for at least 30 seconds, ensuring the baking powder is evenly distributed throughout the flour
- This whisking step is crucial because it prevents pockets of baking powder from creating uneven rising
3. Combine the Wet Ingredients
- In a small bowl or measuring cup, combine the warm water and olive oil
- The water should be warm to the touch but not hot (around 100-110°F or 38-43°C)
- Stir the water and oil together briefly, though they won’t fully emulsify
- Make a well in the center of your dry ingredients by pushing the flour mixture to the sides of the bowl
- Pour the wet ingredients into this well all at once
4. Mix the Dough
- Using a wooden spoon or sturdy spatula, start stirring from the center, gradually incorporating the flour from the sides
- Continue mixing until the dough begins to come together into a shaggy mass
- At this point, the mixture will look rough and uneven, with some dry patches, this is completely normal
- If the dough seems too dry and won’t come together, add water one tablespoon at a time
- If it’s too sticky and wet, sprinkle in flour one tablespoon at a time
- The dough should be soft but not sticky enough to leave residue on your fingers when you touch it briefly
5. Knead the Dough
- Lightly flour your clean work surface, using just enough flour to prevent sticking (about 1-2 tablespoons)
- Turn the dough out onto the floured surface
- Using the heels of your hands, push the dough away from you, then fold it back over itself
- Rotate the dough a quarter turn and repeat this pushing and folding motion
- Continue kneading for 2-3 minutes total (this is much less than yeasted dough requires)
- The dough is ready when it forms a smooth, cohesive ball that springs back slightly when poked
- Avoid over-kneading, which can make the crust tough; you’re just looking to bring the dough together smoothly
6. Rest the Dough
- Form the kneaded dough into a smooth ball
- Lightly oil your mixing bowl or use a clean one
- Place the dough ball in the bowl and cover it with a damp kitchen towel or plastic wrap
- Let the dough rest at room temperature for 15 minutes
- This resting period allows the gluten to relax, making the dough much easier to roll out without it shrinking back
- During this time, you can prepare your toppings and sauce
7. Roll Out the Dough
- After resting, lightly flour your work surface again
- Place the dough ball on the floured surface and gently press it down with your hands to flatten it slightly
- Using a rolling pin, start rolling from the center outward, rotating the dough occasionally to maintain an even round shape
- For a standard 12-inch pizza, roll the dough to about 1/4-inch thickness
- For a thinner, crispier crust, roll it to about 1/8-inch thickness
- For a thicker, softer crust, keep it closer to 1/2-inch thickness
- If the dough resists and keeps shrinking back, let it rest for another 5 minutes before continuing
- Don’t worry if your circle isn’t perfect; homemade charm adds character
8. Transfer to Your Baking Surface
- If using parchment paper, you can roll the dough directly on the paper to make transferring easier
- Otherwise, carefully lift the dough using both hands and drape it over your prepared pan or pizza peel
- Gently stretch and adjust the dough to fit your pan, working from the center outward
- If you tear the dough, simply pinch it back together or patch it with a small piece
- For a defined crust edge, fold and pinch the outer rim slightly, creating a raised border that will contain your toppings
9. Add Toppings
- Spread your pizza sauce evenly over the dough, leaving about a 1/2-inch border around the edges
- Use about 1/2 to 2/3 cup of sauce for a 12-inch pizza, depending on how saucy you like it
- Add your shredded cheese, distributing it evenly (about 1 1/2 to 2 cups for a 12-inch pizza)
- Layer on your chosen toppings, but don’t overload the pizza or the crust won’t crisp properly
- Keep heavier or wetter ingredients like fresh tomatoes and mushrooms in moderation
- Drizzle a little olive oil around the exposed crust edge for extra golden color and flavor
10. Bake the Pizza
- Carefully transfer the pizza to your preheated oven
- Bake for 12-15 minutes, checking at the 10-minute mark
- The pizza is done when the crust is golden brown, the cheese is fully melted and bubbly, and the edges are crispy
- If you’re using a pizza stone, the bottom should be nicely browned and crisp
- If the top is browning too quickly but the crust isn’t done, tent the pizza loosely with foil for the last few minutes
- For an extra-crispy bottom, you can finish the pizza under the broiler for 1-2 minutes, watching carefully to prevent burning
11. Cool and Serve
- Remove the pizza from the oven using oven mitts or a pizza peel
- Let it rest on the pan or a cutting board for 2-3 minutes before slicing
- This brief cooling period allows the cheese to set slightly, preventing toppings from sliding off when you cut
- Use a pizza cutter or sharp knife to slice into 6-8 pieces
- Serve immediately while hot and enjoy your homemade pizza
For another quick homemade option that requires minimal waiting, try this Old Fashioned Pancake Recipe.
Tips for Success
These expert tips will help you achieve the best possible results and troubleshoot common issues before they happen.
Master these techniques for consistently excellent homemade pizza:
- Don’t skip the resting period: Those 15 minutes allow the gluten to relax and the baking powder to begin activating, making a significant difference in texture
- Use warm (not hot) water: Water that’s too hot can cause the baking powder to activate prematurely, while cold water slows down the process
- Measure flour correctly: Spoon flour into your measuring cup and level it off with a knife rather than scooping directly from the bag, which compacts the flour and adds too much
- Keep extra flour minimal when rolling: Too much flour during rolling makes the dough dry and tough; use just enough to prevent sticking
- Preheat thoroughly: A fully preheated oven is essential for proper crust texture and cooking
- Don’t overload toppings: Heavy or wet toppings can make the crust soggy; less is often more with pizza
- Check the bottom: Lift the edge of your pizza with a spatula to check if the bottom is golden brown before removing from the oven
- Par-bake for wet toppings: If using very wet ingredients like fresh tomatoes or lots of vegetables, bake the crust alone for 5 minutes before adding toppings
- Let the dough warm up if refrigerated: Cold dough is harder to roll out; let it sit at room temperature for 20-30 minutes first
- Brush the crust with garlic butter: For restaurant-style flavor, brush the edges with melted butter mixed with garlic powder before baking
This Creamy Mac and Cheese Recipe is another comfort food classic that can be made quickly when you need dinner fast.
Serving Suggestions
No-yeast pizza dough is incredibly versatile and pairs beautifully with countless topping combinations and side dishes.
Turn your homemade pizza into a complete meal:
Classic topping combinations:
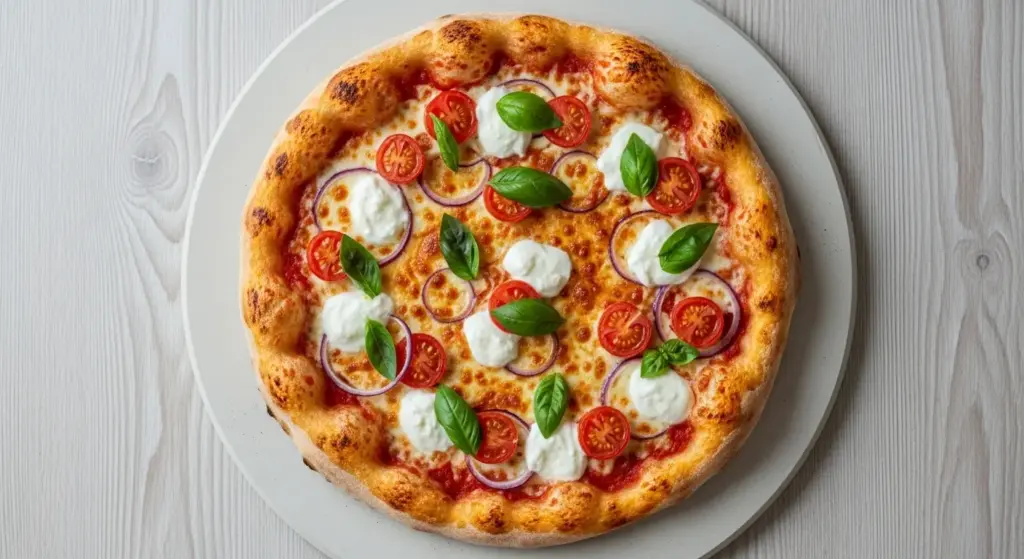
- Margherita: Fresh mozzarella, tomato sauce, fresh basil, and a drizzle of olive oil
- Pepperoni and mushroom: Tomato sauce, mozzarella, pepperoni slices, and sliced mushrooms
- BBQ chicken: BBQ sauce base, grilled chicken, red onions, cilantro, and mozzarella
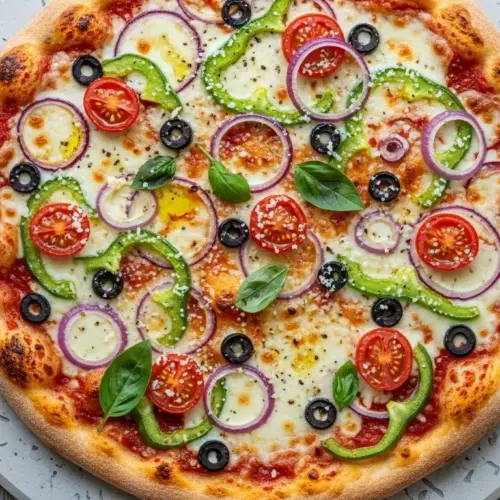
- Veggie supreme: Bell peppers, onions, mushrooms, olives, and tomatoes
- White pizza: Ricotta, mozzarella, garlic, and spinach with no tomato sauce
Perfect side dishes:
- Classic Caesar Salad
- Creamy Coleslaw
- Cunettos Garlic Cheese Bread
- Classic Deviled Eggs
- Easy Hummus with raw vegetables
Beverage pairings:
- For classic tomato-based pizzas, try a light red wine or sparkling water with lemon
- White pizzas pair beautifully with crisp white wine or Italian soda
- For family meals, homemade lemonade or iced tea complements any pizza perfectly
Read Also: Spinach Soup Recipe
Variations to Try
This basic no-yeast pizza dough serves as a blank canvas for endless creative possibilities, from flavor additions to alternative uses.
Experiment with these delicious variations:
- Whole wheat version: Replace up to half the all-purpose flour with whole wheat flour for added fiber and a nuttier flavor (you may need slightly more water)
- Herb-infused dough: Knead in 2 tablespoons fresh chopped basil, oregano, or rosemary for an aromatic crust
- Garlic parmesan crust: Add 1 teaspoon garlic powder to the dry ingredients and brush the edges with melted butter and grated Parmesan before baking
- Cheesy crust: Mix 1/4 cup shredded cheese directly into the dough for extra richness
- Gluten-free adaptation: Use a 1:1 gluten-free flour blend in place of all-purpose flour (Bob’s Red Mill 1-to-1 works well)
- Mini personal pizzas: Divide the dough into 4-6 portions and roll into small individual pizzas, perfect for customizing to different preferences
- Flatbread: Roll the dough very thin and bake without toppings for a flatbread base to use with dips or for sandwiches
- Calzone: Fill one half of a rolled circle with toppings, fold over, seal the edges, and bake for a stuffed pocket pizza
- Pizza rolls: Roll the dough into a rectangle, add toppings, roll up jelly-roll style, slice, and bake for pizza pinwheels
- Breakfast pizza: Top with scrambled eggs, bacon, cheese, and hash browns for a morning twist
You might also enjoy this Belgian Waffle Recipe for another versatile base that works with both sweet and savory toppings.
Storage and Reheating
Proper storage techniques help you enjoy leftover pizza or prepare components ahead for faster future meals.
Keep your pizza fresh and delicious:
Storing the unbaked dough:
- Shape the dough into a ball, coat lightly with oil, and wrap tightly in plastic wrap
- Refrigerate for up to 24 hours (let it come to room temperature for 20-30 minutes before rolling)
- Freezing is not recommended for this dough as the baking powder will lose effectiveness over time
Storing baked pizza:
- Let leftover pizza cool completely to room temperature
- Stack slices with parchment paper between each piece to prevent sticking
- Store in an airtight container or wrap tightly in plastic wrap or aluminum foil
- Refrigerate for up to 3-4 days
Reheating methods:
- Skillet method (best for crispy crust): Heat a dry skillet over medium heat, add pizza, cover with a lid, and heat for 3-4 minutes until the cheese melts and the bottom crisps
- Oven method: Preheat oven to 375°F (190°C), place pizza directly on the rack or a baking sheet, and heat for 8-10 minutes
- Air fryer method: Heat at 350°F (175°C) for 3-4 minutes for perfectly crispy reheated pizza
- Microwave (quick but less crispy): Place a glass of water in the microwave alongside the pizza to prevent the crust from getting tough, heat for 30-60 seconds
For meal prep enthusiasts, check out this Breakfast Casserole Recipe that can be made ahead.
Nutritional Facts
Understanding the nutritional content helps you make informed decisions about portion sizes and fit this recipe into your meal planning.
Per serving (1/8 of a 12-inch pizza, crust only, without toppings):
- Calories: 130
- Total Fat: 4g
- Saturated Fat: 0.5g
- Sodium: 270mg
- Total Carbohydrates: 21g
- Dietary Fiber: 1g
- Sugars: 0g
- Protein: 3g
Notes on nutrition:
- Values are for the dough only and don’t include sauce, cheese, or toppings, which will significantly increase calories and fat
- A typical slice with cheese and pepperoni adds approximately 150-200 additional calories
- Using bread flour instead of all-purpose flour increases protein slightly
- Whole wheat flour variations increase fiber content by about 2-3g per serving
- This recipe contains no cholesterol and is naturally dairy-free and egg-free (though toppings may not be)
Health Benefits of Key Ingredients
While pizza is typically considered an indulgence, the individual ingredients in this dough offer some nutritional value.
The simple ingredients provide more benefits than you might expect:
All-purpose flour:
- Many brands are enriched with B vitamins (thiamin, riboflavin, niacin) and iron
- Provides energy through complex carbohydrates that fuel your body and brain
- Contains some protein that contributes to the dough’s structure
Olive oil:
- Rich in monounsaturated fats that support heart health
- Contains antioxidants and anti-inflammatory compounds
- Provides vitamin E, which supports immune function and skin health
- Extra virgin varieties offer the most health benefits due to minimal processing
Salt:
- Essential mineral that helps regulate fluid balance
- Supports proper nerve and muscle function
- Should be consumed in moderation as part of a balanced diet
Making it healthier:
- Substitute half the flour with whole wheat for increased fiber and nutrients
- Use high-quality extra virgin olive oil for maximum antioxidant benefits
- Choose vegetable-heavy toppings to boost vitamins, minerals, and fiber
- Control portion sizes by pairing with a large salad to increase fullness without excess calories
- Make your own tomato sauce to control sodium and sugar content
For another recipe with wholesome ingredients, try this Carrot Soup Recipe.
Frequently Asked Questions
1. Can I use self-rising flour instead of all-purpose flour and baking powder?
Yes, you can substitute self-rising flour in this recipe. If using self-rising flour, omit both the all-purpose flour and the baking powder, and reduce the salt to just a pinch (about 1/4 teaspoon).
Self-rising flour already contains baking powder and salt mixed in at the proper ratios. Keep in mind that self-rising flour-based dough may rise slightly more and have a lighter, fluffier texture than the standard version.
2. Why is my pizza dough too sticky or too dry?
Dough consistency issues usually come down to flour measurement or humidity levels. If your dough is too sticky, add flour one tablespoon at a time while kneading until it reaches the right consistency.
If it’s too dry and crumbly, add water one tablespoon at a time until the dough holds together. Humidity, flour brand, and even how you measure can affect the dough, so minor adjustments are completely normal and expected.
3. Can I make this dough ahead of time?
You can make the dough up to 24 hours ahead, but it’s best used within a few hours for optimal results. Mix and knead the dough, then wrap it tightly in plastic wrap coated with a bit of oil and refrigerate.
When ready to use, let the dough sit at room temperature for 20-30 minutes to make rolling easier. The baking powder will lose some effectiveness over time, so dough made fresh will rise slightly better than refrigerated dough.
4. How is no-yeast pizza dough different from regular pizza dough?
The main difference is texture and flavor development. Yeast creates more complex flavors through fermentation and produces a chewier, airier crust with those characteristic large bubbles around the edges.
No-yeast dough made with baking powder is denser, softer, and more bread-like, similar to biscuit texture. It won’t get quite as crispy or develop the same depth of flavor, but it’s ready in a fraction of the time and doesn’t require any special skills or timing.
5. What temperature should I bake no-yeast pizza at?
The ideal temperature is 425°F (220°C) for most home ovens. This temperature is hot enough to create a golden, crispy crust without overcooking the toppings.
If your oven runs hot, you can reduce it to 400°F (200°C) and bake for a few minutes longer. For an extra-crispy bottom, preheat a pizza stone at 450°F (230°C) for at least 30 minutes before baking.
Check out this Easy Waffle Recipe for another quick breakfast or dinner option.
No-Yeast Pizza Dough
Equipment
- Large mixing bowl
- Measuring cups and spoons
- Whisk or fork
- Wooden spoon or spatula
- Clean work surface
- Rolling Pin - a wine bottle works in a pinch
- Pizza pan, baking sheet, or pizza stone
- Parchment paper - optional but helpful
- Kitchen towel
Ingredients
- 2 cups all-purpose flour - 250g
- 1 tablespoon baking powder - 12g
- 3/4 teaspoon salt - 4g
- 2/3 cup warm water - 160ml
- 2 tablespoons olive oil - 30ml
Optional additions for extra flavor
- 1 teaspoon Italian seasoning
- 1/2 teaspoon garlic powder
- 1 teaspoon sugar or honey - helps with browning
Instructions
- Preheat your oven to 425°F (220°C). If using a pizza stone, place it in the oven to preheat. Prepare your baking surface with parchment paper or light dusting of flour/cornmeal.
- In a large mixing bowl, whisk together the flour, baking powder, salt, and any optional seasonings for at least 30 seconds to ensure even distribution.
- In a small bowl, combine the warm water and olive oil. Make a well in the center of the dry ingredients and pour in the wet mixture.
- Stir with a wooden spoon until a shaggy dough forms. Adjust with additional water or flour, one tablespoon at a time, until the dough is soft but not sticky.
- Turn the dough onto a lightly floured surface and knead for 2-3 minutes until smooth and cohesive. Avoid over-kneading.
- Form the dough into a ball, place in a lightly oiled bowl, cover with a damp towel, and let rest for 15 minutes at room temperature.
- On a lightly floured surface, roll the dough to desired thickness (1/8-inch for thin crust, 1/4-inch for standard, up to 1/2-inch for thicker).
- Transfer the dough to your prepared pan or stone. Add sauce, cheese, and toppings, leaving a border for the crust. Drizzle olive oil on the edges if desired.
- Bake for 12-15 minutes until the crust is golden brown, cheese is bubbly, and bottom is crisp. Broil for 1-2 minutes for extra crispiness if needed.
- Let the pizza rest for 2-3 minutes before slicing and serving hot.
Notes
- Don’t skip the 15-minute rest—it relaxes the gluten for easier rolling and better texture.
- Use warm (not hot) water around 100-110°F to properly activate the baking powder.
- Spoon and level flour for accurate measurement; scooping can make the dough too dry.
- Avoid overloading with wet or heavy toppings to prevent a soggy crust.
- For make-ahead, refrigerate the oiled dough ball up to 24 hours; bring to room temperature before rolling.
- Par-bake the crust for 5 minutes if using very wet toppings like fresh tomatoes.
- Brush crust edges with garlic butter before baking for restaurant-style flavor.
- Store leftover baked pizza in the fridge up to 3-4 days; reheat in a skillet or oven for crispiness.
- Substitute up to half the flour with whole wheat for more fiber (may need extra water).
- This dough works for flatbreads, calzones, or pizza rolls with creative variations.
Final Thoughts
This no-yeast pizza dough recipe proves that you don’t need hours of rising time to enjoy delicious homemade pizza. With just five simple ingredients and about 30 minutes total, you can create a tender, flavorful crust that rivals your favorite pizzeria.
The beauty of this recipe lies in its simplicity and reliability. No more worrying about whether your yeast is fresh, no more waiting for dough to double in size, and no more complicated temperature requirements.
Just mix, knead briefly, rest, roll, and bake. It’s perfect for busy weeknights when takeout feels too expensive or impersonal, and ideal for getting kids involved in the kitchen since the process is so straightforward.
Give this recipe a try for your next pizza night and discover how easy homemade pizza can be. I’d love to hear how it turned out for you and what toppings you chose, so leave a comment below and share your creations!
Recommended:
- Baked Mac and Cheese Recipe
- Classic French Toast Recipe
- Easy Lasagna Recipe
- Classic Chicken Parmesan Recipe
- Baked Ziti Recipe
- Classic Shepherds Pie Recipe
- Creamy Mashed Potatoes Recipe
- Classic Sloppy Joe Recipe
- White Chicken Chili Recipe
- Easy Chicken Pot Pie Recipe


