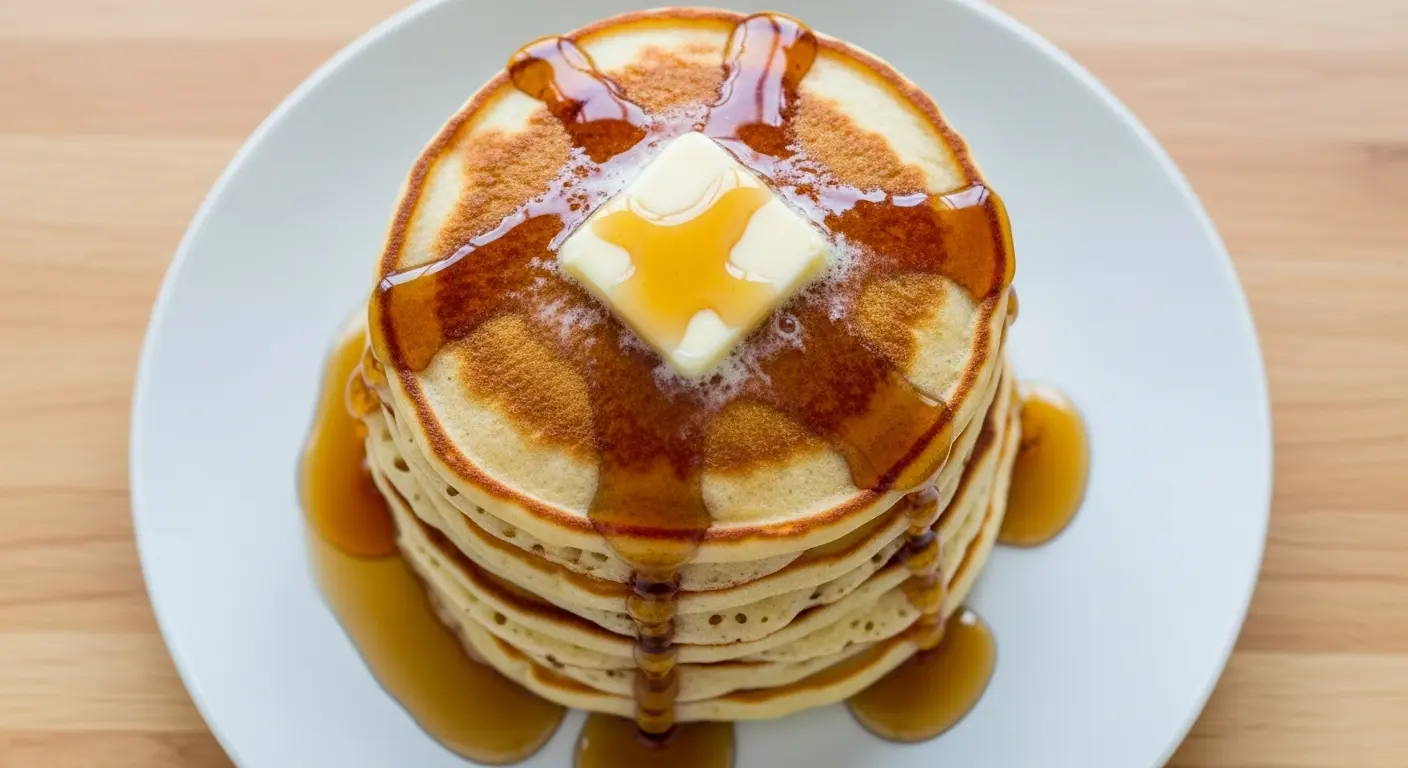
Nothing beats waking up to a stack of warm, fluffy old fashioned pancakes on a lazy weekend morning. This classic recipe has been passed down through generations, bringing families together around the breakfast table with its simple ingredients and foolproof method.
These old fashioned pancakes are made with pantry staples you already have on hand. No buttermilk needed, no fancy ingredients, just pure comfort food that delivers perfect results every single time. The secret lies in not overmixing the batter and cooking them at just the right temperature for that ideal golden-brown exterior and impossibly fluffy interior.
Growing up, pancakes were always a special weekend treat in my house. The smell would drift through the hallways and pull everyone out of bed without fail. Now I make this same recipe for my own family, and it never disappoints.
What makes these truly special is their versatility. They’re sweet enough to enjoy on their own but not so sweet that you can’t drizzle them with maple syrup and add your favorite toppings.
Why You’ll Love This Old Fashioned Pancake Recipe
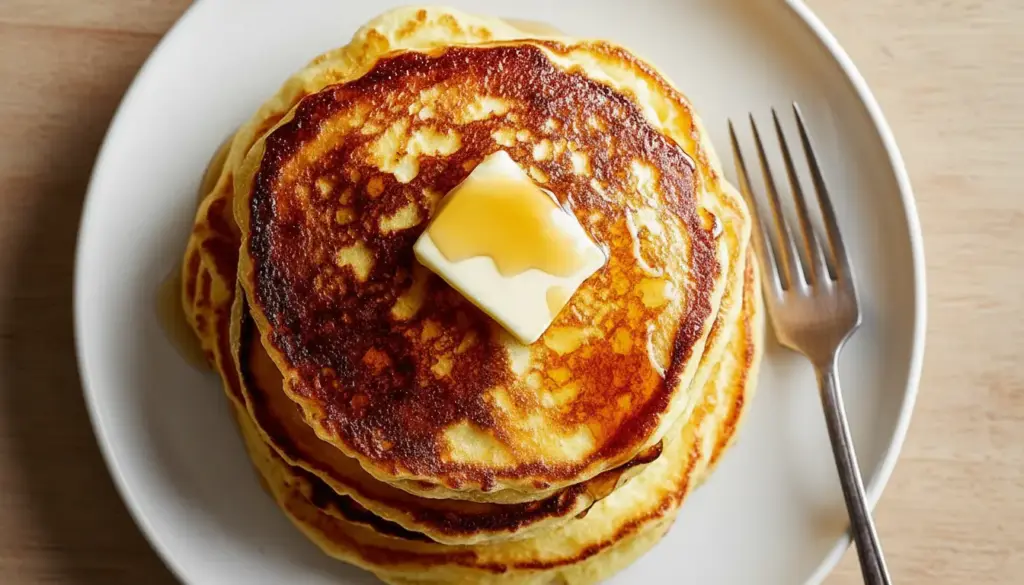
This recipe creates perfectly fluffy pancakes with crispy, golden edges that stay soft in the middle. The batter comes together in minutes, and you don’t need any special equipment or hard-to-find ingredients.
These pancakes have the ideal texture that soaks up butter and syrup without falling apart. They’re thick enough to be satisfying but light enough that you won’t feel weighed down after breakfast. Plus, they reheat beautifully, making them perfect for meal prep.
- Simple ingredients you already have in your pantry
- Quick preparation taking less than 20 minutes from start to finish
- Foolproof method that works every single time
- Perfectly fluffy texture with golden, slightly crispy edges
- Kid-friendly and loved by the whole family
- Versatile base for endless flavor variations
- Freezer-friendly for make-ahead breakfast options
For more breakfast inspiration, you might enjoy my buttermilk pancake recipe.
Ingredients
These old fashioned pancakes call for basic ingredients you likely have in your kitchen right now. The key is using fresh baking powder for maximum fluffiness and not skimping on the butter for richness. I prefer using whole milk for the creamiest texture, but 2% works well too.
- 1 1/2 cups (190g) all-purpose flour – provides structure
- 3 1/2 teaspoons baking powder – creates those fluffy air pockets
- 1 tablespoon (12g) granulated sugar – adds subtle sweetness
- 1/2 teaspoon salt – enhances all the flavors
- 1 1/4 cups (300ml) whole milk – makes the batter smooth and pourable
- 1 large egg – binds everything together
- 3 tablespoons (42g) melted butter – adds richness and flavor
- 1 teaspoon pure vanilla extract – optional but recommended
- Additional butter or oil for the griddle
You might also like: Easy Waffle Recipe
Kitchen Equipment Needed
Having the right tools makes pancake-making so much easier. A good griddle maintains even heat, which is crucial for consistent results. I highly recommend using a non-stick griddle if you make pancakes regularly.
- Large mixing bowl for dry ingredients
- Medium mixing bowl for wet ingredients
- Whisk for mixing
- Measuring cups and spoons
- Non-stick griddle or large skillet
- 1/4 cup measuring cup or ladle for portioning batter
- Spatula for flipping
- Wire cooling rack for keeping finished pancakes warm
Recommended Products for This Recipe
These are my tried-and-true product recommendations that will genuinely improve your pancake-making experience. I’ve tested countless brands and kitchen tools, and these consistently deliver the best results for this old fashioned pancake recipe.
1. Lodge Cast Iron Griddle
This cast iron griddle distributes heat perfectly and creates those beautiful golden-brown pancakes with crispy edges. It can go from stovetop to oven, and with proper seasoning, it becomes naturally non-stick. This is an heirloom-quality piece that will last generations.
2. Bob’s Red Mill Aluminum-Free Baking Powder
The difference between regular and aluminum-free baking powder is night and day. This one gives you incredibly fluffy pancakes without any metallic aftertaste. Fresh baking powder is absolutely crucial for achieving maximum rise.
3. OXO Good Grips Pancake Turner
This turner has the perfect width and flexibility for flipping pancakes without breaking them. The angled head slides easily under even the most delicate pancakes, and it won’t scratch your non-stick surfaces.
4. Pure Vermont Maple Syrup
Once you try real maple syrup on these old fashioned pancakes, you’ll never go back to the artificial stuff. The rich, complex flavor complements the buttery pancakes perfectly. Grade A Dark Amber is my personal favorite for its robust taste.
Read Also: Belgian Waffle Recipe
Step-by-Step Instructions
Follow these detailed instructions for perfect old fashioned pancakes every time. The key is preparing your batter properly and getting your cooking temperature just right. Don’t rush the process, especially the resting time for the batter.
1. Prepare Your Dry Ingredients
- Grab your large mixing bowl and add the flour, baking powder, sugar, and salt
- Whisk everything together thoroughly for at least 30 seconds to ensure the baking powder is evenly distributed throughout the flour
- This step is crucial because it prevents pockets of baking powder that can create an uneven rise or bitter taste
- Set this bowl aside while you prepare the wet ingredients
2. Mix Your Wet Ingredients
- In your medium mixing bowl, crack the egg and whisk it gently with a fork for about 15 seconds
- Add the milk, melted butter (make sure it’s cooled slightly so it doesn’t cook the egg), and vanilla extract if using
- Whisk everything together until the mixture is smooth and the egg is completely incorporated
- The melted butter should be warm but not hot, around 100-110°F (38-43°C) is perfect
- If the butter is too hot, let it sit for 2-3 minutes before adding to the milk mixture
3. Combine Wet and Dry Ingredients
- Pour the wet ingredients into the bowl with the dry ingredients
- Using your whisk, gently stir the mixture together with broad, sweeping motions
- Stop mixing as soon as no large pockets of dry flour remain, even if the batter looks lumpy
- A few lumps are perfectly fine and actually desirable, overmixing will result in tough, dense pancakes
- The batter should be thick but still pourable, similar to the consistency of thick cream
- If your batter seems too thick, add milk 1 tablespoon at a time until it reaches the right consistency
- Let the batter rest for 5-10 minutes while your griddle heats up, this allows the flour to fully hydrate and the baking powder to start working
4. Heat Your Griddle
- Place your griddle or large skillet over medium heat
- Let it preheat for a full 3-4 minutes, this ensures even cooking temperature
- Test the temperature by sprinkling a few drops of water on the surface
- The water should sizzle and dance across the griddle before evaporating
- If the water just sits there, your griddle isn’t hot enough yet
- If it evaporates instantly with a hiss, your heat is too high
- Add a small pat of butter or a thin coating of oil to the griddle
- Use a paper towel to spread it evenly across the surface
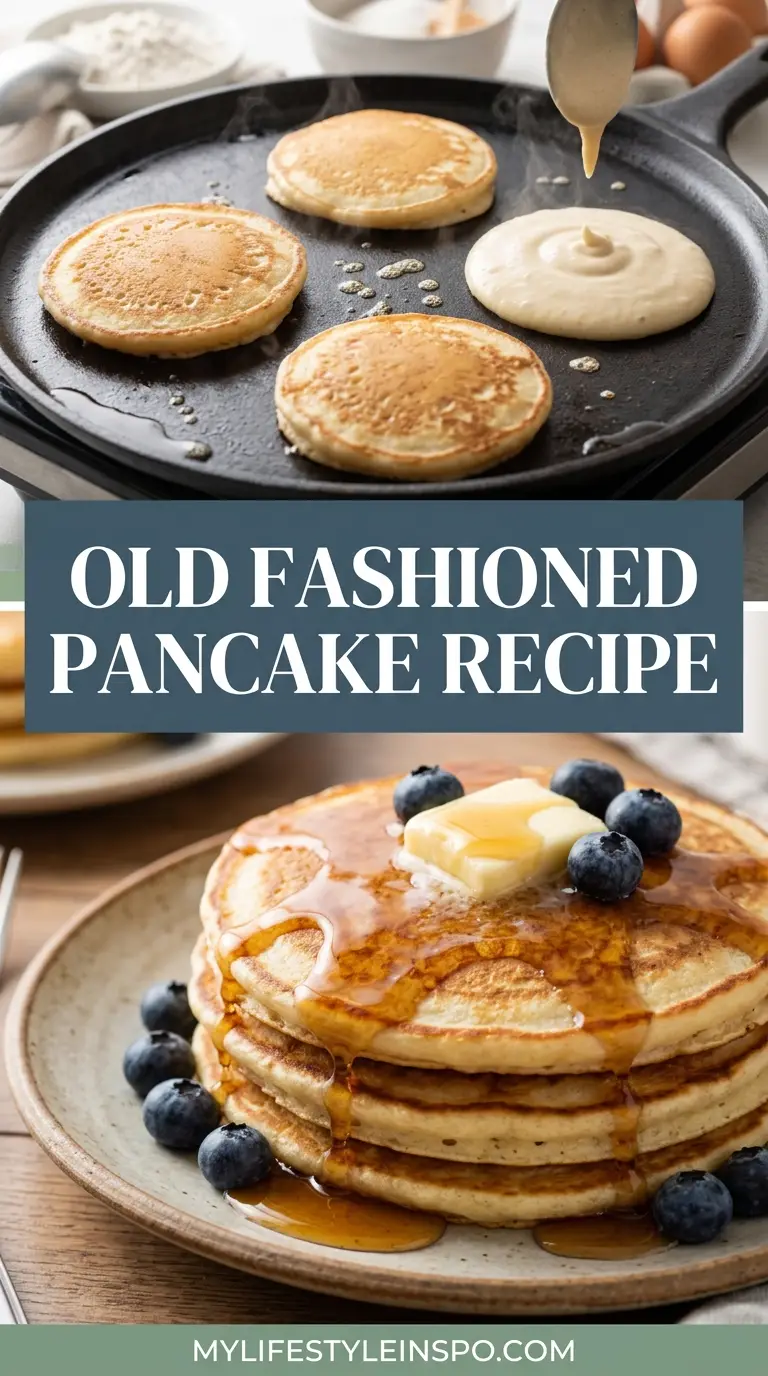
5. Pour and Cook the First Side
- Using a 1/4 cup measuring cup or ladle, pour the batter onto the hot griddle
- Pour from a few inches above the griddle to help the batter spread naturally
- Leave about 2 inches of space between each pancake to make flipping easier
- Watch the surface carefully as the pancake cooks
- After about 1-2 minutes, you’ll see small bubbles forming around the edges
- Wait until bubbles appear across the entire surface and some of them start to pop and stay open
- The edges should look dry and slightly matte rather than wet and shiny
- The bottom should be golden brown, which you can check by gently lifting one edge with your spatula
6. Flip and Finish Cooking
- Slide your spatula completely under the pancake in one smooth motion
- Flip the pancake confidently and quickly, letting it drop gently onto the griddle
- Cook the second side for about 1-1.5 minutes, which is shorter than the first side
- The pancake should puff up slightly in the center as it cooks
- The second side won’t get as many bubbles, so you’ll need to check doneness by gently pressing the center
- It should spring back lightly when touched
- The second side should be golden brown but typically a shade lighter than the first side
- Remove to a serving plate or keep warm in a 200°F (93°C) oven while you cook the remaining pancakes
7. Continue Cooking Remaining Batter
- Repeat the process with the remaining batter, adding a bit more butter or oil to the griddle between batches as needed
- The first pancake is often imperfect as the griddle temperature regulates, so don’t be discouraged
- Adjust your heat slightly between batches if the pancakes are browning too quickly or too slowly
- You should be able to cook 3-4 pancakes at a time on a standard griddle
- Stir the batter gently before pouring each batch, as it can settle and thicken slightly while sitting
For another classic breakfast option, try these Classic French Toast.
Tips for Success
These tried-and-true tips come from years of making pancakes every weekend. The biggest game-changer for me was letting the batter rest and not overmixing. Temperature control is also absolutely crucial for achieving those perfectly golden pancakes.
- Don’t overmix the batter – lumps are your friend, they’ll disappear during cooking and overmixing develops gluten which makes pancakes tough and chewy
- Let the batter rest for 5-10 minutes after mixing, this allows the flour to absorb the liquid and the baking powder to activate, resulting in fluffier pancakes
- Use fresh baking powder – check the expiration date because old baking powder loses its potency and won’t create the lift you need, if you’re unsure, test it by adding 1/2 teaspoon to hot water and see if it fizzes vigorously
- Maintain consistent heat – if your pancakes are browning too quickly on the outside while remaining raw inside, your heat is too high, conversely if they’re pale and taking forever to cook, increase the heat slightly
- Wait for the bubbles – flipping too early results in pancakes that don’t cook through properly and may fall apart, patience is key
- Keep finished pancakes warm in a 200°F (93°C) oven on a baking sheet while you cook the rest of the batch
- Don’t press down on pancakes while they’re cooking, this deflates the air pockets that make them fluffy
- Add mix-ins after pouring batter onto the griddle rather than stirring them into the batter, this prevents overmixing and ensures even distribution
Another favorite: Easy French Toast Recipe
Serving Suggestions
The beauty of old fashioned pancakes is how well they pair with both sweet and savory accompaniments. While classic butter and maple syrup will never go out of style, there are endless ways to dress up these fluffy stacks.
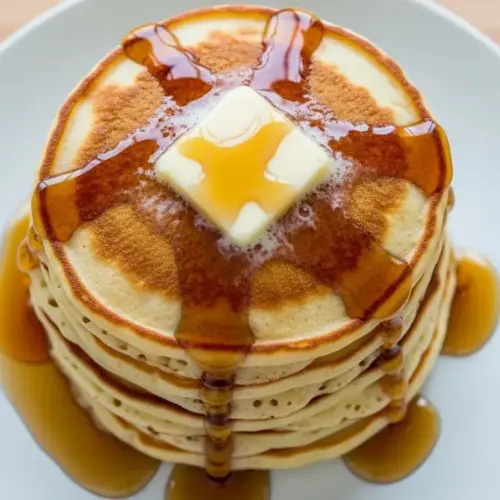
Serve these pancakes hot off the griddle with pats of salted butter that melt into the nooks and crannies. Drizzle generously with warm maple syrup or honey. Fresh fruit like sliced strawberries, blueberries, or banana slices add brightness and natural sweetness.
- Top with a dollop of whipped cream and fresh berries for an indulgent breakfast
- Drizzle with homemade berry compote or strawberry sauce
- Sprinkle with powdered sugar and serve with lemon wedges
- Add crispy Air Fryer Bacon on the side for a classic breakfast combo
- Serve alongside scrambled eggs or an omelet for a complete meal
- Try them with nut butter and sliced bananas for a protein-packed option
- Make a pancake sandwich with eggs, cheese, and sausage for breakfast on the go
- Pair with Breakfast Potatoes for a hearty brunch spread
- Serve with Greek yogurt and honey for a lighter option
- Top with warm cinnamon apples and a sprinkle of granola
Variations to Try
Once you’ve mastered the basic recipe, these variations will keep your breakfast routine exciting. I love experimenting with different add-ins depending on the season and what I have on hand. Each variation adds its own special twist while maintaining that classic fluffy texture.
- Blueberry Pancakes – gently fold 1 cup fresh or frozen blueberries into the batter after mixing, or drop them onto each pancake right after pouring the batter on the griddle
- Chocolate Chip Pancakes – sprinkle 2-3 tablespoons of chocolate chips onto each pancake after pouring the batter, let them melt slightly before flipping
- Banana Pancakes – mash 1 ripe banana and stir it into the wet ingredients, or slice a banana thinly and press slices into the pancakes after pouring the batter
- Cinnamon Sugar Pancakes – add 1 teaspoon cinnamon to the dry ingredients and increase sugar to 2 tablespoons for extra warmth and sweetness
- Lemon Poppy Seed – add 2 tablespoons poppy seeds and 1 tablespoon lemon zest to the dry ingredients, plus 1 tablespoon fresh lemon juice to the wet ingredients
- Whole Wheat – replace half the all-purpose flour with whole wheat flour for added nutrition and a nuttier flavor
- Buttermilk Style – substitute milk with buttermilk and reduce baking powder to 2 teaspoons while adding 1/2 teaspoon baking soda for tangier pancakes
- Apple Cinnamon – fold in 1 cup diced apple that’s been sautéed with butter and cinnamon
Read Also: Gluten Free Pancake Recipe
Storage and Reheating
Leftover pancakes are a blessing for busy weekday mornings. I always make extra on Sunday so we have quick breakfast options throughout the week. Proper storage is key to maintaining their texture and flavor.
Store cooled pancakes in an airtight container or resealable bag in the refrigerator for up to 4 days. Place parchment paper between each pancake to prevent sticking. For longer storage, freeze them for up to 3 months.
- Refrigerator Storage – let pancakes cool completely before stacking them with parchment paper between each one, store in an airtight container for 3-4 days
- Freezer Storage – arrange cooled pancakes in a single layer on a baking sheet and freeze until solid (about 1 hour), then transfer to a freezer bag with parchment paper between each pancake, label with the date and freeze for up to 3 months
- Microwave Reheating – place 1-3 pancakes on a microwave-safe plate, cover with a damp paper towel, and heat for 20-30 seconds per pancake on high power
- Oven Reheating – arrange pancakes on a baking sheet in a single layer, cover with foil, and warm at 350°F (175°C) for 8-10 minutes
- Toaster Reheating – this is my favorite method for frozen pancakes, just pop them in the toaster on a medium setting until heated through and slightly crispy on the outside
- Skillet Reheating – warm pancakes in a dry skillet over medium-low heat for about 1 minute per side
You might also enjoy: Kodiak Pancake Recipe
Nutritional Facts
Serving Size: 2 pancakes (based on 1/4 cup batter per pancake)
Per Serving:
- Calories: 285
- Total Fat: 10g
- Saturated Fat: 6g
- Trans Fat: 0g
- Cholesterol: 60mg
- Sodium: 520mg
- Total Carbohydrates: 40g
- Dietary Fiber: 1g
- Sugars: 6g
- Protein: 7g
- Vitamin D: 5mcg
- Calcium: 225mg
- Iron: 2.5mg
- Potassium: 135mg
Nutritional Notes: These values are estimates and will vary based on specific brands used and exact measurements. The nutritional information does not include toppings like butter, syrup, or fruit. One serving provides about 14% of your daily calcium needs and includes a good amount of protein to keep you satisfied throughout the morning.
For a healthier variation, check out my Pancake Recipe Without Milk.
Health Benefits of Key Ingredients
While these old fashioned pancakes are definitely a treat, they do contain some surprisingly beneficial ingredients. Understanding what each component brings to your plate can help you appreciate this breakfast classic even more.
Eggs provide high-quality protein containing all nine essential amino acids your body needs. They’re also rich in choline, which supports brain health and memory function. The B vitamins in eggs help convert food into energy, keeping you fueled throughout your morning.
Milk delivers calcium and vitamin D for strong bones and teeth, plus potassium for healthy blood pressure. The protein in milk helps build and repair tissues, making these pancakes more filling than you might expect.
- All-purpose flour provides carbohydrates for energy and contains small amounts of iron and B vitamins that support metabolism
- Eggs offer complete protein, choline for brain health, lutein for eye health, and vitamin D
- Milk supplies calcium, vitamin D, potassium, and protein for bone health and muscle function
- Butter contains fat-soluble vitamins A, E, and K2, plus conjugated linoleic acid which may have health benefits when consumed from grass-fed sources
- Vanilla extract contains antioxidants and has been shown to have calming properties
- Baking powder is fortified with calcium and provides about 10% of your daily needs per serving
Another delicious option: German Pancake Recipe
Frequently Asked Questions
1. Why are my pancakes not fluffy?
The most common cause is overmixing the batter, which develops gluten and makes pancakes dense and tough. Mix just until the dry ingredients disappear, leaving lumps in the batter. Also check that your baking powder is fresh – expired baking powder won’t create the rise you need.
2. Can I make the batter ahead of time?
While you can mix the dry ingredients ahead, it’s best to combine wet and dry ingredients right before cooking. The baking powder starts working immediately when it contacts liquid, and sitting too long results in less fluffy pancakes. If you must prepare ahead, refrigerate the batter for no more than 2 hours and gently stir before using.
3. Why do my pancakes stick to the pan?
Your pan may not be properly preheated or greased. Heat your griddle for at least 3-4 minutes before cooking and ensure it’s properly greased with butter or oil between batches. Using a quality non-stick pan also makes a huge difference.
4. Can I substitute ingredients in this recipe?
You can swap whole milk for 2%, almond milk, or oat milk with good results. For a dairy-free version, use plant-based milk and substitute melted coconut oil or vegetable oil for the butter. However, don’t substitute self-rising flour for all-purpose flour without adjusting the baking powder and salt.
5. How do I know when to flip the pancakes?
Wait until small bubbles form across the entire surface of the pancake and begin to pop, creating small holes that stay open. The edges should also look set and dry rather than wet and shiny. This usually takes about 1.5-2 minutes for the first side.
Read Also: IHOP Pancake Recipe
Old Fashioned Pancakes
Equipment
- Large mixing bowl - For dry ingredients
- Medium mixing bowl - For wet ingredients
- Whisk
- Measuring cups and spoons
- Non-stick griddle or large skillet - Cast iron griddle recommended
- 1/4 cup measuring cup or ladle - For portioning batter
- Spatula - Wide, angled turner works best
- Wire cooling rack - For keeping finished pancakes warm
Ingredients
- 1.5 cups all-purpose flour - 190g; provides structure
- 3.5 tsp baking powder - use fresh for maximum fluffiness; aluminum-free recommended
- 1 tbsp granulated sugar - 12g
- 0.5 tsp salt
- 1.25 cups whole milk - 300ml; 2% milk also works
- 1 large egg
- 3 tbsp unsalted butter, melted - 42g; cooled to about 100–110°F (38–43°C) before using
- 1 tsp pure vanilla extract - optional but recommended
For the griddle
- butter or neutral oil - for greasing between batches
Instructions
- In a large bowl, whisk together the flour, baking powder, sugar, and salt for about 30 seconds until evenly combined. Set aside.
- In a medium bowl, whisk the egg lightly, then add the milk, cooled melted butter, and vanilla extract and whisk until smooth and fully combined.
- Pour the wet ingredients into the dry and stir with broad sweeping motions just until no large dry pockets remain — lumps are fine. Let the batter rest 5–10 minutes while the griddle heats.
- Heat a non-stick griddle or skillet over medium heat for 3–4 minutes. Test by sprinkling water droplets — they should sizzle and dance. Lightly grease with butter or oil.
- Pour 1/4 cup batter per pancake onto the griddle, leaving 2 inches between each. Cook 1.5–2 minutes until bubbles form across the entire surface and edges look dry and set.
- Flip each pancake confidently in one smooth motion and cook the second side for 1–1.5 minutes until golden brown. The center should spring back lightly when pressed.
- Repeat with remaining batter, adding fresh butter or oil between batches. Keep finished pancakes warm in a 200°F (93°C) oven on a baking sheet while you work through the batch.
Notes
- Do not overmix the batter — lumps disappear during cooking, while overmixing develops gluten that makes pancakes dense and tough.
- Always let the batter rest 5–10 minutes after mixing so the flour fully hydrates and the baking powder activates for a fluffier result.
- Check your baking powder freshness by adding 1/2 tsp to hot water — it should fizz vigorously. Expired powder won’t give you the lift you need.
- The first pancake is almost always imperfect as the griddle reaches an even temperature — adjust heat up or down and carry on.
- Do not press down on pancakes while cooking; this deflates the air pockets responsible for their fluffy texture.
- For dairy-free pancakes, substitute plant-based milk (almond or oat) and replace butter with melted coconut oil or vegetable oil.
- Make it buttermilk-style: swap milk for buttermilk, reduce baking powder to 2 tsp, and add 1/2 tsp baking soda.
- Store cooled pancakes in an airtight container in the refrigerator for up to 4 days, with parchment paper between each pancake.
- Freeze for up to 3 months: freeze in a single layer on a baking sheet first, then transfer to a freezer bag. Reheat in a toaster straight from frozen.
- Add mix-ins like blueberries or chocolate chips directly onto each pancake after pouring the batter onto the griddle to avoid overmixing.
Final Thoughts
This old fashioned pancake recipe is a true breakfast staple that never goes out of style. The simple ingredients and straightforward method make it accessible for cooks of all skill levels, while the results are impressive enough to serve guests.
There’s something deeply comforting about making pancakes from scratch, knowing exactly what goes into every bite. These pancakes embody everything breakfast should be: warm, satisfying, and made with love.
I hope this recipe becomes a regular in your weekend breakfast rotation just like it has in mine. Try it out and let me know how they turn out in the comments below. Don’t forget to share your pancake creations with friends and family – breakfast is always better when shared!
Recommended:
- French Toast Casserole Recipe
- Breakfast Casserole Recipe
- Air Fryer Bacon Recipe
- Air Fryer French Toast Recipe
- Classic Deviled Eggs Recipe
- Easy Granola Recipe
- Homemade Granola Recipe
- Basic Crepe Recipe
- Skillet Cornbread Recipe
- Betty Crocker Pancake Recipe


