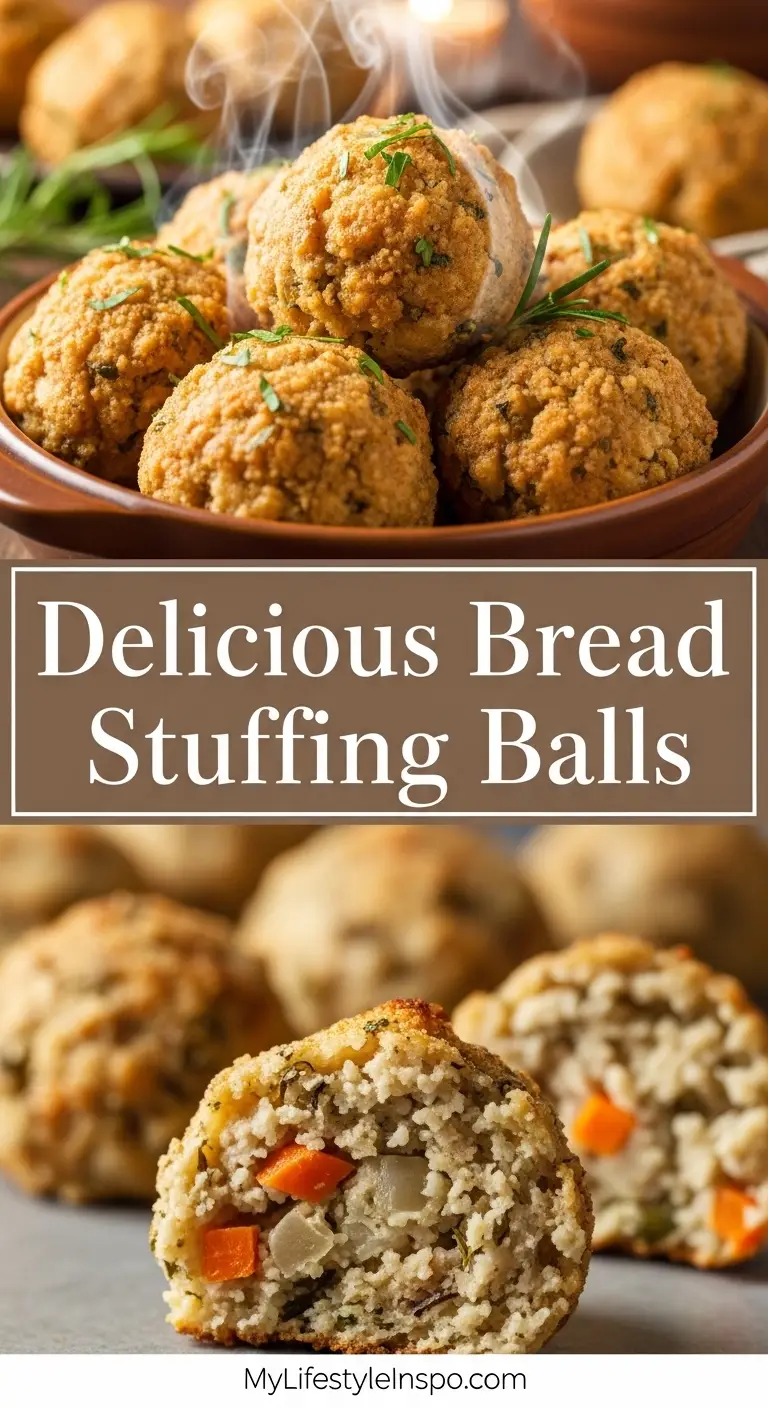
This 1940s bread stuffing balls recipe brings authentic wartime comfort to your table with crispy golden exteriors and tender, herb-filled centers. Born from necessity during World War II, these savory stuffing balls transform simple ingredients like stale bread, celery, onion, and aromatic herbs into something truly special.
My grandmother used to make these every Thanksgiving, rolling each ball by hand with care and purpose. Back then, nothing went to waste. Stale bread became the base, bacon drippings or butter added richness, and herbs from her garden brought life to every bite. The result was pure comfort food that stretched resources without sacrificing flavor.
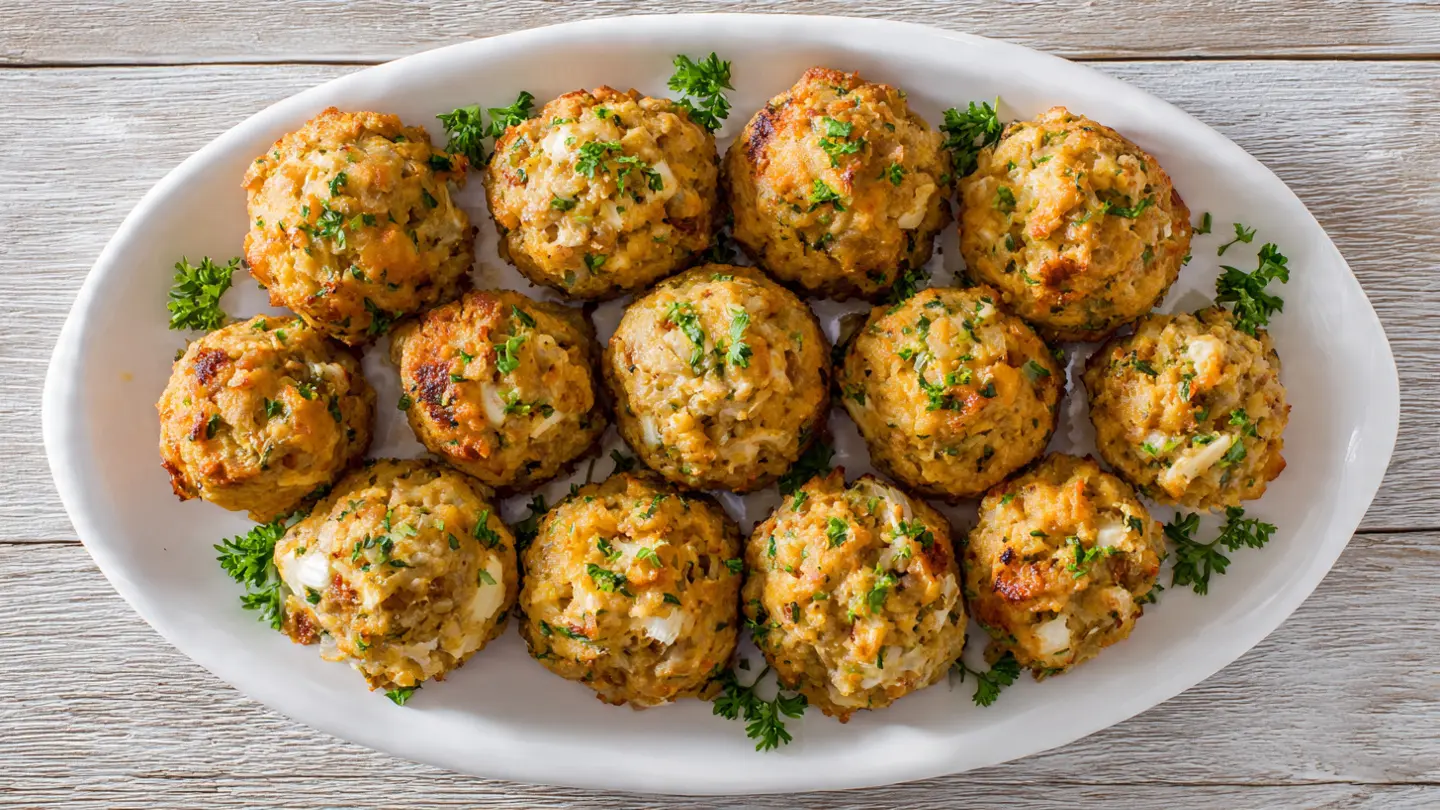
What makes this recipe so enduring is its simplicity. There’s no fancy equipment required and no complicated techniques to master. Just honest ingredients combined with intention, exactly as home cooks did in the 1940s. These stuffing balls crisp up beautifully in the oven, developing a golden crust that gives way to a soft, savory interior bursting with the flavors of sage, thyme, and onion.
The beauty of 1940s bread stuffing balls recipe lies in their versatility. Serve them alongside roasted turkey or chicken for a traditional holiday meal, or pair them with pork chops for a comforting weeknight dinner. They absorb gravy like a dream and taste even better as leftovers the next day.
Why You’ll Love This 1940s Bread Stuffing Balls Recipe
This recipe honors a time when cooks made magic from simplicity. Each ingredient serves a purpose, nothing is wasted, and the flavors speak for themselves without any need for shortcuts or packaged mixes.
The texture alone makes these worth making. That crispy exterior contrasts perfectly with the tender, moist center. Unlike traditional stuffing baked in a casserole dish, these individual portions develop more surface area for that coveted golden crust. Plus, they’re easier to serve and portion than scooping from a pan.
Here’s what makes this 1940s bread stuffing balls recipe so special:
- Authentic wartime recipe with roots in American culinary history from the 1940s
- Perfect texture with crispy golden outsides and soft, flavorful insides
- Budget-friendly using simple, affordable ingredients you likely have on hand
- Great for meal prep as they freeze beautifully and reheat without losing quality
- Individual portions that look impressive and are easy to serve at gatherings
- Versatile base that accepts variations like herbs, dried fruit, or nuts
- No stuffing mix required so you control every ingredient and flavor
- Nostalgic comfort food that brings back memories of simpler times
This breakfast casserole recipe also uses similar bread-based techniques for satisfying comfort food.
Ingredients
These simple ingredients reflect what was accessible in 1940s kitchens during wartime rationing. The recipe relies on staples that home cooks could find or grow themselves, with every component serving an important purpose. Day-old bread works best because it absorbs the liquid without becoming mushy.
For the Stuffing Balls:
- 8 cups cubed day-old white bread (about 1 pound or 450g), cut into 1-inch pieces
- 4 tablespoons unsalted butter (56g)
- 1 large onion (200g), finely chopped
- 2 celery stalks (100g), finely chopped
- 2 cups chicken or turkey broth (480ml), warm
- 2 large eggs, beaten
- 1 tablespoon fresh sage, chopped (or 1 teaspoon dried sage)
- 1 teaspoon dried thyme
- 1 teaspoon poultry seasoning
- 2 tablespoons fresh parsley, chopped
- 1 teaspoon salt (or to taste)
- ½ teaspoon black pepper
- Additional butter for greasing the baking sheet
Kitchen Equipment Needed
Having the right tools makes this recipe easier to execute, though you don’t need anything fancy. These are the basics that would have been found in any 1940s kitchen, and they’re still essential today for achieving the best results.
- Large mixing bowl for combining ingredients
- Large skillet or frying pan for sautéing vegetables
- Baking sheet or roasting pan
- Sharp knife and cutting board for prep work
- Wooden spoon or spatula for mixing
- Measuring cups and spoons
- Small bowl for beating eggs
You might also enjoy making these air fryer mashed potato balls for another hand-held side dish option.
Recommended Products for This Recipe
These carefully selected products will help you achieve the most authentic and delicious results when making this vintage recipe. Quality ingredients and tools make a noticeable difference in the final outcome.
1. Le Creuset Enameled Cast Iron Braiser
This versatile pan is perfect for sautéing the vegetables and can even be used for baking the stuffing balls. The even heat distribution ensures your onions and celery cook uniformly without burning, which is essential for developing proper flavor. The enameled interior also makes cleanup remarkably easy.
2. Organic Poultry Seasoning Blend
A quality poultry seasoning blend with sage, thyme, marjoram, and rosemary captures the authentic flavors of 1940s cooking. Look for organic blends without fillers or additives for the most vibrant herb flavor. This single spice blend simplifies the recipe while delivering complex, traditional taste.
3. Nordic Ware Natural Aluminum Commercial Baker’s Half Sheet
This commercial-grade half sheet pan ensures even baking and prevents sticking when properly greased. The aluminum conducts heat efficiently, giving your stuffing balls that perfect golden crust on all sides. Unlike thin pans that warp, this one stays flat and lasts for decades.
4. Artisan-Style White Bread
For the most authentic results, choose a hearty white bread with a substantial crumb structure. Avoid ultra-soft sandwich bread, which can turn mushy. Day-old bread works best, or you can dry fresh bread in a low oven for 20 minutes.
For more traditional comfort foods, check out this classic chicken pot pie recipe.
Step-by-Step Instructions
Follow these detailed instructions to create authentic 1940s bread stuffing balls with the perfect texture and flavor. Taking your time with each step ensures the best results, just as home cooks did during wartime when every ingredient mattered.
1. Prepare the Bread
- Cut your day-old bread into uniform 1-inch cubes, including the crusts for authentic texture and to prevent waste
- If your bread is fresh rather than stale, spread the cubes on a baking sheet and place in a 300°F (150°C) oven for 15-20 minutes, stirring halfway through until slightly dried but not toasted
- Transfer the bread cubes to your large mixing bowl and set aside while you prepare the vegetables
- The bread should feel dry to the touch but not hard or crispy, which allows it to absorb the broth properly without becoming soggy
2. Sauté the Vegetables
- Melt the 4 tablespoons of butter in your large skillet over medium heat, swirling to coat the bottom evenly
- Add the finely chopped onion and celery to the melted butter, stirring to coat all the pieces
- Cook the vegetables for 8-10 minutes, stirring occasionally, until the onion becomes translucent and the celery softens but still has a slight bite
- The vegetables should release their moisture and begin to caramelize slightly at the edges, which develops deep flavor
- Season with a pinch of salt during cooking to help draw out moisture and enhance the vegetables’ natural sweetness
- Remove the skillet from heat and let the mixture cool for 5 minutes before adding to the bread
3. Combine the Dry Seasonings
- In a small bowl, mix together the dried sage (if using dried instead of fresh), dried thyme, poultry seasoning, salt, and black pepper
- This pre-mixing ensures the seasonings distribute evenly throughout the stuffing rather than clumping in one area
- Add the fresh chopped sage and parsley directly to the bread cubes in the large mixing bowl
- Sprinkle the dried seasoning mixture over the bread cubes and toss gently with your hands or a wooden spoon to coat evenly
4. Add the Wet Ingredients
- Pour the warm (not hot) chicken or turkey broth gradually over the seasoned bread cubes, adding about ½ cup at a time
- Use your hands or a large spoon to toss the bread gently after each addition, allowing the bread to absorb the liquid evenly
- The bread should be moist but not soaking wet or falling apart – it should hold together when squeezed but not be dripping
- Add the beaten eggs to the mixture and fold them in thoroughly, working gently to avoid breaking down the bread cubes too much
- Fold in the cooled sautéed vegetables, distributing them evenly throughout the mixture
- Let the mixture rest for 5-10 minutes, which allows the bread to fully absorb the liquid and makes shaping easier
5. Shape the Stuffing Balls
- Preheat your oven to 375°F (190°C) and generously grease your baking sheet with butter
- Using your hands or a ½ cup measuring cup, scoop portions of the stuffing mixture
- Roll each portion between your palms to form balls about the size of a tennis ball (approximately 2-3 inches or 5-7cm in diameter)
- Press firmly but gently as you shape to ensure the balls hold together during baking
- Place each ball on the prepared baking sheet, spacing them about 2 inches apart to allow for air circulation and even browning
- If the mixture seems too dry and crumbly to hold together, add 1-2 tablespoons more broth; if too wet, add a handful of breadcrumbs
6. Bake to Golden Perfection
- Place the baking sheet on the middle rack of your preheated oven
- Bake for 25-30 minutes, checking after 20 minutes for color development
- The stuffing balls should develop a deep golden-brown crust on the outside while remaining moist inside
- For extra crispiness, brush the tops lightly with melted butter halfway through baking
- Rotate the pan 180 degrees halfway through baking to ensure even browning on all sides
- The balls are done when they feel firm to the touch and the tops are crispy and golden
- Remove from the oven and let rest for 5 minutes before serving, which allows the interior to set properly
This tuna casserole recipe offers another satisfying vintage comfort food option.
Tips for Success
These proven techniques ensure your stuffing balls turn out perfectly every time. The small details make a significant difference in achieving that authentic 1940s texture and flavor.
Master these tips for foolproof stuffing balls:
- Use properly dried bread – Fresh bread absorbs liquid unevenly and can result in mushy stuffing balls that fall apart during baking
- Don’t over-saturate – Add broth gradually and stop when the bread is moist but still holds its shape when squeezed
- Pack firmly when shaping – Compact the mixture well between your palms so the balls hold together during baking without being dense
- Check mixture consistency – Before shaping all the balls, make one test ball; if it crumbles, add more broth, if it’s too wet, add breadcrumbs
- Space them properly – Leave 2 inches between balls on the baking sheet for air circulation and even browning on all sides
- Use warm broth – Cold broth doesn’t absorb as well and can make the mixture harder to work with
- Let mixture rest – The 5-10 minute rest allows bread to fully absorb liquid, making shaping easier and preventing soggy centers
- Toast for extra crispness – If you prefer an even crispier exterior, broil for 1-2 minutes at the end of baking, watching carefully
Another favorite: cowboy casserole recipe for hearty comfort food.
Serving Suggestions

These versatile stuffing balls complement a wide range of main dishes, just as they did on 1940s dinner tables. The crispy exterior and savory interior pair beautifully with rich gravies and roasted meats.
Serve these stuffing balls with classic protein options like roasted turkey, chicken, or pork chops. They’re exceptional when drizzled with pan gravy, which they soak up like sponges while maintaining their structure. The combination creates that perfect bite of crispy exterior, tender stuffing, and rich gravy.
Traditional 1940s accompaniments include:
- Classic roasted turkey or chicken with pan drippings spooned over the top
- Pot roast or braised beef where the stuffing balls can be nestled alongside the meat for the final 30 minutes
- Baked ham with a side of cranberry sauce for sweet-tart contrast
- Pork chops either pan-fried or baked with apple slices
- Meatloaf for a complete comfort food dinner plate
- Creamy mashed potatoes and green beans for a traditional holiday spread
- Mushroom gravy for a rich, earthy vegetarian option
- Cranberry relish on the side for brightness and acidity
For a lighter meal, these air fryer chicken breast pairs perfectly with stuffing balls.
Variations to Try
While the traditional recipe is perfect as written, these variations allow you to customize the stuffing balls to your taste or use what you have on hand. Home cooks in the 1940s were masters of adaptation, and this recipe welcomes creativity.
Classic Variations:
- Sausage stuffing balls – Add 1 pound cooked, crumbled breakfast sausage to the mixture for extra richness and protein
- Cornbread version – Replace half the white bread with crumbled cornbread for a Southern twist with slightly sweet undertones
- Herb-forward – Double the fresh herbs and add fresh rosemary or marjoram for a more pronounced herbal flavor
- Apple and sage – Fold in 1 cup diced apples sautéed in butter with extra sage for a sweet-savory combination
- Cranberry walnut – Add ½ cup dried cranberries and ½ cup chopped toasted walnuts for texture and tartness
- Mushroom – Sauté 8 ounces sliced mushrooms with the onion and celery for earthy depth
- Gluten-free – Use your favorite gluten-free bread, allowing it to dry completely before using
- Vegetarian – Swap chicken broth for vegetable broth and increase the herbs for a meat-free version
Try these funeral potatoes as another crowd-pleasing side dish.
Storage and Reheating
Proper storage ensures your stuffing balls maintain their texture and flavor for several days or even months. These guidelines follow time-tested preservation methods that work beautifully with this recipe.
Refrigerator Storage:
- Allow stuffing balls to cool completely to room temperature before storing to prevent condensation and sogginess
- Place in an airtight container with parchment paper between layers to prevent sticking
- Refrigerate for up to 4 days, keeping them covered tightly to maintain moisture
- Reheat individual portions in a 350°F (175°C) oven for 10-15 minutes until warmed through and crispy again
Freezer Storage:
- Flash freeze unbaked or baked stuffing balls on a baking sheet for 2 hours until solid
- Transfer frozen balls to freezer-safe bags or containers, removing as much air as possible
- Label with the date and store for up to 3 months in the freezer
- For unbaked frozen balls, bake directly from frozen at 375°F (190°C) for 35-40 minutes
- For baked frozen balls, reheat at 350°F (175°C) for 20-25 minutes until heated through
Best Reheating Methods:
- Oven method – Place on a baking sheet and heat at 350°F (175°C) for 10-15 minutes for the crispiest results
- Microwave method – Heat individual balls for 30-60 seconds, though the exterior will be softer than oven reheating
- Skillet method – Pan-fry in a bit of butter over medium heat, turning occasionally, for extra-crispy exteriors
These cheesy potatoes also reheat beautifully for meal prep.
Nutritional Facts
Each stuffing ball (based on 12 servings from the recipe) provides a satisfying balance of carbohydrates, protein, and fats. These values are approximate and will vary based on the specific ingredients you use.
Per Serving (1 stuffing ball):
- Calories: 165
- Total Fat: 6g
- Saturated Fat: 3g
- Cholesterol: 45mg
- Sodium: 380mg
- Total Carbohydrates: 22g
- Dietary Fiber: 1g
- Sugars: 2g
- Protein: 5g
The nutrition profile reflects the simple, whole-food ingredients used in the original 1940s recipe. The bread provides energy through complex carbohydrates, while eggs and broth add protein. Butter contributes richness and helps achieve the golden crust that makes these stuffing balls so appealing.
Read Also: Baked Potato Recipe
Health Benefits of Key Ingredients
While this recipe focuses on comfort and tradition, several ingredients offer nutritional benefits worth noting. Home cooks in the 1940s understood instinctively what we now know scientifically about these wholesome components.
The humble ingredients in these stuffing balls provide more than just flavor. Celery adds fiber and essential vitamins K and C while contributing almost no calories. Onions deliver quercetin, a powerful antioxidant that supports immune function and heart health.
Fresh herbs like sage, thyme, and parsley aren’t just for flavor. Sage contains compounds that may support brain health and memory. Thyme provides antimicrobial properties and vitamin K. Parsley offers vitamin C, vitamin K, and folate. Using fresh herbs whenever possible maximizes these nutritional benefits.
Key nutritional contributions:
- Bread – Provides B vitamins, iron, and energy through complex carbohydrates that sustain you through meals
- Eggs – Deliver complete protein with all essential amino acids plus choline for brain health
- Celery – Offers hydration, fiber, and antioxidants while being extremely low in calories
- Onions – Supply prebiotic fiber that supports gut health and flavonoids with anti-inflammatory properties
- Herbs – Pack antioxidants, vitamins, and minerals into every bite with minimal calories
- Broth – Provides collagen, minerals, and hydration while adding deep savory flavor
You might also like this chicken rice soup recipe for more nourishing comfort food.
Frequently Asked Questions
1. Can I make stuffing balls ahead of time?
Yes, you can prepare stuffing balls up to 24 hours in advance. Shape the balls and place them on a baking sheet, then cover tightly with plastic wrap and refrigerate. When ready to serve, bake as directed, adding 5 extra minutes to account for the cold start. You can also freeze unbaked balls for up to 3 months and bake directly from frozen.
2. Why are my stuffing balls falling apart?
Stuffing balls typically fall apart for one of three reasons: the bread wasn’t dry enough to absorb liquid properly, you didn’t add enough liquid to bind the ingredients, or you didn’t pack them firmly enough when shaping. Make sure your bread is thoroughly dried, add liquid gradually until the mixture holds together when squeezed, and compress the balls firmly between your palms.
3. Can I use store-bought stuffing mix instead of bread?
While you can use packaged stuffing mix, it will produce a different result than the authentic 1940s version. Stuffing mix is already seasoned and often contains preservatives, so you’ll need to reduce or eliminate additional seasonings. The texture also tends to be finer and less rustic than using cubed bread.
4. What’s the best type of bread for stuffing balls?
Day-old white bread or whole wheat bread works best because it has a sturdy structure that holds up to moisture. Avoid soft, squishy sandwich bread which can become gummy. Artisan-style loaves, sourdough, or even leftover dinner rolls all work beautifully. The bread should be slightly stale and dry, or you can dry fresh bread in a low oven.
5. How do I prevent stuffing balls from getting too dry?
The key is finding the right moisture balance. Add warm broth gradually, stopping when the mixture is moist enough to hold together but not dripping wet. If baked stuffing balls turn out dry, you can rescue them by serving with plenty of hot gravy or broth poured over them. For future batches, increase the broth slightly or add an extra egg.
Another family favorite: old fashioned pancake recipe brings vintage breakfast flavors to life.
1940s Bread Stuffing Balls
Equipment
- Large mixing bowl - For combining all ingredients
- Large skillet or frying pan - For sautéing vegetables
- Baking sheet or roasting pan - Half sheet pan recommended
- Sharp knife and cutting board - For prep work
- Wooden spoon or spatula - For mixing
- Measuring cups and spoons
- Small bowl - For beating eggs
Ingredients
For the Stuffing Balls
- 8 cups day-old white bread - about 1 lb / 450g, cut into 1-inch cubes, crusts included
- 4 tbsp unsalted butter - 56g, plus more for greasing the baking sheet
- 1 large onion - 200g, finely chopped
- 2 celery stalks - 100g, finely chopped
- 2 cups chicken or turkey broth - 480ml, warm
- 2 large eggs - beaten
- 1 tbsp fresh sage - chopped; or substitute 1 tsp dried sage
- 1 tsp dried thyme
- 1 tsp poultry seasoning
- 2 tbsp fresh parsley - chopped
- 1 tsp salt - or to taste
- ½ tsp black pepper
- additional butter - for greasing the baking sheet
Instructions
- Cut day-old bread into uniform 1-inch cubes including the crusts. If using fresh bread, spread cubes on a baking sheet and dry in a 300°F (150°C) oven for 15–20 minutes, stirring halfway, until slightly dried but not toasted.
- Melt butter in a large skillet over medium heat, add the onion and celery, and cook for 8–10 minutes until the onion is translucent and celery is softened. Season with a pinch of salt, then remove from heat and cool for 5 minutes.
- Combine dried thyme, poultry seasoning, salt, and pepper in a small bowl. Add fresh sage and parsley directly to the bread cubes, then sprinkle the dried seasoning mixture over and toss gently to coat evenly.
- Pour warm broth over the seasoned bread gradually, about ½ cup at a time, tossing after each addition until the bread is moist but not dripping. Fold in beaten eggs and the cooled sautéed vegetables, then let the mixture rest for 5–10 minutes.
- Preheat oven to 375°F (190°C) and generously grease a baking sheet with butter.
- Using your hands or a ½-cup measure, scoop portions of the stuffing and roll firmly between your palms into balls about 2–3 inches (5–7 cm) in diameter. Place on the prepared baking sheet about 2 inches apart.
- Bake on the middle rack for 25–30 minutes, rotating the pan halfway through and optionally brushing tops with melted butter for extra crispiness, until the exterior is deep golden-brown and the balls feel firm to the touch. Rest for 5 minutes before serving.
Notes
- Dry your bread properly: Fresh bread absorbs liquid unevenly and leads to mushy stuffing balls. Use truly stale bread or dry it in a low oven first.
- Add broth gradually: Stop adding liquid when the mixture is moist enough to hold together when squeezed but not dripping wet.
- Pack firmly: Compress each ball well between your palms to prevent crumbling during baking without making them dense.
- Do a test ball: Before shaping all the balls, make one to check consistency — add more broth if crumbly, add breadcrumbs if too wet.
- Use warm broth: Cold broth doesn’t absorb as well and can make the mixture harder to work with.
- Make-ahead tip: Shape balls up to 24 hours in advance, cover tightly, and refrigerate. Bake as directed, adding 5 extra minutes from cold.
- Freezer storage: Flash freeze baked or unbaked balls on a sheet for 2 hours, then transfer to freezer bags for up to 3 months. Bake frozen balls at 375°F for 35–40 minutes.
- Reheating: Reheat in a 350°F oven for 10–15 minutes for best crispiness. Avoid microwaving if you want to preserve the crispy crust.
- Variation — Sausage: Add 1 lb cooked, crumbled breakfast sausage to the mixture for extra richness and protein.
- Variation — Vegetarian: Substitute vegetable broth for chicken/turkey broth and increase herbs for a meat-free version.
Final Thoughts
This 1940s bread stuffing balls recipe connects us to a time when resourcefulness and creativity defined home cooking. Every ingredient mattered, nothing was wasted, and meals were made with intention and care.
These golden, crispy stuffing balls honor that legacy. They prove that simple ingredients, when treated with respect and combined thoughtfully, create something far greater than the sum of their parts. The contrast of textures, the aromatic herbs, and the savory richness transport you to dinner tables of generations past.
I encourage you to try this recipe and experience authentic wartime comfort food. Share it with family, make it for the holidays, or simply enjoy it on a quiet weeknight when you crave something warm and nostalgic. If you make these stuffing balls, I’d love to hear how they turned out in the comments below or see your photos on social media.
Recommended:
- Twice Baked Potato Recipe
- Au Gratin Potatoes Recipe
- French Toast Casserole Recipe
- Corn Casserole Recipe
- Squash Casserole Recipe
- Classic Chicken Pot Pie Recipe
- Easy Shepherds Pie Recipe
- Creamy Mashed Potatoes Recipe
- Garlic Mashed Potatoes Recipe
- Fried Cabbage Recipe


