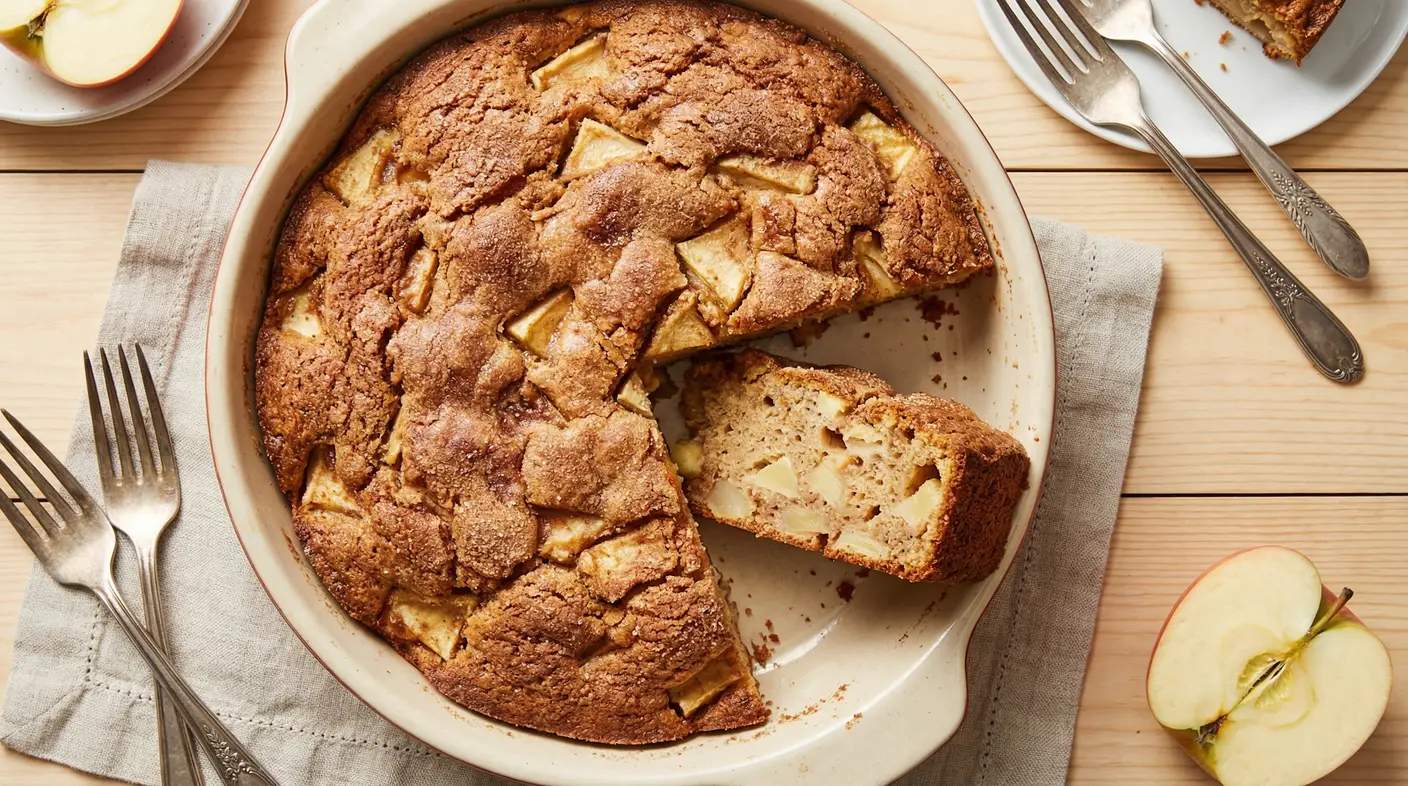
If you’ve never tried an Amish apple cake recipe, you’re in for something truly special. This is the kind of old-fashioned cake that has been passed down through generations for a reason: it’s incredibly moist, deeply flavored with cinnamon and warm spices, and absolutely packed with tender apple chunks in every bite.
What makes this cake stand out from other apple desserts is the method. Amish baking traditions lean heavily on simplicity and quality, and this recipe reflects that. The oil-based batter keeps the cake moist for days (yes, days), while the combination of fresh apples and brown sugar creates a rich, caramel-like depth of flavor that you just can’t get from boxed mixes.
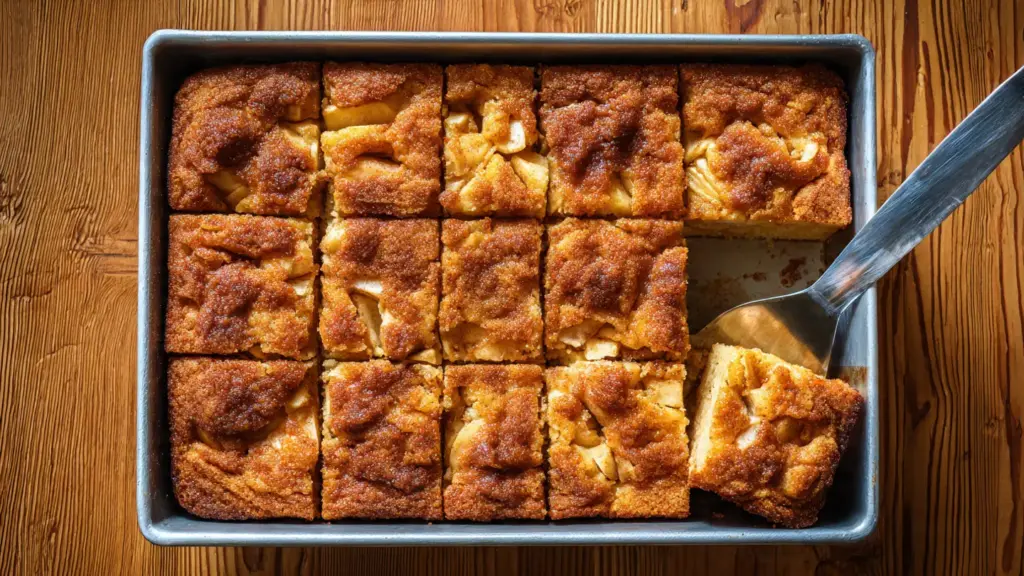
It comes together in one bowl, requires no mixer, and bakes up in a standard 9×13-inch pan. That means it’s perfect for potlucks, holiday gatherings, bake sales, or just a quiet afternoon when you want something homemade and comforting.
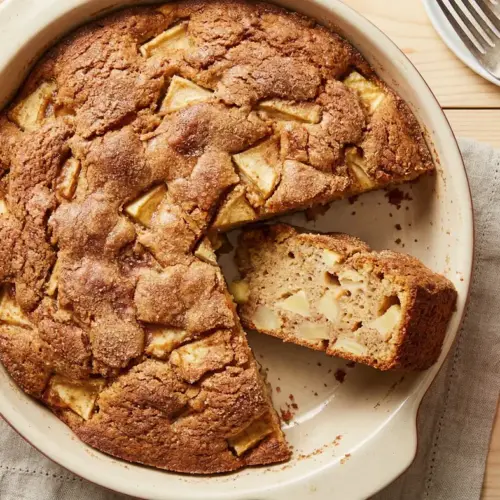
The cake is often finished with a simple vanilla glaze or cream cheese frosting, though it’s honestly delicious plain. Once you try it, this Amish apple cake recipe is sure to become a permanent fixture in your fall baking rotation.
If you love apple desserts, you might also want to check out this Classic Apple Crisp Recipe for another crowd-pleasing option.

Why You’ll Love This Amish Apple Cake Recipe
This cake checks every box for a perfect homemade dessert.
It’s a one-bowl recipe with no complicated steps, which means even beginner bakers can pull it off without stress.
The oil-based batter is the secret to its legendary moistness. Unlike butter cakes that can dry out after a day, this one stays tender and flavorful for up to four days at room temperature.
Fresh apples are stirred directly into the batter, so you get juicy, softened apple pieces in every single slice. No mushy filling, no separation, just fruit baked right into the crumb.
The spice blend of cinnamon, nutmeg, and sometimes cloves gives the cake a warm, cozy flavor profile that makes it feel like fall in every bite.
It feeds a crowd. A 9×13-inch pan gives you roughly 15 to 20 servings, making it ideal for family gatherings, potlucks, and holiday tables.
- No electric mixer needed
- Made with pantry staples you likely already have
- Stays moist and flavorful for several days
- Easily adaptable with nuts, raisins, or different apple varieties
- Works beautifully with or without frosting
You might also love this Amish Banana Bread Recipe if you’re a fan of traditional Amish-style baked goods.
Ingredients
For this Amish apple cake recipe, you’ll need simple pantry staples plus fresh apples. Granny Smith apples are the most popular choice because their tartness balances the sweetness of the batter, but Honeycrisp, Fuji, or Braeburn all work beautifully. Use apples that hold their shape during baking so you get defined pieces rather than mush.
- 3 cups (375g) all-purpose flour
- 2 cups (400g) granulated sugar
- 1 cup (200g) packed brown sugar
- 1½ teaspoons baking soda
- 1½ teaspoons ground cinnamon
- ½ teaspoon ground nutmeg
- ¼ teaspoon ground cloves
- ½ teaspoon salt
- 3 large eggs, room temperature
- 1½ cups (360ml) vegetable oil (or canola oil)
- 2 teaspoons pure vanilla extract
- 4 cups (about 4 medium apples, roughly 560g) peeled, cored, and diced apples
- 1 cup (115g) chopped walnuts or pecans (optional but highly recommended)
For the Optional Vanilla Glaze:
- 1 cup (120g) powdered sugar
- 2 to 3 tablespoons milk
- ½ teaspoon pure vanilla extract
Read Also: German Applesauce Cake Recipe
Kitchen Equipment Needed
You don’t need any fancy equipment for this recipe, which is part of its appeal. A large mixing bowl and a wooden spoon or spatula are the key tools. That said, using a quality baking pan makes a real difference in how evenly the cake bakes.
- Large mixing bowl (at least 4-quart capacity)
- Whisk
- Rubber spatula or wooden spoon
- 9×13-inch baking pan (metal or glass)
- Apple peeler and corer
- Chef’s knife and cutting board
- Dry and liquid measuring cups
- Measuring spoons
- Cooling rack
- Toothpick or cake tester
You might also enjoy: Banana and Apple Bread
Recommended Products for This Recipe
These are products I genuinely recommend based on quality and performance. They can make a real difference in how your cake turns out.
1. USA Pan 9×13-Inch Baking Pan
This heavy-gauge aluminized steel pan distributes heat evenly, so your cake bakes with a consistent crumb from edge to center. The nonstick coating makes it easy to release slices cleanly, and it won’t warp in a hot oven. It’s one of the most reliable baking pans available for everyday use.
2. OXO Good Grips Apple Peeler, Corer, and Slicer
Peeling and coring four apples by hand takes time. This countertop tool does it all in seconds, producing uniform apple pieces that bake evenly throughout the cake. It’s a small investment that pays off every apple season.
3. Nielsen-Massey Pure Vanilla Extract
The vanilla in the batter and glaze plays a supporting but important role in rounding out all the spiced flavors. Nielsen-Massey is made from real Madagascar vanilla beans and has a noticeably richer, more complex flavor than imitation vanilla. A small bottle goes a long way.
4. Baking Cooling Rack (Set of 2)
Cooling your cake properly on a rack allows air circulation underneath, which prevents the bottom from becoming soggy. A good set of racks is an inexpensive kitchen essential for anyone who bakes regularly.
Read Also: Easy Apple Crisp Recipe
Step-by-Step Instructions
1. Preheat Your Oven and Prepare the Pan
- Preheat your oven to 325°F (163°C). Amish apple cake bakes at a slightly lower temperature than most cakes because the batter is very thick and dense. A lower temperature allows the center to cook through without the edges overbrowning.
- Grease your 9×13-inch baking pan thoroughly with butter, shortening, or cooking spray. Make sure to coat the corners and sides completely.
- Lightly dust the greased pan with flour and tap out any excess. This two-step prep process ensures clean release every time.
2. Prepare the Apples
- Wash, peel, core, and dice your apples into roughly ½-inch (1.25cm) cubes. You want chunks large enough to notice in the finished cake but not so large that they take too long to soften during baking.
- You’ll need about 4 medium apples to get 4 cups (560g) of diced apple. Granny Smith is the top choice, but Honeycrisp or Braeburn both work well.
- Set the diced apples aside on your cutting board or in a small bowl. Do not add them to the batter yet.
3. Combine the Dry Ingredients
- In your large mixing bowl, whisk together the 3 cups (375g) of all-purpose flour, 2 cups (400g) granulated sugar, 1 cup (200g) packed brown sugar, 1½ teaspoons baking soda, 1½ teaspoons ground cinnamon, ½ teaspoon ground nutmeg, ¼ teaspoon ground cloves, and ½ teaspoon salt.
- Whisk until the mixture is completely uniform with no streaks of baking soda or clumping from the brown sugar. Breaking up the brown sugar thoroughly at this stage is important because lumps of undissolved sugar can create uneven sweetness in the finished cake.
4. Add the Wet Ingredients
- Make a well in the center of the dry ingredients by pushing them toward the edges of the bowl.
- Add the 3 large eggs, 1½ cups (360ml) vegetable oil, and 2 teaspoons pure vanilla extract directly into the well.
- Using a rubber spatula or large spoon, stir from the center outward, incorporating the wet ingredients into the dry ingredients gradually. Continue stirring until you have a very thick, shaggy batter with no dry flour streaks visible. The batter will be stiff and much thicker than typical cake batter. This is normal and expected.
5. Fold In the Apples and Nuts
- Add the 4 cups (560g) of diced apples to the batter and fold them in using a sturdy spatula. The batter is very thick, so you’ll need to apply some pressure to distribute the apple pieces throughout.
- If you’re using walnuts or pecans, add 1 cup (115g) of chopped nuts now and fold them in along with the apples.
- Continue folding until the apples and nuts are evenly distributed throughout the batter. The batter will still look quite thick and heavy. That’s exactly right.
6. Transfer to the Pan and Spread Evenly
- Scrape the entire batter into your prepared 9×13-inch pan. Because the batter is so thick, it won’t spread on its own like a thinner cake batter.
- Use a spatula or the back of a large spoon to spread the batter evenly across the pan, pressing it into the corners and smoothing the top as best you can. It doesn’t need to be perfectly smooth, but an even thickness ensures even baking.
7. Bake the Cake
- Place the pan on the center rack of your preheated 325°F (163°C) oven.
- Bake for 55 to 65 minutes. Start checking for doneness at the 55-minute mark by inserting a toothpick or cake tester into the center of the cake. If it comes out clean or with just a few moist crumbs attached, the cake is done. If it comes out with wet batter, return the cake to the oven and check again in 5-minute intervals.
- The top should be deep golden brown and the edges should have pulled away slightly from the sides of the pan.
8. Cool the Cake
- Remove the pan from the oven and place it on a cooling rack. Allow the cake to cool in the pan for at least 20 to 30 minutes before glazing or serving.
- For cleaner slices, let the cake cool completely, which takes about 1 to 2 hours at room temperature.
9. Make and Apply the Optional Vanilla Glaze
- In a small bowl, whisk together 1 cup (120g) powdered sugar, 2 to 3 tablespoons of milk, and ½ teaspoon pure vanilla extract until smooth. Add milk one tablespoon at a time until you reach a thick but pourable consistency. The glaze should fall from the whisk in a slow ribbon.
- Drizzle the glaze over the cooled cake using a spoon or fork, moving back and forth across the surface for an even drizzle pattern.
- Allow the glaze to set for 10 to 15 minutes before slicing and serving.
Another great fall baking recipe to bookmark: Coffee Cake Recipe Without Sour Cream
Tips for Success
A few simple techniques can take this already-great cake from good to absolutely outstanding. Paying attention to these small details makes a real difference in the final texture and flavor of the cake.
- Use room temperature eggs. Cold eggs can cause the oil and eggs to separate slightly, which affects the final texture. Set your eggs out 30 minutes before baking.
- Don’t skip the brown sugar. The combination of granulated and brown sugar is key to the deep, caramel-like flavor this cake is known for. Substituting all granulated sugar will give you a flatter, less interesting taste.
- Cut apples into uniform pieces. Inconsistent apple chunks mean some pieces will be mushy while others stay undercooked. Aim for consistent ½-inch (1.25cm) cubes throughout.
- Don’t overmix once the flour is added. Stir just until the dry ingredients are incorporated. Overmixing develops gluten, which can make the cake dense and tough.
- Test for doneness with a toothpick. Ovens vary. Start checking at 55 minutes and go by the toothpick test rather than the clock alone.
- Let the cake cool before slicing. Cutting into a warm cake makes it crumble and fall apart. Patience here pays off with clean, beautiful slices.
- Toast your nuts first. If using walnuts or pecans, toast them in a dry skillet for 3 to 4 minutes over medium heat before adding. Toasted nuts have a deeper, richer flavor than raw.
You might also love this Carrot Cake with Cream Cheese Frosting for another beautifully moist, oil-based spiced cake.
Serving Suggestions
This Amish apple cake is wonderful on its own, but pairing it the right way can turn a simple dessert into a full experience.
A warm slice with a generous scoop of vanilla ice cream on top is one of the most classic and satisfying ways to serve it. The cold ice cream melts slightly over the warm (or room temperature) cake and creates a sauce-like effect that’s hard to beat.
- Drizzle with warm Caramel Sauce for a rich, buttery topping that complements the apple and cinnamon flavors
- Serve alongside a mug of warm Mulled Apple Cider for the ultimate fall pairing
- Top with a dollop of lightly sweetened whipped cream and a pinch of cinnamon
- Dust with powdered sugar for a simple, elegant presentation
- Pair with a scoop of cinnamon ice cream for an extra layer of spiced flavor
- Serve warm as a breakfast cake alongside coffee or tea
- Add a cream cheese frosting layer (similar to carrot cake) for a more decadent dessert version
Variations to Try
Once you’ve mastered the classic recipe, there are so many fun directions to take this cake. The base recipe is flexible and forgiving, which is part of why Amish baking traditions have always encouraged personalization based on what’s available.
- Raisin Amish Apple Cake: Add 1 cup (150g) of raisins along with the apples for an extra chewy texture and natural sweetness. Golden raisins work especially well.
- Cream Cheese Frosted Version: Swap the vanilla glaze for a full cream cheese frosting layer. Beat 8oz (225g) softened cream cheese with 2 cups powdered sugar, 4 tablespoons butter, and 1 teaspoon vanilla.
- Pear Variation: Swap half or all of the apples for firm, ripe pears for a slightly softer, more delicate fruit flavor.
- Maple Glaze: Replace the vanilla glaze with a pure maple syrup glaze (maple syrup whisked with powdered sugar) for a fall-forward flavor upgrade.
- Applesauce Version: Replace ½ cup of oil with unsweetened applesauce to reduce fat slightly while adding additional apple flavor.
- Chocolate Chip Addition: Stir ½ cup (85g) of semi-sweet chocolate chips into the batter along with the apples. The chocolate and apple combination is more delicious than you might expect.
- Gluten-Free Version: Substitute a 1:1 gluten-free flour blend for the all-purpose flour. The texture will be slightly denser but still delicious.
For another classic fruit dessert, try this Dutch Apple Pie Recipe
Storage and Reheating
One of the best things about this cake is how well it keeps. The high oil content means it actually gets better over the first day or two as the flavors deepen and meld together.
- Room temperature: Store covered with plastic wrap or in an airtight container at room temperature for up to 4 days. The oil-based batter keeps it moist without refrigeration.
- Refrigerator: If your kitchen is warm or if the cake is frosted with cream cheese frosting, store it covered in the refrigerator for up to 6 days. Bring slices to room temperature before serving for the best texture.
- Freezer: This cake freezes beautifully. Wrap individual slices in plastic wrap, then in aluminum foil, and freeze for up to 3 months. Thaw overnight in the refrigerator or at room temperature for a few hours.
- Reheating: Warm individual slices in the microwave for 15 to 20 seconds for a fresh-from-the-oven feeling. Alternatively, place slices in a 300°F (150°C) oven for 5 to 8 minutes.
- Glaze note: If freezing, add the glaze after thawing rather than before freezing for the best appearance.
Read Also: Classic Apple Pie Recipe
Nutritional Facts
The following values are approximate and based on a recipe cut into 16 servings, without the optional vanilla glaze or nuts.
| Nutrient | Per Serving |
|---|---|
| Calories | 340 kcal |
| Total Fat | 18g |
| Saturated Fat | 2g |
| Cholesterol | 35mg |
| Sodium | 190mg |
| Total Carbohydrates | 44g |
| Dietary Fiber | 1.5g |
| Total Sugars | 29g |
| Protein | 3g |
Values are estimates and will vary based on the specific ingredients used, apple variety, and whether optional add-ins are included.
You might also enjoy: Best Carrot Cake Recipe
Health Benefits of Key Ingredients
While this is absolutely a dessert, a few of the core ingredients do bring genuine nutritional value to the table. It’s worth knowing what’s working in your favor.
Apples are the star ingredient here, and they earn their place nutritionally. Fresh apples are a good source of dietary fiber (particularly pectin), vitamin C, and potassium. The fiber in apples supports digestive health, and the natural polyphenols found in apple skins have antioxidant properties.
- Apples provide dietary fiber, vitamin C, potassium, and antioxidants from their natural polyphenols, supporting heart and digestive health
- Cinnamon contains compounds like cinnamaldehyde that have anti-inflammatory properties, and some research suggests it may support healthy blood sugar management
- Eggs contribute complete protein, B vitamins including choline, and fat-soluble vitamins A, D, E, and K
- Walnuts (if used) are one of the best plant-based sources of omega-3 fatty acids, plus they provide protein, magnesium, and antioxidants
- Nutmeg contains small amounts of antioxidants and has traditionally been used to support digestion and sleep quality
Read Also: Apple Pie Biscuits Recipe
Frequently Asked Questions
1. What type of apples work best for Amish apple cake?
Granny Smith apples are the most popular choice because their tartness balances the sweetness of the batter and they hold their shape during baking rather than turning mushy. That said, Honeycrisp, Braeburn, Fuji, or even Pink Lady apples all work well. Avoid very soft varieties like McIntosh or Red Delicious, which tend to disintegrate and create a mushy texture.
2. Can I make this cake in a different pan size?
Yes, though baking times will vary. You can bake this in two 9-inch round cake pans for approximately 40 to 50 minutes. A Bundt pan works beautifully and gives an impressive presentation, with a baking time of about 65 to 75 minutes at 325°F (163°C). Always use the toothpick test to confirm doneness rather than relying solely on timing.
3. Why is my cake so dense?
This cake is naturally dense compared to a light sponge cake, and that’s intentional. The heavy apple pieces and thick batter create a dense, moist crumb that’s part of its charm. If you feel your cake is too dense, double-check that your baking soda is fresh (it should fizz actively when combined with vinegar) and that you didn’t overmix the batter.
4. Can I reduce the sugar in this recipe?
You can reduce the total sugar by up to ½ cup (100g) without significantly impacting the structure of the cake. The brown sugar contributes to both moisture and flavor, so it’s worth keeping as much of it as possible. Reducing the sugar too aggressively may result in a drier, less flavorful cake.
5. Does this cake need to be refrigerated?
If served plain or with a simple vanilla glaze, this cake can sit at room temperature for up to 4 days covered tightly. If topped with cream cheese frosting, it should be refrigerated and will keep for up to 6 days. In both cases, bring the cake to room temperature before serving for the best texture and flavor.
For another comforting fall dessert, try: Peach Cobbler Recipe
Amish Apple Cake
Equipment
- Large mixing bowl - At least 4-quart capacity
- Whisk
- Rubber spatula or wooden spoon
- 9×13 inch baking pan - Metal or glass
- Apple peeler and corer
- Chef’s Knife and Cutting Board
- Dry and liquid measuring cups
- Measuring spoons
- Cooling rack
- Toothpick or cake tester
Ingredients
- 3 cups all-purpose flour - 375g
- 2 cups granulated sugar - 400g
- 1 cup packed brown sugar - 200g
- 1½ tsp baking soda
- 1½ tsp ground cinnamon
- ½ tsp ground nutmeg
- ¼ tsp ground cloves
- ½ tsp salt
- 3 large eggs - room temperature
- 1½ cups vegetable oil - 360ml; canola oil also works
- 2 tsp pure vanilla extract
- 4 cups apples - about 4 medium apples, 560g; peeled, cored, and diced into ½-inch cubes; Granny Smith recommended
- 1 cup walnuts or pecans - 115g; chopped; optional
For the Vanilla Glaze (Optional)
- 1 cup powdered sugar - 120g
- 2-3 tbsp milk - added one tablespoon at a time
- ½ tsp pure vanilla extract
Instructions
- Preheat your oven to 325°F (163°C). Grease a 9×13-inch baking pan with butter or cooking spray, then dust lightly with flour and tap out the excess.
- Peel, core, and dice your apples into ½-inch (1.25cm) cubes — you’ll need about 4 cups (560g). Set aside.
- In a large bowl, whisk together the flour, granulated sugar, brown sugar, baking soda, cinnamon, nutmeg, cloves, and salt until fully combined with no lumps.
- Make a well in the center of the dry ingredients and add the eggs, vegetable oil, and vanilla extract. Stir from the center outward until a thick, uniform batter forms with no dry streaks.
- Add the diced apples and chopped nuts (if using) to the batter and fold with a sturdy spatula until evenly distributed throughout the thick batter.
- Scrape the batter into the prepared pan and spread it evenly to the corners using a spatula or the back of a spoon.
- Bake for 55 to 65 minutes, until a toothpick inserted in the center comes out clean or with a few moist crumbs. The top should be deep golden brown.
- Transfer the pan to a cooling rack and let the cake cool in the pan for at least 20 to 30 minutes before glazing, or allow to cool completely for cleanest slices.
- Whisk together the powdered sugar, 2 to 3 tablespoons of milk, and vanilla extract until smooth and pourable, then drizzle over the cooled cake and let set for 10 to 15 minutes before slicing.
Notes
- Use room temperature eggs for the smoothest batter and best texture. Cold eggs can cause the oil to separate slightly.
- Granny Smith apples are the top choice for their tartness and firm texture, but Honeycrisp, Braeburn, or Fuji work well too. Avoid soft varieties like McIntosh or Red Delicious.
- Do not overmix once the flour is incorporated — stir just until no dry streaks remain to avoid a tough crumb.
- Toast walnuts or pecans in a dry skillet for 3 to 4 minutes before adding for a deeper, richer nut flavor.
- The batter will be very thick — much thicker than typical cake batter. This is completely normal and expected.
- Start checking for doneness at 55 minutes. Oven temperatures vary, so always use the toothpick test rather than relying on timing alone.
- Store covered at room temperature for up to 4 days. The oil-based batter keeps it moist without refrigeration.
- If frosted with cream cheese frosting, refrigerate and consume within 6 days. Bring to room temperature before serving.
- To freeze, wrap individual slices in plastic wrap then aluminum foil and freeze for up to 3 months. Thaw at room temperature and add glaze after thawing.
- For a cream cheese frosting variation, beat 8oz (225g) softened cream cheese with 2 cups powdered sugar, 4 tablespoons softened butter, and 1 teaspoon vanilla extract until fluffy.
Final Thoughts
This Amish apple cake recipe is the kind of bake that earns a permanent place in your recipe collection. It’s humble, straightforward, and honest in the way that the best homemade food always is.
The oil-based batter keeps it moist for days, the fresh apples add texture and natural sweetness, and the warm spices make the whole kitchen smell absolutely incredible while it bakes.
It’s one of those recipes that works for every occasion, from a casual weeknight treat to a holiday dessert table centerpiece. Once you try it, you’ll understand why this style of baking has been cherished for generations.
Give this Amish apple cake a try this weekend and see for yourself how something so simple can be so deeply satisfying. If you make it, leave a comment below and let us know how it turned out. And if you added your own twist, share that too. We love hearing how readers make these recipes their own!
Recommended:
- Amish Banana Bread
- German Applesauce Cake Recipe
- Dutch Apple Pie Recipe
- Pumpkin Muffin Recipe
- Fruit Cocktail Cake Recipe
- Easy Pecan Pie Dump Cake Recipe
- Classic Pumpkin Pie Recipe
- Banana and Apple Bread Recipe
- Classic Vanilla Cake Recipe
- Mug Cake Recipe


