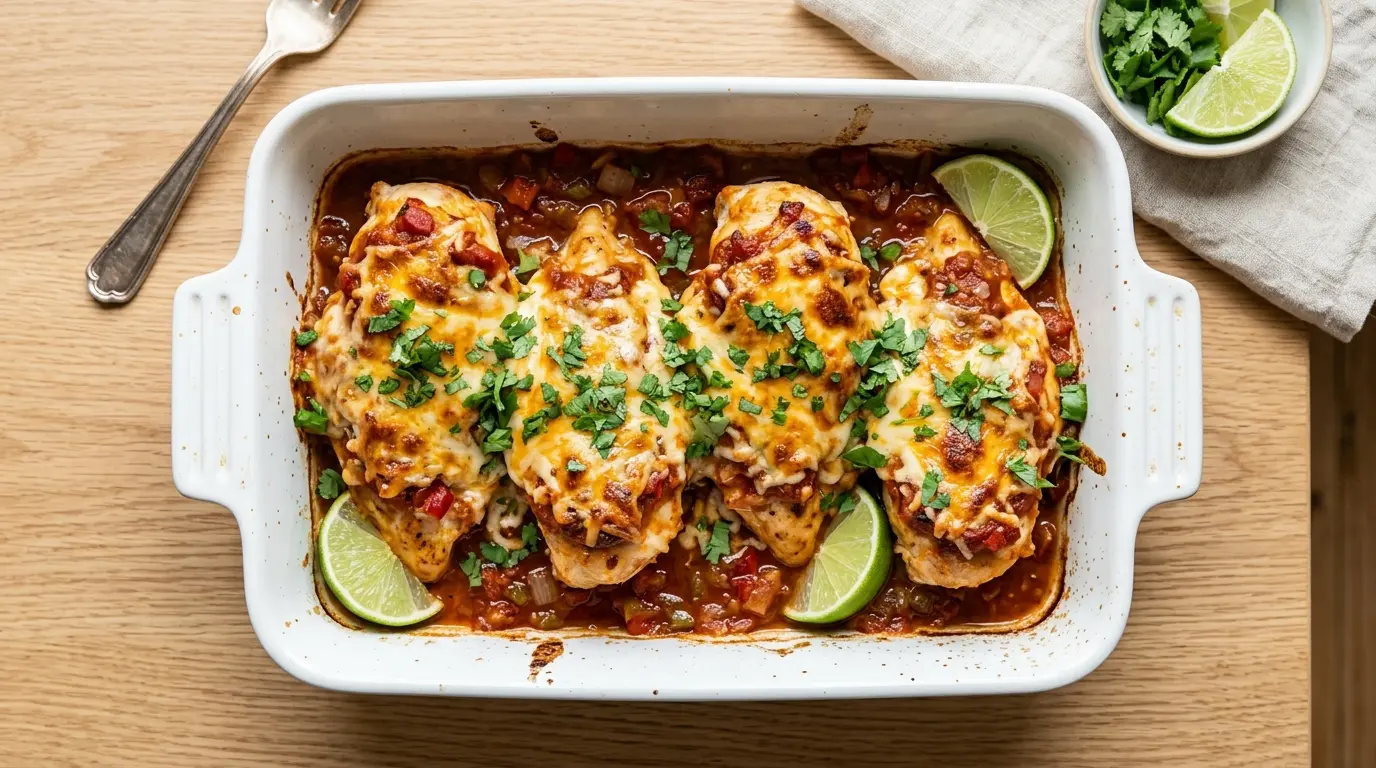
Few weeknight dinners come together this fast and still taste this satisfying. This baked salsa chicken recipe has become a staple in kitchens everywhere because it uses pantry-friendly ingredients to deliver bold, Mexican-inspired flavor with almost zero effort. All you need is some chicken, a good jar of chunky salsa, taco seasoning, and melty cheese, and you have a dinner that the whole family will actually be excited about.
The magic here is in how the salsa works double duty. It acts as a marinade, a sauce, and a moisture-keeper all at once. As the chicken bakes, it absorbs every bit of that tomato, pepper, and onion goodness, becoming incredibly juicy and full of flavor. The taco seasoning layered underneath ties everything together with just the right amount of warmth and spice.
Best of all, this dish is done in under 45 minutes, start to finish. You will spend about 5 minutes on prep and let the oven do the rest.
If you love easy, salsa-forward chicken dinners, you might also enjoy this Salsa Verde Chicken for a tangy green chile twist.
Why You’ll Love This Baked Salsa Chicken Recipe
This recipe checks every box for a weeknight winner. It is fast, fuss-free, and endlessly flexible.
Even beginners can nail it on the first try. There is no fancy technique required, no browning, no sauce-making, and no babysitting.
The salsa keeps the chicken incredibly moist without any added butter or cream. That means it is also a naturally lighter dinner option that does not feel like diet food.
The cheesy topping at the end is non-negotiable. That bubbly, golden layer of melted cheddar or Monterey Jack pulls the whole dish together.
It works for so many occasions. You can serve it as a classic plated dinner, shred it for tacos, or use it as meal prep throughout the week.
- Only 5 ingredients needed for the base recipe
- Ready in under 45 minutes
- Kid-friendly and crowd-pleasing
- Naturally gluten-free
- Works for meal prep, tacos, burrito bowls, and more
- Uses pantry staples you likely already have on hand
- Easily customizable for different heat levels
Another favorite weeknight meal that works perfectly alongside this one: Chicken Tacos
Ingredients
The beauty of this recipe is in its simplicity. Every ingredient has a clear purpose, from keeping the chicken juicy to building layer after layer of flavor.
Use a chunky salsa rather than a thin, watery one. Thin salsa can make the dish soupy instead of saucy. A good jar with visible tomato chunks, peppers, and onions will give the chicken something to cling to as it bakes.
- 4 boneless, skinless chicken breasts (about 6 oz / 170 g each)
- 1 packet (1 oz / 28 g) taco seasoning, or 2 tablespoons homemade
- 1.5 cups (360 ml) chunky salsa (mild, medium, or hot, your choice)
- 1 cup (100 g) shredded Mexican cheese blend (or cheddar, Monterey Jack, or pepper jack)
- 2 tablespoons (30 ml) olive oil
- 1 tablespoon (15 ml) fresh lime juice
- 2 tablespoons fresh cilantro, chopped (for garnish)
- Salt and black pepper to taste
You might also enjoy using leftover chicken for this Chicken Enchiladas Recipe.
Kitchen Equipment Needed
You do not need anything specialized for this recipe. A simple baking dish and a few standard kitchen tools are all it takes.
Using a 9×13-inch baking dish gives the chicken enough room to bake evenly without overcrowding. Overcrowding traps steam and can lead to uneven cooking, so make sure each breast has its own space.
- 9×13-inch baking dish
- Meat thermometer (essential for checking doneness)
- Meat mallet or rolling pin
- Zip-lock bag or plastic wrap (for pounding chicken)
- Mixing bowl (small, for seasoning)
- Basting brush or spoon
- Aluminum foil
- Cutting board
- Sharp chef’s knife
Read Also: Baked Chicken Breast Recipe
Recommended Products for This Recipe
These are products I genuinely recommend based on quality, performance, and how much of a difference they make in this specific recipe.
1. Pyrex Easy Grab Glass Baking Dish (9×13)
This baking dish distributes heat evenly, which is exactly what you want when baking chicken breasts of varying thickness. The clear glass also lets you monitor the color of the salsa and cheese without opening the oven. It is easy to clean and durable enough to go from oven to table.
2. ThermoPro Instant-Read Meat Thermometer
The single most important tool for juicy baked chicken is a reliable thermometer. Pulling chicken at exactly 165°F (74°C) instead of guessing means the difference between perfectly moist and sadly dry. This thermometer reads in seconds and takes all the guesswork out of the equation.
3. OXO Good Grips Meat Mallet
Pounding the chicken to an even thickness before baking is the step most home cooks skip, and it makes a significant difference in how evenly the chicken cooks. This mallet has a flat side for thinning and a textured side for tenderizing, and it is comfortable to use without being heavy.
4. Frontera Chunky Salsa (Medium)
A great salsa is the heart of this recipe, and Frontera’s restaurant-style salsa is one of the best jarred options out there. It has real texture, roasted tomato flavor, and the right balance of heat without being overwhelming. It holds up beautifully in the oven without turning watery.
5. Simply Organic Taco Seasoning
This blend is free of artificial additives and uses quality herbs and spices. It has a more balanced, complex flavor than many grocery store packets. A good taco seasoning is doing a lot of the flavor heavy lifting in this recipe, so it is worth using one you actually enjoy.
For a slow-cooker version with similar flavors, try this Crockpot Salsa Chicken Recipe.
Step-by-Step Instructions
1. Preheat the Oven and Prepare the Baking Dish
- Set your oven to 375°F (190°C) and allow it to fully preheat before the dish goes in. A properly preheated oven ensures even cooking from the start.
- Lightly grease your 9×13-inch baking dish with cooking spray or a drizzle of olive oil. This prevents the salsa from sticking to the bottom and makes cleanup much easier.
- Spread about 1/2 cup (120 ml) of the salsa in an even layer across the bottom of the baking dish. This creates a flavorful base that infuses into the underside of the chicken as it bakes.
2. Pound the Chicken to an Even Thickness
- Place each chicken breast inside a zip-lock bag or between two sheets of plastic wrap on your cutting board.
- Using a meat mallet or rolling pin, gently pound the thicker end of each breast until it is roughly 3/4-inch (2 cm) thick throughout. This step is critical because thick and thin sections cook at different rates, which often leads to overcooked edges and an underdone center.
- Pat the chicken dry with paper towels after pounding. Removing surface moisture helps the seasoning adhere better and allows the exterior to develop more flavor in the oven.
3. Season the Chicken
- In a small bowl, combine the taco seasoning packet with a pinch of salt and black pepper. If you are using homemade taco seasoning, a typical blend includes cumin, chili powder, garlic powder, onion powder, paprika, and a touch of cayenne.
- Drizzle each chicken breast lightly with olive oil on both sides. The fat helps the seasoning stick and promotes a more flavorful crust.
- Rub the seasoning mixture generously over both sides of each chicken breast, making sure every part is coated. Do not skip the undersides, as that is the surface sitting in the salsa and will absorb the most flavor.
- Squeeze the lime juice evenly over the seasoned chicken. The acid in lime juice helps tenderize the surface slightly and brightens the overall flavor of the dish.
4. Assemble the Dish
- Place the seasoned chicken breasts on top of the salsa layer in the baking dish, leaving a small gap between each piece so air can circulate.
- Spoon the remaining salsa (about 1 cup / 240 ml) evenly over each chicken breast, making sure the tops are fully coated. The salsa on top will bubble and caramelize as the chicken bakes, creating an intensely flavorful coating.
- For extra saucy chicken, press the salsa gently into the surface with the back of a spoon so it nestles into any crevices in the meat.
5. Bake the Chicken
- Place the baking dish in the fully preheated 375°F (190°C) oven on the center rack.
- Bake uncovered for 25 to 35 minutes. The exact time will depend on the thickness of your chicken breasts. Thin breasts (around 1/2 inch thick) may be done closer to 25 minutes, while thicker breasts may need the full 35 minutes.
- Start checking at the 25-minute mark by inserting a meat thermometer into the thickest part of one breast. You are looking for an internal temperature of 165°F (74°C). Do not pull the chicken before it reaches this temperature, and do not let it go significantly beyond it or the meat will become dry.
- The salsa should be bubbling around the edges and the top of the chicken should look cooked through with no visible pink.
6. Add the Cheese and Finish
- Once the chicken reaches 165°F, remove the baking dish from the oven.
- Sprinkle the shredded cheese evenly over each chicken breast, making sure to cover the entire top surface.
- Return the dish to the oven and bake for an additional 5 minutes, or until the cheese is fully melted and starting to turn golden at the edges. For a more golden, bubbly cheese topping, switch the oven to broil for the last 1 to 2 minutes. Watch it closely if broiling, as cheese can go from golden to burnt very quickly.
7. Rest and Serve
- Remove the baking dish from the oven and allow the chicken to rest for 5 minutes before serving. Resting allows the juices to redistribute throughout the meat instead of running out the moment you cut into it. This is the step that keeps the chicken juicy all the way through.
- Sprinkle the chopped fresh cilantro over the top of each breast just before serving. Cilantro added after cooking retains its bright, fresh flavor much better than cilantro added during baking.
- Serve directly from the baking dish or transfer each breast to individual plates, spooning the salsa from the bottom of the dish over the top as a sauce.
Also delicious with similar flavors: Mango Salsa Chicken Recipe
Tips for Success
A few small habits make a big difference in this recipe. These are the details that take baked salsa chicken from good to genuinely great.
The most important tip is to use a meat thermometer every single time. Visual cues alone are not reliable for chicken. Pulling it right at 165°F (74°C) gives you the most juicy, safe result.
- Use chunky salsa, not thin: Thin or watery salsa creates a watery sauce that does not cling well to the chicken. A chunky salsa with visible vegetable pieces gives you a thicker, more flavorful coating.
- Pound the chicken: Even thickness = even cooking. Skipping this step is the most common reason baked chicken turns out dry on the thin end and underdone in the middle.
- Do not crowd the pan: Give each breast its own space. Overcrowding causes the chicken to steam rather than bake, which affects the texture and reduces caramelization.
- Layer salsa both below and on top: Salsa beneath the chicken prevents sticking and adds flavor to the underside; salsa on top bastes the chicken as it bakes.
- Rest before cutting: Five minutes of rest is all it takes. Cutting immediately causes the juices to run out all at once.
- Add the cheese at the end: Adding cheese from the start results in an overcooked, greasy layer. Adding it in the last 5 minutes gives you that perfectly melted, slightly golden result.
- Lime juice matters: The acid in fresh lime juice brightens the entire dish and balances the richness of the cheese. Bottled lime juice works in a pinch, but fresh is always better.
Read Also: Salsa Chicken Recipe
Serving Suggestions
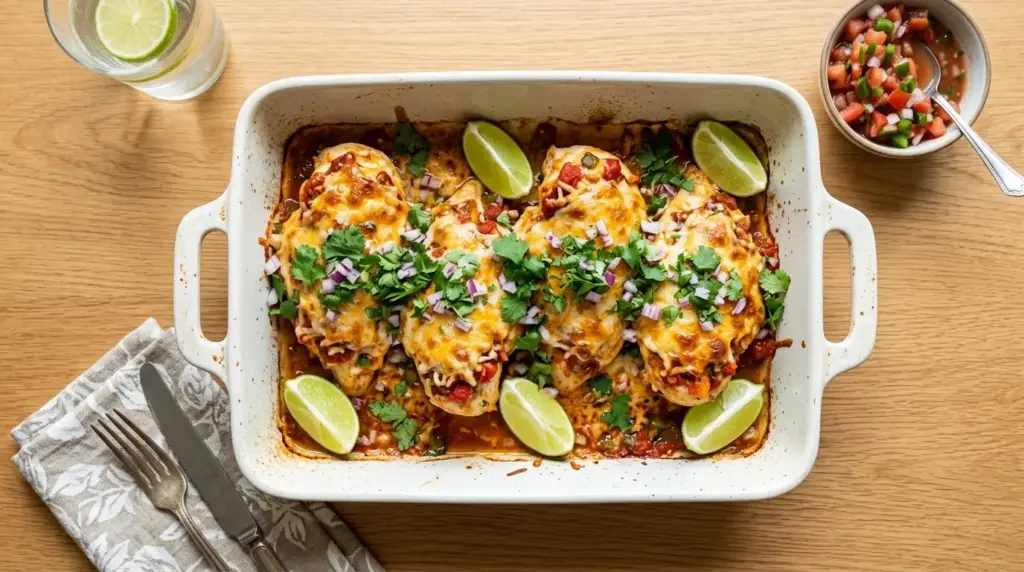
Baked salsa chicken is one of those rare dishes that works beautifully as a standalone plate or as a building block for other meals. The richness of the cheese, the acidity of the salsa, and the warmth of the taco seasoning pair well with a wide range of sides.
Keep the Mexican-inspired theme going with classic accompaniments or go a completely different direction with a simple green salad for something lighter.
- Over Cilantro Lime Rice: This is the most popular serving option for good reason. The bright, herby rice absorbs the salsa sauce perfectly.
- With Mexican Rice: A heartier, tomato-flavored rice that complements the salsa flavors in the chicken beautifully.
- Alongside Refried Beans: Creamy beans alongside the cheesy, saucy chicken make for a fully satisfying plate.
- Tucked into warm tortillas as Chicken Tacos: Slice or shred the chicken and serve with your favorite toppings.
- Over a green salad: For a lighter option, slice the chicken over romaine with avocado, corn, and a squeeze of lime.
- With Corn on the Cob: A simple side that balances the bold flavors with natural sweetness.
- As a burrito bowl: Layer the shredded chicken over rice with black beans, corn salsa, sour cream, and guacamole.
You might also enjoy a bowl of Chicken Tortilla Soup on the side for a full Tex-Mex spread.
Variations to Try
Once you have made the base recipe, it is easy to switch things up depending on what you are craving or what you have on hand. These variations all follow the same basic technique with small ingredient swaps.
Keep the method the same and let the new ingredients do the work. Most variations take no extra prep time at all.
- Salsa Verde version: Swap the red salsa for salsa verde (green tomatillo salsa) for a tangy, slightly tart flavor profile. This pairs especially well with Monterey Jack cheese.
- Cream cheese version: Place 2 tablespoons of softened cream cheese on each breast before adding the salsa. It melts into the dish and creates a rich, creamy sauce.
- Spicy version: Use hot salsa and pepper jack cheese, and add a pinch of cayenne to the taco seasoning. For even more heat, top with sliced pickled jalapenos before baking.
- Black bean and corn version: Add half a can each of drained black beans and corn to the salsa before spreading it over the chicken. This makes the dish heartier and stretches it further for a crowd.
- Chicken thigh version: Boneless, skinless chicken thighs are a great substitute. They stay even juicier than chicken breasts and have a deeper flavor. The bake time stays roughly the same; just verify the internal temperature reaches 165°F.
- Low-sodium version: Use a homemade taco seasoning without added salt and choose a low-sodium salsa. The lime juice still provides plenty of brightness and flavor.
- Stuffed pepper version: Shred the finished chicken and use it to fill halved bell peppers. Top with extra cheese and bake for another 15 minutes.
Read Also: Spinach Stuffed Chicken Breast Recipe
Storage and Reheating
This recipe stores exceptionally well, making it a great candidate for meal prep. The flavors actually deepen a little overnight, so leftovers are genuinely worth looking forward to.
Store leftovers properly and they will stay delicious for several days in the fridge or up to three months in the freezer.
- Refrigerator: Store cooled chicken in an airtight container for up to 4 days. Keep any extra salsa sauce from the bottom of the baking dish in a separate container and spoon it over the chicken when reheating.
- Freezer: Let the chicken cool completely, then place individual portions in freezer-safe zip-lock bags or airtight containers. Freeze for up to 3 months. Thaw overnight in the refrigerator before reheating.
- Oven reheating (best method): Place chicken in a covered baking dish with a spoonful of salsa and reheat at 325°F (165°C) for 10 to 15 minutes, or until warmed through. Covering the dish prevents the chicken from drying out.
- Microwave reheating: Place chicken on a microwave-safe plate, add a spoonful of salsa on top, and cover loosely. Microwave in 30-second intervals until heated through.
- Do not refreeze: Once thawed, do not refreeze the chicken. Use thawed portions within 24 hours.
- Shredded leftovers: Shred leftover chicken directly into the salsa sauce and use it for tacos, quesadillas, or burrito bowls throughout the week.
Another great make-ahead chicken dinner: Baked Chicken with Alfredo Sauce
Nutritional Facts
The following values are approximate per serving (1 chicken breast with toppings), based on 4 servings total. Exact values will vary depending on the brand of salsa and cheese used.
| Nutrient | Amount Per Serving |
|---|---|
| Calories | ~320 kcal |
| Protein | 42 g |
| Total Fat | 12 g |
| Saturated Fat | 5 g |
| Carbohydrates | 8 g |
| Fiber | 1 g |
| Sugars | 4 g |
| Sodium | ~680 mg |
| Cholesterol | 110 mg |
| Calcium | 180 mg |
These numbers make this recipe a solid high-protein, moderate-calorie dinner. Using low-fat cheese or a reduced-sodium salsa can adjust the saturated fat and sodium content significantly.
For a lighter pairing, serve alongside Green Beans for a simple, low-carb side.
Health Benefits of Key Ingredients
This recipe is not only easy to make but genuinely nutritious. The core ingredients offer meaningful health benefits beyond just satisfying flavor.
Chicken breast is one of the leanest, most protein-dense meats available. Each breast provides over 35 grams of protein with very little saturated fat, making it excellent for muscle maintenance, satiety, and overall health.
- Tomato-based salsa: Tomatoes are rich in lycopene, a powerful antioxidant linked to reduced risk of chronic disease. Salsa also contains onions and peppers, both of which have anti-inflammatory properties.
- Chili powder and cumin (in taco seasoning): These spices are more than just flavor. Cumin supports digestion and contains iron, while chili powder contains capsaicin, which has been studied for its metabolism-boosting and anti-inflammatory effects.
- Lime juice: A small amount of lime juice adds vitamin C, which supports immune function and helps the body absorb the iron present in both the chicken and the spices.
- Cheese: While often seen as indulgent, cheese in moderation provides calcium, phosphorus, and protein. Using a modest amount on top adds richness without going overboard on saturated fat.
- Cilantro: This often-overlooked garnish is actually a good source of vitamins A, C, and K, and it has been studied for its potential detoxifying and antimicrobial properties.
- Olive oil: Used in small amounts to coat the chicken, olive oil contributes healthy monounsaturated fats and enhances the absorption of fat-soluble nutrients from the salsa vegetables.
Read Also: Chipotle Chicken Recipe
Frequently Asked Questions
1. Can I use chicken thighs instead of chicken breasts?
Absolutely. Boneless, skinless chicken thighs work wonderfully in this recipe and are actually more forgiving than breasts because their higher fat content keeps them juicy even if they spend an extra minute or two in the oven.
The bake time is similar; just verify with a thermometer that the thighs reach 165°F (74°C) before pulling them from the oven.
2. Do I need to cover the baking dish with foil?
No, you do not need to cover it. Baking uncovered allows the salsa on top to caramelize and the cheese to melt properly in the final step.
If you find the chicken is browning too quickly on the outside before it is cooked through, loosely tent foil over the dish for the first half of baking, then remove it for the final 10 to 15 minutes.
3. What type of salsa works best?
Chunky salsa is the best choice for this recipe. Thin or restaurant-style salsa can become watery during baking, resulting in a loose, soupy sauce rather than a thick, clingy coating.
Any heat level works, from mild to hot. Choose based on your preference and the preferences of anyone you are serving.
4. Can I make this ahead of time?
Yes. You can assemble the dish fully (seasoned chicken with salsa, minus the cheese) up to 24 hours in advance. Cover it tightly with plastic wrap and refrigerate. When ready to bake, add the cheese at the end as directed.
This makes it a great option for meal prep or for getting dinner ready during the day for an easy evening bake.
5. Why is my chicken dry?
The most common culprit is overcooking. Chicken breast dries out quickly past 165°F (74°C), so a reliable meat thermometer is your best tool for avoiding this.
Other reasons include using chicken breasts that were not pounded to an even thickness, or using a thin salsa that did not provide enough moisture during baking. Chunky salsa and consistent thickness solve both issues.
Read Also: Chicken Fajita Recipe
Final Thoughts
This baked salsa chicken recipe is exactly the kind of dinner that earns a permanent spot in your weekly rotation. It is fast enough for a busy Tuesday, flavorful enough for a casual Friday gathering, and versatile enough to become something entirely new with leftovers the next day.
The combination of taco seasoning, tangy salsa, and gooey melted cheese is just one of those flavor combinations that works every single time without fail.
Give it a try this week and see just how easy a truly delicious chicken dinner can be. If you make it, leave a comment below and let me know how it turned out, and share it with someone who could use an easy weeknight win.
Recommended:
- Salsa Verde Chicken Recipe
- Crockpot Salsa Chicken Recipe
- Chicken Enchiladas Recipe
- Corn Salsa Recipe
- Pico de Gallo Recipe
- Taco Seasoning Recipe
- Chicken Tortilla Soup Recipe
- Seven Layer Dip Recipe
- Easy Guacamole Recipe
- Homemade Tortilla Chips Recipe


