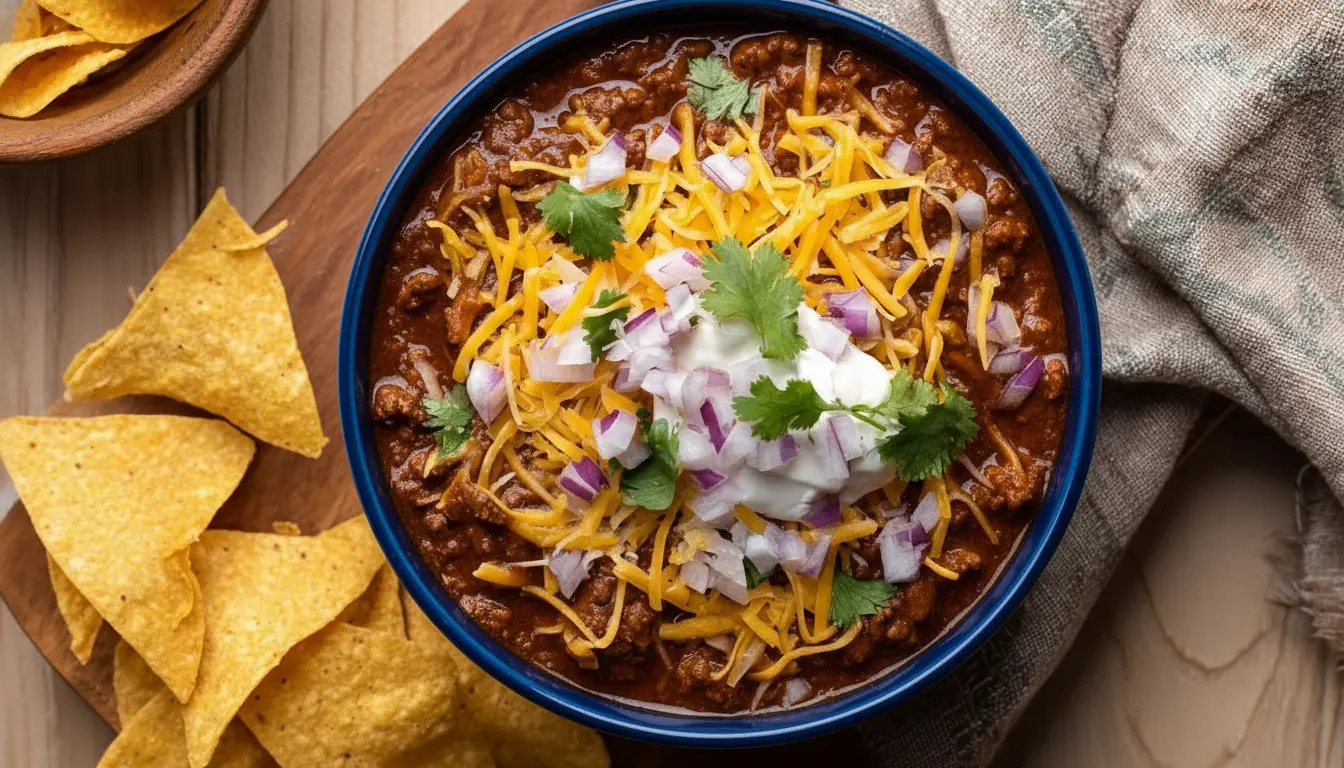
Bold, meaty, and unapologetically rich, this Texas chili recipe delivers the authentic “bowl of red” that Texas has been famous for since the 1800s. Tender chunks of beef swim in a thick, smoky chile-based sauce that’s been slow-simmered to perfection.
No beans. No tomatoes. Just pure, beefy goodness that honors the cowboy tradition where this dish got its start.
Growing up in the Southwest, I learned early on that Texas chili isn’t just another chili recipe. It’s a whole different beast. The first time I tasted authentic Texas red at a San Antonio chili cookoff, I understood what all the fuss was about. The way the dried chiles create layers of flavor, the way the beef becomes fork-tender after hours of simmering—it changed everything I thought I knew about chili.
This recipe uses a blend of dried ancho chiles, guajillo chiles, and pasilla chiles to build depth and complexity you simply can’t get from chili powder alone. The dried chiles bring smoky, earthy, slightly sweet notes that make each spoonful incredibly satisfying.
I’m sharing exactly how to make this chili the traditional way, with tips I’ve learned from Texas chili champions and plenty of my own trial-and-error. The key is patience. Good chili can’t be rushed.
Why You’ll Love This Texas Chili Recipe
This Texas chili recipe stands out because it focuses on what really matters: quality beef and the complex flavor of real dried chiles. Every bite delivers bold, beefy satisfaction without any fillers getting in the way.
Making chili from scratch this way might seem intimidating, but the process is actually straightforward. You toast the chiles, make a paste, sear the beef, and let it all simmer together until magic happens.
Here’s what makes this recipe special:
- Authentic Texas-style preparation with chunks of beef instead of ground meat
- Deep, complex chile flavor from toasting and blending dried peppers
- Rich, thick consistency that coats a spoon and sticks to your ribs
- No beans or tomatoes keeping the focus squarely on the meat
- Better the next day as the flavors continue to develop
- Freezer-friendly so you can make a big batch and enjoy it for months
This pairs beautifully with skillet cornbread for soaking up every drop of that rich sauce.
Ingredients
This recipe uses real dried chiles instead of chili powder for authentic flavor. The combination creates layers of taste that get richer as the chili simmers. Each ingredient serves a purpose in building the complex, hearty profile that Texas chili is known for.
- 3 pounds (1.36 kg) beef chuck roast, cut into 1-inch (2.5 cm) cubes
- 3 dried ancho chiles, stems and seeds removed
- 3 dried guajillo chiles, stems and seeds removed
- 2 dried pasilla chiles, stems and seeds removed
- 2 tablespoons (30 ml) vegetable oil, divided
- 1 large yellow onion, diced (about 2 cups or 300 g)
- 6 cloves garlic, minced
- 2 tablespoons (14 g) ground cumin
- 1 tablespoon (7 g) smoked paprika
- 2 teaspoons (4 g) dried oregano
- 1 teaspoon (2 g) ground coriander
- 1/2 teaspoon (1 g) cayenne pepper (adjust to taste)
- 1/4 teaspoon (0.5 g) ground cinnamon
- 4 cups (960 ml) beef broth, divided
- 1 cup (240 ml) dark beer (such as porter or amber ale)
- 2 tablespoons (16 g) masa harina or cornmeal
- 2 tablespoons (30 ml) apple cider vinegar
- 1 tablespoon (12 g) brown sugar
- 2 teaspoons (10 g) kosher salt, plus more to taste
- 1 teaspoon (2 g) black pepper
- 1 ounce (28 g) dark chocolate (70% cacao or higher), chopped
For Serving:
- Shredded cheddar cheese
- Sour cream
- Diced white onion
- Fresh cilantro
- Sliced jalapeños
- Lime wedges
- Tortilla chips or corn chips
Kitchen Equipment Needed
Having the right equipment makes the chili-making process smoother and more enjoyable. A heavy-bottomed pot distributes heat evenly, preventing scorching during the long simmer. A food processor makes quick work of turning those dried chiles into a smooth paste.
- Large Dutch oven (6-8 quart/5.7-7.6 liter capacity)
- Cast iron skillet or dry pan for toasting chiles
- Food processor or blender
- Sharp chef’s knife
- Cutting board
- Wooden spoon or silicone spatula
- Measuring cups and spoons
- Ladle
Another favorite: Cowboy Skillet
Recommended Products for This Recipe
These carefully selected products will help you achieve the best results with this Texas chili recipe. Quality ingredients and equipment make a noticeable difference in the final flavor and texture.
1. Dried Chile Variety Pack
Getting a variety pack of dried chiles ensures you have the right mix for authentic flavor. Ancho, guajillo, and pasilla chiles each bring unique characteristics—sweet, tangy, and smoky respectively. Fresh dried chiles are pliable and aromatic, not brittle or dusty.
2. Le Creuset Enameled Cast Iron Dutch Oven
This Dutch oven distributes heat evenly and maintains consistent temperature throughout the long simmer time. The heavy lid traps moisture while the enamel coating prevents any metallic taste. It’s an investment that will serve you for decades of chili-making.
3. High-Quality Beef Chuck Roast
Premium grass-fed beef chuck creates the most flavorful chili. Look for well-marbled cuts with good fat distribution. The fat renders during cooking, adding richness to the sauce while the meat becomes incredibly tender.
4. Masa Harina
Real masa harina thickens the chili while adding authentic corn flavor. It creates a silky texture and subtle sweetness that regular cornmeal can’t match. Bob’s Red Mill makes an excellent masa harina that’s readily available.
You might also enjoy: Slow Cooker Chili Recipe
Step-by-Step Instructions
Making Texas chili requires patience and attention to detail, but the steps themselves are straightforward. Each phase builds on the last, creating layers of flavor that make this chili unforgettable.
1. Prepare the Dried Chiles
The dried chiles form the flavor foundation of this recipe, so taking time to prepare them properly pays off.
- Heat a dry cast iron skillet over medium heat
- Place the dried ancho, guajillo, and pasilla chiles in the skillet in a single layer
- Toast each side for 2-3 minutes until fragrant and slightly darkened, watching carefully to prevent burning
- Transfer the toasted chiles to a heat-safe bowl
- Cover completely with boiling water and let soak for 20-30 minutes until softened and pliable
- Reserve 1 cup (240 ml) of the soaking liquid before draining
2. Make the Chile Paste
This paste is what gives Texas chili its signature deep red color and complex flavor profile.
- Remove the softened chiles from the soaking liquid and place in a food processor
- Add 1 cup (240 ml) of the reserved soaking liquid
- Add 4 cloves of the minced garlic
- Add 1 tablespoon (14 g) of the ground cumin
- Add 1 teaspoon (5 g) of the kosher salt
- Process on high speed for 2-3 minutes, scraping down the sides as needed, until completely smooth with no chunks remaining
- Set aside the chile paste
3. Prepare and Season the Beef
Cutting the beef into uniform pieces ensures even cooking. Seasoning before searing helps develop a flavorful crust.
- Pat the beef chuck cubes dry with paper towels (this helps them brown better)
- Season all sides of the beef cubes generously with 1 teaspoon (5 g) kosher salt and 1 teaspoon (2 g) black pepper
- Let the seasoned beef sit at room temperature for 10-15 minutes while you heat the pot
4. Sear the Beef
Proper searing creates a rich, caramelized crust that adds depth to the final chili.
- Heat 1 tablespoon (15 ml) of vegetable oil in your Dutch oven over medium-high heat until shimmering
- Working in batches to avoid crowding (crowd the pan and the beef steams instead of sears), add beef cubes in a single layer
- Sear each batch for 2-3 minutes per side until deeply browned
- Transfer seared beef to a plate and repeat with remaining beef, adding more oil as needed
- Don’t worry about cooking the beef through—it will finish cooking during the simmer
5. Build the Flavor Base
The aromatics create a savory foundation that complements the chile paste and beef.
- Reduce heat to medium and add the remaining 1 tablespoon (15 ml) of vegetable oil to the Dutch oven
- Add the diced onion and cook for 5-7 minutes, stirring occasionally, until softened and translucent
- Add the remaining 2 cloves of minced garlic
- Add the remaining 1 tablespoon (14 g) ground cumin
- Add the smoked paprika, dried oregano, ground coriander, cayenne pepper, and ground cinnamon
- Stir constantly for 1-2 minutes until the spices are fragrant and coat the onions
6. Combine and Simmer
This is where everything comes together and the magic starts happening.
- Pour in the dark beer, scraping up any browned bits from the bottom of the pot (this adds incredible flavor)
- Let the beer simmer for 2-3 minutes to cook off the alcohol
- Add the prepared chile paste and stir until fully incorporated with the onion mixture
- Return all the seared beef and any accumulated juices to the pot
- Pour in 3 cups (720 ml) of the beef broth
- Add the apple cider vinegar and brown sugar
- Stir everything together until well combined
- Bring to a boil over high heat
- Once boiling, reduce heat to low and cover with the lid slightly ajar
- Simmer gently for 2-3 hours, stirring every 30 minutes, until the beef is fork-tender and the sauce has thickened
7. Thicken and Finish
The final adjustments bring the chili to perfect consistency and balanced flavor.
- In a small bowl, whisk together the masa harina with the remaining 1 cup (240 ml) beef broth until smooth with no lumps
- Stir the masa mixture into the chili
- Add the chopped dark chocolate and stir until melted (this adds richness and depth without making it taste sweet)
- Continue simmering uncovered for 20-30 minutes, stirring occasionally, until the chili reaches your desired thickness
- Taste and adjust seasoning with additional salt and pepper as needed
- Remove from heat and let rest for 10-15 minutes before serving (this allows the flavors to settle)
Read Also: Caldo De Res Recipe
Tips for Success
These practical tips come from years of making Texas chili and learning from mistakes. Following them will help you avoid common pitfalls and achieve the best possible results.
Small details make a big difference when you’re cooking something this traditional and beloved.
- Don’t skip toasting the chiles. This step releases their essential oils and deepens their flavor significantly. Untoasted chiles taste flat and one-dimensional.
- Sear the beef in small batches. Overcrowding the pot lowers the temperature and causes the meat to steam instead of developing a proper crust. That caramelization is flavor gold.
- Use chuck roast, not lean beef. The marbling and connective tissue in chuck break down during the long simmer, creating tender, juicy meat. Lean cuts will turn tough and dry.
- Let it simmer low and slow. High heat makes the beef chewy. Keep the simmer gentle with just a few bubbles breaking the surface every few seconds.
- Taste and adjust at the end. Every batch of dried chiles varies slightly in heat and flavor intensity. Trust your palate and adjust the seasoning before serving.
- Make it ahead. Texas chili tastes even better the day after you make it. The flavors meld together and deepen overnight in the refrigerator.
- Add liquid if needed. If the chili gets too thick during cooking, add beef broth 1/4 cup (60 ml) at a time until you reach the consistency you prefer.
This technique works wonderfully in hamburger soup as well.
Serving Suggestions
Texas chili is hearty enough to serve as a complete meal, but the right accompaniments take it from great to unforgettable. The toppings and sides you choose can highlight different aspects of the chili’s flavor.
Traditional Texas-style means keeping things simple and letting the chili shine, but feel free to get creative based on your preferences.
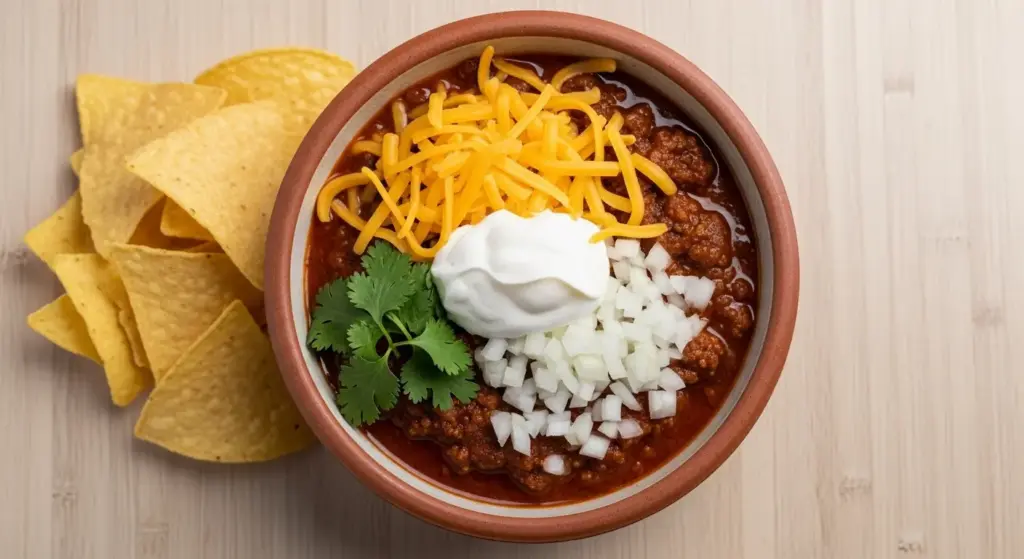
- Classic toppings: Shredded sharp cheddar cheese, a dollop of sour cream, diced white onion, and fresh cilantro are traditional choices that complement the rich beef and chile flavors without overpowering them.
- Bread and cornbread: Serve with warm sweet cornbread or crusty bread for soaking up the sauce. The slight sweetness of cornbread balances the savory, spicy chili perfectly.
- Over a base: Spoon the chili over baked potatoes, rice, or even creamy mac and cheese for an extra hearty meal.
- Chip and dip style: Create Texas-style Frito pie by serving the chili over corn chips with all the toppings. It’s casual, fun, and perfect for game day.
- Fresh elements: Add brightness with lime wedges, sliced jalapeños, or pickled red onions. The acidity cuts through the richness.
- Side salads: Balance the heavy chili with a light, crisp green salad or Mexican street corn on the side.
Read Also: Loaded Nachos Recipe
Variations to Try
Once you’ve mastered the traditional version, these variations let you customize the chili to your taste preferences or dietary needs. Each one maintains the spirit of Texas chili while offering something a little different.
- Extra spicy version: Double the cayenne pepper and add 2 diced serrano peppers or 1 diced habanero with the onions. For serious heat lovers, leave some chile seeds in when making the paste.
- Smoky chipotle chili: Replace 1 pasilla chile with 2 dried chipotle chiles for a deeper smoky flavor. Add 1 tablespoon of chipotle in adobo sauce with the chile paste for an even smokier kick.
- Coffee-enhanced chili: Replace the beer with 1 cup (240 ml) strong brewed coffee. The coffee adds earthy depth that pairs beautifully with the chocolate and beef.
- Pork and beef combination: Use 1.5 pounds (680 g) beef chuck and 1.5 pounds (680 g) pork shoulder for a richer, more complex meat flavor. Pork adds sweetness that balances the heat.
- Ground beef version: For a quicker weeknight option, use 3 pounds (1.36 kg) ground beef chuck instead of cubed beef. Brown it thoroughly, then follow the same process. Cooking time reduces to about 1 hour.
- Bean addition (non-traditional): If you absolutely must add beans, stir in 2 cans (15 oz/425 g each) of drained pinto beans or kidney beans during the last 30 minutes of cooking. Just know that purists will side-eye you.
- Venison or bison chili: Substitute wild game meat for the beef for a leaner, slightly gamey version. Add an extra tablespoon of oil when searing since these meats are leaner.
For another hearty comfort food option, try white chicken chili.
Storage and Reheating
Proper storage keeps your Texas chili fresh and delicious for days, even weeks. In fact, many chili enthusiasts insist it tastes better after a day or two in the fridge.
The flavors continue to develop and meld together as it sits.
- Refrigerator storage: Let the chili cool to room temperature (within 2 hours of cooking), then transfer to airtight containers. Store in the refrigerator for up to 5 days. The fat may solidify on top, which you can either stir back in or remove before reheating.
- Freezer storage: Portion cooled chili into freezer-safe containers or heavy-duty freezer bags, leaving 1 inch (2.5 cm) of headspace for expansion. Freeze for up to 3 months. Label with the date so you remember when you made it.
- Thawing: Transfer frozen chili to the refrigerator 24 hours before you plan to serve it. For faster thawing, place the sealed container in a bowl of cold water, changing the water every 30 minutes.
- Reheating on stovetop: Add chili to a pot over medium-low heat and stir occasionally until heated through, about 10-15 minutes. Add a splash of beef broth or water if it’s too thick.
- Microwave reheating: Place a portion in a microwave-safe bowl, cover loosely, and heat in 1-minute intervals, stirring between each, until hot throughout.
- Slow cooker warming: For serving at a party, transfer chili to a slow cooker on the low or warm setting. Stir occasionally and add liquid as needed to maintain consistency.
You might also enjoy: Lasagna Soup Recipe
Nutritional Facts
Per serving (based on 8 servings, without toppings):
- Calories: 425
- Total Fat: 24 g
- Saturated Fat: 8 g
- Trans Fat: 0 g
- Cholesterol: 110 mg
- Sodium: 780 mg
- Total Carbohydrates: 15 g
- Dietary Fiber: 4 g
- Sugars: 5 g
- Protein: 38 g
- Vitamin A: 25% DV
- Vitamin C: 15% DV
- Calcium: 4% DV
- Iron: 35% DV
Note: Nutritional values are approximate and will vary based on specific ingredients used and portion sizes. Toppings like cheese, sour cream, and chips will add additional calories and nutrients.
Read Also: Beef Pozole Recipe
Health Benefits of Key Ingredients
Beyond its incredible flavor, Texas chili contains several ingredients that offer nutritional value. Understanding what these ingredients bring to the table makes enjoying this hearty dish even more satisfying.
Beef chuck provides high-quality protein essential for muscle maintenance and growth. It’s also rich in iron, zinc, vitamin B12, and other nutrients that support energy production, immune function, and red blood cell formation. The fat in well-marbled beef helps your body absorb fat-soluble vitamins.
Dried chiles are packed with vitamins A and C, both powerful antioxidants that support immune health and skin health. They contain capsaicin, the compound that gives them heat, which may boost metabolism and have anti-inflammatory properties. Chiles also provide fiber and minerals like potassium.
Garlic and onions belong to the allium family known for cardiovascular benefits. They contain compounds that may help lower blood pressure and cholesterol levels. Both are also rich in antioxidants and have antimicrobial properties that support overall health.
Cumin is more than just a flavorful spice. It aids digestion, may help regulate blood sugar levels, and contains iron and other minerals. Traditional medicine has used cumin for centuries to treat various digestive issues.
Dark chocolate (yes, the chocolate in the chili!) provides flavonoids that support heart health. In small amounts, it adds depth and richness while contributing beneficial antioxidants. The 70% cacao chocolate used here is particularly high in these compounds.
For a lighter soup option, try mediterranean lentil soup.
Frequently Asked Questions
1. Can I make Texas chili in a slow cooker or Instant Pot?
Absolutely. For a slow cooker, sear the beef and sauté the onions in a skillet first, then transfer everything to the slow cooker with the remaining ingredients. Cook on low for 6-8 hours or high for 3-4 hours.
For an Instant Pot, use the sauté function for searing and aromatics, then pressure cook on high for 35 minutes with natural release. The texture won’t be quite as rich as the stovetop version, but it’s a great time-saving option.
2. Why doesn’t Texas chili have beans?
Traditional Texas chili dates back to the 1800s when cowboys on cattle drives needed hearty, portable meals. Beans were sometimes served alongside chili but never mixed in, keeping the focus on beef and chiles. This tradition continues today, distinguishing Texas chili from other regional variations.
Many Texans feel strongly about the no-bean rule, considering it essential to authenticity. That said, you’re free to add beans if you prefer—just know you’re breaking with tradition.
3. Can I use chili powder instead of dried chiles?
You can, but you’ll sacrifice significant flavor complexity. If you must substitute, use 1/4 cup (28 g) of high-quality chili powder plus 1 tablespoon (7 g) smoked paprika and skip the chile paste step. The result will be good but won’t have the depth and richness that comes from toasting and blending whole dried chiles.
For the best flavor, try to source the dried chiles online or at a Mexican grocery store if your regular supermarket doesn’t carry them.
4. How can I make the chili less spicy?
Remove all the cayenne pepper and use only mild dried chiles like ancho and guajillo, avoiding the hotter varieties. You can also add an extra tablespoon of brown sugar to balance any remaining heat. Serving with plenty of sour cream and cheese also helps cool things down.
Remember that the heat from dried chiles is usually milder and more complex than the sharp bite of cayenne, so don’t be too worried about the quantity of chiles.
5. What’s the best way to serve Texas chili at a party?
Keep the chili warm in a slow cooker on low or warm setting, stirring occasionally. Set up a topping bar with shredded cheese, sour cream, diced onions, cilantro, jalapeños, lime wedges, and corn chips so guests can customize their bowls. Make the chili 1-2 days ahead—it actually gets better with time.
Provide both mild and spicy hot sauce on the side for guests who want extra heat.
Another favorite: Chicken Casserole Recipe
Final Thoughts
There’s something deeply satisfying about making Texas chili from scratch. The way your kitchen fills with the smoky aroma of toasting chiles, the way tender beef falls apart at the touch of a spoon, the way each bowl delivers bold, unapologetic flavor—it’s comfort food at its finest.
This recipe honors the cowboy tradition while giving you room to make it your own. Once you try making chili with real dried chiles instead of powder, you’ll understand why Texas has been so protective of this dish for over a century.
I hope you’ll give this Texas chili recipe a try and experience what authentic “bowl of red” is all about. Share your results in the comments below—I’d love to hear how it turns out for you and any personal touches you added.
Recommended:
- Taco Skillet Recipe
- Mexican Beef and Rice Skillet Recipe
- Cowboy Casserole Recipe
- Corn Casserole Recipe
- Breakfast Casserole Recipe
- Classic Sloppy Joe Recipe
- Easy Shepherds Pie Recipe
- Classic Shepherds Pie Recipe
- Garlic Mashed Potatoes Recipe
- Baked Ziti Recipe


