I’ll admit, traditional stuffed peppers can feel like a commitment. All that hollowing out, stuffing, arranging in a pan, and waiting for them to bake?
Some nights, you just want those same flavors without the fuss. That’s exactly why I created this stuffed pepper skillet recipe—it delivers everything you love about classic stuffed peppers in a fraction of the time.
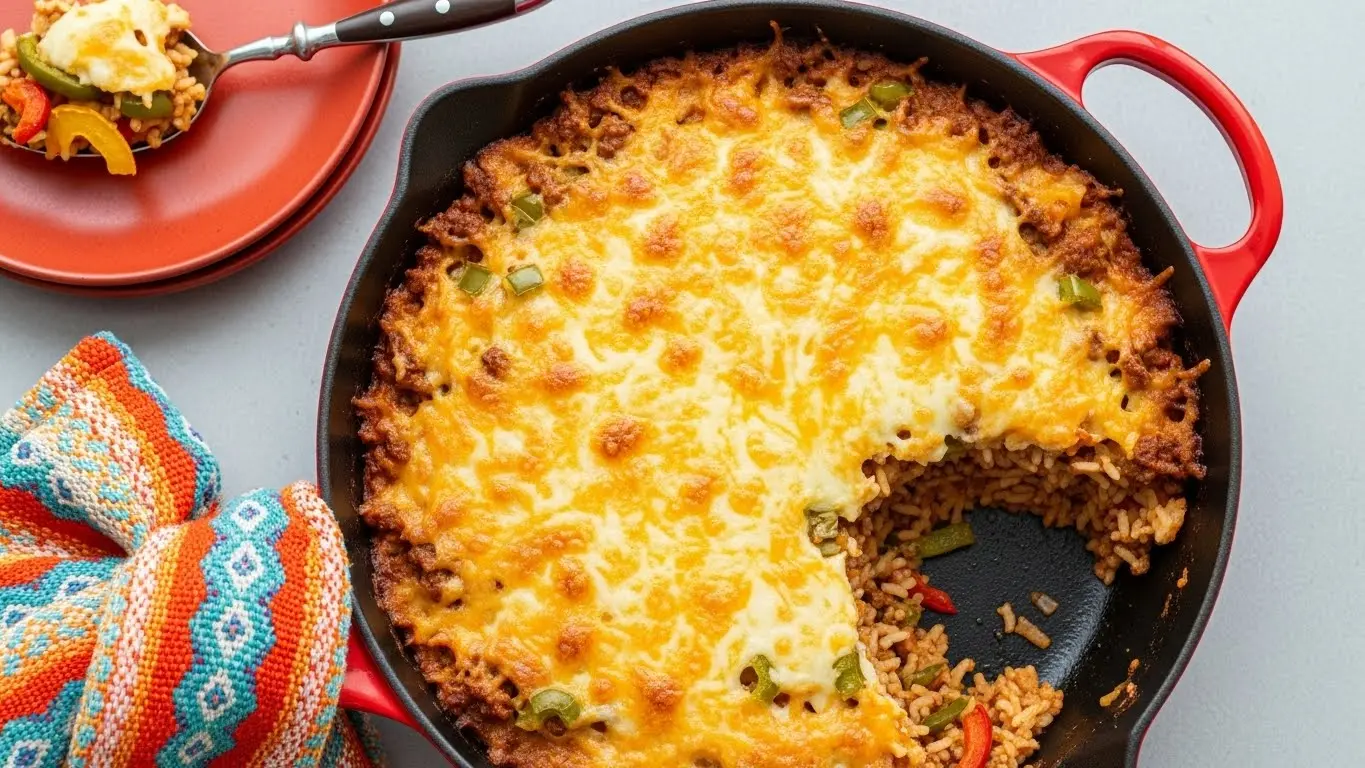
This one-pan wonder brings together seasoned ground beef, tender bell peppers, fluffy rice, and melted cheese in about 30 minutes. No pre-cooking the peppers, no wrestling with filling techniques, and definitely no mountain of dishes to wash afterward.
I make this at least twice a month when I need dinner on the table fast but still want something that feels hearty and satisfying. My kids actually cheer when they see me pulling out the skillet because they know what’s coming.
The best part? You can customize it endlessly based on what’s in your fridge or what your family prefers.
Ground turkey instead of beef? Go for it. Extra spicy? Add more jalapeños. Vegetarian? Swap in black beans or lentils.
This recipe has become my go-to for busy weeknights, and I have a feeling it’s about to become yours too.
Why You’ll Love This Stuffed Pepper Skillet Recipe
This dish solves the eternal “what’s for dinner?” dilemma without requiring you to be a culinary genius. It’s genuinely beginner-friendly, uses everyday ingredients you probably already have, and comes together faster than ordering takeout.
Here’s what makes this recipe a keeper:
- Ready in 30 minutes: From chopping to serving, you’re looking at half an hour max
- One-pan simplicity: Less cleanup means more time doing literally anything else
- Budget-friendly: Ground beef, peppers, rice, and pantry staples won’t break the bank
- Crowd-pleaser: Even picky eaters gobble this up thanks to the familiar, comforting flavors
- Meal prep friendly: Makes excellent leftovers that somehow taste even better the next day
- Customizable: Easily adapt to dietary needs, spice preferences, or whatever vegetables need using up
If you’re craving more hearty skillet dinners, try my taco skillet recipe for another quick weeknight favorite.
Ingredients
Start by gathering these simple ingredients that probably look familiar from your weekly grocery haul. The magic happens when they all come together in one pan.
- 1 pound ground beef (80/20 blend works perfectly)
- 3 medium bell peppers, diced (I use a mix of red, green, and yellow for color)
- 1 medium yellow onion, diced
- 3 cloves garlic, minced
- 1 cup long-grain white rice, uncooked
- 1 can (14.5 oz) diced tomatoes, undrained
- 1 can (8 oz) tomato sauce
- 2 cups beef broth
- 1 tablespoon olive oil
- 1 teaspoon Italian seasoning
- 1 teaspoon paprika
- ½ teaspoon cumin
- Salt and black pepper to taste
- 1½ cups shredded cheddar cheese
- Fresh parsley for garnish (optional)
Kitchen Equipment Needed
You don’t need a fancy kitchen to pull off this recipe. Just grab these basics and you’re set to go.
- Large skillet with lid (12-inch works best)
- Sharp knife and cutting board
- Wooden spoon or spatula
- Measuring cups and spoons
- Can opener
Recommended Products for This Recipe
After making this stuffed pepper skillet countless times, I’ve found a few products that genuinely make the process smoother and the results tastier. These aren’t just random recommendations—they’re the tools and ingredients I actually reach for in my own kitchen.
1. Lodge Pre-Seasoned Cast Iron Skillet
This 12-inch cast iron skillet has been my ride-or-die for years. It distributes heat so evenly that your rice cooks perfectly without any burnt spots, and the peppers get that slight caramelization that adds incredible depth. The best part is how it goes from stovetop to oven if you want to finish with a broiled cheese top.
2. Better Than Bouillon Beef Base
I used to use regular beef broth until I discovered this concentrate. It adds such a rich, deep flavor to the dish that boxed broth just can’t match. One jar lasts forever, and you can control the intensity of the beef flavor.
3. OXO Good Grips 3-Piece Wooden Utensil Set
These wooden spoons are perfect for breaking up ground beef and stirring everything together without scratching your skillet. They’re sturdy enough to handle the job but gentle on your cookware.
4. Tillamook Sharp Cheddar Cheese
Real cheese makes such a difference here. Tillamook melts beautifully and has that sharp, tangy flavor that cuts through the richness of the beef. Pre-shredded works fine, but if you have time, shredding a block yourself gives an even creamier melt.
Step-by-Step Instructions
Take your time with these steps, especially if you’re new to skillet cooking. Each one builds on the last to create layers of flavor.
1. Prepare Your Ingredients
- Dice the bell peppers into roughly ½-inch pieces so they cook evenly
- Chop the onion into a similar size as the peppers
- Mince the garlic finely (or use a garlic press if you have one)
- Measure out your rice and set aside
- Have your canned tomatoes, tomato sauce, and broth within easy reach
2. Brown the Ground Beef
- Heat your large skillet over medium-high heat
- Add the ground beef, breaking it up with your wooden spoon as it cooks
- Cook for 5-7 minutes until no pink remains
- Season lightly with salt and pepper during cooking
- Drain excess fat if there’s more than a tablespoon or two (I usually leave a little for flavor)
3. Sauté the Vegetables
- Push the cooked beef to the edges of the skillet
- Add the olive oil to the center
- Toss in the diced onions and cook for 2-3 minutes until they start turning translucent
- Add the bell peppers and cook for another 3-4 minutes until slightly softened
- Stir in the minced garlic and cook for 30 seconds until fragrant (don’t let it burn)
- Mix everything together with the beef
4. Add Rice and Seasonings
- Pour the uncooked rice directly into the skillet
- Sprinkle in the Italian seasoning, paprika, and cumin
- Stir everything together so the rice gets coated with the seasonings and fat
- Toast the rice for about 1 minute (this helps prevent mushy rice later)
- Add salt and black pepper to taste
5. Add Liquids and Simmer
- Pour in the diced tomatoes with their juices
- Add the tomato sauce
- Pour in the beef broth
- Stir everything together, making sure the rice is evenly distributed
- Bring the mixture to a boil
- Once boiling, reduce heat to low and cover with a tight-fitting lid
6. Cook Until Rice is Tender
- Let everything simmer covered for 18-20 minutes without lifting the lid (seriously, resist the urge)
- Check at the 18-minute mark by tilting the skillet—if there’s still liquid pooling, cook for 2 more minutes
- The rice should be tender and have absorbed most of the liquid
- If the rice is done but there’s too much liquid, remove the lid and cook for 2-3 minutes on medium heat
7. Add the Cheese
- Remove the skillet from heat
- Sprinkle the shredded cheddar cheese evenly over the top
- Cover again with the lid and let sit for 3-4 minutes
- The residual heat will melt the cheese perfectly
- For extra melty cheese, you can pop the uncovered skillet under the broiler for 1-2 minutes
8. Garnish and Serve
- Remove the lid and admire that gorgeous melted cheese
- Sprinkle with fresh chopped parsley if using
- Let it rest for 2-3 minutes before serving (this helps everything set slightly)
- Serve directly from the skillet for that rustic, homey vibe
Another favorite one-pan meal in my house is this mexican skillet recipe that brings similar bold flavors with a slightly different twist.
Tips for Success
These little tricks have saved me from skillet disasters and turned good batches into great ones. Learn from my mistakes.
- Use a heavy-bottomed skillet: Thin pans lead to burnt bottoms and undercooked rice on top
- Don’t skip the rice toasting step: Those 60 seconds prevent gummy, overcooked rice
- Keep the lid on while simmering: Every time you peek, you release steam and extend cooking time
- Let the rice rest before serving: This allows any remaining moisture to distribute evenly
- Adjust liquid based on your rice: Some rice varieties absorb more liquid than others—check the package instructions
- Brown the beef well: Good caramelization on the meat adds depth to the entire dish
- Cut vegetables uniformly: This ensures everything cooks at the same rate
Serving Suggestions

This stuffed pepper skillet is hearty enough to stand on its own, but pairing it with a few simple sides takes the meal to the next level. Here’s how I typically serve it at my house.
Keep it simple with a crisp green salad dressed with vinaigrette to cut through the richness. The acidity from the dressing balances the savory, cheesy flavors beautifully.
Some nights I’ll serve this alongside my roasted broccoli for an extra vegetable boost that doesn’t require much effort.
Here are more pairing ideas:
- Warm, crusty bread for soaking up any sauce
- Sour cream and sliced avocado on top
- Tortilla chips on the side for scooping
- Steamed green beans with garlic butter
- Simple cucumber and tomato salad
- Cornbread muffins
Read Also: Buttermilk Biscuit Recipe
Variations to Try
Once you’ve mastered the basic version, these variations keep things interesting without straying too far from the original concept. I rotate through these depending on what’s in the fridge.
- Turkey version: Swap ground beef for ground turkey (add an extra tablespoon of olive oil since turkey is leaner)
- Spicy kick: Add diced jalapeños with the bell peppers and use pepper jack cheese instead of cheddar
- Italian style: Use Italian sausage instead of ground beef, add oregano, and top with mozzarella and Parmesan
- Tex-Mex twist: Add a packet of taco seasoning, black beans, corn, and top with Mexican cheese blend
- Vegetarian option: Replace beef with 2 cans of black beans (drained) or crumbled extra-firm tofu
- Cauliflower rice version: Substitute riced cauliflower for regular rice (add it in the last 5 minutes of cooking)
- Greek-inspired: Use ground lamb, add oregano and cinnamon, top with feta cheese
You might also enjoy: Stuffed Pepper Soup Recipe
Storage and Reheating
Leftovers are where this recipe really shines. Some people (myself included) think it tastes even better the next day once all the flavors have had time to marry.
Storage tips:
- Let the skillet cool completely before transferring to storage containers
- Store in airtight containers in the refrigerator for up to 4 days
- Freeze portions in freezer-safe containers for up to 3 months
- Label containers with the date so you remember when you made it
- Store the cheese separately if meal prepping for the week (add fresh cheese when reheating)
Reheating instructions:
- Microwave individual portions for 2-3 minutes, stirring halfway through
- Add a splash of water or broth to prevent drying out
- Reheat on the stovetop in a covered pan over medium-low heat for 5-7 minutes
- From frozen, thaw overnight in the refrigerator before reheating
- Sprinkle fresh cheese on top after reheating for that just-made taste
Nutritional Facts
Here’s the approximate nutritional breakdown per serving (recipe serves 6). Keep in mind these numbers can vary based on the specific brands and products you use.
Per Serving:
- Calories: 425
- Protein: 28g
- Carbohydrates: 38g
- Fat: 18g
- Saturated Fat: 8g
- Fiber: 3g
- Sugar: 6g
- Sodium: 720mg
- Cholesterol: 75mg
This dish provides a good balance of protein, carbs, and vegetables in one serving. The bell peppers add vitamin C and antioxidants, while the beef delivers iron and B vitamins.
Health Benefits of Key Ingredients
Beyond just tasting amazing, this stuffed pepper skillet actually packs some serious nutritional value. Here’s what those colorful ingredients are doing for your body.
Bell peppers are vitamin C powerhouses with more of the immune-boosting vitamin than oranges. They’re also loaded with antioxidants that support eye health and may help reduce inflammation.
Here’s what else you’re getting:
- Ground beef: Provides complete protein, iron, zinc, and B vitamins essential for energy production
- Tomatoes: Rich in lycopene, an antioxidant linked to heart health and cancer prevention
- Garlic: Contains compounds that may lower blood pressure and boost immune function
- Onions: Packed with quercetin and sulfur compounds that support heart health
- Rice: Offers quick energy and helps you feel satisfied longer
- Cheese: Delivers calcium for strong bones and protein for muscle maintenance
For another protein-packed dinner option, check out my chicken fajita recipe.
Frequently Asked Questions
1. Can I use brown rice instead of white rice?
Yes, but you’ll need to adjust the cooking method. Brown rice requires more liquid and longer cooking time—use 2½ cups of broth instead of 2 cups, and simmer for 40-45 minutes instead of 18-20. You can also use pre-cooked brown rice, adding it in the last 5 minutes just to heat through.
2. Why is my rice still crunchy after the cooking time?
This usually means there wasn’t enough liquid or the heat was too high. Add ¼ cup more broth or water, cover, and continue cooking for 5 more minutes. Make sure your heat is on low during the simmering phase, not medium.
3. Can I make this ahead of time?
Absolutely. Cook everything except the cheese, let it cool, and refrigerate for up to 2 days. When ready to serve, reheat in the skillet with a splash of broth, then add the cheese and let it melt.
4. What other proteins work well in this recipe?
Ground turkey, ground chicken, Italian sausage (removed from casings), or even ground pork all work beautifully. For a leaner option, use 93/7 ground beef or turkey breast. Just remember that leaner meats may need a bit more oil to prevent sticking.
5. How do I prevent the bottom from burning?
Use a heavy-bottomed skillet and make sure your heat is on low once you cover it to simmer. Stir before adding the lid to ensure nothing is stuck to the bottom. If your stove runs hot, you can even use a heat diffuser underneath the skillet.
Final Thoughts
This stuffed pepper skillet recipe has earned its permanent spot in my weekly rotation for good reason. It’s the kind of meal that makes you look like you’ve got your act together even when you’re winging it.
The fact that it all comes together in one pan means less stress and more time sitting down with your family. Plus, leftovers actually get requested, which feels like a major parenting win in my book.
Give this recipe a try this week and see why it’s become such a weeknight staple. I’d love to hear what variations you come up with or how your family liked it—drop a comment below and share your experience!
Recommended:
- Summer Tortellini Skillet Recipe
- Loaded Breakfast Skillet Recipe
- Breakfast Skillet Recipe
- Cookie Skillet Recipe
- Picadillo Recipe
- Egg Roll in a Bowl Recipe
- Meatloaf Recipe
- Beef Stroganoff Recipe
- Crack Burger Recipe
- Crack Chicken Recipe


