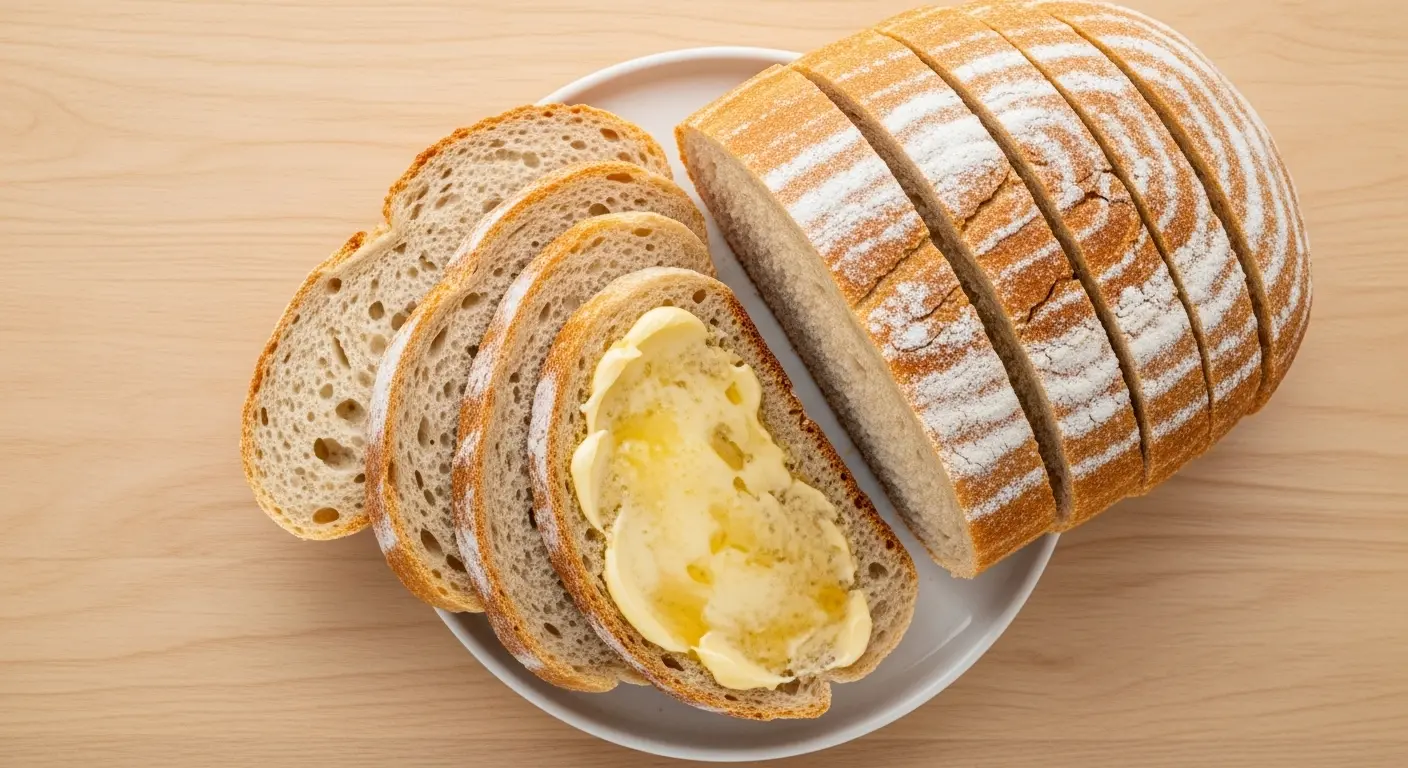
If you have been searching for the perfect sourdough sandwich bread recipe, your search ends here. This is the soft, pillowy, sliceable loaf that holds up to everything from a classic BLT to a thick smear of peanut butter and honey. Unlike crusty artisan boules that require a Dutch oven and complicated shaping, this sandwich loaf comes together in a standard loaf pan with minimal fuss and maximum reward.
What makes this recipe special is the enriched dough. A small amount of butter and honey goes into the mix, and those two ingredients do a lot of heavy lifting. The butter creates a tender, cotton-soft crumb, while the honey balances the natural tang of the sourdough starter just enough to make the bread approachable for even the pickiest eaters at the table.
You do not need to be an experienced baker to pull this off. You do need one thing: an active, bubbly sourdough starter. That starter is the engine of the whole recipe. When it is at its peak, it fills the dough with enough natural gas to produce a beautiful, high-rising loaf that practically floats out of the pan.
This recipe uses all-purpose flour, which keeps things simple and affordable. It does not require stretching, folding, or scoring. Mix, bulk ferment, shape, proof, and bake. That is the whole process, and it produces a loaf you will be proud to slice every single morning.
For anyone new to working with sourdough, check out the Sourdough Starter Recipe before you begin to make sure your starter is ready to work.
Why You’ll Love This Sourdough Sandwich Bread Recipe
This is not your average homemade bread. It has everything that makes a loaf worth baking from scratch.
The texture is soft and airy with a tight, closed crumb that is perfect for sandwiches. You will not lose your toppings through the holes like you might with a more open-crumbed sourdough.
The crust is thin and tender, not the thick, chewy kind you find on artisan loaves. It tears easily and holds its shape even after a day or two on the counter.
The flavor has a gentle tang that does not overpower. Most people who say they do not like sourdough find this loaf to be a pleasant surprise.
It freezes beautifully. You can slice the whole loaf and freeze it, then pull out individual slices as needed.
There are no preservatives, no additives, and no ingredients you cannot pronounce. Just real food made with simple pantry staples.
- Beginner-friendly process with no complicated shaping techniques
- Enriched dough with butter and honey for a soft, bakery-quality crumb
- Versatile for sandwiches, toast, avocado toast, French toast, and grilled cheese
- Long-fermentation benefits that make the bread easier to digest than commercial bread
- Excellent shelf life compared to store-bought bread when stored properly
- Doubles easily so you can bake two loaves and freeze one for later
You might also enjoy the Easy Sourdough Bread Recipe if you want a more classic crusty artisan-style loaf to compare.
Ingredients
This recipe makes one standard loaf using a 9×5-inch (23×13 cm) loaf pan. The ingredients are simple, but quality matters here, particularly with the sourdough starter.
Here is a quick note on measurements before you begin: weighing your ingredients with a kitchen scale gives you far more consistent results than measuring by volume. Flour especially can vary significantly depending on how tightly it is packed into a cup.
- 100 g (½ cup) active, bubbly sourdough starter
- 300 g (1¼ cups) warm water (around 75-80°F / 24-27°C)
- 2 tablespoons (28 g) unsalted butter, softened to room temperature
- 1 tablespoon (21 g) honey (or granulated sugar as a substitute)
- 9 g (1½ teaspoons) fine sea salt
- 500 g (4 cups) all-purpose flour (unbleached preferred)
- Optional: 1 tablespoon melted butter for brushing the top after baking
Read Also: Same Day Sourdough Bread Recipe
Kitchen Equipment Needed
Having the right tools on hand makes sourdough baking considerably smoother. Most of these are standard kitchen items, though a kitchen scale and a loaf pan are non-negotiable for the best results.
- Digital kitchen scale (highly recommended for accuracy)
- Stand mixer with dough hook (or a large mixing bowl for hand kneading)
- 9×5 inch loaf pan
- Large mixing bowl
- Plastic wrap or a damp kitchen towel (to cover the dough while it rises)
- Bench scraper (helpful for shaping)
- Instant-read thermometer (to check internal bread temperature)
- Cooling rack
- Pastry brush (for brushing butter on top, optional)
Read Also: Sourdough Focaccia Recipe
Recommended Products for This Recipe
These are products I genuinely recommend based on their quality, performance, and how much they can improve your bread-baking experience. Using the right tools makes a noticeable difference, especially when working with sourdough.
1. KitchenAid Stand Mixer with Dough Hook
Kneading enriched sourdough dough by hand for 10 minutes can be tiring, especially when you are working butter into the dough. A stand mixer makes the job effortless and produces a consistently smooth, elastic dough. It is also a workhorse for countless other recipes in your kitchen.
2. USA Pan 9×5 Inch Loaf Pan
This professional-quality aluminized steel loaf pan distributes heat evenly and promotes a nicely browned crust on all sides. The nonstick coating means your bread releases cleanly every time without any stuck edges.
3. Thermapen Instant-Read Thermometer
Knowing the internal temperature of your bread removes all the guesswork about whether it is fully baked. A perfectly baked sourdough sandwich loaf should read 200-210°F (93-99°C) in the center. The Thermapen gives you a reading in seconds and is worth every penny.
4. OXO Good Grips Digital Food Scale
Consistency in sourdough baking starts with accurate measurement. This scale measures in both grams and ounces, has a pull-out display for easy reading, and is compact enough to store in a drawer. It is the one kitchen tool that will improve every recipe you bake.
5. Cambro Square Food Storage Container
A clear, straight-sided container is ideal for bulk fermentation because you can see exactly how much your dough has risen. These containers are also easy to clean and stack well in the refrigerator if you want to do a cold overnight ferment.
This technique is also used in the Sweet Sourdough Bread Recipe if you want to try an enriched variation with a sweeter flavor profile.
Step-by-Step Instructions
Step 1: Feed Your Sourdough Starter
- Start by feeding your sourdough starter 8-12 hours before you plan to mix the dough, so it peaks right around the time you need it.
- To feed your starter, discard all but about 20-30 grams, then add equal weights of fresh flour and water (for example, 50 g flour and 50 g water).
- Stir well, cover loosely, and let it sit at room temperature (ideally around 70-75°F / 21-24°C).
- Your starter is ready when it has roughly doubled in size, looks bubbly and active throughout, and has a pleasantly tangy aroma.
- A quick float test can help confirm readiness: drop a small spoonful of starter into a glass of water. If it floats, it is ready. If it sinks, let it rest for another hour or two.
Step 2: Mix the Dough
- In the bowl of your stand mixer (or a large mixing bowl if working by hand), add the warm water and sourdough starter.
- Use a fork or spatula to stir them together until the starter is mostly dissolved into the water. You will see it become slightly foamy and pale.
- Add the honey (or sugar) and softened butter, and stir again to distribute.
- Add the flour and salt on top, keeping the salt from directly touching the starter if possible (salt can inhibit fermentation if added directly to the starter).
- Using the dough hook on your stand mixer, knead on medium-low speed for 8-10 minutes, until the dough is smooth, slightly tacky, and elastic.
- If kneading by hand, work the dough on a lightly floured surface for 10-12 minutes, using a push-fold-turn motion until it becomes stretchy and smooth.
- The dough should pass the windowpane test: stretch a small piece gently between your fingers. If you can stretch it thin enough to see light through it without it tearing, the gluten is well-developed.
Step 3: Bulk Fermentation (First Rise)
- Lightly oil your mixing bowl or a large container and place the dough inside.
- Cover tightly with plastic wrap or a damp kitchen towel to prevent a skin from forming.
- Place the covered dough in a warm spot in your kitchen. The top of the refrigerator, inside the oven with just the light on, or near a warm stove all work well.
- Allow the dough to bulk ferment for 8-12 hours at room temperature (around 70-75°F / 21-24°C), or until the dough has roughly doubled in size.
- In warmer kitchens (above 75°F / 24°C), this can happen in as little as 6 hours. In cooler kitchens, it may take up to 14 hours.
- Do not rush this step. A properly fermented dough will be noticeably puffy, have small bubbles visible around the edges, and feel airy when you gently press it.
- Alternatively, you can do a shorter bulk ferment of 4-6 hours at room temperature, then move the dough to the refrigerator overnight (cold retard) for a slower, more flavorful ferment.
Step 4: Shape the Dough
- Lightly flour your work surface and gently turn the dough out of the bowl.
- Pat the dough gently into a rough rectangle, being careful not to deflate it too aggressively. You want to degas the large bubbles but keep some air in the dough.
- Roll the dough into a tight log shape, about the same length as your loaf pan. Work from one end, rolling the dough toward you and pressing down with each roll to create tension.
- Pinch the seam closed along the bottom to seal it.
- Lightly grease your loaf pan with butter or non-stick spray, then place the shaped dough seam-side down into the pan.
- The dough should fit snugly in the pan. If it seems too small, let it rest uncovered for 10 minutes before reshaping.
Step 5: Second Rise (Proof in the Pan)
- Cover the loaf pan loosely with plastic wrap or a clean kitchen towel.
- Allow the dough to proof at room temperature for 2-4 hours, or until it has risen approximately 1 inch (2.5 cm) above the rim of the loaf pan.
- The dough is ready to bake when it crowns over the edge of the pan and springs back slowly (not immediately) when gently poked with a lightly floured finger.
- If your kitchen is warm, check it at the 2-hour mark. If it is cool, it may take closer to 4 hours.
- Do not over-proof the dough. An over-proofed loaf will collapse in the oven or bake up dense rather than light.
Step 6: Preheat the Oven
- About 30 minutes before you are ready to bake, preheat your oven to 375°F (190°C).
- Make sure a rack is positioned in the middle of the oven for even baking.
- If you have an oven thermometer, use it. Many ovens run hotter or cooler than the dial indicates, and accurate temperature is important for a properly baked loaf.
Step 7: Bake the Bread
- Just before placing the loaf in the oven, you can optionally brush the surface with a little water or egg wash for a shinier crust, though this is not required.
- Place the loaf pan on the middle oven rack and bake at 375°F (190°C) for 35-45 minutes, until the top is a deep golden brown.
- To check for doneness, insert an instant-read thermometer into the center of the loaf. It should read between 200-210°F (93-99°C).
- You can also tap the bottom of the loaf (removed from the pan): a hollow sound means it is fully baked.
- If the top is browning too quickly before the inside is done, loosely tent a piece of aluminum foil over the loaf for the remaining baking time.
Step 8: Cool and Slice
- Remove the loaf from the oven and immediately brush the top with the optional tablespoon of melted butter. This softens the crust and adds a lovely shine.
- Turn the loaf out onto a cooling rack and resist the urge to slice it right away.
- Allow the bread to cool for at least 1 hour before slicing. The interior is still cooking via carry-over heat, and slicing too early will result in a gummy, doughy crumb that has not finished setting.
- Once fully cooled, slice the loaf using a serrated bread knife with a gentle sawing motion.
This loaf pairs beautifully with a bowl of Chicken Rice Soup on a cool evening.
Tips for Success
Getting sourdough sandwich bread right comes down to a few key details. Keep these in mind and you will avoid the most common mistakes.
- Use a truly active starter. This is the number one reason sourdough loaves fail. Your starter should be doubled in size, full of bubbles, and smell pleasantly tangy and yeasty before it goes into the dough. If it is sluggish, give it another feeding and wait.
- Weigh your ingredients. Volume measurements are inconsistent. A cup of tightly packed flour weighs significantly more than a loosely spooned cup, and that difference can make your dough too dry or too wet.
- Do not rush the bulk ferment. Under-fermented dough will produce a dense, heavy loaf that does not rise well in the oven. Trust the process and wait until the dough has genuinely doubled.
- Keep dough covered at all times. Any skin that forms on the surface will create hard spots in your finished bread. Cover tightly during both fermentation stages.
- Check the internal temperature. The only reliable way to know your bread is done is with a thermometer. Aim for 200-210°F (93-99°C) in the center.
- Cool completely before slicing. This step is non-negotiable. The bread needs that resting time to finish cooking through.
For another great bread recipe to add to your routine, the Homemade Bagel Recipe is a rewarding weekend bake.
Serving Suggestions
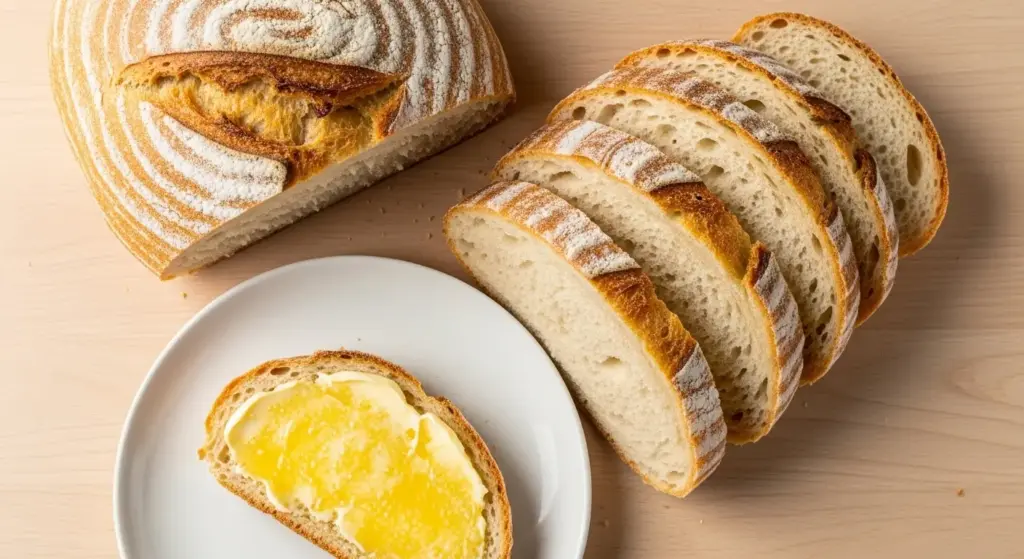
This sourdough sandwich bread is incredibly versatile. It is soft enough for children, sturdy enough for stacked sandwiches, and flavorful enough to eat plain with a generous spread of salted butter.
Here are some of the best ways to enjoy it:
- Classic sandwiches: Sliced turkey, avocado, tomato, and sprouts on thick-cut slices make a filling lunch that is miles better than anything on store-bought bread.
- Avocado toast: This is one of the best ways to use a thick slice. The chewy, tangy bread is the perfect base for smashed avocado, a pinch of flaky salt, and a drizzle of olive oil. Try the Avocado Toast recipe for topping inspiration.
- French toast: Day-old sourdough sandwich bread makes extraordinary French toast because the slight tang balances the sweetness of the egg custard beautifully.
- Grilled cheese: The soft crumb and thin crust are ideal for grilled cheese. It toasts evenly and gets golden and crispy without burning before the cheese melts.
- Bread and soup: Thick slices alongside a bowl of hearty soup is a meal that never gets old.
- Toast with honey butter: Simply toasted and spread with softened honey butter, this bread is a treat all on its own.
Variations to Try
Once you have mastered the basic recipe, there are so many ways to customize this loaf and keep things interesting.
- Whole wheat version: Replace 20% of the all-purpose flour (about 100 g) with whole wheat flour for a nuttier flavor and slightly denser crumb. Add an extra tablespoon of water if the dough feels stiff.
- Honey oat loaf: Stir in 50 g (½ cup) of rolled oats along with the butter and honey, and press a handful of oats on top of the shaped loaf before the second rise for a gorgeous, rustic-looking crust.
- Multigrain sandwich loaf: Add 50-75 g of your favorite seeds, such as sesame, flax, sunflower, or pumpkin, to the dough when mixing in the butter and honey.
- Cinnamon raisin sandwich bread: Add 1 teaspoon of cinnamon and 100 g of raisins to the dough just before the bulk ferment. This makes a beautiful, subtly sweet loaf perfect for toasting.
- Bread flour swap: Use bread flour in place of all-purpose flour for a slightly chewier crumb and taller rise. Bread flour has a higher protein content, which creates more gluten structure. You may need to add an extra tablespoon of water.
- Milk loaf variation: Replace the water with whole milk for an even softer, more enriched crumb. This version is especially tender and rich.
Read Also: Gluten Free Dairy Free Bread Recipe
Storage and Reheating
Proper storage keeps your sourdough sandwich bread fresh and prevents it from drying out faster than it should.
- Room temperature: Store the fully cooled loaf in a bread bag, beeswax wrap, or airtight container at room temperature for up to 3 days.
- Refrigerator: Refrigerating bread actually speeds up staling, so avoid it unless necessary.
- Freezer: For longer storage, slice the loaf completely and freeze the slices in a zip-lock freezer bag for up to 3 months.
- Reheating from frozen: Pull individual slices directly from the freezer and pop them in the toaster on a medium setting. They will taste freshly baked.
- Reviving a stale loaf: Wrap the loaf in foil and warm it in a 300°F (150°C) oven for 10-15 minutes to refresh a loaf that has been sitting out for a couple of days.
This loaf is a wonderful companion to Classic Egg Salad for an easy lunch.
Nutritional Facts
The following nutritional information is approximate and based on one slice (approximately 1/12 of the loaf), using the standard recipe as written.
| Nutrient | Per Slice |
|---|---|
| Calories | ~165 kcal |
| Carbohydrates | ~30 g |
| Protein | ~5 g |
| Fat | ~3 g |
| Saturated Fat | ~1.5 g |
| Sodium | ~195 mg |
| Fiber | ~1 g |
| Sugar | ~2 g |
Note: These values are estimates only. Actual nutritional content will vary depending on the specific brands and quantities of ingredients used, as well as the hydration level of your sourdough starter.
You might also enjoy the Einkorn Bread Recipe as a nutritious alternative with ancient grain benefits.
Health Benefits of Key Ingredients
Sourdough sandwich bread is not just delicious. It has some genuine nutritional advantages over commercial white bread, thanks largely to the fermentation process.
Long fermentation with a live sourdough starter partially breaks down the gluten and phytic acid in the flour, making the bread easier to digest and the minerals in the wheat more bioavailable.
Here are the standout health benefits of the key ingredients in this recipe:
- Sourdough starter (wild fermentation): The naturally occurring lactobacillus bacteria produce lactic and acetic acids during fermentation, which lower the glycemic index of the bread and give it that characteristic tang. These same organic acids act as natural preservatives, extending shelf life without any chemical additives.
- All-purpose flour: Provides complex carbohydrates for sustained energy, along with iron, B vitamins, and some protein. Choosing unbleached flour retains slightly more of the natural wheat nutrients.
- Honey: A natural sweetener that also contributes trace antioxidants and has mild antimicrobial properties. It helps feed the yeast in the starter during fermentation and adds a gentle sweetness that balances the tang.
- Butter: Adds fat-soluble vitamins A, D, E, and K to the loaf, as well as contributing to the soft, tender crumb and satisfying flavor.
- Salt: Essential for flavor and for controlling the fermentation rate. Salt also strengthens the gluten structure, giving the dough better elasticity and helping the bread hold its shape.
The Fresh Milled Flour Bread Recipe is a fantastic option if you want to maximize the nutritional content of your homemade bread.
Frequently Asked Questions
1. Why did my sourdough sandwich bread turn out dense?
The most common cause of a dense loaf is an underactive or under-fed sourdough starter. If your starter was not truly doubled, bubbly, and at its peak when you mixed the dough, it would not have had enough leavening power to produce a light, airy loaf.
The second most common cause is under-fermentation during the bulk rise. Give the dough more time in a warm spot and wait until it has genuinely doubled in size before moving on to shaping.
2. Can I make this recipe without a stand mixer?
Absolutely. You can knead the dough entirely by hand on a lightly floured surface. It takes about 10-12 minutes of active kneading to develop enough gluten structure. The dough will feel slightly sticky at first but should smooth out as you knead.
Work the butter into the dough gradually, a small piece at a time, so it does not make the dough greasy before it is fully incorporated.
3. How long does sourdough sandwich bread last at room temperature?
Properly stored in a bread bag or airtight container, this loaf stays fresh for 2-3 days at room temperature. Because the fermentation process produces natural acids that act as preservatives, sourdough bread typically stays fresh slightly longer than commercially yeasted bread.
For best results beyond day 3, slice the remaining bread and freeze it.
4. Can I add commercial yeast to speed up the process?
You can create a hybrid loaf by adding a small amount of instant yeast (about ¼ teaspoon) to the dough along with the sourdough starter. This will significantly shorten both the bulk fermentation and proofing times.
However, doing so reduces some of the health and digestive benefits of long fermentation. If you are new to sourdough and struggling with timing, a hybrid loaf is a reasonable first step.
5. Why do I need to let the bread cool before slicing?
When bread comes out of the oven, the interior is still cooking via residual heat and the starches are still setting. Slicing too early disrupts this process and results in a gummy, sticky crumb that feels undercooked even if the exterior looks perfect.
Waiting at least 1 hour, ideally 2 hours for a larger loaf, gives the crumb time to firm up and the moisture to distribute evenly throughout the loaf.
The Homemade Biscuit Recipe is a great option when you want fresh-baked bread that is ready in far less time.
Final Thoughts
There is a certain satisfaction that comes from pulling a perfectly risen loaf of sourdough sandwich bread out of the oven. It is the kind of thing that fills the kitchen with an unbelievable smell and makes everyone wander in from the other room to ask what is baking.
This recipe is approachable, flexible, and genuinely rewarding. Once you make it a few times, you will find yourself adjusting the timing to fit your schedule without thinking twice.
Give this sourdough sandwich bread recipe a try this weekend. You might just find it becomes a standing weekly tradition in your kitchen.
If you make this loaf, leave a comment below and let us know how it turned out. Did you add any mix-ins? Try a variation? We would love to hear about it.
Recommended:
- Easy Sourdough Bread Recipe
- Sourdough Focaccia Recipe
- Sweet Sourdough Bread Recipe
- Dinner Rolls Recipe
- Garlic Naan Bread Recipe
- Easy Naan Bread Recipe
- Cheesy Garlic Bread Recipe
- Buttermilk Biscuit Recipe
- Blackberry Bread Recipe
- Chocolate Chip Bread Recipe


