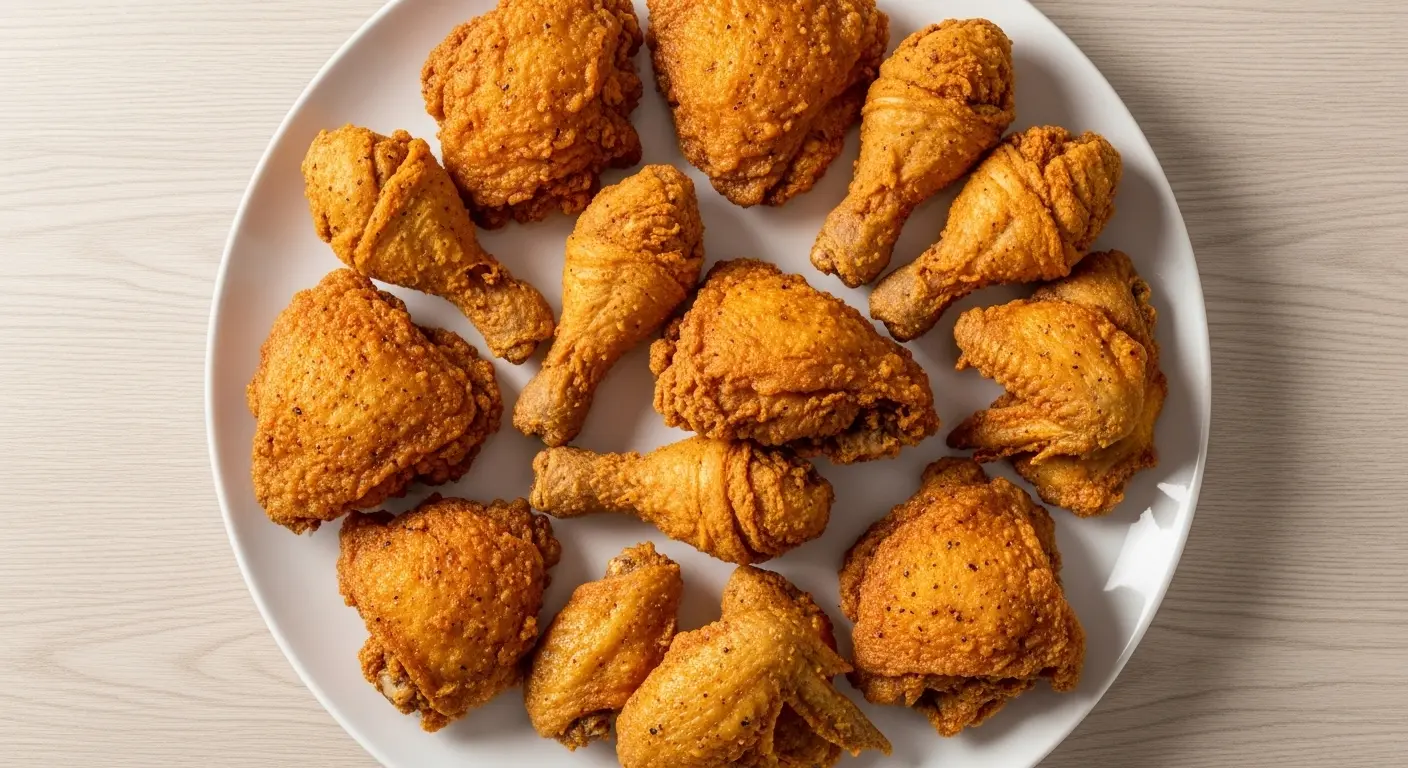
Golden, crispy fried chicken is one of those dishes that brings everyone to the table. This easy fried chicken recipe delivers perfectly seasoned, extra crispy skin with juicy, tender meat inside using simple ingredients you probably already have in your kitchen.
No overnight marinades, no fancy equipment, and no complicated steps needed. Just straightforward Southern-style cooking that turns out restaurant-quality results every single time.
Making fried chicken at home might seem intimidating, but it’s actually one of the most rewarding recipes you’ll master. The secret lies in a few key techniques: proper seasoning, the right oil temperature, and giving the coating time to set before frying.
This recipe uses a simple flour dredging method with perfectly balanced spices. The chicken gets a light coating that fries up wonderfully crisp without being heavy or greasy.
You’ll love how the seasoned flour creates those crunchy, flavorful bits that make homemade fried chicken so irresistible. And the best part is that this method works beautifully for any cut of chicken, from drumsticks to thighs to breasts.
Why You’ll Love This Easy Fried Chicken Recipe
This recipe strips away all the fuss and focuses on what really matters: creating incredibly crispy, flavorful chicken that stays juicy inside. The straightforward method means you can have hot, fresh fried chicken on your table in about an hour from start to finish.
- Simple ingredients: Just chicken, flour, and a handful of basic spices create amazing flavor
- No buttermilk required: Skip the overnight soak and still get perfectly tender, flavorful chicken
- Foolproof technique: Clear instructions ensure crispy coating that won’t fall off during frying
- Versatile: Works perfectly with drumsticks, thighs, wings, or breasts
- Make-ahead friendly: The coated chicken can rest while you prep sides
- Budget-friendly: Uses affordable ingredients and a whole chicken for maximum value
If you enjoy crispy chicken dishes, you might also love this Air Fryer Chicken Drumsticks.
Ingredients
This easy fried chicken recipe relies on simple, quality ingredients that work together to create that perfect crispy exterior and juicy interior. The seasoned flour coating is the star here, developing a beautiful golden crust when it hits the hot oil.
- 3 to 4 pounds (1.4 to 1.8 kg) whole chicken, cut into 8 pieces (or pre-cut chicken pieces)
- 2 cups (250 g) all-purpose flour
- 1 tablespoon (18 g) kosher salt, plus more for seasoning chicken
- 2 teaspoons (5 g) black pepper, plus more for seasoning chicken
- 2 teaspoons (5 g) garlic powder
- 2 teaspoons (5 g) paprika
- 1 teaspoon (3 g) onion powder
- 1 teaspoon (2 g) cayenne pepper (optional, for heat)
- 4 to 6 cups (946 ml to 1.4 L) vegetable oil or peanut oil for frying
Kitchen Equipment Needed
Having the right tools makes frying chicken safer and easier. A heavy-bottomed pot distributes heat evenly and maintains a steady frying temperature, while a good thermometer takes all the guesswork out of the process.
- Large cast iron skillet or heavy-bottomed pot
- Cooking thermometer
- Large shallow bowls or dishes for dredging
- Wire cooling rack
- Paper towels
- Metal tongs or spider strainer
- Baking sheet
For a different take on chicken, try this Air Fryer Chicken Parmesan.
Recommended Products for This Recipe
These carefully selected products will help you achieve the best results with your fried chicken and make the cooking process easier and safer.
1. Lodge Cast Iron Skillet
A cast iron skillet is the gold standard for frying chicken because it retains heat exceptionally well and distributes it evenly across the cooking surface. This means your oil temperature stays consistent, which is crucial for achieving that perfectly crispy crust without greasy chicken. The skillet will last a lifetime with proper care.
2. ThermoPro Digital Instant Read Meat Thermometer
Temperature control is everything in frying chicken. This instant-read thermometer gives you accurate readings in seconds, helping you maintain the perfect oil temperature and ensuring your chicken is cooked through safely. No more guessing or cutting into chicken to check doneness.
3. Spider Strainer Skimmer
This Asian-style wire skimmer makes it incredibly easy to lower chicken into hot oil and lift it out without splashing. The long handle keeps your hands safely away from the heat, and the wire mesh basket allows excess oil to drain immediately. It’s much safer and more efficient than regular tongs for deep frying.
4. Stackable Cooling Rack Set
These elevated racks let air circulate around the fried chicken as it rests, which keeps the coating crispy instead of getting soggy from sitting in its own steam. The stackable design is perfect when you’re frying in batches and need space to hold finished pieces. They’re also dishwasher safe for easy cleanup.
Step-by-Step Instructions
1. Prepare the Chicken
- Pat the chicken pieces completely dry with paper towels. Removing surface moisture is critical because wet chicken won’t allow the coating to adhere properly.
- Season each piece generously on all sides with kosher salt and black pepper. Don’t be shy here, as this base seasoning penetrates the meat and provides essential flavor.
- Let the seasoned chicken sit at room temperature for 15 to 20 minutes. This allows the salt to begin working into the meat and brings the chicken closer to room temperature for more even cooking.
- While the chicken rests, set up your frying station with a bowl for the seasoned flour, a clean workspace for coating, and a baking sheet lined with a wire rack to hold the coated pieces.
2. Make the Seasoned Flour
- In a large shallow bowl or dish, combine 2 cups all-purpose flour, 1 tablespoon kosher salt, 2 teaspoons black pepper, 2 teaspoons garlic powder, 2 teaspoons paprika, 1 teaspoon onion powder, and 1 teaspoon cayenne pepper if using.
- Whisk the ingredients together thoroughly until the spices are evenly distributed throughout the flour. You shouldn’t see any clumps or streaks of individual spices.
- The seasoned flour creates that classic golden color and deeply savory flavor that makes this fried chicken so irresistible.
3. Coat the Chicken
- Working with one piece at a time, place the seasoned chicken into the flour mixture.
- Press the chicken firmly into the flour, turning it and pressing multiple times to ensure complete coverage on all sides, in all the crevices, and around the bone.
- Shake off any excess flour, but leave a generous coating. You want a visible layer of flour that will create the crispy crust.
- Place the coated chicken pieces on the wire rack over the baking sheet, making sure they don’t touch each other.
- Let the coated chicken rest for 10 to 15 minutes. This resting period allows the coating to hydrate slightly and adhere better to the chicken, which prevents it from falling off during frying.
4. Heat the Oil
- Pour oil into your cast iron skillet or heavy pot to a depth of about 1.5 to 2 inches (4 to 5 cm). You need enough oil to come about halfway up the chicken pieces.
- Heat the oil over medium-high heat until it reaches 350°F (175°C) on a cooking thermometer. This is the ideal temperature for crispy coating without burning.
- If you don’t have a thermometer, test the oil by dropping a small pinch of flour into it. The flour should sizzle immediately and start to brown within about 30 seconds.
- Maintain the heat so the oil stays between 325°F and 350°F (163°C to 175°C) throughout the frying process. Too hot and the outside burns before the inside cooks, too cool and the chicken absorbs too much oil and becomes greasy.
5. Fry the Chicken
- Carefully lower 3 to 4 pieces of chicken into the hot oil using metal tongs or a spider strainer, skin side down. Don’t overcrowd the pan, as this drops the oil temperature and leads to soggy coating.
- The oil should bubble actively around the chicken. If it’s bubbling violently, reduce the heat slightly. If it barely bubbles, increase the heat a bit.
- Fry the chicken for 12 to 15 minutes on the first side without moving it. You’ll see the coating turn golden brown as it cooks, and the edges should look crispy and set.
- Carefully flip the chicken using tongs, being gentle to avoid knocking off the coating.
- Continue frying for another 10 to 13 minutes on the second side. Larger pieces like breasts may need a few minutes more, while smaller wings cook faster.
- The chicken is done when it reaches an internal temperature of 165°F (74°C) in the thickest part, and the coating is deep golden brown and crispy all over.
6. Drain and Rest
- Remove the fried chicken from the oil and let excess oil drip off for a moment.
- Transfer the chicken to a clean wire rack set over a baking sheet lined with paper towels. The rack allows air to circulate underneath, keeping the bottom crispy instead of steaming.
- Let the chicken rest for at least 5 to 10 minutes before serving. This resting time allows the juices to redistribute throughout the meat and helps the coating set to maximum crispiness.
- If frying in batches, you can keep finished chicken warm in a 200°F (95°C) oven on the wire rack while you fry the remaining pieces.
- Bring the oil back to 350°F (175°C) before adding the next batch of chicken.
Another fantastic chicken recipe to try is this Air Fryer Chicken Thighs.
Tips for Success
These tried-and-true tips will help you achieve perfect fried chicken every single time. Pay special attention to oil temperature and don’t rush the resting periods.
- Dry the chicken thoroughly: Moisture is the enemy of crispy coating, so take the time to pat each piece completely dry before seasoning
- Don’t skip the resting time: Letting the coated chicken sit before frying allows the coating to set and stick better
- Use a thermometer: Guessing oil temperature leads to inconsistent results, burned outsides, or undercooked insides
- Maintain steady heat: Adjust your burner as needed to keep the oil between 325°F and 350°F throughout frying
- Don’t overcrowd the pan: Fry in batches to maintain oil temperature and achieve even browning
- Flip only once: Multiple flips can dislodge the coating, so resist the urge to fuss with the chicken
- Check internal temperature: The coating might look perfect, but the chicken isn’t safe to eat until it reaches 165°F internally
- Let it rest: Those final minutes on the rack make the difference between good and exceptional fried chicken
Serving Suggestions
This easy fried chicken shines as the centerpiece of a comforting Southern-style meal. The crispy, savory chicken pairs beautifully with classic sides that balance its richness.
Serve your fried chicken hot with fluffy Garlic Mashed Potatoes and Creamy Coleslaw for a traditional combination that never disappoints. The cool, tangy slaw cuts through the richness of the fried chicken perfectly.
- Baked Mac and Cheese adds another layer of comfort food indulgence
- Corn Casserole brings sweetness that complements the savory chicken
- Skillet Cornbread is perfect for soaking up any cooking juices
- Green Beans with Bacon provides a fresh, smoky vegetable side
- Creamy Mashed Potatoes offer the ultimate comfort food pairing
For a weekend brunch treat, serve fried chicken alongside waffles drizzled with maple syrup for the classic chicken and waffles experience. Cold fried chicken also makes incredible sandwiches the next day.
Read Also: Classic Deviled Eggs Recipe
Variations to Try
Once you’ve mastered the basic technique, these variations let you customize your fried chicken to suit different tastes and occasions. Each one brings its own unique flavor profile while maintaining that essential crispy texture.
- Buttermilk Fried Chicken: Soak chicken in buttermilk for 2 to 4 hours before coating for extra tender, tangy meat
- Spicy Fried Chicken: Double the cayenne pepper and add 1 teaspoon of hot sauce to the flour mixture for serious heat
- Herb-Crusted Fried Chicken: Mix 2 tablespoons of dried herbs like thyme, oregano, and rosemary into the flour
- Nashville Hot Chicken: Brush finished chicken with a spicy cayenne oil mixture for that signature Nashville heat
- Lemon Pepper Fried Chicken: Replace paprika and garlic powder with 2 tablespoons of lemon pepper seasoning
- Korean-Style Fried Chicken: Double-fry the chicken for extra crispiness, then toss in a sweet and spicy gochujang glaze
You might also enjoy: Classic Chicken Parmesan Recipe
Storage and Reheating
Properly storing fried chicken preserves that wonderful crispy texture and keeps the meat juicy and flavorful. The key is preventing steam from making the coating soggy.
- Refrigerator: Let chicken cool completely, then store in an airtight container lined with paper towels for up to 4 days. Don’t stack pieces directly on top of each other.
- Freezer: Wrap individual pieces tightly in plastic wrap, then place in a freezer-safe bag or container for up to 3 months. Freeze pieces in a single layer first, then stack once frozen solid.
- Reheating in the Oven: Place cold chicken on a wire rack over a baking sheet. Bake at 375°F (190°C) for 15 to 20 minutes until heated through and the coating crisps up again.
- Reheating in the Air Fryer: Arrange pieces in a single layer and air fry at 375°F (190°C) for 8 to 10 minutes, turning once halfway through.
- Avoid the Microwave: While convenient, microwaving makes the coating soft and chewy rather than crispy.
Another favorite: Air Fryer Chicken Breast Recipe
Nutritional Facts
Per serving (1 piece of chicken, approximately 4 oz/113g):
- Calories: 380
- Protein: 28g
- Fat: 22g
- Saturated Fat: 4g
- Carbohydrates: 16g
- Fiber: 1g
- Sugar: 0g
- Cholesterol: 95mg
- Sodium: 680mg
- Potassium: 310mg
Note: Nutritional values are approximate and will vary based on the specific cut of chicken used and how much oil is absorbed during frying.
Health Benefits of Key Ingredients
While fried chicken is certainly an indulgence, the core ingredients do offer some nutritional value. Understanding these benefits helps you enjoy this dish as part of a balanced diet.
Chicken provides high-quality protein essential for muscle maintenance, immune function, and overall health. A single serving delivers nearly half your daily protein needs, along with important B vitamins like niacin and B6 that support energy metabolism.
- Garlic powder contains allicin compounds that support heart health and immune function
- Paprika provides antioxidants including vitamin A and carotenoids that promote eye health
- Black pepper contains piperine, which may enhance nutrient absorption and has anti-inflammatory properties
- Onion powder offers quercetin, a flavonoid with potential anti-inflammatory and antioxidant effects
- Cayenne pepper contains capsaicin, which may boost metabolism and provide pain relief
For a lighter option, try: Air Fryer Chicken Nuggets Recipe
Frequently Asked Questions
1. Can I use boneless chicken for this recipe?
Yes, boneless chicken works wonderfully with this recipe. Boneless thighs and breasts will cook faster than bone-in pieces, typically requiring only 6 to 8 minutes per side. Use a meat thermometer to ensure they reach 165°F (74°C) internally, as cooking times vary based on thickness.
2. What’s the best oil for frying chicken?
Peanut oil and vegetable oil are the top choices for frying chicken because they have high smoke points and neutral flavors. Peanut oil adds a subtle nutty taste that many people love, while vegetable oil is more budget-friendly. Avoid olive oil, which has a low smoke point and will burn at frying temperatures.
3. Why is my fried chicken coating falling off?
Coating falls off when the chicken is too wet, the coating hasn’t had time to set, or the oil temperature is incorrect. Always pat chicken completely dry, let the coated pieces rest for 10 to 15 minutes before frying, and maintain oil temperature between 325°F and 350°F (163°C to 175°C). Avoid moving the chicken too much once it’s in the oil.
4. How do I know when the chicken is done without a thermometer?
Cut into the thickest part of the chicken near the bone. The juices should run clear, not pink, and the meat should be opaque white throughout. However, a meat thermometer is the only reliable way to ensure the chicken has reached the safe internal temperature of 165°F (74°C).
5. Can I prepare the chicken ahead of time?
Absolutely! You can season the chicken and prepare the seasoned flour mixture the night before, storing them separately in the refrigerator. Coat the chicken up to 2 hours before frying and let it rest in the refrigerator on a wire rack. Just bring it to room temperature for 15 minutes before frying for the best results.
Read Also: Air Fryer Chicken Wings Recipe
Final Thoughts
There’s nothing quite like the satisfaction of pulling perfectly golden, crispy fried chicken from hot oil and watching your family’s faces light up. This easy fried chicken recipe proves you don’t need fancy techniques or hard-to-find ingredients to create restaurant-quality results at home.
The simple combination of well-seasoned flour, properly heated oil, and patience produces chicken that’s crispy on the outside and incredibly juicy inside every single time. Once you’ve mastered this straightforward method, you’ll find yourself making fried chicken for Sunday dinners, picnics, and special occasions throughout the year.
Give this recipe a try this weekend and experience how rewarding home-cooked fried chicken can be. Share your results in the comments below or tag us with photos of your crispy creations!
Recommended:
- Chicken Fried Rice Recipe
- Classic Chicken Pot Pie Recipe
- Healthy Chicken Salad Recipe
- Classic Chicken Salad Recipe
- Air Fryer Chicken Cutlets Recipe
- Air Fryer Chicken Tenders Recipe
- Chicken Casserole Recipe
- Easy Chicken Pot Pie Recipe
- Chicken Skillet Recipe
- Baked Chicken with Alfredo Sauce Recipe


