If you’ve been craving that satisfying crunch of a breaded chicken cutlet without standing over a hot skillet full of oil, this air fryer chicken cutlets recipe is exactly what you need.
These golden, crispy cutlets come together in under 25 minutes, using just a handful of pantry staples and a simple three-step dredging process. The air fryer circulates hot air around the chicken at high speed, giving you a beautifully crisp exterior while keeping every bite tender and juicy on the inside.
What makes this recipe so reliable is the combination of Italian breadcrumbs and panko. Italian breadcrumbs bring seasoned flavor straight to the coating, while the panko adds that extra crackle and crunch that makes each bite so satisfying.
Whether you serve these cutlets over pasta, tuck them into a sandwich, or plate them up with a simple salad, they are endlessly versatile. Once you see how easy they are, they will absolutely become a weeknight staple in your home.
If you love chicken cooked to golden perfection in the air fryer, you will also enjoy this Air Fryer Chicken Parmesan Recipe for an equally quick and crowd-pleasing dinner.
Why You’ll Love This Air Fryer Chicken Cutlets Recipe
This recipe strikes the perfect balance between simplicity and impressive results.
The air fryer does all the heavy lifting, so you get deep-fried-level crunch with a fraction of the oil and effort. No greasy splatters, no babysitting a pan, and no lingering fried food smell in the kitchen.
The prep is minimal, the ingredient list is short, and the cooking time is under 15 minutes once the chicken hits the basket. That makes this recipe ideal for chaotic weeknights when you need dinner on the table fast.
These cutlets are also incredibly versatile. You can slice them over salads, pile them onto rolls, use them as a base for chicken parm, or serve them straight from the air fryer with a dipping sauce.
Here is a quick summary of why this recipe stands out:
- Crispy golden coating without deep frying
- Ready in about 20 to 25 minutes from start to finish
- Uses simple, affordable ingredients
- Kid-friendly and adult-approved
- Pairs well with almost any side dish
- Easily customizable with different seasonings or coatings
- Great for meal prep and reheats beautifully in the air fryer
Another fantastic air fryer chicken option you might want to bookmark is this Air Fryer Chicken Tenders Recipe, which uses a similar dredging method with equally crispy results.
Ingredients
The key to these cutlets is the double-breadcrumb combo. Mixing Italian breadcrumbs with panko gives you flavor and texture in every bite, while a light coating of cooking spray helps the crust brown evenly without any oil pooling at the bottom of the basket.
- 4 boneless, skinless chicken breasts (about 2 lbs / 900g total), halved horizontally into thin cutlets
- 1/2 cup (65g) all-purpose flour
- 2 large eggs
- 1 tablespoon water
- 1/2 cup (55g) Italian breadcrumbs
- 1/2 cup (55g) panko breadcrumbs
- 1 teaspoon garlic powder
- 1 teaspoon onion powder
- 1 teaspoon smoked paprika
- 1/2 teaspoon salt
- 1/4 teaspoon black pepper
- Cooking spray (avocado oil or olive oil spray recommended)
Read Also: Air Fryer Chicken Breast Recipe
Kitchen Equipment Needed
Having the right tools ready before you begin makes the dredging process smooth and mess-free. Setting up your station in a row (flour, egg, breadcrumbs) before you start breading will keep things organized and efficient.
- Air fryer (5 to 6 quart capacity recommended)
- Meat mallet or rolling pin for pounding chicken to even thickness
- 3 shallow dishes or bowls for dredging station
- Instant-read meat thermometer
- Tongs
- Paper towels
- Cutting board
- Sharp chef’s knife
- Plate or wire rack for resting breaded chicken
You might also enjoy making Air Fryer Chicken Drumsticks with your air fryer for an equally easy weeknight protein.
Recommended Products for This Recipe
These are products that genuinely make a difference in how your air fryer chicken cutlets turn out, chosen based on quality and real-world performance.
1. COSORI Air Fryer (5.8 Quart)
This air fryer has a wide, square basket that fits multiple cutlets in a single layer without crowding, which is the key to getting an even, golden crust on every piece. The rapid air circulation technology means consistent heat from all sides, so you do not end up with pale spots or uneven browning. It is one of the most recommended air fryers among food bloggers and home cooks for good reason.
2. 4C Seasoned Panko Breadcrumbs
Panko crumbs are significantly lighter and larger than regular breadcrumbs, which is what creates that satisfying shattering crunch when you bite into the cutlet. Using a seasoned panko blend adds extra flavor without any extra work on your part. This brand consistently delivers a great texture and is easy to find both online and in stores.
3. ThermoPro Instant Read Meat Thermometer
Chicken cutlets are thin and cook fast, which means the line between perfectly cooked and overdone is slim. An instant-read thermometer takes the guesswork out entirely. You simply probe the thickest part of the cutlet and pull it from the air fryer the moment it hits 165°F (74°C).
4. Misto Brushed Aluminum Oil Sprayer
Using a refillable oil mister means you can use your own avocado or olive oil instead of aerosol sprays, which can damage the non-stick coating on some air fryer baskets over time. A light, even coat of oil is all you need to get that beautiful golden color on the breadcrumb crust.
For another delicious air fryer protein idea, check out this Air Fryer Bacon Wrapped Chicken Breast Recipe.
Step-by-Step Instructions
1. Prepare the Chicken Cutlets
- Place your chicken breasts on a clean cutting board.
- Using a sharp chef’s knife, carefully slice each breast in half horizontally. Hold the breast flat with your non-dominant hand and use slow, even strokes to create two thin, even pieces from each breast. You should end up with 8 thin cutlets total.
- Place each cutlet between two sheets of plastic wrap or inside a zip-top bag.
- Use a meat mallet or the bottom of a heavy skillet to gently pound each cutlet to an even thickness of about 1/4 inch (6mm). This ensures every piece cooks evenly and no part dries out before the rest is done.
- Pat all the cutlets thoroughly dry on both sides using paper towels. This step is critical because excess moisture on the surface will prevent the flour from adhering properly and lead to a soggy coating.
- Season both sides of the cutlets lightly with salt and black pepper. Set them aside on a clean plate while you set up the dredging station.
2. Set Up Your Dredging Station
- Line up three shallow dishes side by side on your counter, with a clean plate at the end to hold the breaded cutlets before cooking.
- In the first shallow dish, add the all-purpose flour and spread it evenly.
- In the second shallow dish, crack in the 2 eggs and add 1 tablespoon of water. Beat them together with a fork until the yolk and white are fully combined and the mixture is smooth.
- In the third shallow dish, combine the Italian breadcrumbs, panko breadcrumbs, garlic powder, onion powder, and smoked paprika. Stir everything together until the spices are evenly distributed throughout the crumbs.
3. Bread the Chicken Cutlets
- Pick up one chicken cutlet and place it in the flour dish. Press it lightly into the flour and flip it over, making sure both sides and all the edges are lightly coated. Then shake off any excess flour. A thin, even flour coating is what you want. Too much flour leads to a thick, pasty crust rather than a light, crispy one.
- Transfer the flour-coated cutlet to the egg wash dish. Let it sit for a second and then flip it over, making sure the egg coats both sides completely. Lift the cutlet and let any excess egg drip back into the dish.
- Place the egg-coated cutlet into the breadcrumb dish. Press it down firmly with your fingers, then flip and press again. Use your hands to press the crumbs gently into the surface of the chicken so they really adhere. This pressing step is key to getting a crust that stays on during cooking.
- Transfer the breaded cutlet to the clean plate and repeat the process with all remaining cutlets.
- Once all the cutlets are breaded, let them rest on the plate for 5 minutes. This short rest allows the egg to absorb slightly into the breadcrumbs, helping the coating bond more securely to the chicken before it goes into the air fryer.
4. Preheat the Air Fryer
- Set your air fryer to 390°F (200°C) and allow it to preheat for 3 to 5 minutes. Preheating is important because placing the chicken into a hot basket means the crust starts crisping immediately on contact, rather than steaming as the basket slowly heats up.
- Once preheated, lightly spray the air fryer basket with cooking spray to prevent the chicken from sticking.
5. Cook the Chicken Cutlets
- Working in batches, arrange the breaded cutlets in a single layer in the air fryer basket. Do not overlap them or stack them on top of each other. The air fryer works by circulating hot air around the food, and if pieces are touching or overlapping, that airflow is blocked, resulting in soggy spots and uneven cooking.
- Spray the tops of the cutlets generously with cooking spray. Getting good coverage on the top surface is what helps the breadcrumb crust turn golden and crispy rather than staying pale and powdery.
- Cook at 390°F (200°C) for 5 minutes.
- After 5 minutes, use tongs to carefully flip each cutlet. Spray the newly exposed side with cooking spray again.
- Continue cooking for another 4 to 5 minutes, or until the coating is deep golden brown and the chicken is cooked through.
- To confirm doneness, insert your instant-read thermometer into the thickest part of a cutlet. It should read 165°F (74°C). Remove the cutlets from the air fryer immediately once they hit temperature to avoid overcooking.
- Transfer cooked cutlets to a wire rack or plate and cook the remaining batches using the same process.
Read Also: Air Fryer Chicken Wings Recipe
Tips for Success
Getting the most out of this recipe comes down to a few simple but important techniques that make the difference between just-okay cutlets and truly spectacular ones.
- Dry your chicken thoroughly. Patting the cutlets dry before dredging removes surface moisture that would otherwise prevent the flour from sticking cleanly.
- Do not skip the flour step. Flour creates a dry base layer that gives the egg wash something to grip onto. Skipping it often results in the breadcrumb coating sliding off during cooking.
- Press the breadcrumbs firmly. The more you press the crumbs into the surface, the better they adhere, and the less likely they are to fall off when you flip the cutlets.
- Let the breaded cutlets rest before cooking. Even just 5 minutes of resting before air frying allows the coating to set, which leads to a much crispier result.
- Never crowd the basket. Overcrowding is the number one reason air fryer chicken comes out steamed instead of crispy. Cook in batches if needed.
- Always spray both sides. Spraying the top surface before cooking, and again after flipping, is essential for even browning across the entire crust.
- Use a meat thermometer. Thin cutlets cook fast, and a thermometer is the most accurate way to know exactly when to pull them from the basket.
Another great air fryer chicken recipe to add to your rotation is this Air Fryer Chicken Thighs Recipe, which uses a similar technique with even juicier results.
Serving Suggestions
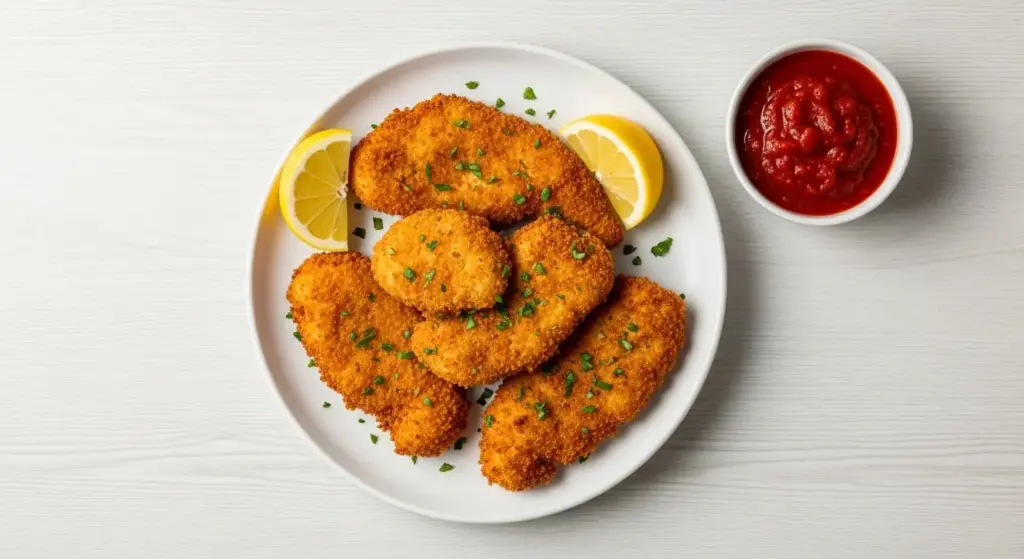
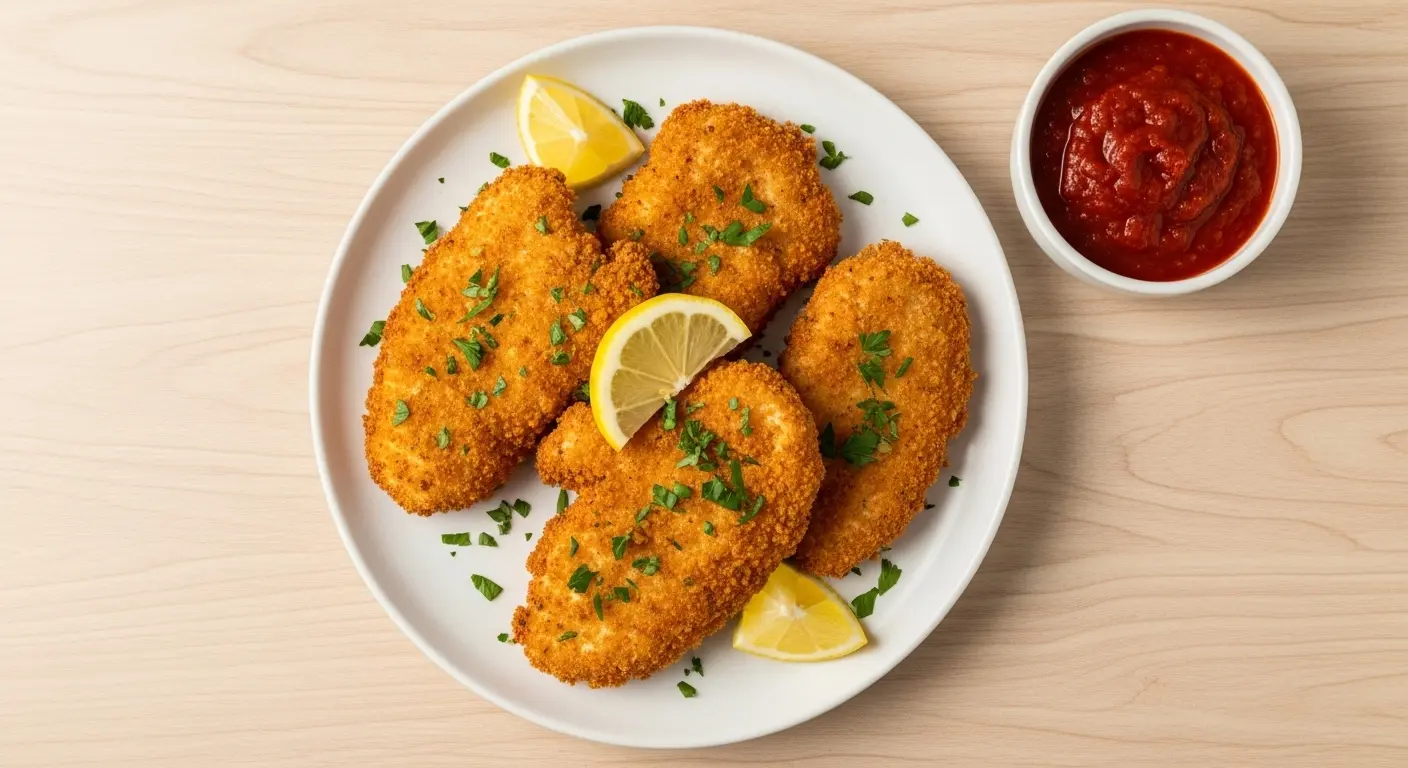
These cutlets are endlessly versatile. Serve them simply with a squeeze of lemon and a light dusting of fresh parsley, or build an entire meal around them.
Here are some excellent ways to serve them:
- Over pasta: Slice the cutlets and serve them over spaghetti with marinara or Creamy Mac and Cheese on the side
- As a sandwich: Layer them into a hoagie roll with lettuce, tomato, and your favorite condiment
- On a salad: Slice thinly and lay them over mixed greens with a light vinaigrette
- Chicken Parmesan style: Top with marinara sauce and mozzarella, then return to the air fryer for 2 minutes until the cheese melts
- With Creamy Mashed Potatoes and roasted vegetables for a classic comfort food plate
- With dipping sauces: Serve with Comeback Sauce, ranch, honey mustard, or marinara on the side
- Sliced over grain bowls with roasted vegetables and a drizzle of tahini or lemon dressing
Variations to Try
Once you have mastered the base recipe, there are so many easy ways to customize these cutlets to suit different tastes and occasions.
- Parmesan crusted: Add 1/4 cup of finely grated Parmesan cheese to the breadcrumb mixture for a nutty, salty crust with extra depth of flavor.
- Lemon herb: Add 1 teaspoon of lemon zest and 1 teaspoon of dried Italian herbs to the breadcrumb mixture for a bright, fragrant coating.
- Spicy: Mix 1/2 teaspoon of cayenne pepper or red chili flakes into the breadcrumbs for a kick of heat.
- Gluten-free: Swap the all-purpose flour for rice flour and use gluten-free breadcrumbs for a version that is just as crispy.
- Pickle-brined: Marinate the chicken in dill pickle juice for 30 minutes before dredging for a tangy, Chick-fil-A-inspired flavor.
- Coconut crusted: Replace the panko with unsweetened shredded coconut for a sweet, tropical twist that pairs beautifully with a mango dipping sauce.
You might also like trying Air Fryer Turkey Cutlets using the same breading technique for a delicious alternative protein.
Storage and Reheating
These cutlets store and reheat exceptionally well, making them a fantastic option for meal prepping ahead of a busy week.
- Refrigerator: Allow the cooked cutlets to cool completely on a wire rack before storing. Place them in an airtight container with parchment paper between layers to prevent sticking. They will keep well in the refrigerator for up to 4 days.
- Freezer: For longer storage, place cooled cutlets on a baking sheet in a single layer and freeze for 1 to 2 hours until solid. Then transfer to a zip-top freezer bag or airtight container. They will keep in the freezer for up to 1 month.
- Reheating from refrigerator: Place cutlets in the air fryer at 370°F (188°C) for 3 to 4 minutes until heated through and crispy again. The air fryer is far superior to the microwave for reheating because it restores the crunch.
- Reheating from frozen: Cook frozen cutlets in the air fryer at 390°F (200°C) for 8 to 10 minutes, flipping once halfway through.
- Microwave option: If you are in a hurry, microwave on high for 1 to 1.5 minutes. The coating will soften, but the chicken will still be delicious.
Read Also: Air Fryer Chicken Nuggets Recipe
Nutritional Facts
The following nutritional information is an estimate per serving (2 cutlets), based on 4 servings from this recipe. Actual values may vary depending on specific brands and exact portion sizes used.
| Nutrient | Amount Per Serving |
|---|---|
| Calories | ~310 kcal |
| Protein | 38g |
| Total Fat | 7g |
| Saturated Fat | 1.5g |
| Carbohydrates | 20g |
| Fiber | 1g |
| Sugar | 1g |
| Sodium | 520mg |
| Cholesterol | 145mg |
This recipe is relatively low in fat compared to pan-fried or deep-fried cutlets. Because the air fryer requires only a light spritz of cooking spray rather than a full cup of oil, the calorie count stays much lower than traditional frying methods while keeping the protein content high.
For another lean and satisfying air fryer protein, try these Air Fryer Salmon Bites for a quick weeknight dinner packed with omega-3s.
Health Benefits of Key Ingredients
Beyond being delicious, this recipe puts some genuinely nourishing ingredients to work.
The combination of lean chicken breast with seasoned breadcrumbs makes for a satisfying, high-protein meal that supports muscle maintenance and keeps you feeling full longer. Here is a closer look at what the key ingredients bring to the table:
- Chicken breast: One of the leanest sources of animal protein available. A single 4 oz (113g) serving provides roughly 26 grams of protein with very little saturated fat, making it a strong choice for anyone focused on muscle health or caloric balance.
- Eggs: The egg wash does more than help the breading stick. Eggs are a complete protein source, meaning they contain all nine essential amino acids. They are also rich in choline, which supports brain function and cell health.
- Garlic powder: Concentrated dried garlic retains many of the same beneficial compounds found in fresh garlic, including allicin, which has demonstrated antimicrobial and anti-inflammatory properties in research.
- Smoked paprika: Rich in antioxidants, particularly carotenoids like beta-carotene and capsanthin. These compounds help protect cells from oxidative stress.
- Panko breadcrumbs: While not a major nutritional contributor, using panko instead of traditional breadcrumbs means a lighter, crispier coating with a lower calorie density per tablespoon compared to many commercial Italian seasoned crumbs.
- Avocado oil spray: Avocado oil is high in heart-healthy monounsaturated fats and has a high smoke point, making it ideal for high-heat air frying without producing harmful compounds.
Another healthy and quick protein you might enjoy is this Air Fryer Salmon Recipe, which is packed with omega-3 fatty acids and comes together just as quickly.
Frequently Asked Questions
1. Do I need to preheat the air fryer for chicken cutlets?
Yes, preheating is highly recommended. Placing the breaded cutlets into a preheated basket means the exterior starts crisping on contact, which leads to a significantly crunchier coating. Most air fryers reach temperature in 3 to 5 minutes. If your model does not have a preheat function, simply run it at 390°F (200°C) for 3 to 5 minutes before adding the chicken.
2. Can I use store-bought thin-sliced chicken breasts instead of cutting my own?
Absolutely. Pre-sliced thin chicken cutlets are widely available at most grocery stores and save you the slicing and pounding step entirely. Just make sure they are roughly uniform in thickness so they all cook evenly. If some pieces are thicker than others, give them a quick pound with a mallet.
3. Why is my breading falling off during cooking?
There are a few common reasons this happens. First, make sure you pat the chicken completely dry before dredging, as moisture prevents the flour from adhering. Second, press the breadcrumbs firmly onto the surface rather than just dipping and hoping. Third, do not skip the 5-minute rest period after breading, which allows the coating to set before it hits the heat. Finally, use tongs instead of your fingers when flipping to avoid disturbing the crust.
4. How do I know when the chicken cutlets are fully cooked?
The most reliable method is using an instant-read meat thermometer. Insert the probe into the thickest part of the cutlet, and when it reads 165°F (74°C), the chicken is safe to eat. Visually, the crust should be deep golden brown and the juices should run clear when the cutlet is pierced. Because cutlets are thin, they cook quickly, so start checking around the 8-minute mark.
5. Can I make these ahead of time and reheat them?
Yes, and they reheat beautifully. For best results, reheat the cooked cutlets in the air fryer at 370°F (188°C) for 3 to 4 minutes. This restores most of the crispiness. Avoid microwaving if you care about texture, as the microwave will steam the coating and make it soft. If you want to prep ahead, you can also bread the cutlets and store them in the refrigerator (uncooked) for up to 24 hours before air frying.
Read Also: Classic Chicken Parmesan Recipe
Final Thoughts
This air fryer chicken cutlets recipe proves that you do not need a deep fryer, a gallon of oil, or a ton of cleanup to get that satisfying, golden crunch.
With a simple three-step dredge and about 10 minutes in the air fryer, you get chicken that is crispy on the outside, juicy on the inside, and endlessly adaptable to whatever you are in the mood for.
Give these a try on your next weeknight, and do not be surprised when they become a permanent part of your dinner rotation. Drop a comment below if you made them and let me know how you served yours, or share a photo with friends who love easy air fryer recipes!
Recommended:
- Air Fryer Chicken Breast Recipe
- Air Fryer Bacon Wrapped Chicken Breast Recipe
- Air Fryer Turkey Cutlets Recipe
- Air Fryer Turkey Burgers Recipe
- Air Fryer Beef Tips Recipe
- Air Fryer Zucchini Fritters Recipe
- Air Fryer French Fries Recipe
- Air Fryer Egg Rolls Recipe
- Southern Fried Chicken Recipe
- Chicken Fajita Recipe


