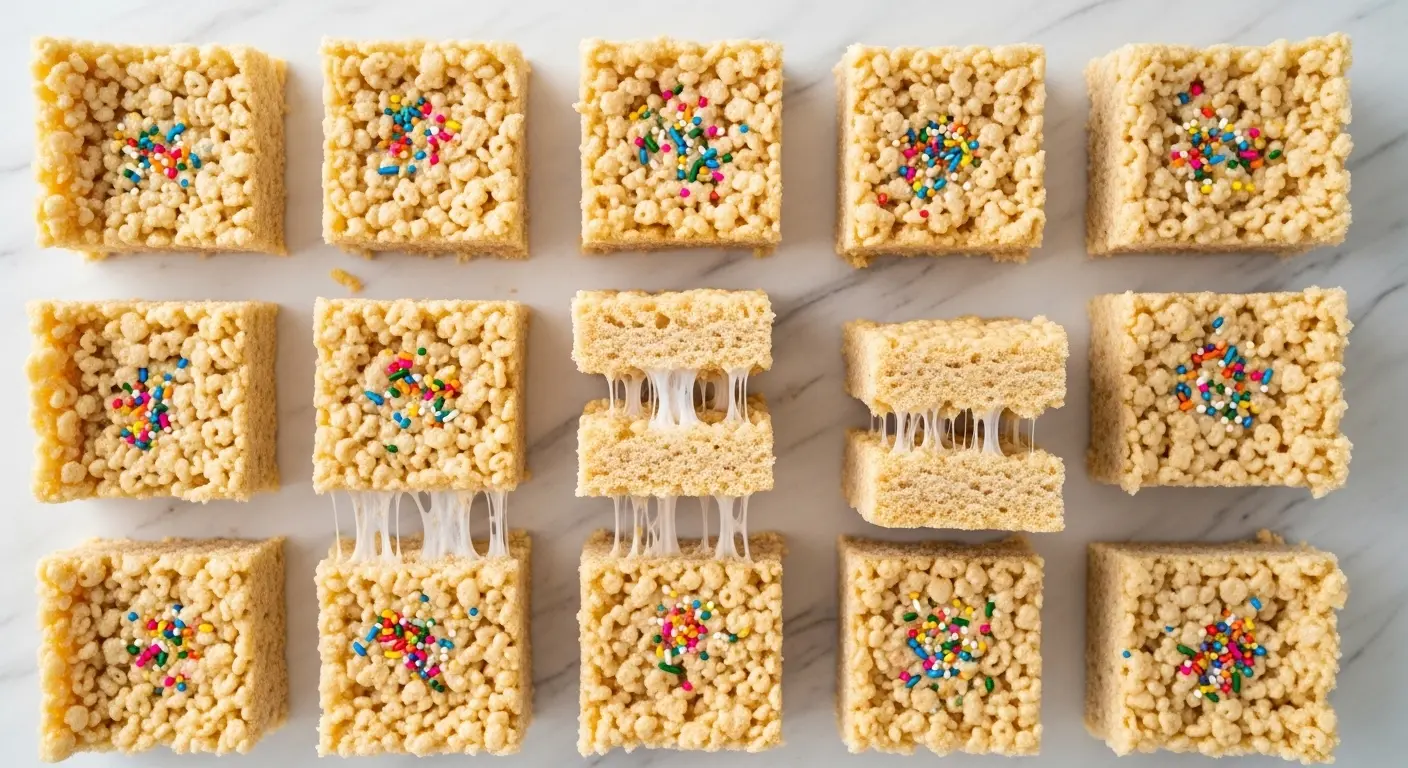
If you’ve been searching for the perfect rice krispie treat recipe with large marshmallows, you’ve landed in exactly the right place. Large marshmallows melt down into a richer, creamier base than the mini variety, giving you treats that are thicker, chewier, and packed with that classic sticky sweetness everyone loves.
These treats come together in under 15 minutes with just a handful of pantry staples. No oven required, no complicated techniques, no fuss.
Whether you’re whipping up a batch for a school bake sale, a holiday treat platter, or a late-night craving, this recipe delivers every single time. Once you try it with large marshmallows, you’ll never look back.
You might also enjoy: Gooey Rice Krispie Treat Recipe
Why You’ll Love This Rice Krispie Treat Recipe with Large Marshmallows
Large marshmallows make all the difference when it comes to texture and richness. They contain slightly less air than mini marshmallows, which means they melt into a denser, more luxurious marshmallow layer.
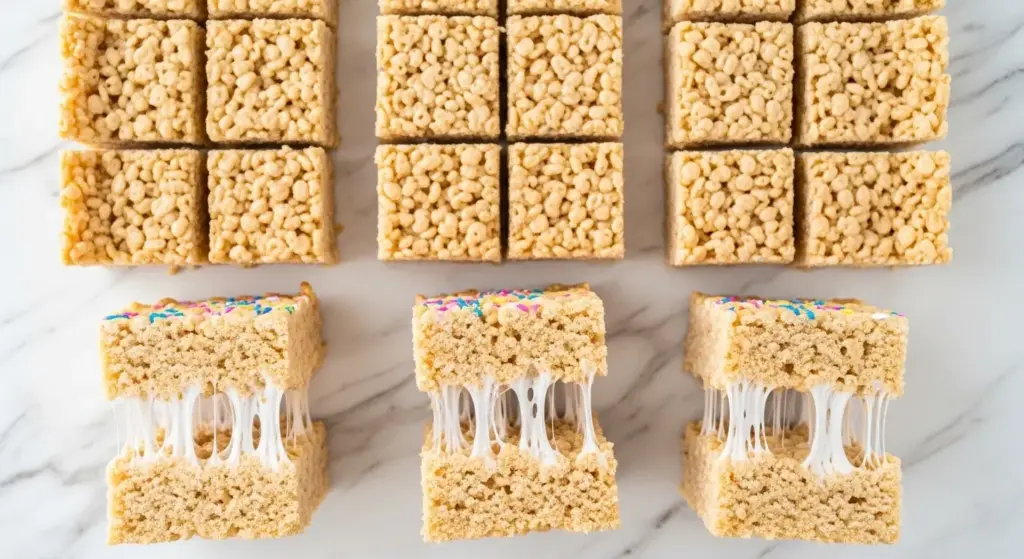
That extra density translates directly into treats that hold together beautifully without becoming hard or overly stiff. You get a soft, satisfying chew in every single bite.
This recipe is also incredibly forgiving for beginners. You don’t need any special equipment or candy thermometers, just a pot, a spatula, and a pan.
The ingredient list is short and affordable. You probably already have everything you need sitting in your pantry right now.
- Only 3 main ingredients: large marshmallows, butter, and Rice Krispies cereal
- Ready in under 15 minutes with no baking required
- Perfectly chewy texture thanks to the dense melt of large marshmallows
- Easy to customize with mix-ins, drizzles, or flavored extracts
- Stores well for up to 3 days at room temperature when wrapped properly
- Kid-friendly and crowd-pleasing for parties, bake sales, and everyday snacking
Read Also: Original Rice Krispie Treat Recipe
Ingredients
This recipe keeps things beautifully simple. Using a slightly higher ratio of marshmallows to cereal is the key to getting that extra-gooey result that makes these treats stand out.
- 6 cups (170g / 6oz) Rice Krispies cereal
- 4 tablespoons (57g / 2oz) unsalted butter, plus extra for greasing
- 1 bag (10oz / 283g) large marshmallows (about 40 marshmallows)
- 1/4 teaspoon (1.25ml) pure vanilla extract
- 1/4 teaspoon (1.25g) fine salt (optional, but highly recommended for flavor balance)
Another favorite: Easy Rice Krispie Treat Recipe
Kitchen Equipment Needed
You don’t need any specialty tools to make these treats, but having the right setup makes the process smooth and stress-free.
- Large heavy-bottomed saucepan or Dutch oven (at least 4 quarts)
- 9×13 inch (23x33cm) baking pan
- Silicone spatula or wooden spoon
- Measuring cups and measuring spoons
- Parchment paper or butter for greasing the pan
- Parchment paper sheets (optional, for easier removal)
- Butter knife or offset spatula for pressing and cutting
Read Also: Microwave Rice Krispie Treat Recipe
Recommended Products for This Recipe
These are products I genuinely recommend based on quality and performance that will help you get the best results from this recipe.
1. Large Jumbo Marshmallows
The size and freshness of your marshmallows matters more than you’d think. A fresh bag of large marshmallows melts down into a silkier, more consistent base compared to marshmallows that have been sitting in the pantry for a while. Look for brands with minimal added stabilizers for the cleanest melt and the gooiest results.
2. Heavy Duty Non-Stick 9×13 Baking Pan
A sturdy, non-stick 9×13 pan ensures your treats release cleanly and cut into neat, even squares. Thin or warped pans can cause uneven thickness and sticky bottoms. A quality pan is one of those small upgrades that genuinely improves your results.
3. High-Quality Pure Vanilla Extract
Pure vanilla extract adds a subtle warmth and depth that makes these treats taste far more homemade and intentional. Imitation vanilla works in a pinch, but the difference in flavor is noticeable, especially in simple recipes like this where each ingredient truly matters.
4. Silicone Spatula Set
A heat-resistant silicone spatula is non-negotiable for stirring hot marshmallow mixture. It doesn’t scratch your pan and releases the sticky marshmallow mixture far more cleanly than a wooden spoon or metal utensil. A set gives you backups in case one gets too sticky mid-recipe.
This pairs beautifully with peanut butter rice krispie treats if you’re looking for another fun no-bake treat to round out your snack table.
Step-by-Step Instructions
Step 1: Prepare Your Pan and Workspace
- Lightly grease your 9×13 inch (23x33cm) baking pan with softened butter, making sure to coat the bottom and sides thoroughly.
- Alternatively, line the pan with parchment paper and lightly grease the parchment for the easiest removal possible.
- Measure out all 6 cups (170g) of Rice Krispies cereal into a large bowl and set it nearby. Having everything ready before you start is important because the marshmallow mixture moves fast once it’s melted.
- Set a piece of parchment paper or plastic wrap on the counter near the pan. You’ll use this to press the mixture down without it sticking to your hands.
Step 2: Melt the Butter
- Place a large heavy-bottomed saucepan over medium-low heat.
- Add the 4 tablespoons (57g) of unsalted butter to the pan.
- Allow the butter to melt slowly and evenly, stirring occasionally with your silicone spatula.
- Do not let the butter brown or bubble aggressively. You want it fully melted and gently foaming, not sizzling. Medium-low heat is key here. High heat is one of the most common reasons Rice Krispie treats turn out hard and dry.
Step 3: Add the Large Marshmallows
- Once the butter is fully melted, add the entire 10oz (283g) bag of large marshmallows to the pot.
- Stir the marshmallows with your silicone spatula, making sure each one gets coated in the melted butter.
- Continue stirring gently and consistently as the marshmallows melt. Do not walk away from the pot at this stage.
- The large marshmallows will take slightly longer to melt than mini marshmallows, roughly 3 to 5 minutes over medium-low heat. This slower melt is actually a good thing: it preserves moisture and creates a softer, chewier final texture.
- Stir until the mixture is completely smooth with no visible lumps. You want a uniform, glossy, slightly stretchy marshmallow mixture.
Step 4: Add Vanilla and Salt
- Remove the pot from heat.
- Stir in the 1/4 teaspoon (1.25ml) of pure vanilla extract immediately.
- If using, add the 1/4 teaspoon (1.25g) of fine salt and stir to incorporate.
- Taking the pot off the heat before adding vanilla prevents the alcohol in the extract from cooking off too quickly, giving you better flavor in the finished treats.
Step 5: Add the Rice Krispies Cereal
- Working quickly, pour all 6 cups (170g) of Rice Krispies cereal into the pot of melted marshmallow.
- Use your silicone spatula to fold and stir the cereal into the marshmallow mixture.
- Stir from the bottom and sides, turning the mixture over itself to ensure every single piece of cereal gets coated.
- This step should take about 1 to 2 minutes. Work efficiently but gently. You don’t want to crush the cereal, just fold it in until no dry pieces remain.
- If the mixture feels like it’s seizing up before you’re done incorporating the cereal, briefly return the pot to very low heat for 30 seconds while you continue stirring.
Step 6: Transfer to the Pan
- Immediately pour and scrape the Rice Krispie mixture into your prepared 9×13 inch pan.
- Use a lightly buttered spatula or the back of a buttered spoon to spread the mixture evenly across the pan.
- To press it flat without sticking, place a piece of parchment paper or plastic wrap over the top of the mixture and use your hands or a flat-bottomed measuring cup to gently press it into an even layer.
- Do not press too hard. You want the treats to be compact enough to hold together, but light enough to remain airy and chewy. Pressing too firmly is another common reason treats turn out dense and hard.
Step 7: Let Set and Cut
- Allow the treats to cool at room temperature for at least 30 minutes before cutting. If you’re in a rush, 20 minutes is the minimum. Cutting too soon will result in treats that fall apart.
- Once set, use a sharp buttered knife to cut the treats into squares or rectangles. A 4×6 grid gives you 24 standard-sized pieces.
- For extra clean cuts, spray the knife lightly with non-stick cooking spray or dip it in warm water and wipe dry between cuts.
- Serve at room temperature for the best chewy texture.
For a fun twist on the classic, try the rice krispie treat recipe with marshmallow fluff for an ultra-stretchy, extra-gooey variation.
Tips for Success
A few small adjustments make the difference between good Rice Krispie treats and truly great ones. These tips address the most common pitfalls so you can nail it on the first try.
- Low and slow is the rule: Always melt your butter and marshmallows over medium-low or low heat. High heat causes the sugar in the marshmallows to seize, resulting in a hard, sticky, unpleasant texture.
- Use fresh marshmallows: Old marshmallows that have been exposed to air don’t melt as smoothly. For the best results, open a fresh bag right before making the recipe.
- Butter your hands: When pressing the mixture into the pan, lightly butter your hands or use parchment paper. This prevents sticking and makes the job much easier.
- Don’t skip the salt: Even just 1/4 teaspoon of salt dramatically enhances the sweetness and brings out the buttery flavor. It won’t make the treats taste salty; it just makes everything pop.
- Work fast once cereal is added: Marshmallow mixture cools and thickens quickly. Once you add the cereal, move efficiently to get the mixture into the pan before it stiffens up on you.
- Let them fully set: Resist the urge to cut the treats right away. A full 30-minute rest lets the marshmallow firm up to the ideal chewy consistency.
You might also love the single serve rice krispie treat recipe on days when you only want one perfect square without making a whole batch.
Serving Suggestions
These treats are delicious as-is, but they also pair wonderfully with other desserts and snacks for a fun spread. They’re especially great at parties alongside other bite-sized sweets.
Serve them on a dessert board alongside no bake cookies, brownies, and seasonal fruit for a crowd-pleasing treat table that requires zero oven time.
- Drizzle with chocolate: Melt semisweet or dark chocolate and drizzle it over the set treats before cutting for a more elegant presentation.
- Dip in white chocolate: Dip individual squares halfway into melted white chocolate and let them set on parchment for a bakery-style look.
- Pair with hot chocolate: Serve alongside a warm mug of hot chocolate for the ultimate cozy treat combination.
- Add to a dessert platter: Arrange cut squares alongside other no-bake treats like buckeyes and bourbon balls for holiday entertaining.
- Serve with ice cream: Press a warm treat into a bowl of vanilla or caramel ice cream for a simple but truly satisfying dessert.
- Pack for lunchboxes: Individually wrap squares in plastic wrap for easy, portable, kid-approved school or work snacks.
Read Also: Fruity Pebbles Rice Krispie Treat Recipe
Variations to Try
The classic version is always a winner, but these treats are an incredibly versatile canvas for different flavors and mix-ins. Once you’ve mastered the base, try one of these fun twists.
- Peanut butter: Stir 1/2 cup of creamy peanut butter into the melted butter before adding the marshmallows for a rich, nutty variation.
- Brown butter: Let the butter cook a little longer until it turns golden and smells nutty before adding the marshmallows. Brown butter adds incredible depth and a toffee-like undertone.
- Chocolate drizzle: Once cooled, drizzle melted milk or dark chocolate over the top and let it set before cutting.
- Sprinkles: Stir in 1/3 cup of rainbow sprinkles right after removing the pot from the heat for birthday-style funfetti treats.
- Cinnamon: Add 1/2 teaspoon of ground cinnamon to the marshmallow mixture for a warm, spiced version that’s especially good in fall.
- Cocoa pebbles: Swap the Rice Krispies for Cocoa Pebbles or Cocoa Krispies for a chocolatey twist.
- S’mores style: Press graham cracker pieces and mini chocolate chips into the top of the warm mixture before it sets.
For a completely different but equally delicious no-bake treat, the vegan rice krispie treat recipe is a great option for guests with dietary restrictions.
Storage and Reheating
Proper storage keeps your Rice Krispie treats soft and chewy for days. The biggest enemy is air, which dries them out and makes them stale and hard.
- Room temperature: Store cut squares in an airtight container or individually wrapped in plastic wrap for up to 3 days. Place a piece of parchment between layers to prevent sticking.
- Refrigerator: While you can refrigerate them, cold temperatures tend to make Rice Krispie treats harder and drier. Room temperature storage is strongly preferred.
- Freezer: Freeze individually wrapped squares in a zip-top freezer bag for up to 6 weeks. Thaw at room temperature for about 30 to 60 minutes before eating.
- Reheating: If your treats have gotten slightly firm, microwave an individual square for 5 to 8 seconds to soften it back up. Be careful not to overheat or the marshmallow will become sticky and messy.
- Avoid the fridge when possible: The humidity differential between the fridge and room temperature can cause condensation that makes the treats soggy.
Read Also: Copycat Starbucks Rice Krispie Treat Recipe
Nutritional Facts
The following nutritional information is an estimate based on one serving (1 square, assuming 24 squares per batch). Values may vary depending on specific brands used.
| Nutrient | Amount Per Serving |
|---|---|
| Calories | 115 kcal |
| Total Fat | 2.5g |
| Saturated Fat | 1.5g |
| Cholesterol | 5mg |
| Sodium | 95mg |
| Total Carbohydrates | 23g |
| Dietary Fiber | 0g |
| Total Sugars | 12g |
| Protein | 1g |
Nutritional values are approximate and calculated using standard ingredient amounts.
You might also enjoy: Monster Cookie Bars Recipe
Health Benefits of Key Ingredients
Rice Krispie treats are certainly a sweet indulgence, but some of the key ingredients do carry nutritional value worth noting. Understanding what’s in your food helps you enjoy it mindfully.
Rice Krispies cereal is made from enriched rice and is a source of several B vitamins including thiamin, riboflavin, niacin, and folic acid, all of which support energy metabolism and overall cellular health.
Butter, used in moderation here, provides fat-soluble vitamins including vitamin A and vitamin K2, both of which support vision, immune function, and bone health.
Marshmallows are primarily sugar and gelatin. While gelatin is derived from collagen and some research suggests it may support joint health and gut lining integrity, the amounts present in a treat are modest.
- Iron and B vitamins from enriched rice cereal: Support healthy red blood cells and energy levels
- Vitamin A from butter: Contributes to healthy vision and immune function
- Low in fat overall: Each square contains just 2.5 grams of fat, making it a lighter dessert option compared to most cookies or cake
- Quick energy source: The carbohydrates from cereal and marshmallows provide a fast-acting energy boost, which makes these popular for sports events and school activities
- Gluten-free friendly (check labels): Rice Krispies are rice-based, and many brands are certified gluten-free, making these treats accessible for people avoiding gluten
This technique for making a quick marshmallow-based dessert also works wonderfully in treats like muddy buddies for another fun party snack.
Frequently Asked Questions
1. Why are my Rice Krispie treats hard instead of soft and chewy?
The most common cause is heat. If the butter or marshmallows were cooked over medium-high or high heat, the sugars can scorch or over-caramelize, resulting in a firm, almost brittle texture.
Always use medium-low heat and stir constantly. The second most common cause is pressing the mixture too firmly into the pan, which compacts the air out and creates a dense, hard result.
2. Can I use mini marshmallows instead of large marshmallows?
Yes, you can substitute mini marshmallows in equal weight (10oz / 283g). Mini marshmallows melt slightly faster due to their higher surface area, so you may need to reduce the heat slightly and watch them closely.
That said, large marshmallows tend to produce a creamier, denser melt that most people find gives a chewier finished texture.
3. How many large marshmallows are in a 10oz bag?
A standard 10oz bag of large marshmallows contains approximately 38 to 40 marshmallows. You’ll use the entire bag for this recipe, so there’s no need to count them out individually.
If your bag is slightly different in weight, aim for close to 40 large marshmallows or adjust proportionally.
4. How do I prevent the mixture from sticking to the pan?
Butter the pan generously before adding the mixture. For the easiest removal, line the pan with parchment paper and lightly butter the parchment as well.
When pressing the mixture flat, use a sheet of parchment paper or plastic wrap between your hands and the sticky marshmallow mixture. This makes the entire process cleaner and prevents torn treats.
5. Can I make these treats ahead of time?
Absolutely. You can make these treats up to 2 days in advance. Store them in an airtight container at room temperature, with pieces separated by parchment paper to prevent sticking.
For best texture, avoid refrigerating them, as cold air dries them out. If making more than 2 days ahead, consider freezing them individually wrapped instead.
Read Also: Peanut Butter Rice Krispie Treat Recipe
Final Thoughts
A great rice krispie treat recipe with large marshmallows is one of those kitchen staples that never goes out of style. It’s one of the few recipes that genuinely delivers maximum reward for minimum effort, and knowing the right techniques makes all the difference between an average batch and a truly spectacular one.
Give this recipe a try the next time you need a quick, crowd-pleasing treat. The combination of slow-melted large marshmallows, real butter, a touch of vanilla, and a pinch of salt creates a result that’s so much better than any boxed version.
If you make this recipe, leave a comment below and let me know how it turned out! Tag your photos and share this post with anyone who loves a good, classic no-bake treat.
Recommended:
- Original Rice Krispie Treat Recipe
- No Bake Cookie Recipe
- Hot Fudge Sauce Recipe
- Dirt Pudding Recipe
- Cake Pop Recipe
- Toffee Recipe
- Chocolate Pudding Recipe
- Peanut Butter Cookie Recipe
- Snickerdoodle Cookie Recipe
- Monster Cookie Recipe


