
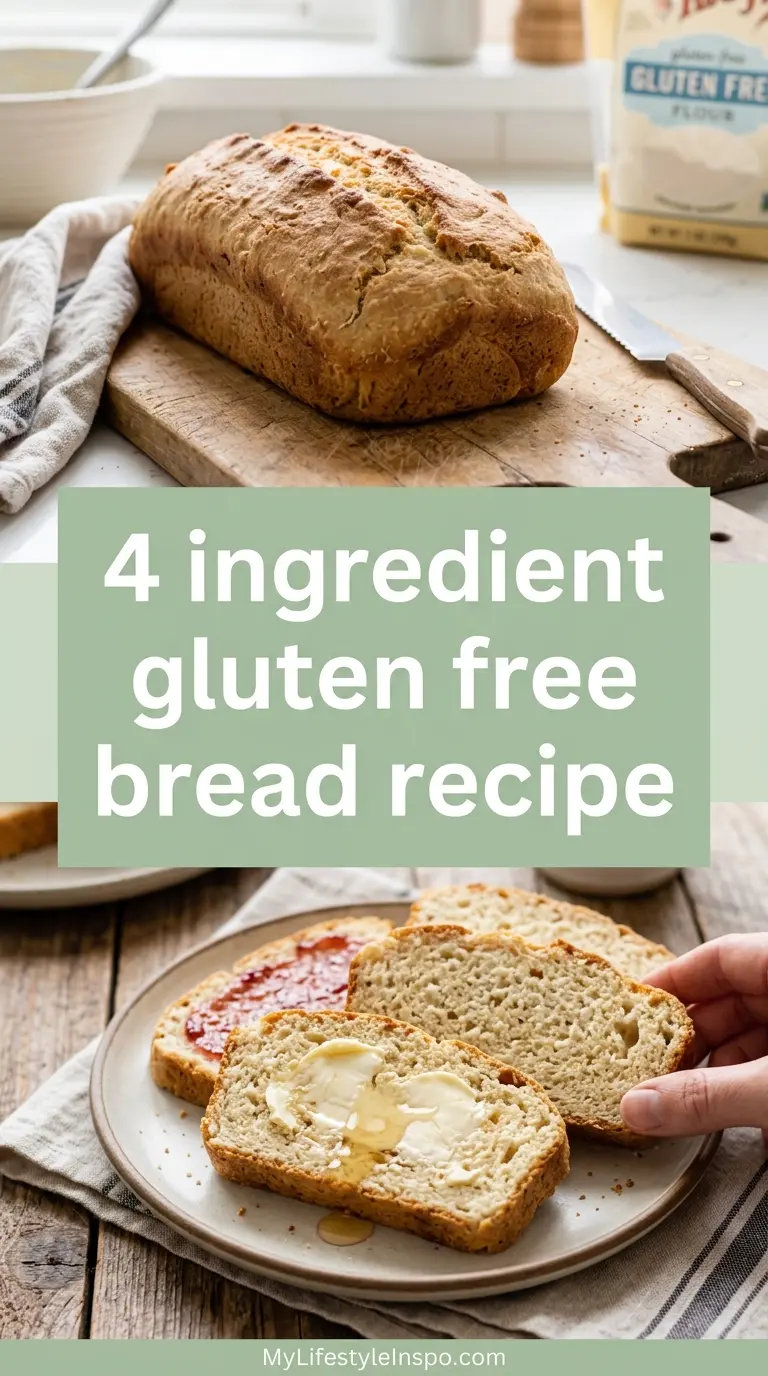
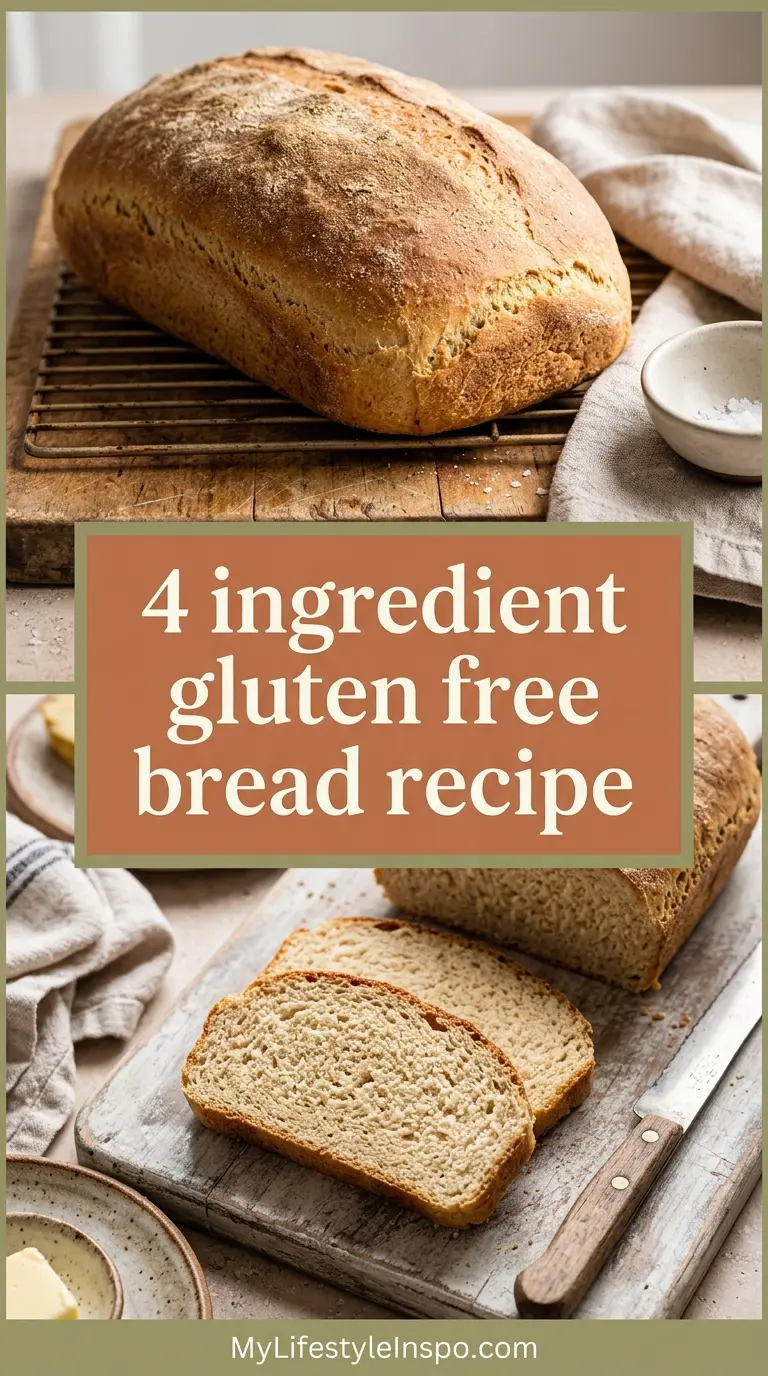
If you’ve been craving homemade bread but don’t want to deal with a long list of specialty ingredients, this 4 ingredient gluten free bread recipe is exactly what you need.
It comes together with just gluten free flour, eggs, baking powder, and olive oil — no yeast, no xanthan gum to measure separately, and no kneading required.
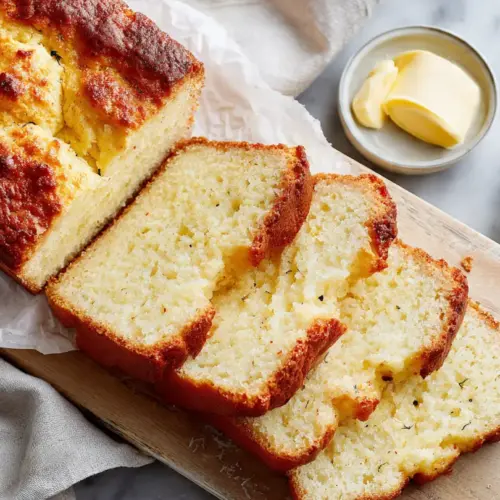
The result is a tender, sliceable loaf with a golden crust and a soft crumb that’s perfect for toast, sandwiches, and snacking.
What makes this recipe work so well is the combination of eggs and baking powder as leavening agents. The eggs add structure and richness — something traditional wheat bread gets from gluten — while baking powder gives the loaf its lift without requiring any rise time.
Olive oil keeps the crumb moist and adds a subtle savory flavor that pairs beautifully with both sweet and savory toppings.
This is the kind of bread that surprises people. It doesn’t taste like a compromise.
You might also enjoy: Gluten Free Dairy Free Bread
Why You’ll Love This 4 Ingredient Gluten Free Bread Recipe
Whether you’re newly gluten-free or you’ve been baking this way for years, having a reliable, minimal-ingredient bread recipe in your back pocket is invaluable.
This loaf is beginner-friendly and forgiving, making it ideal even if bread baking feels intimidating.
It uses no yeast, which means there’s no proofing time and no worrying about whether your yeast is still active.
The batter comes together in just one bowl, so cleanup is minimal and the whole process feels genuinely approachable.
It bakes up beautifully in a standard loaf pan, giving you even slices that hold together without crumbling — a common complaint with store-bought gluten free breads.
The ingredients are pantry staples you can find in any grocery store, which makes this a go-to recipe you can make any time the craving hits.
- No yeast and no rising time needed
- Minimal cleanup with a one-bowl batter
- Soft, sliceable crumb that doesn’t fall apart
- Delicious for toast, sandwiches, or dipping
- Completely gluten free and naturally dairy free
- Ready in under 1 hour from start to finish
- Uses simple, affordable pantry ingredients
Read Also: Gluten Free Pancake Recipe
Ingredients
This recipe keeps things beautifully simple. The key to success is choosing a good quality gluten free all-purpose flour blend that already contains xanthan gum (check the label — most widely available blends like Bob’s Red Mill 1:1 or King Arthur Measure for Measure do include it). Xanthan gum acts as a binder, replacing the stretchy structure that gluten normally provides.
- 2 cups (240g) gluten free all-purpose flour blend (with xanthan gum already included)
- 4 large eggs, room temperature
- 1 tablespoon (12g) baking powder
- 3 tablespoons (45ml) olive oil (or melted coconut oil, or avocado oil)
- ½ teaspoon fine sea salt (optional but recommended for flavor)
- ½ cup (120ml) warm water (100–110°F / 38–43°C)
Note: Salt is technically a fifth ingredient, but it’s such a small amount and so essential to flavor that most versions of this recipe include it. If you’re strictly keeping it to 4 ingredients, you can omit it, but the flavor will be noticeably flat.
For more gluten free baking inspiration, check out this Gluten Free Dairy Free Bread Recipe that uses a similar approach.
Kitchen Equipment Needed
You don’t need any fancy equipment for this recipe — just a few basics that most home kitchens already have. A stand mixer can be used if you prefer, but a hand mixer or even a sturdy whisk works perfectly fine here. The batter is thin enough that you won’t need to fight it.
- 9×5 inch loaf pan (a standard size works well; smaller pans will make a taller loaf)
- Large mixing bowl
- Hand mixer or stand mixer (or a whisk with some elbow grease)
- Measuring cups and spoons
- Kitchen scale (highly recommended for accuracy with gluten free baking)
- Parchment paper (for easy loaf removal)
- Rubber spatula or wooden spoon
- Wire cooling rack
- Instant read thermometer (optional, but helpful — the bread is done when internal temp reaches 205–210°F / 96–99°C)
This simple Easy Sourdough Bread Recipe is another great bake that uses minimal equipment if you ever want to explore yeast-based breads.
Recommended Products for This Recipe
These are products I genuinely recommend based on quality and how much they improve the results of this bread.
1. Bob’s Red Mill 1-to-1 Gluten Free Baking Flour
This is the gold standard for gluten free baking. It’s specifically formulated with xanthan gum already included, so it performs reliably in this recipe every single time. The texture and rise you get with this flour is noticeably better than cheaper alternatives.
2. USA Pan Nonstick Loaf Pan
A quality loaf pan makes a real difference. This one distributes heat evenly for a perfectly golden crust without over-browning the sides or bottom. It also releases baked goods cleanly, which matters a lot with delicate gluten free bread.
3. OXO Good Grips Digital Kitchen Scale
Measuring gluten free flour by weight rather than volume is one of the single biggest improvements you can make to your baking. Even a small over-measurement of flour can make gluten free bread dense and dry. This scale is accurate, easy to read, and built to last.
4. Parchment Paper Sheets (Pre-cut)
Pre-cut parchment sheets save time and make loaf removal completely stress-free. No tearing, no adjusting — just line your pan and bake. Especially useful with gluten free breads that can be more delicate when warm.
You might also enjoy: Gluten Free Protein Pancakes Recipe
Step-by-Step Instructions
1. Preheat the Oven and Prepare Your Loaf Pan
- Preheat your oven to 375°F (190°C). Allow it to fully preheat before placing your bread inside — a properly heated oven is critical for even baking.
- Line your 9×5 inch loaf pan with parchment paper, leaving some overhang on the long sides to act as handles for easy removal.
- Lightly spray or brush the parchment-lined pan with a little olive oil or cooking spray for extra insurance. Set aside.
2. Mix the Dry Ingredients
- In a large mixing bowl, add 2 cups (240g) of gluten free all-purpose flour blend.
- Add 1 tablespoon (12g) of baking powder and ½ teaspoon of fine sea salt to the flour.
- Whisk the dry ingredients together thoroughly with a whisk for about 20–30 seconds. This ensures the baking powder is evenly distributed throughout the flour — uneven distribution can cause the bread to rise unevenly or have dense spots.
3. Add the Eggs and Olive Oil
- Create a small well in the center of your dry ingredients.
- Add 4 large room-temperature eggs directly into the bowl. Room temperature eggs incorporate more easily and help create a smoother batter. If your eggs are cold from the fridge, place them in a bowl of warm water for 5 minutes to bring them up to temp quickly.
- Pour in 3 tablespoons (45ml) of olive oil.
- Using a hand mixer on medium speed (or a stand mixer fitted with the paddle attachment), beat the mixture for about 30 seconds until the eggs and oil begin to combine with the flour.
4. Add the Warm Water and Beat Until Smooth
- With the mixer running on low, slowly pour in ½ cup (120ml) of warm water (between 100–110°F / 38–43°C). This temperature range is warm enough to help the batter come together without cooking the eggs.
- Increase the mixer to medium speed and beat for 1 to 2 minutes until the batter is smooth and well combined.
- The batter should look like a thick pancake batter — it will be wetter and more pourable than traditional wheat bread dough. This is completely normal. Gluten free bread batter is not meant to be kneaded; the eggs and baking powder do all the structural work.
5. Pour the Batter into the Pan
- Using a rubber spatula, scrape the batter evenly into your prepared loaf pan.
- Smooth the top of the batter with the spatula so it’s even from edge to edge. A smooth, level top helps the bread bake and rise evenly.
- If you’d like, sprinkle the top with a pinch of flaky sea salt, sesame seeds, or sunflower seeds for a bakery-style look.
6. Bake the Bread
- Place the loaf pan on the center rack of your preheated 375°F (190°C) oven.
- Bake for 40 to 45 minutes, until the top is deep golden brown and the bread has pulled slightly away from the sides of the pan.
- At the 40-minute mark, test doneness by inserting an instant-read thermometer into the center of the loaf. It should read between 205°F and 210°F (96–99°C). If you don’t have a thermometer, insert a wooden skewer into the center — it should come out clean with no wet batter clinging to it.
- If the top is browning too quickly before the bread is fully cooked through, loosely tent a piece of foil over the top for the last 10 minutes of baking.
7. Cool Before Slicing
- Remove the bread from the oven and let it rest in the pan for 10 minutes. This allows the structure to firm up slightly and makes it easier to handle.
- Use the parchment paper overhang to lift the loaf out of the pan and transfer it to a wire cooling rack.
- Allow the bread to cool for at least 30 minutes before slicing. This is important — slicing too early will result in a gummy, underdone texture even if the bread is fully cooked. The internal structure continues to set as it cools, giving you clean slices and the best texture.
- Use a sharp serrated bread knife to slice through the crust cleanly.
Also delicious alongside this bread: Easy Garlic Bread Recipe
Tips for Success
Getting gluten free bread right every time comes down to a few key details that make a real difference in texture and rise. These aren’t complicated adjustments — just small things worth knowing before you start.
- Measure your flour by weight, not volume. Gluten free flours can compact significantly in the measuring cup, leading to a dense, dry loaf. A kitchen scale gives you precision every time.
- Use room temperature eggs. Cold eggs don’t emulsify as well and can make your batter lumpy and uneven.
- Don’t skip the cooling time. Gluten free bread needs at least 30 minutes to cool before you cut into it, otherwise the crumb will be gummy regardless of whether it’s fully baked.
- Check your flour for xanthan gum. If your blend doesn’t include xanthan gum, add ½ teaspoon to the dry ingredients. Without it, the bread may crumble and fall apart.
- Use the center rack. This ensures even heat circulation and prevents the bottom from over-browning before the top is done.
- Parchment paper is your friend. Gluten free bread can be sticky and more fragile than wheat bread. Lining your pan with parchment makes removal effortless.
For another easy bake that skips the fuss, this Easy Banana Bread Recipe With Self-Rising Flour is worth bookmarking.
Serving Suggestions

This bread is wonderfully versatile. It has a mild, slightly savory flavor that pairs with just about anything — from a simple slick of butter to a full sandwich build.
The firm, sliceable crumb makes it especially good for toast, which crisps up beautifully and gives you something sturdy enough to pile toppings onto without falling apart.
- Toasted with honey butter and a sprinkle of sea salt
- Layered into a classic sandwich with turkey, avocado, and mustard
- Served alongside a warm bowl of Chicken Tortilla Soup for dipping
- Topped with Easy Hummus and sliced cucumbers for a light snack
- Used as the base for Avocado Toast with a squeeze of lemon and chili flakes
- Paired with a fried egg and hot sauce for a quick, satisfying breakfast
- Served alongside a hearty bowl of soup or stew for dunking
Read Also: Sourdough Focaccia Recipe
Variations to Try
Once you’ve mastered the base recipe, it’s easy to customize this bread to suit your taste or whatever you have on hand. The batter is very adaptable, and small additions can transform the flavor profile completely.
- Herb and garlic bread: Add 1 teaspoon of garlic powder and 1 tablespoon of dried rosemary or Italian seasoning to the dry ingredients for a savory, aromatic loaf.
- Cheese loaf: Fold in ½ cup (50g) of shredded sharp cheddar or parmesan before pouring the batter into the pan.
- Seeded top: Before baking, brush the top with a little olive oil and sprinkle with sesame seeds, poppy seeds, or sunflower seeds for a beautiful, crunchy crust.
- Dairy free swap: This recipe is already dairy free with olive oil. You can also use avocado oil or melted coconut oil without any issues.
- Banana bread variation: Replace the olive oil with melted coconut oil, add 2 mashed ripe bananas, 2 tablespoons of maple syrup, and 1 teaspoon of cinnamon to the batter for a gluten free banana bread.
- Higher protein version: Replace one whole egg with 2 egg whites to reduce fat slightly, or add 2 tablespoons of unflavored protein powder to the dry ingredients.
For a classic quick bread in a similar spirit, this Blackberry Bread Recipe is a wonderful seasonal option.
Storage and Reheating
Gluten free bread tends to stale slightly faster than conventional wheat bread, but proper storage keeps it fresh and delicious for several days. The good news is that this loaf freezes beautifully, making it easy to always have gluten free bread on hand.
- Room temperature: Store the fully cooled loaf wrapped tightly in plastic wrap or in an airtight container at room temperature for up to 2 days.
- Refrigerator: For longer shelf life, wrap the loaf tightly and refrigerate for up to 5 days. Note that refrigeration can slightly firm up the crumb, so toasting slices before eating is recommended.
- Freezer: Slice the cooled loaf and lay the slices in a single layer on a baking sheet. Freeze until solid (about 1–2 hours), then transfer to a zip-top freezer bag. Frozen slices keep well for up to 3 months.
- Reheating from frozen: Toast frozen slices directly in the toaster or toaster oven — no need to thaw. They come out crisp and warm in just a couple of minutes.
- Reheating a whole loaf: Wrap the loaf in foil and warm in a 300°F (150°C) oven for 10–15 minutes until heated through.
This Chocolate Chip Bread Recipe is another great loaf to keep stocked in the freezer for sweet cravings.
Nutritional Facts
The following are approximate values per slice, based on a loaf cut into 10 slices. Exact values will vary depending on your specific flour blend and oil used.
| Nutrient | Per Slice (approx.) |
|---|---|
| Calories | 148 kcal |
| Carbohydrates | 21g |
| Protein | 5g |
| Fat | 6g |
| Saturated Fat | 1g |
| Fiber | 2g |
| Sugar | 0g |
| Sodium | 195mg |
| Cholesterol | 74mg |
These are estimated values and should be used as a general guide only. For precise nutritional data, use a nutrition calculator with your specific ingredient brands.
For a lighter breakfast bake, this Easy Protein Pancakes Recipe is another great option worth trying.
Health Benefits of Key Ingredients
This simple bread packs some genuine nutritional benefits, especially compared to heavily processed store-bought gluten free breads that often contain added sugars, starches, and preservatives.
The eggs are especially worth highlighting — they’re one of the most nutrient-dense whole foods you can cook with, and they serve a double purpose here as both a binder and a protein source.
- Eggs are a complete protein source, providing all nine essential amino acids. They also contain choline, which supports brain health, as well as vitamins D, B12, and riboflavin.
- Olive oil is rich in heart-healthy monounsaturated fats and contains powerful antioxidants, including oleocanthal, which has been studied for its anti-inflammatory properties.
- Gluten free flour blends allow people with celiac disease or gluten sensitivity to enjoy bread safely without triggering the immune response associated with gluten exposure.
- Baking powder contributes minimal calories and is naturally free from gluten, dairy, and common allergens when purchased from a certified gluten free brand.
- Eggs plus olive oil together help create a satiating, energy-sustaining slice of bread that keeps you fuller longer compared to breads made with refined carbohydrates alone.
Read Also: Gluten Free Belgian Waffle Recipe
Frequently Asked Questions
1. Can I use a different type of gluten free flour for this recipe?
Yes, but the results will vary depending on the blend. A 1:1 all-purpose gluten free flour blend that already contains xanthan gum (such as Bob’s Red Mill 1:1, King Arthur Measure for Measure, or Pillsbury Gluten Free) works best and is what this recipe is developed for.
Single-ingredient flours like almond flour or rice flour alone will not work in this recipe without significant adjustments to the ratios and binders.
2. Why is my gluten free bread gummy in the middle?
A gummy center almost always means the bread needed more time in the oven, or it was sliced too soon after baking.
Use an instant-read thermometer to confirm the internal temperature reaches 205–210°F (96–99°C) before removing from the oven, and always wait at least 30 minutes before slicing.
3. Can I make this bread without eggs?
Eggs are a critical structural ingredient in this recipe — they provide both binding and lift that replaces what gluten normally does in conventional bread.
If you need an egg-free version, try using 4 flax eggs (1 tablespoon ground flaxseed mixed with 3 tablespoons water per egg, rested for 5 minutes) as a substitute, though the texture will be slightly denser.
4. Can I add yeast to this recipe for a more traditional bread flavor?
This recipe is specifically designed as a yeast-free, quick bread. Adding yeast would change the chemistry of the recipe significantly, and the baking powder leavening would interfere with the yeast’s activity.
If you’d like a yeast-based gluten free bread, that’s a different recipe altogether and requires proofing time and different ratios.
5. How do I know when the bread is fully done?
The most reliable method is using an instant-read thermometer — the center should read between 205°F and 210°F (96–99°C).
Visually, the loaf will be deep golden brown on top, will have pulled slightly from the sides of the pan, and a skewer inserted into the center will come out completely clean with no wet batter.
For another easy bake worth exploring, this Jiffy Spoon Bread Recipe is a classic comfort food that comes together quickly.
4 Ingredient Gluten Free Bread
Equipment
- 9×5-inch loaf pan - standard size
- Large mixing bowl
- Hand mixer or stand mixer - a whisk can be used with some elbow grease
- Measuring cups and spoons
- Kitchen scale - highly recommended for accuracy with gluten free baking
- Parchment paper - for easy loaf removal
- Rubber spatula or wooden spoon
- Wire cooling rack
- Instant-read thermometer - optional – bread is done when internal temp reaches 205-210°F
Ingredients
- 2 cups gluten free all-purpose flour blend - 240g, with xanthan gum already included
- 4 large eggs - room temperature
- 1 tablespoon baking powder - 12g
- 3 tablespoons olive oil - 45ml, or melted coconut oil, or avocado oil
- fine sea salt - ½ teaspoon, optional but recommended for flavor
- warm water - ½ cup or 120ml, 100-110°F / 38-43°C
Optional Toppings
- flaky sea salt - for sprinkling on top before baking
- sesame seeds - for sprinkling on top before baking
- sunflower seeds - for sprinkling on top before baking
Instructions
- Preheat oven to 375°F (190°C). Line a 9×5 inch loaf pan with parchment paper, leaving overhang on long sides. Lightly spray or brush with oil.
- In a large bowl, whisk together 2 cups (240g) gluten free flour, 1 tablespoon (12g) baking powder, and ½ teaspoon fine sea salt until evenly distributed.
- Create a well in the center of dry ingredients. Add 4 room-temperature eggs and 3 tablespoons (45ml) olive oil. Beat on medium speed for 30 seconds until combined.
- With mixer running on low, slowly pour in ½ cup (120ml) warm water. Increase speed to medium and beat for 1-2 minutes until batter is smooth and well combined.
- Pour batter into prepared loaf pan and smooth the top with a spatula. Sprinkle with optional toppings if desired.
- Bake on center rack for 40-45 minutes until deep golden brown and bread pulls from pan sides. Internal temperature should reach 205-210°F (96-99°C) when done.
- Remove from oven and let rest in pan for 10 minutes. Use parchment to lift loaf out and transfer to wire rack. Cool for at least 30 minutes before slicing.
Notes
- Flour choice: Use a quality gluten free all-purpose flour blend that already contains xanthan gum, such as Bob’s Red Mill 1:1 or King Arthur Measure for Measure.
- Measure accurately: Weigh your flour using a kitchen scale for the most consistent results. Gluten free flours can compact significantly when measured by volume.
- Room temperature eggs: Cold eggs don’t emulsify as well and can make the batter lumpy. Place cold eggs in warm water for 5 minutes to bring them to room temperature quickly.
- Don’t skip cooling: Allow the bread to cool completely for at least 30 minutes before slicing. Slicing too early will result in a gummy, underdone texture.
- Check for xanthan gum: If your flour blend doesn’t include xanthan gum, add ½ teaspoon to the dry ingredients or the bread may crumble.
- Storage: Store wrapped tightly at room temperature for up to 2 days, refrigerate for up to 5 days, or freeze sliced for up to 3 months.
- Reheating: Toast frozen slices directly from the freezer. For a whole loaf, wrap in foil and warm at 300°F for 10-15 minutes.
- Flavor variations: Add 1 teaspoon garlic powder and 1 tablespoon dried herbs for savory bread, or fold in ½ cup shredded cheese before baking.
- No yeast needed: This is a quick bread that relies on baking powder and eggs for leavening, requiring no rising time whatsoever.
- Dairy free: This recipe is naturally dairy free when made with olive oil, avocado oil, or coconut oil.
Final Thoughts
This 4 ingredient gluten free bread recipe proves that eating gluten free doesn’t mean settling for something less.
With a handful of pantry staples and under an hour of your time, you can have a fresh, soft, sliceable loaf sitting on your counter — no specialty skills required.
The recipe is endlessly adaptable, freezer-friendly, and genuinely satisfying in a way that store-bought gluten free bread rarely is.
Give it a try, and don’t be surprised when it becomes a weekly staple.
I’d love to hear how it turns out for you — drop a comment below with your experience or any fun variations you tried. And if you share it, tag us so we can see your beautiful loaves!
Recommended:
- Sweet Sourdough Bread Recipe
- Einkorn Bread Recipe
- Fresh Milled Flour Bread Recipe
- Manna Bread Recipe
- Same Day Sourdough Bread Recipe
- Sweet Potato Bread Recipe
- Pineapple Quick Bread Recipe
- Old Fashioned Pumpkin Bread Recipe
- Banana Nut Bread Recipe Without Flour
- Cracklin Bread Recipe


