If you’ve been searching for the perfect buttermilk Belgian waffle recipe, your weekend mornings are about to get a whole lot better.
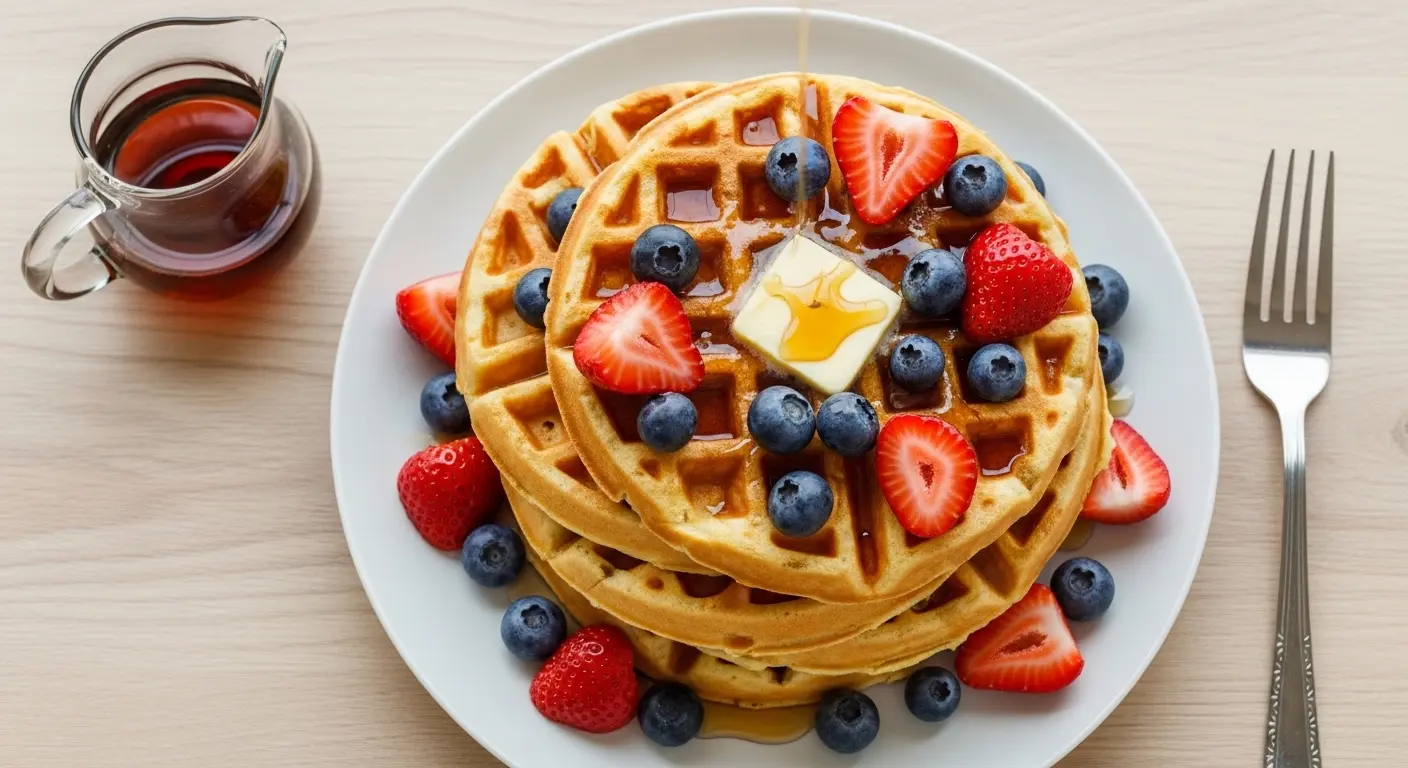
These waffles are thick, golden, and deeply pocketed — the kind that hold pools of maple syrup and melted butter in every square. The secret is in the buttermilk, which adds a subtle tangy flavor while reacting with baking soda to give the batter that signature lift.
Unlike thinner, crispier everyday waffles, Belgian waffles have a lighter, airier interior with a satisfying crunch on the outside. That texture comes from a slightly more aerated batter and a deeper waffle iron grid.
What makes this version even better is that it’s genuinely simple to make. No yeast, no fancy techniques, and no complicated timing — just a reliable, crowd-pleasing batter that comes together in minutes.
Whether you’re making breakfast for the family or treating yourself on a slow Sunday morning, this recipe delivers every single time.
For another fluffy morning classic, you’ll love this Belgian Waffle Recipe as a great companion to this one.
Why You’ll Love This Buttermilk Belgian Waffle Recipe
This recipe checks every box for a perfect waffle.
The batter uses real buttermilk, which adds a light tang and makes the inside incredibly tender — not dense or gummy. The slightly acidic buttermilk also reacts with the baking soda to create extra lift, giving each waffle that fluffy, cloud-like interior.
The recipe calls for separating the eggs and whipping the whites to stiff peaks before folding them in.
This extra step is what sets this waffle apart from most basic recipes. Those whipped egg whites trap air in the batter, making the cooked waffle lighter and more delicate inside, while the outside stays beautifully crispy.
The deep grid of a Belgian waffle iron creates pockets that hold toppings better than any regular waffle can.
Every bite gets syrup, butter, or fruit in it — and that’s the point.
- Made with real buttermilk for a rich, tangy flavor
- Crispy outside and fluffy inside with the perfect texture contrast
- Uses whipped egg whites for an extra-light, airy interior
- Easy to make with simple pantry ingredients
- Batter comes together in about 10 minutes
- Freezer-friendly for quick weekday breakfasts
- Customizable with your favorite mix-ins and toppings
You might also enjoy: Easy Waffle Recipe
Ingredients
This batter uses pantry staples you likely already have on hand, plus a few that make all the difference in achieving that signature Belgian waffle texture.
- 2 cups (240g) all-purpose flour
- 2 tablespoons granulated sugar
- 2 teaspoons baking powder
- ½ teaspoon baking soda
- ½ teaspoon salt
- 2 cups (480ml) buttermilk, at room temperature
- ½ cup (115g) unsalted butter, melted and slightly cooled
- 2 large eggs, separated (yolks and whites divided)
- 1 teaspoon pure vanilla extract
- Non-stick cooking spray or melted butter, for greasing the iron
Read Also: Buttermilk Pancake Recipe
Kitchen Equipment Needed
You don’t need much specialized equipment for this recipe, but having the right tools will make the process smoother and ensure better results.
- Belgian waffle maker (deep-grid style, not a standard waffle iron)
- 2 large mixing bowls
- Electric hand mixer or stand mixer (for whipping egg whites)
- Whisk
- Rubber spatula
- Ladle or measuring cup for portioning batter
- Pastry brush or paper towels (for greasing the iron)
- Wire cooling rack (to keep finished waffles crispy)
Read Also: Cracker Barrel Pancake Recipe
Recommended Products for This Recipe
These are a few products I genuinely recommend based on quality and performance. Using the right tools makes a noticeable difference in your final result.
1. Cuisinart Deep-Dish Belgian Waffle Maker
A deep-grid Belgian waffle maker is non-negotiable for this recipe. It creates those signature thick, deep pockets that hold toppings and give the waffle its classic look. A quality model heats evenly so you get consistent browning with no burnt edges.
2. KitchenAid Hand Mixer
Whipping egg whites to stiff peaks is the key step that sets this recipe apart. A good electric hand mixer makes it effortless and ensures the whites are properly aerated. Doing this by hand is possible but takes much longer.
3. Organic Pure Vanilla Extract
Vanilla extract is a supporting flavor in these waffles, but using a high-quality pure extract (rather than imitation) gives the batter a noticeably warmer, more complex flavor. A small bottle goes a long way.
4. Silicone Pastry Brush
A silicone pastry brush is ideal for greasing your waffle iron evenly with melted butter or oil between each waffle. It gives better coverage than a paper towel and won’t shed bristles into your food.
This technique works wonderfully when making Pumpkin Pancakes too — the same care with equipment and prep produces consistent, beautiful results every time.
Step-by-Step Instructions
1. Preheat Your Waffle Iron
- Turn on your Belgian waffle maker and allow it to preheat fully before adding any batter.
- Most models have an indicator light that signals when they’ve reached the right temperature — wait for that light before proceeding.
- A properly preheated iron is critical. Adding batter to a cold or warm-but-not-hot iron produces pale, soft waffles rather than crispy, golden ones.
- Once preheated, lightly grease the top and bottom plates with non-stick cooking spray or brush them with melted butter using a silicone pastry brush.
2. Mix the Dry Ingredients
- In a large mixing bowl, add 2 cups (240g) of all-purpose flour.
- Add 2 tablespoons of granulated sugar.
- Add 2 teaspoons of baking powder and ½ teaspoon of baking soda. Both leaveners work together: the baking powder provides general lift, while the baking soda specifically reacts with the acidic buttermilk for extra rise.
- Add ½ teaspoon of salt.
- Whisk all the dry ingredients together until fully combined and no lumps remain. Set this bowl aside.
3. Separate and Whip the Egg Whites
- Carefully separate your 2 large eggs, placing the yolks in one small bowl and the whites in a clean, completely dry large mixing bowl. Any fat or moisture in the whites’ bowl (including traces of yolk) will prevent them from whipping properly.
- Using an electric hand mixer or stand mixer, beat the egg whites on medium-high speed until they reach stiff peaks. This means when you lift the beaters, the peaks stand straight up without drooping.
- This step typically takes 2 to 3 minutes. Stiff peaks, not soft or foamy, are what you’re after — this is what creates the waffle’s light, airy interior.
- Set the whipped whites aside. Do not let them sit for too long, as they can begin to deflate.
4. Make the Wet Mixture
- To the bowl containing the egg yolks, add 2 cups (480ml) of buttermilk. Room temperature buttermilk blends more smoothly than cold.
- Add ½ cup (115g) of melted, slightly cooled unsalted butter. Make sure the butter isn’t too hot when you add it — hot butter can scramble the egg yolks.
- Add 1 teaspoon of pure vanilla extract.
- Whisk the yolk mixture together until smooth and fully combined.
5. Combine Wet and Dry Ingredients
- Pour the wet yolk mixture into the bowl with the dry ingredients.
- Using a whisk or rubber spatula, stir together until just combined. Stop mixing as soon as no dry streaks of flour remain.
- It’s completely normal and expected for the batter to be slightly lumpy. Overmixing activates the gluten in the flour and results in tough, dense waffles rather than tender, fluffy ones.
- A few small lumps in the batter are a good sign.
6. Fold In the Whipped Egg Whites
- Add the whipped egg whites to the batter bowl.
- Using a rubber spatula, gently fold the egg whites in. To fold properly: slide the spatula down the center of the bowl, then sweep it up along the side in a gentle arc, rotating the bowl as you go.
- Do this slowly and deliberately, folding until just incorporated. You should not see large streaks of white, but don’t overmix — you want to preserve as much of that air as possible.
- The batter will look slightly thicker and more voluminous than a typical pancake batter. That’s exactly right.
7. Cook the Waffles
- Ladle or pour the batter onto the center of the preheated, greased waffle iron. The exact amount depends on the size of your iron — typically about ¾ cup (180ml) to 1 cup (240ml) per waffle for a standard Belgian iron.
- Spread it slightly with the ladle if needed, but don’t overfill. The batter will spread as the lid closes and presses down.
- Close the lid firmly and cook according to your waffle iron’s instructions — usually 4 to 6 minutes, until the waffle is deep golden and steam has stopped escaping from the sides of the iron.
- Do not open the iron prematurely. Opening too soon can cause the waffle to tear apart or stick, since it hasn’t fully set yet.
- Once the steam has significantly reduced and the indicator light (if your iron has one) signals readiness, open the iron and carefully remove the waffle using a fork or tongs.
8. Keep Warm and Crispy Until Serving
- Place finished waffles in a single layer on a wire cooling rack set on a baking sheet.
- If serving multiple waffles, place the rack and baking sheet in an oven set to 200°F (95°C) to keep them warm without getting soggy.
- Avoid stacking hot waffles directly on a plate — the steam they release gets trapped between them, turning the bottoms soft.
- Repeat the greasing and cooking process with the remaining batter.
The same technique for keeping things warm and crispy applies beautifully if you ever make Air Fryer French Toast — resting it on a wire rack makes all the difference.
Tips for Success
A few small habits can make the difference between good waffles and truly great ones.
- Don’t skip the egg white step. Whipping egg whites to stiff peaks is the key to that signature light, airy interior. If you skip it, the waffles will still taste good but will be denser.
- Use room temperature buttermilk. Cold buttermilk won’t blend as smoothly with the other wet ingredients and can result in a lumpy, uneven batter.
- Don’t overmix the batter. Stir just until no dry streaks remain. Overmixing develops gluten and leads to tough waffles. Lumps in the batter are totally fine.
- Grease the iron between each waffle. Even non-stick irons benefit from a light coating of butter or spray to prevent sticking and encourage browning.
- Wait for the steam to stop. Steam escaping from the iron means moisture is still cooking off. When it slows significantly, your waffle is done — don’t rush it.
- Use a wire rack to keep waffles crispy. Stacking hot waffles traps steam and makes them soggy. A single layer on a rack in a warm oven keeps them perfectly crispy.
- Measure flour correctly. Spoon flour into your measuring cup and level it off with a knife rather than scooping directly from the bag, which compacts the flour and can add too much.
For a heartier breakfast spread, consider pairing these with a Breakfast Skillet.
Serving Suggestions
These waffles are endlessly versatile, and the deep pockets make every topping combination even better.
The most classic way to serve them is simply with real maple syrup and a pat of salted butter. The butter melts into the pockets while the syrup pools around it — simple, perfect, and hard to beat.
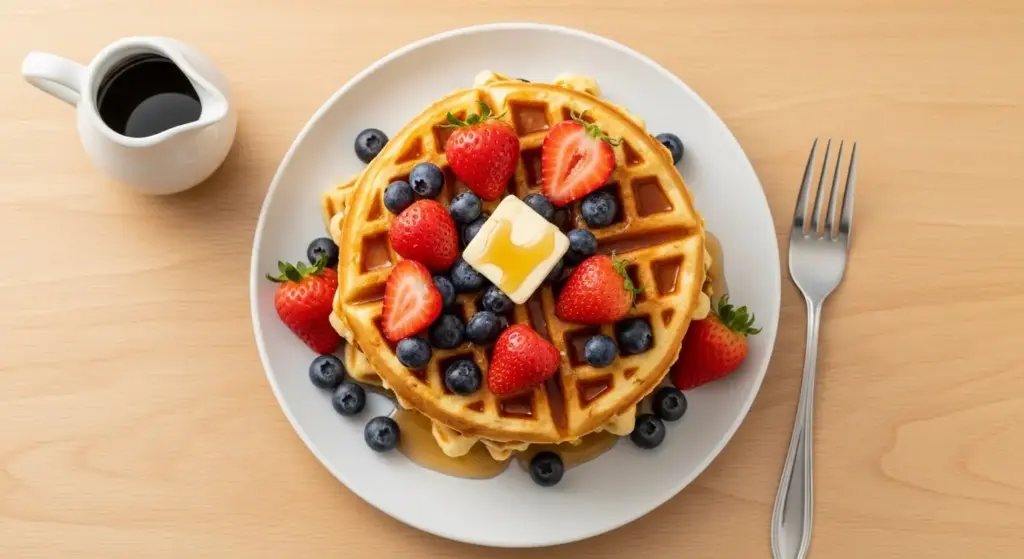
If you want to go a little fancier, top them with fresh strawberries or blueberries, a dollop of whipped cream, and a drizzle of honey. The tangy batter complements fresh fruit beautifully.
For a truly indulgent breakfast, try them topped with a drizzle of homemade Honey Butter — it melts right into the warm waffle and takes the whole thing to another level.
- Fresh mixed berries and lightly sweetened whipped cream
- Sliced bananas with peanut butter and a drizzle of honey
- Classic maple syrup and salted butter
- Warm Strawberry Sauce and powdered sugar
- Crispy bacon and a fried egg for a savory sweet combo
- Nutella and sliced strawberries
- Caramel Sauce with toasted pecans and vanilla ice cream for a dessert waffle
Variations to Try
Once you’ve mastered the base recipe, it’s easy to customize the batter to suit any mood or craving.
- Blueberry Buttermilk Belgian Waffles: Gently fold ¾ cup (110g) of fresh or frozen blueberries into the finished batter just before cooking. Frozen blueberries work great — no need to thaw them, though they may tint the batter slightly purple.
- Chocolate Chip Waffles: Stir ½ cup (85g) of mini chocolate chips into the batter after folding in the egg whites. Mini chips distribute more evenly than regular sized ones.
- Lemon Poppy Seed Waffles: Add 1 tablespoon of poppy seeds and the zest of 1 large lemon to the batter for a bright, citrusy twist.
- Cinnamon Spice Waffles: Add 1 teaspoon of ground cinnamon and ¼ teaspoon of ground nutmeg to the dry ingredients for a warm, cozy flavor.
- Whole Wheat Buttermilk Belgian Waffles: Substitute up to half the all-purpose flour (1 cup / 120g) with whole wheat flour. The waffles will be slightly denser but have a nutty, hearty flavor.
- Savory Herb Waffles: Omit the sugar and vanilla, and stir in ¼ cup of shredded cheddar cheese, 1 tablespoon of chopped fresh chives, and a pinch of garlic powder. Serve with eggs and sausage gravy.
Another favorite breakfast variation to explore is this Easy French Toast Recipe — the same pantry ingredients take you in a completely different direction.
Storage and Reheating
Leftover waffles are a fantastic make-ahead breakfast option, and they reheat surprisingly well.
- Refrigerator: Allow waffles to cool completely on a wire rack before storing. Layer them between sheets of parchment paper in an airtight container and refrigerate for up to 3 days.
- Freezer: Freeze cooled waffles in a single layer on a baking sheet until solid, about 1 to 2 hours. Then transfer to a zip-top freezer bag with parchment paper between each waffle. Freeze for up to 3 months.
- Reheating in the toaster: Pop a refrigerated or frozen waffle directly into the toaster and toast until crispy and heated through. This is the best method for restoring the exterior crunch.
- Reheating in the oven: Place waffles on a wire rack set on a baking sheet in a 350°F (175°C) oven for 8 to 10 minutes from refrigerated, or 12 to 15 minutes from frozen.
- Avoid the microwave: Microwaving makes waffles soft and rubbery rather than crispy. It works in a pinch but the texture won’t be the same.
Read Also: Breakfast Casserole Recipe
Nutritional Facts
The following nutritional information is an estimate per waffle, based on a recipe that makes approximately 4 large Belgian waffles. Toppings are not included.
| Nutrient | Amount Per Waffle |
|---|---|
| Calories | ~410 kcal |
| Total Fat | 18g |
| Saturated Fat | 10g |
| Cholesterol | 135mg |
| Sodium | 490mg |
| Total Carbohydrates | 52g |
| Dietary Fiber | 1g |
| Total Sugars | 9g |
| Protein | 10g |
| Calcium | 190mg |
| Iron | 3mg |
Values are estimates and may vary depending on specific ingredients and exact portions used. For precise tracking, use a nutritional calculator with your exact brands and measurements.
Another great breakfast option for tracking nutrition is Baked Oatmeal — it’s satisfying, easy to portion, and packed with fiber.
Health Benefits of Key Ingredients
This recipe uses simple, real ingredients that each bring something nutritional to the table alongside their flavor contributions.
While waffles are a treat food rather than a health food, they don’t have to be empty calories — and understanding what each ingredient contributes gives you a clearer picture of what you’re eating.
Buttermilk is lower in fat than regular milk and provides calcium, phosphorus, and probiotics. The live cultures in cultured buttermilk support gut health and aid digestion. Its acidity also makes baked goods more tender without adding extra fat.
Eggs are one of the most nutrient-dense foods available. They provide high-quality complete protein with all nine essential amino acids, along with B vitamins, choline for brain function, and fat-soluble vitamins like A, D, and E.
Real butter (in moderate amounts) contributes fat-soluble vitamins A and K2 and adds richness that makes the waffle more satiating.
- Buttermilk provides calcium and protein with less fat than whole milk, plus gut-supporting probiotics
- Eggs deliver complete protein, choline, vitamin D, and essential amino acids for muscle repair and energy
- Real butter supplies vitamins A and K2, and helps the body absorb fat-soluble nutrients from other foods
- All-purpose flour provides carbohydrates for quick energy and some B vitamins from enriched flour
- A swap to whole wheat flour increases fiber and mineral content significantly
Read Also: Easy Protein Pancakes Recipe
Frequently Asked Questions
1. Can I make the batter ahead of time?
You can mix the dry and wet ingredients separately the night before, but it’s best to whip and fold in the egg whites right before cooking.
Pre-mixed batter with egg whites will lose its airiness overnight in the fridge, resulting in flatter, denser waffles. Storing the components separately and combining them in the morning takes only a couple of extra minutes.
2. What if I don’t have buttermilk?
You can make a quick homemade substitute by adding 1 tablespoon of white vinegar or fresh lemon juice to a measuring cup, then filling it to the 2-cup (480ml) mark with regular whole milk.
Stir it briefly and let it sit for 5 minutes. The milk will curdle slightly, creating a reasonable substitute. It won’t be quite identical to true buttermilk, but it works well in this recipe.
3. Why are my waffles not crispy?
The most common reasons are opening the waffle iron too soon, not preheating the iron fully, or adding too little fat to the batter.
Make sure to wait until the steam from the iron slows down significantly before opening it. Also check that you’re using the full ½ cup of butter — fat is essential for crispy edges.
4. Can I use a regular waffle iron instead of a Belgian waffle iron?
Yes, but the results will be different. A standard waffle iron has shallower grids and produces thinner waffles that crisp up faster.
If using a standard iron, reduce the amount of batter per waffle and check for doneness earlier — probably around 3 to 4 minutes. The texture will be crispier overall, but the waffles won’t have the thick, fluffy interior that defines a Belgian-style waffle.
5. Can I make this recipe gluten-free?
Yes, with some adjustments. Substitute the all-purpose flour with a 1:1 gluten-free baking flour blend that contains xanthan gum (such as Bob’s Red Mill or King Arthur’s Measure for Measure).
The batter may be slightly different in consistency, and you may need to add a tablespoon or two more buttermilk to reach the right thickness. The waffles may also need a slightly longer cook time.
Read Also: French Toast Casserole Recipe
Final Thoughts
This buttermilk Belgian waffle recipe is the kind of breakfast that turns a regular morning into something special.
The combination of real buttermilk, whipped egg whites, and real butter creates a waffle that’s genuinely worth making from scratch. Crispy on the outside, soft and airy on the inside, with just a hint of tang — it checks every box.
Give this recipe a try this weekend and see for yourself. If you make it, leave a comment below to let me know how it went, and share your favorite toppings — I’d love to hear how you served yours!
Recommended:
- Easy Waffle Recipe
- Gluten Free Pancake Recipe
- Old Fashioned Pancake Recipe
- German Pancake Recipe
- IHOP Pancake Recipe
- Classic French Toast Recipe
- Sausage Gravy Recipe
- Scrambled Eggs Recipe
- Breakfast Potatoes Recipe
- Basic Crepe Recipe
