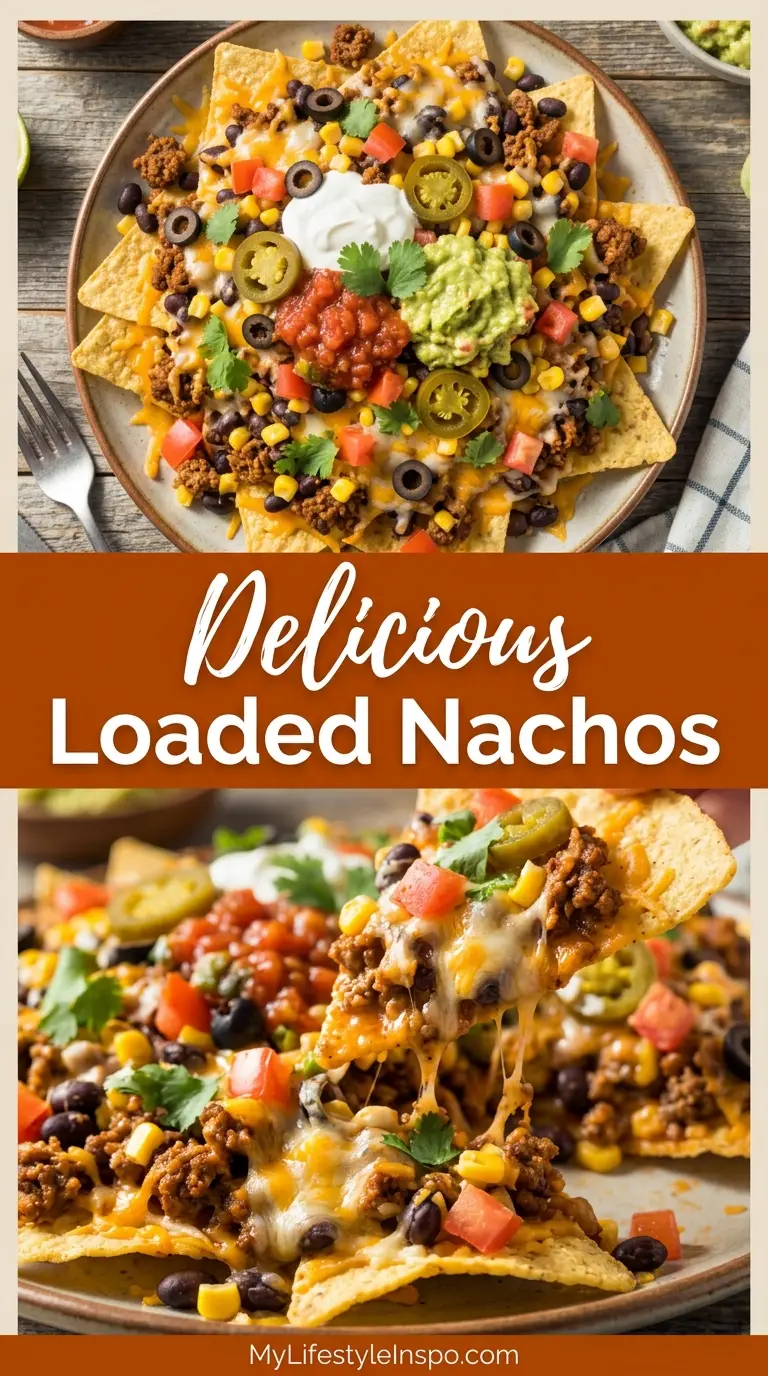
Crispy tortilla chips piled high with seasoned ground beef, melted cheese, and all your favorite toppings make the perfect crowd-pleasing appetizer or meal. This loaded nachos recipe delivers restaurant-quality results right in your own kitchen, transforming simple ingredients into an irresistible platter that disappears in minutes.
Game day gatherings, movie nights, or casual dinners all call for something shareable and satisfying. The beauty of nachos lies in their versatility and the fact that every bite can be customized to your liking.
You can control the heat level, choose your favorite cheese blend, and pile on as many toppings as your heart desires. The best part is that this recipe comes together in under 30 minutes, making it an ideal choice when you need to feed a hungry crowd without spending hours in the kitchen.
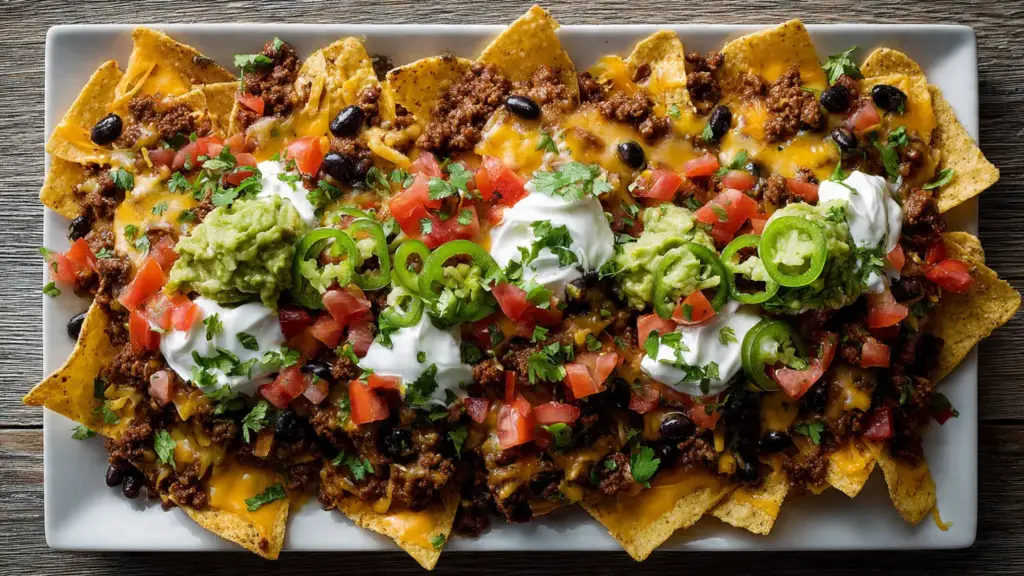
The secret to truly exceptional nachos is all about the layering technique. Rather than dumping everything on top of a pile of chips, building multiple layers ensures that each chip gets its fair share of toppings. This method prevents the dreaded soggy bottom chips while guaranteeing that every handful delivers the perfect combination of crunch, savory meat, gooey cheese, and fresh garnishes.
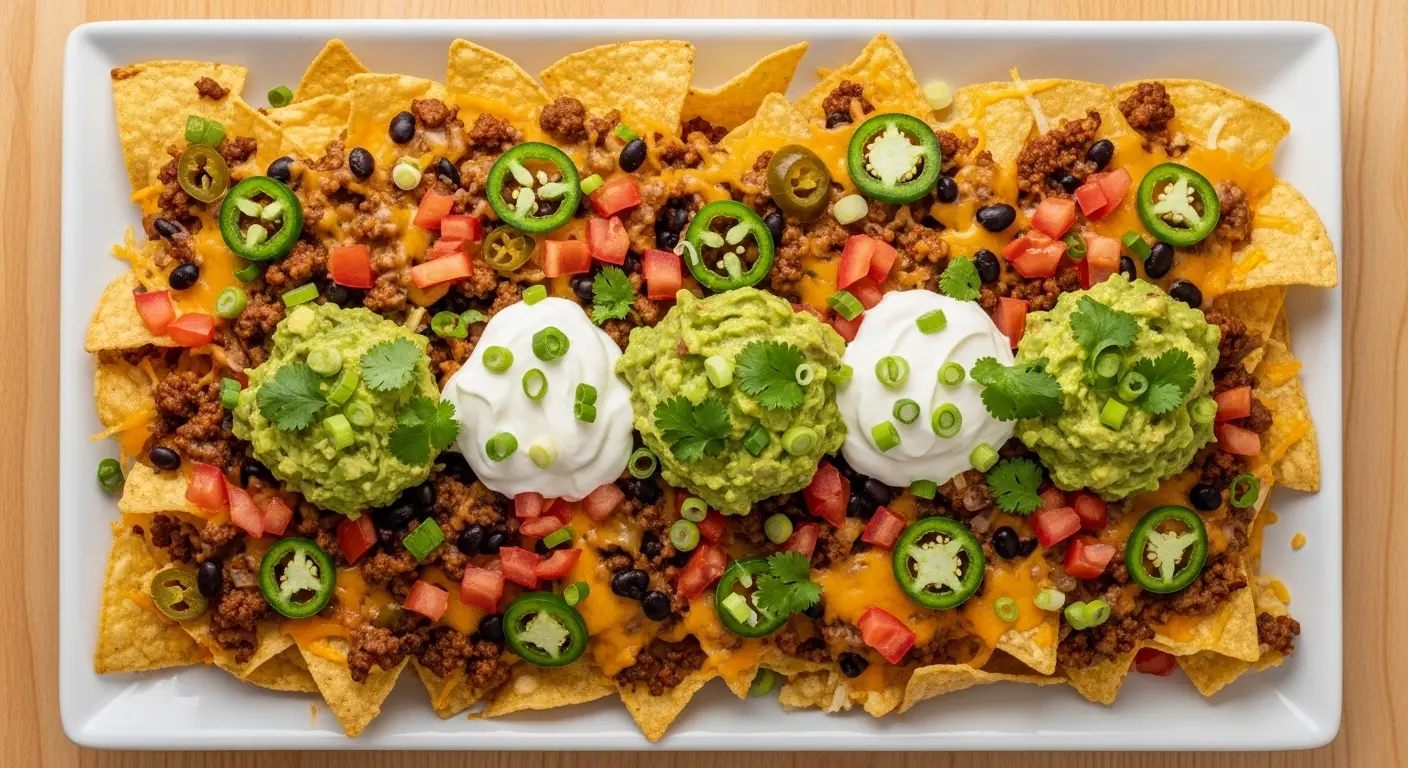
This loaded nachos recipe combines perfectly seasoned ground beef with black beans, multiple cheese layers, and a colorful array of fresh toppings. The seasoned beef mixture gets cooked with taco spices and a touch of liquid to keep it moist and flavorful. The cheese melts into every crevice, creating those irresistible cheese pulls we all crave.
Fresh toppings added after baking provide a cool, crisp contrast to the hot, melty layers underneath. From creamy sour cream and guacamole to bright pico de gallo and sliced jalapeños, these finishing touches transform a simple snack into something truly special.
If you love customizable, shareable dishes, you might also enjoy this Easy Nachos Recipe.
Why You’ll Love This Loaded Nachos Recipe
This recipe takes the guesswork out of making perfect nachos every time. The layering method ensures even distribution of toppings, so nobody gets stuck with plain chips.
The combination of seasoned ground beef and beans creates a hearty, protein-packed base that turns these nachos into a complete meal. The beef stays moist and flavorful thanks to the cooking technique that includes simmering with spices and liquid.
Here’s what makes this recipe a keeper:
- Ready in 30 minutes from start to finish, perfect for last-minute gatherings or weeknight dinners
- Feeds a crowd easily with one sheet pan serving 6-8 people as an appetizer or 4-6 as a main dish
- Completely customizable to accommodate different heat preferences, dietary restrictions, and topping preferences
- Minimal cleanup with just one skillet for the meat and one sheet pan for baking
- Budget-friendly using affordable, readily available ingredients that won’t break the bank
- Kid-approved with the option to adjust spice levels and let everyone customize their portion
- Perfect for meal prep since you can prepare the beef mixture ahead and assemble when ready to eat
You might also enjoy: Taco Skillet Recipe
Ingredients
This recipe calls for simple, accessible ingredients that you can find at any grocery store. The ingredient list is divided into components to make shopping and preparation easier.
For the Seasoned Beef:
- 1 pound (450g) ground beef, 80/20 blend for best flavor
- 1 small onion, finely diced (about ½ cup)
- 2 cloves garlic, minced
- 2 tablespoons taco seasoning (homemade or store-bought)
- ½ cup (120ml) water
- 1 can (15 ounces/425g) black beans, drained and rinsed
- Salt and black pepper to taste
For the Nacho Base:
- 12 ounces (340g) tortilla chips, sturdy restaurant-style
- 3 cups (340g) shredded cheese blend (cheddar and Monterey Jack), divided
- ½ cup (75g) sliced black olives (optional)
- ½ cup (75g) pickled jalapeño slices (more or less to taste)
For Fresh Toppings:
- 1 cup (150g) diced tomatoes (about 2 medium tomatoes)
- ½ cup (50g) diced red onion
- 1 cup (240ml) sour cream
- 1 cup (240ml) guacamole or 2 diced avocados
- ½ cup (20g) fresh cilantro, chopped
- 2 green onions, thinly sliced
- Salsa for serving
- Lime wedges for serving
Read Also: Classic Guacamole Recipe
Kitchen Equipment Needed
Having the right tools makes assembling these loaded nachos quick and effortless. Most of these items are kitchen basics you likely already own.
- Large rimmed baking sheet (18×13 inches) for even heat distribution and preventing spills
- Parchment paper or aluminum foil for easy cleanup
- Large skillet (12 inches) for browning the beef
- Wooden spoon or spatula for breaking up the meat
- Sharp knife and cutting board for prep work
- Measuring cups and spoons for accurate seasoning
- Cheese grater if using block cheese (freshly grated melts better)
- Small bowls for organizing toppings
For a lighter option, try: Air Fryer French Bread Pizza Recipe
Recommended Products for This Recipe
These carefully selected products will help you create the best loaded nachos with less effort and better results.
1. Wilton Recipe Right Non-Stick Baking Sheet
This heavy-duty baking sheet distributes heat evenly across the entire surface, ensuring your nachos get crispy edges without burning. The non-stick coating makes cleanup a breeze, even with melted cheese. The raised rim prevents toppings from sliding off during transfer.
2. Ortega Taco Seasoning Mix
This seasoning blend delivers authentic Mexican flavors with the perfect balance of spices, cumin, and a touch of heat. It eliminates the need to measure individual spices while providing consistent, delicious results every time. The convenient packets ensure you never run out mid-recipe.
3. Mission Restaurant Style Tortilla Chips
These thick, sturdy chips stand up to heavy toppings without breaking or becoming soggy. The restaurant-style cut and texture provide the perfect vehicle for loaded nachos. Their slightly salted flavor complements the toppings without overpowering them.
4. Tillamook Mexican Blend Shredded Cheese
This premium cheese blend melts smoothly and evenly without separating or becoming greasy. The combination of cheddar, Monterey Jack, and other cheeses creates the perfect flavor profile for nachos. Pre-shredded convenience saves time while maintaining quality.
Another favorite: Cheeseburger Skillet Recipe
Step-by-Step Instructions
Follow these detailed instructions to create perfect loaded nachos with crispy chips, flavorful meat, and melted cheese in every bite.
1. Prepare Your Ingredients and Preheat the Oven
- Preheat your oven to 400°F (200°C) to ensure it reaches the proper temperature by the time you’re ready to bake
- Line a large rimmed baking sheet with parchment paper or aluminum foil for easy cleanup and to prevent sticking
- Dice the tomatoes, onions, and any other fresh toppings you plan to use, placing them in separate small bowls
- Drain and rinse the black beans in a colander, shaking off excess water
- Shred your cheese if using block cheese, or measure out the pre-shredded cheese and divide it into portions (you’ll need it in layers)
- Gather all your toppings and arrange them near your workspace for easy access during assembly
2. Cook the Seasoned Ground Beef
- Heat a large skillet over medium-high heat and add the ground beef, breaking it up with a wooden spoon or spatula
- Add the diced onion to the beef and cook together, stirring occasionally to prevent sticking
- Continue cooking for 7-10 minutes until the beef is browned and no pink remains, breaking up any large chunks as it cooks
- If your beef has excessive fat (more than 2 tablespoons), drain the excess grease by carefully tilting the pan and spooning it out
- Add the minced garlic and cook for 30 seconds until fragrant, stirring constantly to prevent burning
- Sprinkle the taco seasoning over the meat and stir to coat everything evenly
- Pour in the water and bring the mixture to a simmer, allowing the liquid to reduce and the flavors to meld
- Add the drained black beans and stir to combine with the beef mixture
- Simmer for 4-5 minutes until most of the liquid has evaporated but the mixture is still moist, not dry
- Taste and adjust seasoning with salt and pepper if needed
- Remove from heat and set aside
3. Build the First Layer of Nachos
- Spread about one-third of the tortilla chips across the prepared baking sheet in a relatively even layer, leaving some gaps between chips
- Spoon half of the beef and bean mixture over the chips, distributing it as evenly as possible
- Don’t worry about covering every chip; uneven distribution will be corrected in subsequent layers
- Sprinkle 1 cup of the shredded cheese over the beef layer, letting it fall into the gaps between chips
- Add half of the sliced jalapeños and black olives if using, scattering them across the layer
- This first layer creates the foundation for your nachos, so make sure the chips aren’t too tightly packed
4. Add the Second Layer
- Add another third of the tortilla chips on top of the first layer, again distributing them somewhat evenly
- Top with the remaining beef and bean mixture, spreading it across the chips
- Sprinkle another 1 cup of cheese over this layer, ensuring good coverage
- Add the remaining jalapeños and olives, if using
- This middle layer is crucial for ensuring every bite has toppings, not just the top layer
5. Create the Final Layer and Bake
- Distribute the final third of tortilla chips over the top of the nachos
- Sprinkle the remaining 1 cup of cheese over the entire surface, making sure to get some cheese on the edges where chips might be exposed
- The top layer of cheese will brown slightly in the oven, creating an appealing golden color
- Place the baking sheet in the preheated oven on the middle rack
- Bake for 8-10 minutes, watching carefully after 8 minutes to prevent burning
- The nachos are done when the cheese is completely melted and bubbly throughout and the edges of some chips are just beginning to brown
- Remove from the oven and let rest for 1-2 minutes to allow the cheese to set slightly, making it easier to serve
6. Add Fresh Toppings and Serve
- Working quickly while the nachos are still hot, add dollops of sour cream across the surface
- Scatter the diced tomatoes, red onions, and green onions over the top
- Add spoonfuls of guacamole or scatter diced avocado across the nachos
- Sprinkle fresh cilantro over everything for a burst of color and fresh flavor
- Serve immediately while hot, with salsa and lime wedges on the side
- Encourage guests to squeeze fresh lime juice over their portion for added brightness
- Provide serving spoons or a large spatula to help guests scoop their portions onto plates
You might also enjoy: Mexican Beef and Rice Skillet Recipe
Tips for Success
These professional tips will help you avoid common pitfalls and create the best loaded nachos every time.
Choose the Right Chips Use sturdy, restaurant-style tortilla chips that can support heavy toppings. Thin chips will become soggy quickly. Look for chips labeled “restaurant-style” or “cantina-style” for best results.
- Don’t overcrowd the layers; leave some space between chips for cheese and toppings to settle in
- Avoid using flavored chips like lime or ranch, as they can clash with the taco seasonings
- Consider warming the chips in the oven for 2-3 minutes before building the nachos for extra crispiness
- If chips seem stale, a quick toast in the oven at 350°F for 3-4 minutes will revive them
- Pat diced vegetables with paper towels to remove excess moisture before adding them to prevent soggy nachos
- Cook the beef mixture until most liquid has evaporated to prevent the nachos from getting watery
- Shred your own cheese from a block rather than buying pre-shredded for better melting and less clumping
- Add delicate toppings like lettuce, fresh tomatoes, and avocado only after baking to maintain their texture and temperature
- Don’t skip the layering process; it’s the key to ensuring every chip gets toppings
- Keep a close eye on the nachos during the last 2 minutes of baking to prevent burning
- Let the nachos rest for 1-2 minutes after baking so the cheese sets slightly and makes serving easier
- Serve immediately after adding fresh toppings; nachos wait for no one and are best enjoyed piping hot
Read Also: Cowboy Skillet Recipe
Serving Suggestions
These loaded nachos shine as both an appetizer and a main course, with endless possibilities for complementary dishes and beverages.
Serve these nachos as the star of your game day spread alongside other crowd-pleasing appetizers. They pair beautifully with cooling dips and fresh sides that balance the richness of the cheese and meat.
For beverages, ice-cold beer, margaritas, or Mexican sodas complement the flavors perfectly. Non-alcoholic options like horchata, Jamaica, or sparkling water with lime wedges work just as well.
Here are some delicious serving ideas:
- As an appetizer for 6-8 people before a Mexican-inspired dinner
- Game day platter paired with Buffalo Chicken Dip and Jalapeño Poppers
- Movie night dinner with a simple side salad to round out the meal
- Taco bar companion alongside Street Tacos and Quesadillas
- Party centerpiece with various salsas including Pico de Gallo and Corn Salsa
- Casual dinner served with Mexican Rice and Refried Beans on the side
- Build-your-own station where guests customize their own portion with different toppings
- Brunch option topped with scrambled eggs and served with breakfast sides
This pairs beautifully with Mexican Street Corn Recipe for a complete meal.
Variations to Try
One of the best things about nachos is their adaptability to different tastes, dietary needs, and ingredients you have on hand.
Protein Swaps Ground beef is classic, but don’t be afraid to experiment with other proteins. Shredded chicken, carnitas, chorizo, or ground turkey all work beautifully. Vegetarians can use seasoned black beans or pinto beans as the main protein, or try crumbled tofu seasoned with taco spices.
Here are some delicious variations:
- BBQ Chicken Nachos: Replace beef with shredded rotisserie chicken tossed in BBQ sauce, top with cheddar and red onions
- Breakfast Nachos: Use scrambled eggs, crumbled bacon or sausage, cheese, and top with salsa and avocado
- Vegetarian Loaded Nachos: Skip the meat and double the beans, add grilled vegetables like bell peppers and zucchini
- Pulled Pork Nachos: Use leftover pulled pork instead of ground beef for a smoky, tender topping
- Steak Nachos: Top with sliced grilled steak, queso blanco, and pickled jalapeños for an upscale version
- Hawaiian Nachos: Add pineapple chunks and use ham or Canadian bacon with teriyaki-seasoned beef
- Buffalo Chicken Nachos: Toss shredded chicken in buffalo sauce, top with blue cheese crumbles and ranch drizzle
- Seafood Nachos: Use grilled shrimp or fish, add mango salsa and cilantro-lime crema
- Vegan Nachos: Use plant-based meat alternative or seasoned lentils, cashew queso, and vegan sour cream
- White Queso Nachos: Replace shredded cheese with a creamy white queso sauce drizzled over the layers
You may also try: Cheese Sauce Recipe
Storage and Reheating
While nachos are always best served fresh from the oven, you can make components ahead and store leftovers with a few tricks to maintain quality.
Advance Preparation Cook the seasoned beef mixture up to 3 days ahead and store it in an airtight container in the refrigerator. Prep fresh toppings the morning of serving and keep them refrigerated in separate containers. Shred cheese and store in an airtight bag. When ready to serve, simply reheat the beef, then assemble and bake the nachos.
- Leftover Storage: Remove as many fresh toppings as possible before storing. Place leftover nachos in an airtight container and refrigerate for up to 2 days.
- Beef Mixture Storage: Cooked seasoned beef can be refrigerated for 3-4 days or frozen for up to 3 months in a freezer-safe container.
- Reheating Nachos: Reheat on a parchment-lined baking sheet in a 350°F oven for 5-7 minutes, watching carefully to prevent chips from burning.
- Microwave Reheating: For smaller portions, microwave on medium power in 30-second intervals until cheese melts, though chips won’t be as crispy.
- Best Practice: Assemble nachos fresh rather than storing assembled nachos, as the chips will inevitably become soggy.
- Freezing: Don’t freeze assembled nachos; freeze only the cooked beef mixture for future use.
- Fresh Topping Storage: Store sour cream, guacamole, salsa, and diced vegetables separately in the refrigerator and add fresh when reheating.
Another favorite: Taco Casserole Recipe
Nutritional Facts
Here’s the approximate nutritional information per serving (based on 8 servings):
- Calories: 485
- Total Fat: 28g
- Saturated Fat: 12g
- Cholesterol: 75mg
- Sodium: 720mg
- Total Carbohydrates: 32g
- Dietary Fiber: 5g
- Sugars: 3g
- Protein: 24g
- Vitamin A: 15% DV
- Vitamin C: 12% DV
- Calcium: 25% DV
- Iron: 18% DV
Note: Nutritional values are estimates and will vary based on specific ingredients used, portion sizes, and optional toppings added. Values include the base nachos with beef, beans, cheese, and chips but do not include all optional toppings like sour cream, guacamole, or extra salsa.
You might also enjoy: Mexican Street Corn Recipe
Health Benefits of Key Ingredients
While loaded nachos are an indulgent treat, several key ingredients offer nutritional benefits that make this dish more than just comfort food.
Ground Beef Provides high-quality protein essential for muscle building and repair, along with important nutrients like iron, zinc, and B vitamins. Choosing 80/20 ground beef offers a good balance between flavor and fat content. The iron in beef supports healthy blood cells and energy levels.
Black Beans Rich in fiber, protein, and essential minerals, black beans support digestive health and help maintain stable blood sugar levels. They contain antioxidants that may reduce inflammation and support heart health. The combination of beans and beef creates a complete protein with all essential amino acids.
Here are the health benefits of other key ingredients:
- Tomatoes: Loaded with lycopene, vitamin C, and potassium; supports heart health and may reduce cancer risk
- Avocado/Guacamole: Rich in heart-healthy monounsaturated fats, fiber, potassium, and vitamins K, C, and E
- Onions: Contain quercetin and other antioxidants that support immune function and reduce inflammation
- Cilantro: Provides vitamins A, C, and K, plus antioxidants that may support detoxification
- Jalapeños: Capsaicin may boost metabolism, reduce pain, and provide anti-inflammatory benefits
- Cheese: Good source of calcium, protein, and vitamin B12 for bone and nerve health
- Garlic: Contains compounds with antimicrobial properties and may support cardiovascular health
This pairs beautifully with Black Bean Soup Recipe.
Frequently Asked Questions
1. Can I make loaded nachos ahead of time?
You can prepare components ahead, but it’s best to assemble and bake nachos just before serving. Cook the seasoned beef mixture up to 3 days in advance and store refrigerated. Prep fresh toppings the morning of your event and keep refrigerated separately.
Shred cheese and store in an airtight container. When ready to serve, reheat the beef in a skillet or microwave until warm, then assemble the layers and bake as directed.
2. How do I prevent my nachos from getting soggy?
The key to crispy nachos is building layers rather than piling everything on top. Cook the beef mixture until most liquid has evaporated, leaving it moist but not watery. Pat fresh vegetables with paper towels to remove excess moisture before adding.
Use sturdy, thick tortilla chips designed to hold up to toppings. Add delicate toppings like sour cream, guacamole, lettuce, and fresh tomatoes only after baking, never before.
3. What’s the best cheese for nachos?
A blend of cheddar and Monterey Jack cheese works best for loaded nachos. Cheddar provides sharp, tangy flavor while Monterey Jack adds creamy smoothness and melts beautifully. You can also use a pre-shredded “Mexican blend” cheese from the store.
For extra melty nachos, add some American cheese or pepper Jack for heat. Freshly shredded cheese from a block melts better than pre-shredded varieties, which contain anti-caking agents.
4. Can I make this recipe vegetarian or vegan?
Absolutely! For vegetarian nachos, simply omit the ground beef and double the black beans, or use pinto beans or a combination. Add sautéed vegetables like bell peppers, zucchini, and mushrooms for extra substance.
For vegan nachos, use dairy-free cheese alternatives and replace sour cream with cashew cream or vegan sour cream. Use vegetable-based proteins like seasoned lentils or plant-based ground meat alternatives.
5. What’s the best way to reheat leftover nachos?
The oven method works best for reheating nachos. Preheat your oven to 350°F and place leftover nachos on a parchment-lined baking sheet. Heat for 5-7 minutes until the cheese melts and chips crisp up slightly.
Avoid the microwave if possible, as it makes chips soggy. If you must use the microwave, heat in 30-second intervals on medium power and expect softer chips.
Read Also: Mexican Carne Asada Recipe
Loaded Nachos
Equipment
- Large rimmed baking sheet - 18×13 inches
- Parchment paper or aluminum foil
- Large skillet - 12 inches
- Wooden spoon or spatula
- Sharp knife
- Cutting board
- Measuring cups and spoons
- Cheese grater - optional
- Small bowls - for organizing toppings
Ingredients
- 1 pound ground beef - 450g, 80/20 blend for best flavor
- 1 small onion - about ½ cup or 75g, finely diced
- 2 cloves garlic - minced
- 2 tablespoons taco seasoning - homemade or store-bought
- ½ cup water - 120ml
- 15 ounces black beans - 425g, canned, drained and rinsed
- salt and black pepper - to taste
- 12 ounces tortilla chips - 340g, sturdy restaurant-style
- 3 cups shredded cheese blend - 340g, cheddar and Monterey Jack, divided
- ½ cup sliced black olives - 75g, optional
- ½ cup pickled jalapeño slices - 75g, more or less to taste
- 1 cup diced tomatoes - 150g, about 2 medium tomatoes
- ½ cup red onion - 50g, diced
- 1 cup sour cream - 240ml
- 1 cup guacamole - 240ml, or 2 diced avocados
- ½ cup fresh cilantro - 20g, chopped
- 2 green onions - thinly sliced
- salsa - for serving
- lime wedges - for serving
Instructions
- Preheat oven to 400°F (200°C). Line a large rimmed baking sheet with parchment paper or foil. Prep all fresh toppings and set aside.
- Heat a large skillet over medium-high heat. Add ground beef and diced onion, breaking up the meat with a spoon. Cook for 7-10 minutes until beef is browned and no pink remains. Drain excess fat if needed.
- Add minced garlic and cook for 30 seconds until fragrant. Sprinkle taco seasoning over the meat and stir to coat. Pour in water, bring to a simmer, and add drained black beans. Simmer for 4-5 minutes until most liquid has evaporated.
- Spread one-third of tortilla chips on the prepared baking sheet. Top with half the beef mixture, 1 cup of shredded cheese, and half the jalapeños and olives.
- Add another third of chips, the remaining beef mixture, another 1 cup of cheese, and the remaining jalapeños and olives.
- Top with the final third of chips and the remaining 1 cup of cheese. Bake for 8-10 minutes until cheese is melted and bubbly and chip edges begin to brown.
- Remove from oven and let rest for 1-2 minutes. Add dollops of sour cream, guacamole, diced tomatoes, red onions, green onions, and fresh cilantro. Serve immediately with salsa and lime wedges.
Notes
- Choose sturdy, restaurant-style tortilla chips that can support heavy toppings. Thin chips will become soggy quickly.
- Don’t overcrowd the chips on the baking sheet; leave some space between chips so cheese and toppings can settle in.
- Shred your own cheese from a block rather than buying pre-shredded for better melting and less clumping.
- Pat diced vegetables with paper towels to remove excess moisture before adding them to prevent soggy nachos.
- Cook the beef mixture until most liquid has evaporated to prevent the nachos from getting watery.
- Add delicate toppings like sour cream, guacamole, and fresh tomatoes only after baking to maintain their texture and temperature.
- For vegetarian nachos, omit the ground beef and double the black beans or add sautéed bell peppers and zucchini.
- Leftover nachos can be refrigerated for up to 2 days. Reheat in a 350°F oven for 5-7 minutes to restore crispness.
- The beef mixture can be made up to 3 days ahead and stored in an airtight container in the refrigerator.
- For extra heat, add a drizzle of hot sauce or use pepper jack cheese instead of Monterey Jack.
Final Thoughts
These loaded nachos deliver everything you want in the perfect shareable dish: crispy chips, savory seasoned beef, gooey melted cheese, and a rainbow of fresh toppings that add brightness and texture to every bite. The layering technique ensures fairness, so everyone gets an equally delicious serving with no sad, plain chips at the bottom.
This recipe proves that restaurant-quality nachos are completely achievable at home with simple ingredients and straightforward techniques. The beauty lies in the customization options, allowing you to adjust heat levels, swap proteins, or cater to dietary preferences without sacrificing flavor or satisfaction.
Don’t wait for game day to make these loaded nachos. Whip up a batch for your next casual gathering, movie night, or anytime you’re craving something indulgent and fun. I’d love to hear how your nachos turn out, so leave a comment below with your favorite topping combinations or any creative variations you tried!
Recommended:
- Breakfast Potatoes Recipe
- Little Smokies Recipe with Jelly
- Pico de Gallo Recipe
- Taco Skillet Recipe
- Chipotle Chicken Recipe
- Taco Casserole Recipe
- Mexican Street Corn Recipe
- Black Bean Soup Recipe
- Carne Asada Marinade Recipe
- Buffalo Chicken Dip Recipe


