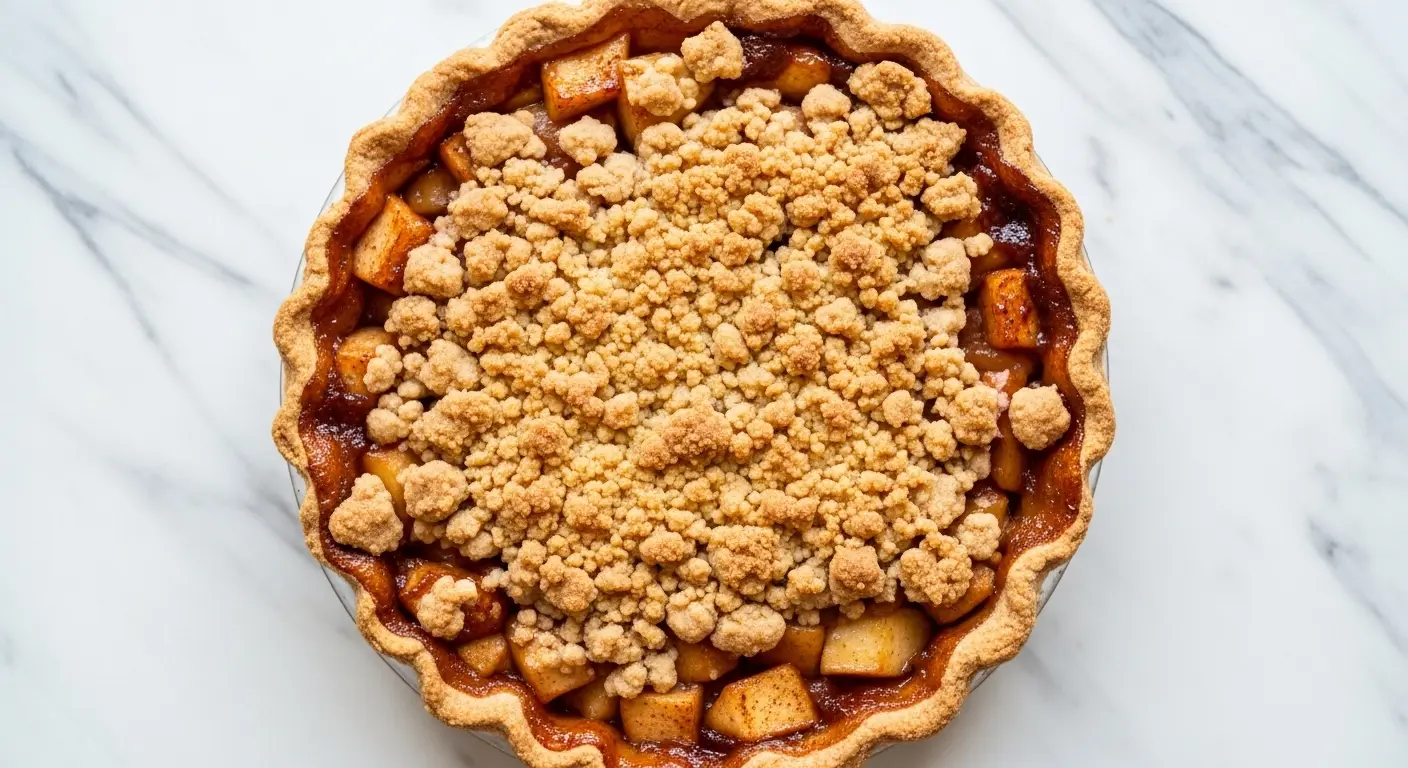
Nothing beats the combination of tender, spiced apples nestled in a flaky crust and topped with a buttery, golden streusel. This Dutch apple pie recipe brings together all the comforting flavors of fall in one stunning dessert that looks as impressive as it tastes.
Unlike traditional apple pie with its double crust, this version features a crumb topping that adds incredible texture and sweetness. The result is a pie that strikes the perfect balance between the crisp, buttery topping and the soft, cinnamon-kissed apple filling beneath.
Making a Dutch apple pie from scratch might seem intimidating, but the process is surprisingly straightforward. The key is using the right apples, creating a sturdy bottom crust, and making sure your streusel topping has those coveted buttery crumbles.
This recipe has been tested and perfected to ensure you get consistent results every time. The filling is pre-cooked on the stovetop, which prevents the dreaded watery pie slice and ensures your apples are perfectly tender without being mushy.

Why You’ll Love This Dutch Apple Pie Recipe
This dessert combines the best elements of apple pie and apple crisp into one irresistible creation. The flaky, buttery crust provides a sturdy foundation that holds up beautifully when sliced.
The pre-cooked apple filling means no more soggy bottom crust or undercooked apples. By cooking the filling first, you release excess moisture and create a thick, luscious apple mixture that slices cleanly and tastes incredible. The blend of cinnamon, nutmeg, and brown sugar enhances the natural sweetness of the apples without overwhelming their flavor.
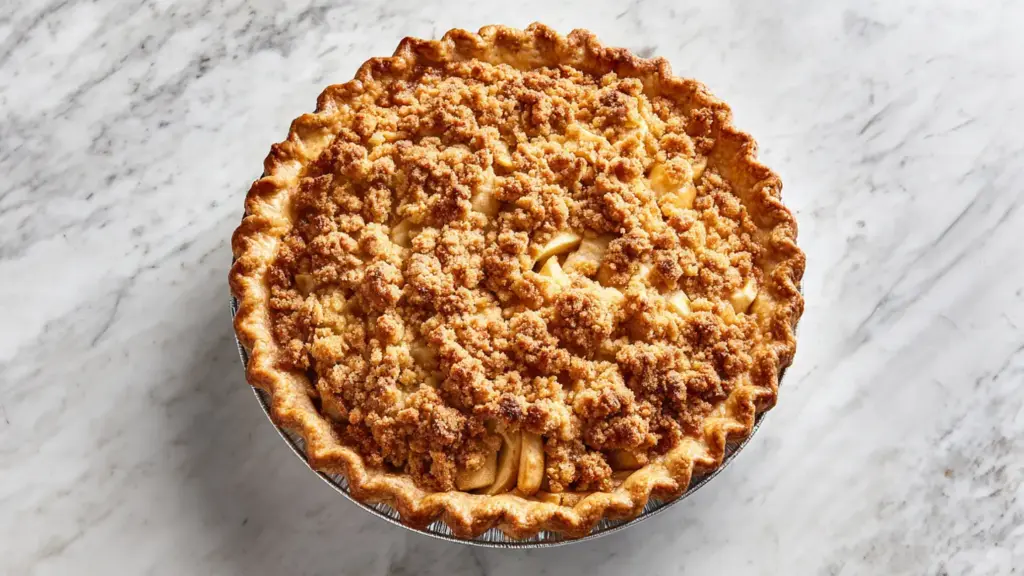
The streusel topping is where this pie truly shines. Made with butter, brown sugar, flour, and a hint of cinnamon, it bakes up into golden, crunchy clusters that provide the perfect textural contrast to the soft filling.
- Perfect texture in every layer – flaky crust, tender apples, and crunchy topping
- No soggy bottom – pre-cooking the filling eliminates excess moisture
- Make-ahead friendly – prepare components in advance for easier assembly
- Crowd-pleaser – appeals to both pie and crisp lovers
- Impressive presentation – the golden streusel topping looks bakery-worthy
- Balanced sweetness – not overly sugary, letting apple flavor shine through
If you love fruit desserts with crumb toppings, you’ll also enjoy this classic apple pie recipe for a traditional double-crust version.
Ingredients
The beauty of this Dutch apple pie lies in its simple, accessible ingredients that come together to create something extraordinary. Each component plays a specific role in achieving the perfect texture and flavor balance.
For the Pie Crust:
- 1 1/4 cups (156g) all-purpose flour, plus extra for dusting
- 1 tablespoon granulated sugar
- 1/2 teaspoon salt
- 1/2 cup (113g) unsalted butter, cold and cubed
- 3-4 tablespoons ice water
For the Apple Filling:
- 5 pounds (about 11 large) apples, peeled, cored, and sliced 1/4-inch thick
- 1/2 cup (100g) granulated sugar
- 1/2 cup (110g) packed light brown sugar
- 3 tablespoons all-purpose flour
- 1 teaspoon ground cinnamon
- 1/4 teaspoon ground nutmeg
- 1/4 teaspoon salt
- 2 tablespoons unsalted butter
- 2 tablespoons fresh lemon juice
- 1/4 teaspoon vanilla extract
For the Streusel Topping:
- 1 cup (125g) all-purpose flour
- 2/3 cup (145g) packed light brown sugar
- 1/2 cup (113g) unsalted butter, melted and cooled slightly
- 1/2 teaspoon ground cinnamon
- 1/4 teaspoon salt
- 1/2 teaspoon vanilla extract
Another favorite: from scratch pumpkin pie
Kitchen Equipment Needed
Having the right tools makes pie-making so much easier and ensures professional results. You likely already have most of these items in your kitchen.
- 9-inch deep-dish pie pan
- Rolling pin
- Large mixing bowls
- Pastry blender or fork
- Food processor (optional, for crust)
- Large skillet or saucepan
- Wooden spoon
- Sharp knife or apple peeler
- Measuring cups and spoons
- Rimmed baking sheet
- Aluminum foil or parchment paper
- Wire cooling rack
Read Also: Sweet Cornbread Recipe
Recommended Products for This Recipe
After testing this recipe multiple times, I’ve found that certain products truly make a difference in achieving the best results. These are quality items that will enhance your pie-making experience and deliver superior outcomes.
1. Le Creuset Enameled Cast Iron Pie Pan
This pie pan distributes heat evenly throughout baking, ensuring your crust gets perfectly golden without any burnt spots. The enameled interior prevents sticking and makes cleanup effortless, even with caramelized apple filling. This investment piece will last for decades and improve every pie you bake.
2. OXO Good Grips Apple Divider
Preparing 11 apples can be tedious, but this apple divider speeds up the process dramatically. It cores and slices apples into uniform wedges in one swift motion, making prep work faster and safer. The sharp stainless steel blades cut cleanly through even firm Granny Smith apples.
3. King Arthur Baking All-Purpose Flour
The quality of your flour directly impacts crust texture and streusel consistency. King Arthur flour has consistent protein content that creates perfectly flaky crusts and tender crumbles. This unbleached flour delivers superior flavor compared to bleached alternatives.
4. Nielsen-Massey Madagascar Bourbon Vanilla Extract
A small amount of vanilla in both the filling and streusel elevates the entire pie. Nielsen-Massey vanilla has a rich, complex flavor that enhances the warm spices without overwhelming them. This pure extract makes a noticeable difference in the finished dessert.
This pairs wonderfully with best carrot cake recipe for a complete dessert spread.
Step-by-Step Instructions
Follow these detailed instructions for a perfect Dutch apple pie every time. Each step is designed to build upon the last, creating layers of flavor and texture that come together beautifully.
1. Prepare the Pie Crust
- In a large mixing bowl, whisk together 1 1/4 cups flour, 1 tablespoon sugar, and 1/2 teaspoon salt until well combined.
- Add the cold, cubed butter to the flour mixture. Using a pastry blender or two forks, cut the butter into the flour until the mixture resembles coarse crumbs with some pea-sized pieces of butter remaining. These butter pieces create flakiness in the baked crust.
- Drizzle 3 tablespoons of ice water over the mixture and toss with a fork until the dough begins to come together. Add the remaining tablespoon of water if needed, but be careful not to add too much liquid as this can make the crust tough.
- Gather the dough into a ball, flatten it into a disk, and wrap tightly in plastic wrap. Refrigerate for at least 1 hour or up to 3 days. This resting period allows the gluten to relax and the butter to firm up.
2. Roll and Shape the Crust
- Remove the chilled dough from the refrigerator and let it sit at room temperature for 5-10 minutes to make rolling easier.
- On a lightly floured surface, roll the dough from the center outward, rotating the dough occasionally to maintain a circular shape. Roll to about 12 inches in diameter and approximately 1/8-inch thick.
- Carefully transfer the dough to your 9-inch pie pan by gently wrapping it around the rolling pin, then unrolling it over the pan. Press the dough gently into the bottom and up the sides of the pan, being careful not to stretch it as this can cause shrinkage during baking.
- Trim the excess dough, leaving about 1 inch of overhang. Fold the overhang under itself to create a thick edge, then crimp decoratively using your fingers or a fork. This creates a professional-looking edge and helps contain the filling.
- Place the prepared crust in the refrigerator to chill while you prepare the filling. A cold crust helps maintain its shape during baking.
3. Make the Streusel Topping
- In a medium bowl, combine 1 cup flour, 2/3 cup brown sugar, 1/2 teaspoon cinnamon, and 1/4 teaspoon salt. Whisk until evenly mixed.
- Pour the melted and slightly cooled butter over the dry ingredients, then add the vanilla extract. Using a fork or your clean hands, mix until the butter is fully incorporated and the mixture forms coarse, crumbly clusters.
- The mixture should clump together when squeezed but still have a crumbly, sandy texture. If it seems too dry, add an additional teaspoon of melted butter.
- Place the streusel in the refrigerator while you prepare the apple filling. Chilling helps the streusel maintain its texture and prevents it from melting too quickly during baking.
4. Prepare the Apple Filling
- Peel, core, and slice your apples into 1/4-inch thick pieces. For best results, use a mix of Granny Smith apples for tartness and Honeycrisp or Golden Delicious for sweetness. Uniform slicing ensures even cooking.
- In a large bowl, toss the sliced apples with the lemon juice immediately after cutting. This prevents browning and adds a bright, fresh flavor that balances the sweetness.
- In a large skillet over medium heat, melt 2 tablespoons of butter. Once melted and foaming, sprinkle in the 3 tablespoons of flour and whisk constantly for about 1 minute to create a roux. This will thicken the filling and prevent it from being watery.
- Add both sugars, cinnamon, nutmeg, and salt to the skillet, whisking until smooth. The mixture will be thick and sandy at this point.
- Gradually add the apples to the skillet, stirring gently to coat them in the butter-sugar mixture. Cook over medium heat for 8-10 minutes, stirring occasionally, until the apples begin to soften but still hold their shape. They should be slightly tender when pierced with a fork but not mushy.
- Remove the skillet from heat and stir in the vanilla extract. Let the filling cool for 10-15 minutes before adding it to the pie crust. This cooling period allows the filling to thicken further and prevents the crust from becoming soggy.
5. Assemble the Pie
- Preheat your oven to 375°F (190°C). Position a rack in the lower third of the oven and place a rimmed baking sheet on it to catch any drips.
- Remove the chilled pie crust from the refrigerator. Using a slotted spoon, transfer the apple filling into the crust, leaving behind any excess liquid in the skillet. This extra liquid can make the pie soggy, so it’s important to drain it off.
- Arrange the apples in an even layer, gently pressing down to eliminate air pockets. The filling should mound slightly in the center as the apples will settle during baking.
- Remove the streusel from the refrigerator and break it into varying sizes of crumbles, from small pea-sized pieces to larger, quarter-sized clusters. This creates great texture variation in the baked topping.
- Sprinkle the streusel evenly over the entire surface of the apple filling, covering it completely. Press down very gently to help the streusel adhere to the filling.
6. Bake the Pie
- Place the assembled pie on the preheated baking sheet in the oven. The baking sheet catches any drips and helps the bottom crust brown evenly.
- Bake for 25 minutes, then check the crust edges. If they’re browning too quickly, cover them loosely with strips of aluminum foil or a pie shield to prevent burning.
- Continue baking for an additional 30-35 minutes, until the streusel topping is deep golden brown, the filling is bubbling around the edges, and you can see steam escaping from the filling. The total baking time should be 55-60 minutes.
- To test for doneness, insert a butter knife into the center of the pie. The apples should feel tender but not mushy, and the filling should be thick and bubbly.
- Remove the pie from the oven and transfer it to a wire cooling rack. Let it cool for at least 3-4 hours before slicing. This cooling time is crucial as it allows the filling to set properly. Cutting into a warm pie results in a runny filling that won’t hold its shape.
7. Serve and Enjoy
- Once the pie has cooled completely and the filling has set, it’s ready to slice and serve. Use a sharp knife to cut clean slices, wiping the knife between cuts for the neatest presentation.
- Serve the pie at room temperature or slightly warm. If you prefer warm pie, reheat individual slices in a 350°F (175°C) oven for 10-15 minutes.
- Top each slice with a scoop of vanilla ice cream, a dollop of whipped cream, or a drizzle of caramel sauce for an extra indulgent treat.
You might also enjoy: classic pumpkin pie recipe
Tips for Success
Getting the perfect Dutch apple pie is all about attention to detail and understanding how each component works together. These tips address the most common challenges and ensure your pie turns out beautifully every time.
- Keep everything cold when making the crust. Cold butter creates steam pockets during baking, resulting in a flaky texture. If your kitchen is warm, chill your mixing bowl and use ice water. Work quickly to prevent the butter from warming up in your hands.
- Don’t skip the resting time for the dough. Refrigerating the crust allows the gluten to relax, preventing shrinkage during baking and making the dough easier to roll. Plan ahead and give yourself time for this crucial step.
- Use a mix of apple varieties. Combining tart Granny Smith apples with sweeter varieties like Honeycrisp, Golden Delicious, or Braeburn creates complex flavor and better texture. Avoid soft apples like McIntosh, which become mushy when baked.
- Slice apples uniformly. Consistent 1/4-inch slices ensure all the apples cook evenly. Use a mandoline or take your time with a sharp knife to achieve uniform thickness.
- Don’t overcook the filling. The apples should be slightly tender when you finish cooking them on the stovetop, as they’ll continue cooking in the oven. Overcooked apples become mushy and lose their shape.
- Drain excess liquid from the filling. Use a slotted spoon to transfer apples to the crust, leaving behind the liquid in the pan. This prevents a soggy bottom crust.
- Create varied streusel sizes. Break the topping into different sized pieces, from fine crumbs to larger clusters. This creates better texture and visual appeal in the finished pie.
- Use a baking sheet under the pie. This catches any drips and helps the bottom crust brown evenly by providing additional heat from below.
- Be patient with cooling. Resist the temptation to cut into the pie early. The filling needs several hours to set properly, or it will be runny and won’t slice cleanly.
- Test for doneness. The filling should be actively bubbling around the edges and the streusel should be deep golden brown. If the topping browns too quickly, tent it with foil and continue baking until the filling bubbles.
Read Also: Skillet Cornbread Recipe
Serving Suggestions
Dutch apple pie is delicious on its own, but the right accompaniments can take it from wonderful to extraordinary. Consider these serving ideas to complement the warm spices and buttery streusel.
The classic pairing is a generous scoop of vanilla ice cream on top of a warm slice. The cold, creamy ice cream melts into the warm pie, creating pockets of sweetness that mingle with the spiced apples. The temperature contrast adds another layer of enjoyment to each bite.
For a lighter option, try freshly whipped cream sweetened with just a touch of sugar and vanilla. The airy texture doesn’t compete with the pie but adds a subtle richness. You can also fold in a pinch of cinnamon to the whipped cream for extra warmth.
Consider these additional serving options:
- Vanilla ice cream – the ultimate classic pairing
- Whipped cream – light and airy complement
- Caramel sauce – adds extra sweetness and visual appeal
- Sharp cheddar cheese – a traditional pairing that balances sweetness with savory notes
- Coffee or hot cider – perfect beverage pairings for fall
- Warm custard sauce – creates a restaurant-quality dessert
For a complete meal, serve this roasted turkey breast with all the trimmings before bringing out the pie.
Variations to Try
Once you’ve mastered the basic Dutch apple pie, these variations offer new ways to enjoy this beloved dessert. Each one maintains the core elements while adding interesting twists.
- Add nuts to the streusel. Mix 1/2 cup of chopped pecans or walnuts into the streusel topping before sprinkling it over the apples. The nuts add crunch and a rich, toasted flavor that pairs beautifully with the apples.
- Include dried fruit in the filling. Toss 1/2 cup of dried cranberries, raisins, or chopped dried apricots with the apples before cooking. The dried fruit adds concentrated sweetness and chewy texture.
- Try different spices. Add 1/4 teaspoon of cardamom, ginger, or allspice to the filling for a unique flavor profile. Apple pie spice blend also works well if you prefer a pre-mixed option.
- Make mini pies. Divide the dough, filling, and streusel among 6-8 individual ramekins or tart pans for personal-sized portions. Reduce baking time to 30-35 minutes.
- Create a lattice-topped version. Make a double batch of crust, use half for the bottom, and cut the other half into strips. Weave a lattice pattern over the streusel for a stunning presentation.
- Add a caramel layer. Drizzle 1/4 cup of prepared caramel sauce over the filling before adding the streusel topping. The caramel melts into the apples and creates extra richness.
- Use oats in the topping. Replace 1/4 cup of the flour in the streusel with old-fashioned oats for a heartier, more textured topping reminiscent of apple crisp.
- Make it gluten-free. Use a 1:1 gluten-free flour blend in place of all-purpose flour in all three components. The texture will be slightly different but still delicious.
This technique works wonderfully in easy waffle recipe as well for adding fruit variations.
Storage and Reheating
Proper storage ensures your Dutch apple pie stays fresh and delicious for several days after baking. Understanding the best methods helps you plan ahead for gatherings or make-ahead preparation.
Store leftover pie at room temperature for up to 2 days if your kitchen is cool. Cover loosely with aluminum foil or plastic wrap to prevent the streusel from becoming stale while allowing some air circulation to maintain crispness. In warm climates or during summer, refrigerate the pie instead to prevent spoilage.
For longer storage, refrigerate the pie for up to 5 days. Place it in an airtight container or cover tightly with plastic wrap. The streusel topping may soften slightly in the refrigerator, but it will crisp up again when reheated.
To freeze an unbaked pie, assemble it completely with the streusel topping, then wrap tightly in plastic wrap followed by aluminum foil. Freeze for up to 3 months. Bake directly from frozen, adding 15-20 minutes to the original baking time and covering the edges with foil to prevent over-browning.
For reheating individual slices:
- Oven method: Place slices on a baking sheet and warm at 350°F (175°C) for 10-15 minutes until heated through. This method keeps the streusel crispy.
- Microwave method: Heat individual slices for 30-60 seconds on medium power. The streusel will soften, but the pie will be warm quickly.
- Whole pie reheating: If you’ve refrigerated a whole pie, reheat it covered with foil at 350°F (175°C) for 20-25 minutes, then uncover for the last 5 minutes to crisp the topping.
Read Also: Belgian Waffle Recipe
Nutritional Facts
Per serving (based on 8 servings):
- Calories: 485
- Total Fat: 21g
- Saturated Fat: 13g
- Cholesterol: 54mg
- Sodium: 228mg
- Total Carbohydrates: 73g
- Dietary Fiber: 5g
- Sugars: 47g
- Protein: 4g
- Vitamin C: 12% DV
- Calcium: 3% DV
- Iron: 8% DV
- Potassium: 285mg
Note: Nutritional values are approximate and will vary based on specific ingredients used and portion sizes. These values are calculated for a slice of pie without any toppings like ice cream or whipped cream.
You might also enjoy: creamy mac and cheese recipe
Health Benefits of Key Ingredients
While Dutch apple pie is certainly a treat, several of its main ingredients offer nutritional benefits that make this dessert a bit more wholesome than you might expect.
Apples are the star of this pie and pack impressive nutritional value. They’re rich in fiber, particularly pectin, which supports digestive health and helps regulate blood sugar levels. Apples also contain vitamin C, an antioxidant that supports immune function, and various polyphenols that have anti-inflammatory properties. The old saying about an apple a day holds some truth when it comes to heart health and disease prevention.
Cinnamon does more than add warmth and flavor. This spice has anti-inflammatory properties and may help regulate blood sugar levels by improving insulin sensitivity. Studies suggest that cinnamon contains compounds that can reduce the risk of heart disease and may have antimicrobial properties as well.
Additional benefits from ingredients in this recipe:
- Nutmeg – Contains antioxidants and compounds that may improve mood and brain health
- Lemon juice – Provides vitamin C and helps prevent the apples from oxidizing and turning brown
- Butter – Supplies fat-soluble vitamins A, E, and K2, and provides energy
- Brown sugar – Contains small amounts of minerals like calcium, potassium, and iron from its molasses content
- Flour – Enriched all-purpose flour provides B vitamins and iron
This pairs beautifully with classic chicken salad recipe for a balanced meal.
Frequently Asked Questions
1. Can I use a store-bought pie crust instead of making one from scratch?
Absolutely! Using a store-bought crust is a great time-saver and still produces delicious results. Look for an unbaked, refrigerated pie crust rather than a frozen one for better texture. Simply unroll it into your pie pan, crimp the edges, and proceed with the recipe as written. The homemade filling and streusel topping are where this pie really shines, so don’t feel guilty about taking this shortcut.
2. Why is my Dutch apple pie filling watery?
Watery filling usually happens when the apples release too much moisture during baking. To prevent this, make sure you’re pre-cooking the filling on the stovetop as directed, which releases excess liquid before baking. Also, use a slotted spoon to transfer the cooked apples to the crust, leaving behind any pooled liquid. Choosing the right apple varieties matters too since some apples are juicier than others.
3. Can I make Dutch apple pie ahead of time?
Yes! You can prepare the pie components separately up to 2 days ahead. Make the crust and keep it wrapped in the refrigerator, prepare the streusel and store it in an airtight container in the fridge, and cook the filling then refrigerate it. Assemble and bake the pie on the day you plan to serve it for the best texture. You can also bake the pie completely up to 2 days ahead and store it at room temperature or refrigerated.
4. What’s the difference between Dutch apple pie and regular apple pie?
The main difference is the topping. Regular apple pie has a double crust with pastry on both the bottom and top, sometimes with a lattice design. Dutch apple pie has a bottom crust only and is topped with a streusel crumb mixture made from butter, sugar, and flour. The streusel creates a sweet, crunchy texture that’s more like an apple crisp topping, making Dutch apple pie a hybrid between traditional apple pie and apple crisp.
5. How do I know when my Dutch apple pie is done baking?
Your pie is done when you see several signs. The streusel topping should be deep golden brown, not pale or light tan. The filling should be actively bubbling around the edges, which indicates the apples are cooked through and the filling has thickened. You can also insert a butter knife into the center to test the apples, they should be tender when pierced. If the topping is browning too quickly, tent it with foil and continue baking until the filling bubbles.
Read Also: Easy Shepherds Pie Recipe

Dutch Apple Pie
Equipment
- 9-inch deep-dish pie pan
- Rolling Pin
- Large mixing bowls
- Pastry blender or fork
- Food processor - (optional, for crust)
- Large skillet or saucepan
- Wooden spoon
- Sharp knife or apple peeler
- Measuring cups and spoons
- Rimmed Baking Sheet
- Aluminum foil or parchment paper
- Wire cooling rack
Ingredients
For the Pie Crust
- 1 1/4 cups all-purpose flour - 156g, plus extra for dusting
- 1 tablespoon granulated sugar
- 1/2 teaspoon salt
- 1/2 cup unsalted butter - 113g, cold and cubed
- 3-4 tablespoons ice water
For the Apple Filling
- 5 pounds apples - about 11 large, peeled, cored, and sliced 1/4-inch thick; mix of Granny Smith and Honeycrisp or Golden Delicious
- 1/2 cup granulated sugar - 100g
- 1/2 cup packed light brown sugar - 110g
- 3 tablespoons all-purpose flour
- 1 teaspoon ground cinnamon
- 1/4 teaspoon ground nutmeg
- 1/4 teaspoon salt
- 2 tablespoons unsalted butter
- 2 tablespoons fresh lemon juice
- 1/4 teaspoon vanilla extract
For the Streusel Topping
- 1 cup all-purpose flour - 125g
- 2/3 cup packed light brown sugar - 145g
- 1/2 cup unsalted butter - 113g, melted and cooled slightly
- 1/2 teaspoon ground cinnamon
- 1/4 teaspoon salt
- 1/2 teaspoon vanilla extract
Instructions
- Whisk together flour, sugar, and salt. Cut in cold cubed butter until coarse crumbs form. Add ice water and mix until dough comes together. Form into a disk, wrap, and refrigerate for at least 1 hour.
- Roll chilled dough into a 12-inch circle on floured surface. Transfer to pie pan, trim and crimp edges. Chill crust while preparing filling.
- Mix flour, brown sugar, cinnamon, and salt. Stir in melted butter and vanilla until crumbly clusters form. Chill streusel.
- Toss sliced apples with lemon juice. In skillet, melt butter, whisk in flour, then add sugars and spices. Add apples and cook 8-10 minutes until slightly tender. Stir in vanilla and cool.
- Preheat oven to 375°F with baking sheet inside. Add cooled filling to crust using slotted spoon. Top evenly with streusel crumbles.
- Bake on sheet for 55-60 minutes until streusel is deep golden and filling bubbles. Cover edges with foil if browning too fast. Cool at least 3-4 hours before slicing.
- Slice and serve at room temperature or slightly warm with vanilla ice cream, whipped cream, or caramel sauce.
Notes
- Keep all crust ingredients cold for maximum flakiness; chill bowl and use ice water if kitchen is warm.
- Use a mix of tart Granny Smith and sweet Honeycrisp or Golden Delicious apples for best flavor and texture.
- Pre-cook the filling to release moisture and prevent a soggy bottom crust.
- Drain excess liquid from filling before adding to crust using a slotted spoon.
- Break streusel into varied sizes for interesting texture in the baked topping.
- Place pie on a rimmed baking sheet to catch drips and promote even browning.
- Cool pie completely (3-4 hours minimum) for the filling to set properly before slicing.
- Store at room temperature up to 2 days or refrigerate up to 5 days; reheat slices at 350°F to crisp streusel.
- Can be made ahead: prepare components separately and assemble on baking day.
- Variations: add chopped nuts to streusel, dried fruit to filling, or a drizzle of caramel.
Final Thoughts
This Dutch apple pie recipe delivers everything you want in a fall dessert: buttery crust, tender spiced apples, and that irresistible golden streusel topping. It’s perfect for holiday gatherings, Sunday dinners, or anytime you’re craving something comforting and delicious.
The combination of textures and flavors makes every bite satisfying, and the make-ahead options mean you can prepare components in advance when time is tight. Once you master this recipe, you’ll find yourself reaching for it again and again throughout apple season and beyond.
Give this recipe a try and experience the magic of homemade pie. Don’t forget to share your results in the comments below, I’d love to hear about your experience and any creative variations you tried!
Recommended:
- Classic Apple Pie Recipe
- From Scratch Pumpkin Pie Recipe
- Classic Pumpkin Pie Recipe
- Best Carrot Cake Recipe
- Carrot Cake with Cream Cheese Frosting Recipe
- Best Chocolate Chip Cookies Recipe
- Chewy Chocolate Chip Cookies Recipe
- Old Fashioned Chocolate Chip Cookie Recipe
- Easy Tiramisu Recipe
- Classic Tiramisu Recipe


