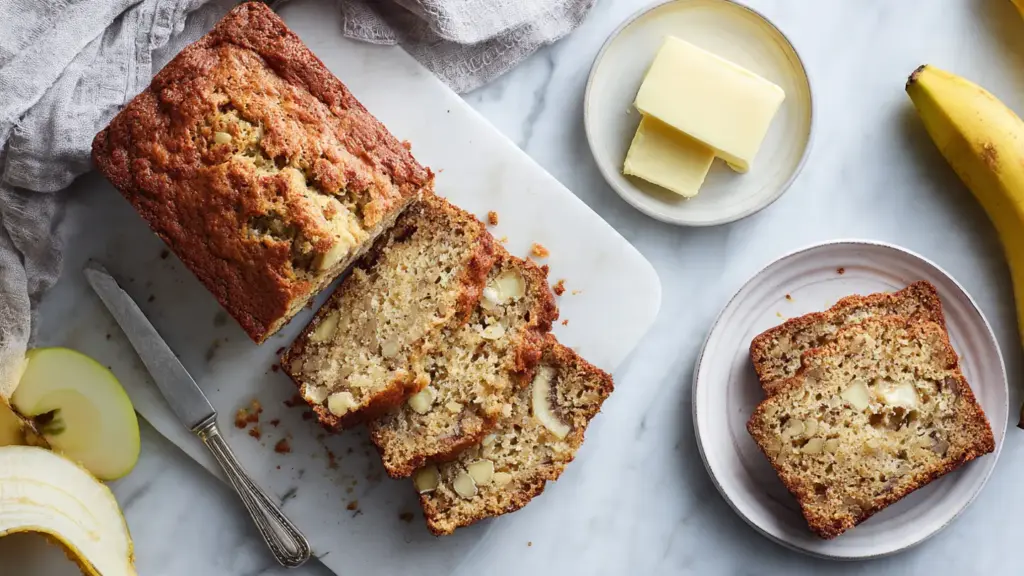
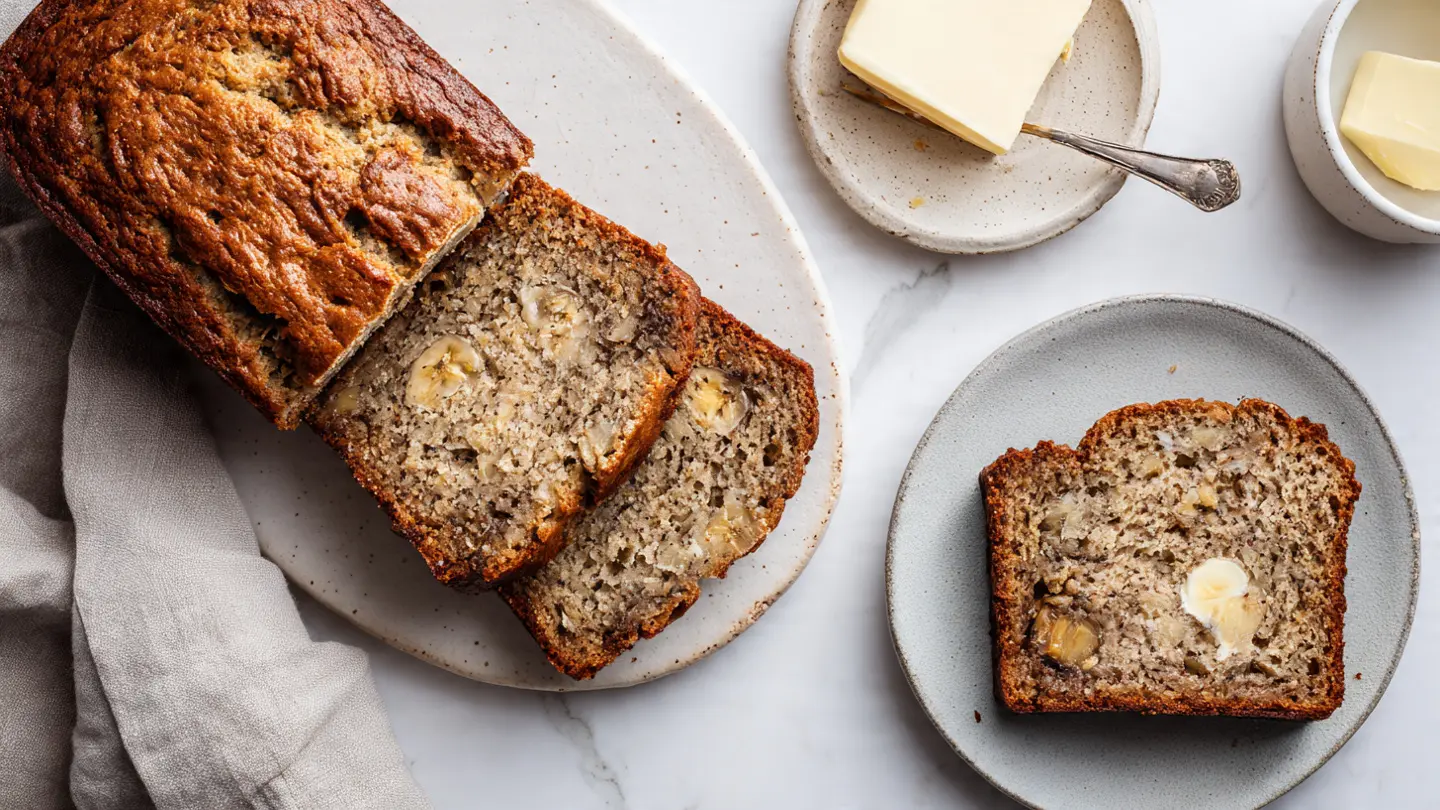
Moist banana bread gets even better when you add chunks of fresh apple. This banana and apple bread recipe combines the natural sweetness of ripe bananas with the crisp texture and subtle tang of apples, creating a quick bread that’s perfect for breakfast, snacks, or even dessert.
The combination works beautifully because the bananas provide moisture and sweetness while the apples add pockets of texture throughout each slice. Warm cinnamon ties everything together, making your kitchen smell absolutely incredible while this bakes. The best part? You can have this in the oven in about 15 minutes with ingredients you probably already have on hand.
This recipe uses a simple mixing method that doesn’t require any special equipment. Just two bowls, a whisk, and a loaf pan are all you need. The apples are tossed in a bit of flour before folding them into the batter, which prevents them from sinking to the bottom and ensures you get fruit in every bite.
If you love easy quick bread recipes, this starbucks banana bread recipe is another must-try favorite.

Why You’ll Love This Banana and Apple Bread Recipe
This banana and apple bread recipe delivers on flavor, texture, and simplicity.
The dual fruit combination means you get incredible moisture from the bananas plus little bursts of fresh apple in every slice. The apples soften slightly during baking but still maintain enough texture to provide a pleasant contrast to the tender crumb.
You’ll love:
- Amazing moisture – The combination of mashed bananas and fresh apples keeps this bread perfectly moist for days
- Simple ingredients – No fancy additions needed, just pantry staples and fresh fruit
- Forgiving recipe – Works with any apple variety and adapts well to substitutions
- Perfect texture – Tender crumb with pockets of soft apple throughout
- Naturally sweetened – The ripe bananas reduce the need for added sugar
- Make-ahead friendly – Actually tastes better the next day as the flavors meld together
Another favorite? Try this amish banana bread recipe for a classic version.
Ingredients
This recipe uses straightforward ingredients that work together to create a perfectly balanced quick bread. The key is using very ripe bananas (the spottier, the better) and fresh, crisp apples that will hold up during baking.
- 3 medium very ripe bananas, mashed (about 1½ cups or 340g)
- 2 medium apples (Granny Smith, Honeycrisp, or Fuji), peeled and diced into ½-inch pieces (about 1½ cups or 225g)
- ½ cup (113g) unsalted butter, melted and slightly cooled
- ¾ cup (150g) granulated sugar
- ¼ cup (50g) light brown sugar, packed
- 2 large eggs, at room temperature
- 2 teaspoons pure vanilla extract
- ¼ cup (60ml) sour cream or full-fat Greek yogurt, at room temperature
- 2 cups (240g) all-purpose flour, plus 1 tablespoon for coating apples
- 1 teaspoon baking soda
- ½ teaspoon salt
- 1½ teaspoons ground cinnamon
- ¼ teaspoon ground nutmeg (optional)
- 2 tablespoons turbinado sugar or coarse sugar for topping (optional)
The sour cream adds richness and helps create that signature tender crumb you want in quick breads. If you only have Greek yogurt on hand, it works just as well.
For another delicious fruity bread option, check out this blackberry bread recipe.
Kitchen Equipment Needed
You don’t need anything fancy to make this banana and apple bread. A few basic tools will get the job done perfectly.
- 9×5-inch loaf pan
- Parchment paper
- Two large mixing bowls
- Whisk
- Rubber spatula
- Box grater or sharp knife for chopping apples
- Fork or potato masher for mashing bananas
- Measuring cups and spoons
- Wire cooling rack
The parchment paper isn’t absolutely necessary, but it makes removing the bread from the pan so much easier. Just let it hang over the long sides of the pan to create handles.
Recommended Products for This Recipe
These carefully selected products will help you achieve the best results with your banana and apple bread.
1. USA Pan Bakeware Aluminized Steel Loaf Pan
This professional-quality pan distributes heat evenly, ensuring your bread bakes uniformly without any burnt edges. The nonstick coating releases the bread perfectly every time, and it’s built to last through hundreds of baking sessions.
2. Nielsen-Massey Madagascar Bourbon Pure Vanilla Extract
High-quality vanilla makes a noticeable difference in baked goods. This extract has a rich, complex flavor that enhances the natural sweetness of the fruit without being overpowering.
3. OXO Good Grips Box Grater
If you prefer grated apples instead of diced (which adds even more moisture), this sturdy grater makes quick work of the task. The non-slip base keeps it stable while you work, and it’s easy to clean.
4. King Arthur Baking Company All-Purpose Flour
Consistent results start with quality flour. This unbleached all-purpose flour has the perfect protein content for tender quick breads that aren’t too dense or too crumbly.
If you enjoy baking with chocolate chip bread recipe, these same tools work perfectly for that too.
Step-by-Step Instructions
Follow these detailed steps for perfect banana and apple bread every time. Taking your time with each step ensures the best texture and flavor.
1. Prepare Your Oven and Pan
- Preheat your oven to 350°F (175°C)
- Position the rack in the center of the oven for even heat distribution
- Line your 9×5-inch loaf pan with parchment paper, allowing the paper to hang over the long sides by about 2 inches
- Lightly grease the parchment paper and exposed sides of the pan with butter or nonstick spray
This preparation step is crucial because quick breads bake better when the oven is fully preheated. The parchment paper overhang creates handles that make it easy to lift the bread out of the pan once it’s cooled.
2. Prepare the Apples
- Peel the apples using a vegetable peeler
- Core the apples and cut them into ½-inch dice (not too small or they’ll dissolve, not too large or they’ll create gaps)
- Place the diced apples in a small bowl
- Add 1 tablespoon of flour to the apples
- Toss the apples until they’re evenly coated with the flour
Coating the apples with flour is a professional baker’s trick. The flour absorbs some of the moisture from the apples and helps them stay suspended in the batter instead of sinking to the bottom during baking.
3. Mash the Bananas
- Peel the very ripe bananas (they should have plenty of brown spots)
- Place them in a large mixing bowl
- Use a fork or potato masher to mash them until mostly smooth with just a few small lumps remaining
- Measure out 1½ cups (340g) of mashed banana
Banana sizes vary wildly, so measuring after mashing ensures you have the right amount. Too much banana makes the bread dense and gummy, while too little results in dry bread that lacks flavor.
4. Mix the Wet Ingredients
- Add the melted butter to the mashed bananas and whisk together
- Add both sugars (granulated and brown) and whisk until well combined, about 1 minute
- Add the eggs one at a time, whisking well after each addition
- Whisk in the vanilla extract
- Add the sour cream and whisk until the mixture is smooth and uniform
The order matters here. Adding the eggs to the butter-banana mixture helps them incorporate smoothly. Whisking vigorously at this stage creates a creamy base that will produce a tender crumb.
5. Combine the Dry Ingredients
- In a separate large bowl, whisk together the 2 cups of flour, baking soda, salt, cinnamon, and nutmeg (if using)
- Whisk for about 30 seconds to ensure everything is evenly distributed
- Make a well in the center of the dry ingredients
Whisking the dry ingredients together before adding them to the wet ingredients prevents pockets of flour or clumps of baking soda in your finished bread. The cinnamon gets evenly dispersed throughout.
6. Combine Wet and Dry Ingredients
- Pour the wet ingredients into the well in the dry ingredients
- Use a rubber spatula to gently fold the mixture together
- Stir just until no dry flour is visible, being careful not to overmix
- The batter should be thick and slightly lumpy
- Stop mixing as soon as the flour disappears, even if there are a few small streaks remaining
Overmixing develops gluten, which creates tough, dense bread. The batter should look a bit rough and uneven. Those small lumps will disappear during baking and result in a more tender texture.
7. Fold in the Apples
- Add the flour-coated apple pieces to the batter
- Use the rubber spatula to gently fold them in with just a few strokes
- Distribute them as evenly as possible, but don’t overmix trying to get perfect distribution
- Some clumping of apples is fine
Folding is different from stirring. Use a motion that brings the spatula down through the center, across the bottom, and up the side, rotating the bowl slightly with each fold. This keeps the batter light.
8. Transfer Batter to Pan
- Pour the batter into your prepared loaf pan
- Use the spatula to spread it evenly, making sure to fill the corners
- Smooth the top gently with the spatula
- If using, sprinkle the turbinado sugar evenly over the top for a crunchy crust
Don’t worry if the surface isn’t perfectly smooth. Quick breads develop cracks during baking, and those cracks are part of their charm.
9. Bake the Bread
- Place the pan in the center of the preheated oven
- Bake for 60-70 minutes, checking at the 60-minute mark
- The bread is done when a toothpick inserted into the center comes out with just a few moist crumbs (not wet batter)
- The top should be deep golden brown
- If the top is browning too quickly (check around 40 minutes), tent it loosely with aluminum foil
Every oven is different, so start checking at 60 minutes. The bread will continue to cook slightly from residual heat even after you remove it from the oven.
10. Cool the Bread
- Remove the pan from the oven and place it on a wire cooling rack
- Let the bread cool in the pan for 15 minutes (this helps it set and makes it easier to remove)
- Use the parchment paper overhang to lift the bread out of the pan
- Place the bread directly on the wire rack to cool completely, about 1 hour
- Resist the urge to slice it while it’s hot, as it needs to set
Cooling on a wire rack allows air to circulate around the entire loaf, preventing the bottom from getting soggy from trapped steam. The bread is easier to slice cleanly once it’s completely cool.
Looking for more baking inspiration? This sweet potato bread recipe offers another delicious option.
Tips for Success
These tips come from years of baking banana bread and will help you avoid common pitfalls while ensuring the best possible results.
- Use very ripe bananas – The peels should be covered in brown spots or even completely brown. Underripe bananas don’t have enough natural sweetness and will make the bread taste flat and starchy.
- Don’t skip measuring the mashed bananas – Since banana sizes vary so much, measuring ensures consistent results every time. Too much banana creates a gummy texture.
- Room temperature ingredients matter – Cold eggs and sour cream don’t incorporate as smoothly, which can create an uneven texture. Let them sit out for 30 minutes before starting.
- Coating apples prevents sinking – The tablespoon of flour you toss with the apples helps them stay distributed throughout the bread instead of settling at the bottom.
- Choose the right apples – Granny Smith apples add a nice tart contrast, Honeycrisp apples are naturally sweet and stay firm, and Fuji apples offer a balance of both. Avoid Red Delicious, which turn mushy.
- Don’t overmix the batter – Mix just until the flour disappears. Overmixing develops gluten, creating dense, tough bread instead of tender crumb.
- Test for doneness properly – Insert a toothpick into the center of the loaf. It should come out with a few moist crumbs but no wet batter. If it comes out completely clean, you may have overbaked it slightly.
- Cool completely before slicing – Warm bread is difficult to slice cleanly and will compress under the knife. Cooling allows the structure to set.
- Store properly – Wrap tightly in plastic wrap or store in an airtight container to prevent drying out. The bread actually tastes better the next day after the flavors have melded.
You might also enjoy this snickerdoodle banana bread recipe for a fun twist.
Serving Suggestions
This versatile bread works beautifully in so many contexts, from casual breakfasts to afternoon tea.
Serve slices warm or at room temperature with a pat of salted butter that melts into the tender crumb. The slight saltiness contrasts perfectly with the sweet fruit. For breakfast, toast thick slices and top with easy pesto recipe and a poached egg for a savory-sweet combination that’s unexpectedly delicious.
Pair it with:
- A smear of cream cheese or mascarpone for added richness
- Classic hummus alongside for a Mediterranean-inspired snack
- A drizzle of honey or maple syrup for extra sweetness
- Nut butter (almond, peanut, or cashew) for protein and healthy fats
- Fresh whipped cream and a sprinkle of cinnamon for dessert
- A cup of coffee, chai tea, or hot apple cider
- Homemade granola crumbled on top with yogurt for breakfast
Variations to Try
Once you’ve mastered the basic recipe, these variations add new dimensions of flavor and texture to keep things interesting.
- Streusel topping – Mix ¼ cup flour, ¼ cup brown sugar, 2 tablespoons cold butter (cut into small pieces), and ½ teaspoon cinnamon until crumbly. Sprinkle over the batter before baking for a coffee cake style topping.
- Nuts – Fold in ½ cup chopped walnuts or pecans along with the apples for added crunch and healthy fats.
- Dried fruit – Add ½ cup raisins, dried cranberries, or chopped dates for concentrated sweetness and chewy texture.
- Spice it up – Add ¼ teaspoon ground ginger and a pinch of ground cloves along with the cinnamon for a more complex spice profile similar to apple pie.
- Chocolate chips – Fold in ¾ cup semi-sweet or dark chocolate chips for a dessert-worthy treat.
- Caramel swirl – Drizzle 3 tablespoons of caramel sauce over the batter before baking and swirl it in gently with a knife for pockets of gooey sweetness.
- Whole wheat version – Replace 1 cup of all-purpose flour with white whole wheat flour for added fiber and a nuttier flavor.
- Healthier swap – Replace the butter with an equal amount of melted coconut oil and use coconut sugar instead of granulated sugar for a paleo-friendly version.
For more breakfast bread ideas, try this old fashioned pumpkin bread recipe.
Storage and Reheating
Proper storage keeps your banana and apple bread fresh and delicious for days, and it actually improves with time as the flavors meld.
- Room temperature – Wrap the completely cooled bread tightly in plastic wrap or store in an airtight container. It will keep at room temperature for up to 4 days. The second and third days often have the best flavor.
- Refrigerator – If your kitchen is warm or humid, refrigerate the wrapped bread for up to 1 week. Let slices come to room temperature before eating or toast them lightly.
- Freezer – This bread freezes beautifully. Wrap the entire loaf or individual slices in plastic wrap, then in aluminum foil or place in a freezer-safe bag. Freeze for up to 3 months. Thaw overnight in the refrigerator or at room temperature for a few hours.
- Reheating individual slices – Toast slices in a toaster or toaster oven until warmed through and slightly crispy on the edges. Alternatively, microwave a slice for 15-20 seconds.
- Reheating the whole loaf – Wrap the loaf in foil and warm in a 300°F (150°C) oven for 15-20 minutes until heated through.
Another great make-ahead option is this pineapple quick bread recipe.
Nutritional Facts
Per slice (1 of 12 slices):
- Calories: 245
- Total Fat: 9g
- Saturated Fat: 5g
- Cholesterol: 48mg
- Sodium: 185mg
- Total Carbohydrates: 39g
- Dietary Fiber: 2g
- Sugars: 21g
- Protein: 4g
- Vitamin A: 6% DV
- Vitamin C: 4% DV
- Calcium: 3% DV
- Iron: 7% DV
Nutritional information is approximate and will vary based on specific ingredients used and portion sizes. This bread provides a good source of potassium from the bananas and some fiber from both fruits.
Read Also: Banana Nut Bread Recipe With Pecans
Health Benefits of Key Ingredients
While this is definitely a treat, the ingredients offer some nutritional benefits that make it a more wholesome choice than many baked goods.
Bananas provide natural sweetness while delivering potassium, vitamin B6, and vitamin C. Potassium supports heart health and helps regulate blood pressure. The fiber in bananas aids digestion and helps you feel satisfied. As bananas ripen, their resistant starch converts to simple sugars, making them easier to digest while also developing that characteristic sweet flavor that makes them perfect for baking.
Key benefits include:
- Apples add fiber – The pectin in apples supports digestive health and helps stabilize blood sugar levels. The natural sweetness means you can use less added sugar.
- Cinnamon provides antioxidants – This warming spice has anti-inflammatory properties and may help regulate blood sugar levels. It also adds depth of flavor without any calories.
- Eggs offer protein – Each egg contributes high-quality protein plus vitamins D, B12, and choline, which supports brain health.
- Sour cream adds probiotics – The cultured dairy provides beneficial bacteria for gut health, plus calcium for strong bones.
- Whole food ingredients – Unlike many store-bought baked goods, this recipe uses real fruit, butter, and eggs rather than artificial flavors or excessive preservatives.
This keto banana bread recipe offers a lower-carb alternative if that fits your dietary needs better.
Frequently Asked Questions
1. Can I use frozen bananas for this recipe?
Yes, frozen bananas work perfectly well. Thaw them completely at room temperature or in the microwave, then drain off any excess liquid before mashing. Frozen bananas often become slightly more watery when thawed, so you may need to reduce the amount slightly or drain well to avoid making the batter too wet.
2. Do I need to peel the apples?
Peeling is recommended for the best texture. Apple peels can become tough and chewy during baking, which creates an unpleasant texture in the tender bread. If you prefer to leave the peels on for extra fiber, choose apples with thin skins like Honeycrisp and dice them very small.
3. Why is my banana bread sinking in the middle?
A sunken center usually happens when the bread is underbaked (the structure hasn’t set), there’s too much liquid in the batter, or the oven temperature is too low. Make sure your oven is properly preheated to 350°F and test for doneness with a toothpick. The bread should be baked until the center is completely set and a toothpick comes out with just a few moist crumbs.
4. Can I make this recipe into muffins instead?
Absolutely! Divide the batter among 12 lined muffin cups, filling each about ¾ full. Bake at 350°F for 22-25 minutes or until a toothpick inserted into the center comes out clean. Muffins bake faster than a whole loaf, so watch them carefully and start checking at 20 minutes.
5. How do I know when the bread is fully baked?
Insert a toothpick or thin knife into the center of the loaf. It should come out with a few moist crumbs clinging to it but no wet batter. The top should be deep golden brown and spring back lightly when touched. The internal temperature should reach about 200°F (93°C) if you’re using a thermometer.
For an egg-free version, check out this eggless banana bread recipe.
Banana and Apple Bread
Equipment
- 9×5-inch loaf pan
- Parchment paper
- Two large mixing bowls
- Whisk
- Rubber spatula
- Box grater or sharp knife - For chopping or grating apples
- Fork or potato masher - For mashing bananas
- Measuring cups and spoons
- Wire cooling rack
- Vegetable peeler - For peeling apples
- Aluminum foil - (optional)
Ingredients
- 3 very ripe bananas - medium; mashed to about 1½ cups / 340g — the spottier the better
- 2 medium apples - about 1½ cups / 225g peeled and diced into ½-inch pieces; Granny Smith, Honeycrisp, or Fuji recommended
- ½ cup unsalted butter - 113g, melted and slightly cooled
- ¾ cup granulated sugar - 150g
- ¼ cup light brown sugar - 50g, packed
- 2 large eggs - at room temperature
- 2 tsp pure vanilla extract
- ¼ cup sour cream - 60ml; or full-fat Greek yogurt, at room temperature
- 2 cups all-purpose flour - 240g; plus 1 extra tablespoon reserved for coating apples
- 1 tbsp all-purpose flour - for coating the diced apples
- 1 tsp baking soda
- ½ tsp salt
- 1½ tsp ground cinnamon
- ¼ tsp ground nutmeg - optional
- 2 tbsp turbinado sugar - or coarse sugar; optional, for sprinkling on top
Instructions
- Preheat oven to 350°F (175°C) with rack in the center position. Line a 9×5-inch loaf pan with parchment paper, letting it overhang the long sides by 2 inches, then lightly grease the parchment and exposed pan sides.
- Peel, core, and dice the apples into ½-inch pieces. Toss them in a small bowl with 1 tablespoon of flour until evenly coated; set aside.
- Peel the very ripe bananas and mash them with a fork or potato masher in a large bowl until mostly smooth with just a few small lumps. Measure out 1½ cups (340g).
- Whisk the melted butter into the mashed bananas, then whisk in both sugars, eggs one at a time, vanilla extract, and sour cream until the mixture is smooth and uniform.
- In a separate large bowl, whisk together the 2 cups of flour, baking soda, salt, cinnamon, and nutmeg (if using) for about 30 seconds until evenly distributed. Make a well in the center.
- Pour the wet ingredients into the well in the dry ingredients and fold together with a rubber spatula just until no dry flour is visible — do not overmix; the batter should be thick and slightly lumpy.
- Add the flour-coated apple pieces to the batter and gently fold them in with just a few strokes until evenly distributed.
- Pour the batter into the prepared loaf pan and spread it evenly into the corners. Sprinkle turbinado sugar over the top if using.
- Bake for 60–70 minutes, tenting loosely with foil around the 40-minute mark if the top is browning too quickly, until a toothpick inserted in the center comes out with just a few moist crumbs.
- Let the bread cool in the pan on a wire rack for 15 minutes, then use the parchment overhang to lift it out and cool completely on the rack for about 1 hour before slicing.
Notes
- Use very ripe bananas: Peels should be heavily spotted or fully brown for the best sweetness and moisture — underripe bananas make the bread taste flat.
- Measure mashed bananas: Banana sizes vary widely; measuring after mashing ensures consistent results. Too much banana makes the bread gummy.
- Room temperature ingredients: Let eggs and sour cream sit out for 30 minutes before starting so they incorporate smoothly into the batter.
- Best apple varieties: Granny Smith adds a tart contrast, Honeycrisp stays firm and sweet, and Fuji offers a balance of both. Avoid Red Delicious — it turns mushy during baking.
- Don’t overmix: Stir only until the flour disappears. Overmixing develops gluten and creates dense, tough bread.
- Flour-coated apples: Tossing the apple pieces in flour prevents them from sinking to the bottom of the loaf during baking.
- Storage: Wrap tightly in plastic wrap or store in an airtight container at room temperature for up to 4 days. The flavor improves on day 2 as the fruits meld together.
- Freezing: Wrap the whole loaf or individual slices in plastic wrap then foil and freeze for up to 3 months. Thaw overnight in the refrigerator or for a few hours at room temperature.
- Muffin variation: Divide batter among 12 lined muffin cups (¾ full each) and bake at 350°F for 22–25 minutes.
- Optional add-ins: Fold in ½ cup chopped walnuts or pecans, ¾ cup chocolate chips, or ½ cup raisins along with the apples for extra flavor and texture.
Final Thoughts
This banana and apple bread recipe combines two beloved fruits into one incredibly moist, flavorful loaf that works just as well for breakfast as it does for dessert. The natural sweetness from ripe bananas and fresh apples means you don’t need tons of added sugar, while the cinnamon adds warmth without overwhelming the fruit flavors.
What makes this recipe truly special is how forgiving it is. You can adapt it to whatever apples you have on hand, swap in different spices, add nuts or chocolate chips, or keep it simple and classic. The bread keeps well for days and actually improves in flavor as it sits, making it perfect for meal prep or bringing to gatherings.
Give this recipe a try and see why the combination of banana and apple has become such a favorite. Don’t forget to leave a comment below and let me know how it turned out for you!
Recommended:
- Paula Deen Banana Bread Recipe
- Banana Bread Recipe With Walnuts and Chocolate Chips
- Maui Banana Bread Recipe
- Easy Banana Bread Recipe With Self Rising Flour
- Chocolate Chip Bread Recipe
- Sweet Potato Bread Recipe
- Pineapple Quick Bread Recipe
- Old Fashioned Pumpkin Bread Recipe
- Blackberry Bread Recipe
- French Toast Casserole Recipe


