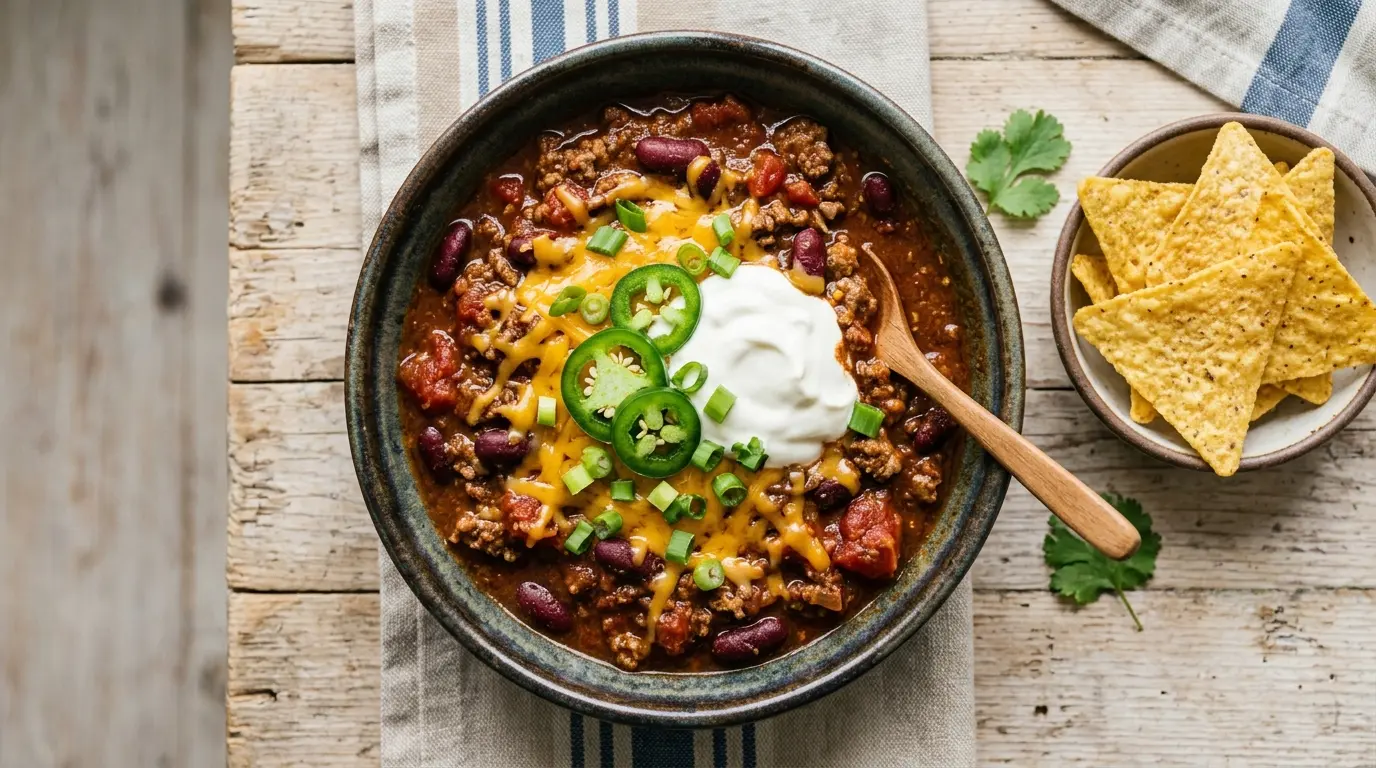
A great chili recipe is one of those things that becomes a household staple once you nail it. Rich, hearty, and deeply spiced, a classic pot of chili brings together ground beef, kidney beans, tomatoes, and a carefully layered spice blend that fills your kitchen with the kind of aroma that makes everyone wander in asking what’s cooking.
This version follows the most widely loved, classic American-style chili. It uses a combination of ground beef and kidney beans simmered low and slow in a tomato-based broth, seasoned with chili powder, cumin, smoked paprika, and a few other pantry staples that give it that bold, signature depth. It’s the kind of recipe that tastes even better the next day, which makes it perfect for meal prepping or feeding a crowd.
One thing that sets a truly great chili apart from a forgettable one is the technique. Browning the beef properly before adding liquids, blooming the spices in the pan, and giving everything time to meld together are the details that take a basic pot of chili to something you’d proudly serve at a game day party or a cozy weeknight dinner.
This recipe is beginner-friendly, uses simple ingredients you probably already have on hand, and comes together in about an hour. Stick around because I’m also sharing my best tips, variations, serving ideas, and storage advice.
This pairs beautifully with a warm bowl of Chicken Tortilla Soup on a cold night if you’re in a soup-loving mood.
Why You’ll Love This Chili Recipe
This chili recipe is the definition of crowd-pleasing comfort food. It hits all the marks: bold flavor, satisfying texture, and enough versatility to work for everything from Super Bowl Sunday to a quiet Tuesday dinner.
The balance of meat, beans, and tomatoes means every spoonful is filling without being overly heavy. It’s also surprisingly simple to pull off, even if you’ve never made chili from scratch before.
Here’s why this recipe earns a permanent spot in your rotation:
- Big, bold flavor from a well-seasoned spice blend including chili powder, cumin, smoked paprika, and oregano
- One-pot cooking means less cleanup and more time enjoying your meal
- Freezer-friendly so you can make a double batch and store half for later
- Fully customizable with easy swaps for spice level, protein, and toppings
- Even better the next day as the flavors continue to deepen overnight
- Ready in under 90 minutes with mostly hands-off simmering time
Another favorite in the same hearty, warming category: Turkey Chili
Ingredients
This chili uses a short list of honest, straightforward ingredients. The kidney beans add a creamy, sturdy texture that holds up during the long simmer, while the crushed tomatoes create a thick, rich base. Using a combination of chili powder and smoked paprika gives the broth that distinctly deep, slightly smoky flavor that makes a great chili so satisfying.
- 2 lbs (900g) ground beef (80/20 blend recommended for flavor)
- 1 medium yellow onion, finely diced
- 1 green bell pepper, diced
- 4 cloves garlic, minced
- 2 cans (15 oz / 425g each) kidney beans, drained and rinsed
- 1 can (28 oz / 794g) crushed tomatoes
- 1 can (14.5 oz / 411g) diced tomatoes
- 2 tbsp tomato paste
- 1 cup (240ml) beef broth
- 2 tbsp chili powder
- 1 tsp ground cumin
- 1 tsp smoked paprika
- 1 tsp garlic powder
- 1 tsp onion powder
- 1/2 tsp dried oregano
- 1/2 tsp black pepper
- 1 tsp salt (plus more to taste)
- 1/4 tsp cayenne pepper (optional, for heat)
- 2 tbsp olive oil or neutral oil
For serving (optional): shredded cheddar cheese, sour cream, sliced jalapeños, green onions, tortilla chips, or crackers.
Read Also: Texas Chili Recipe
Kitchen Equipment Needed
You don’t need any fancy equipment for this chili. A good heavy-bottomed pot is really the only essential piece of gear. A Dutch oven is ideal because it distributes heat evenly and retains it well during the long simmer, which leads to better flavor development overall.
- Dutch oven or large heavy-bottomed pot (at least 6-quart capacity)
- Wooden spoon or silicone spatula for stirring and breaking up the meat
- Chef’s knife and cutting board
- Measuring spoons and measuring cups
- Can opener
- Ladle for serving
- Immersion blender (optional, for thickening the chili)
You might also enjoy: Slow Cooker Chili Recipe
Recommended Products for This Recipe
These are products I genuinely recommend based on quality and performance. They’ll make a real difference in how your chili turns out.
1. Lodge Enameled Cast Iron Dutch Oven
A quality Dutch oven is the single best investment you can make for soups, stews, and chili. The thick walls retain heat evenly, preventing scorching on the bottom while allowing the flavors to develop slowly and deeply. The enamel coating makes cleanup a breeze even after a long simmer.
2. McCormick Chili Powder Blend
Not all chili powders are created equal. McCormick’s classic blend uses a well-balanced combination of ground chilis, cumin, and spices that gives consistent, reliable flavor every time. It’s widely available and a genuine pantry staple for any chili lover.
3. San Marzano Crushed Tomatoes
The quality of your tomatoes matters more than people realize. San Marzano tomatoes are naturally sweeter and less acidic than standard canned tomatoes, which creates a smoother, richer base for your chili without needing any added sugar to balance it out.
4. OXO Good Grips Wooden Spoon Set
A sturdy wooden spoon is essential for breaking up ground beef and scraping up the flavorful browned bits at the bottom of your Dutch oven. This OXO set is comfortable to grip and durable enough for years of heavy-duty cooking.
Read Also: White Chicken Chili Recipe
Step-by-Step Instructions
1. Prep Your Vegetables
- Dice the onion into small, uniform pieces about 1/4 inch in size, which ensures they cook evenly and fully soften into the chili.
- Cut the green bell pepper in half, remove the seeds and white membranes, and dice it into pieces roughly the same size as your onion.
- Peel and finely mince the garlic cloves. You can also use a garlic press if you prefer a smoother texture.
- Open and drain the kidney beans, then rinse them under cold water in a colander. This removes the starchy liquid and prevents an overly thick or gummy texture.
- Open all canned tomatoes and set them aside within reach. Have your beef broth and tomato paste measured out and ready to go.
2. Brown the Ground Beef
- Heat your Dutch oven or large heavy-bottomed pot over medium-high heat. Allow the pot to fully preheat for about 1-2 minutes before adding oil.
- Add the 2 tablespoons of olive oil and swirl to coat the bottom of the pot.
- Add all 2 lbs (900g) of ground beef in a single layer as much as possible. Do not stir it right away. Allow the meat to sear undisturbed for 2-3 minutes until a deep brown crust forms on the bottom.
- Use your wooden spoon to break the beef into rough chunks, then continue cooking and breaking it up until no pink remains, about 5-7 minutes total.
- If there is an excessive amount of grease in the pot (more than 2 tablespoons), carefully tilt the pot and spoon out or drain the excess. Leaving a little fat behind adds flavor.
3. Sauté the Aromatics
- Reduce the heat to medium. Add the diced onion and green bell pepper directly to the pot with the browned beef.
- Cook, stirring frequently, for 5-6 minutes until the onion turns translucent and softened. The vegetables should begin to look slightly jammy at the edges.
- Add the minced garlic and stir it in, cooking for 30-60 seconds until fragrant. Watch carefully here because garlic can burn quickly and turn bitter.
4. Bloom the Spices
- Add the tomato paste to the pot and stir it directly into the meat and vegetable mixture. Cook for 1-2 minutes, stirring constantly. This step caramelizes the tomato paste slightly and deepens the overall flavor.
- Sprinkle in the chili powder, cumin, smoked paprika, garlic powder, onion powder, dried oregano, black pepper, salt, and cayenne (if using).
- Stir everything together well and cook for 1-2 minutes. Blooming the spices in the hot fat before adding liquids activates their fat-soluble compounds, making them significantly more aromatic and flavorful.
5. Add the Tomatoes, Beans, and Broth
- Pour in the crushed tomatoes and stir well to combine with the spiced beef mixture.
- Add the diced tomatoes (with their juices) and stir again.
- Pour in the beef broth and stir to incorporate all the ingredients evenly.
- Add the drained and rinsed kidney beans and stir gently to distribute them throughout the pot.
- Scrape the bottom of the pot with your spoon to release any browned bits that may have stuck, as these add tremendous flavor to the final dish.
6. Simmer and Develop Flavor
- Raise the heat to bring the chili to a gentle boil, then immediately reduce the heat to low.
- Place the lid on the pot slightly ajar (not fully sealed) to allow some steam to escape. This helps the chili reduce and thicken naturally.
- Let the chili simmer for a minimum of 30 minutes, stirring every 10 minutes to prevent sticking on the bottom. For deeper, richer flavor, simmer for 45-60 minutes.
- The chili is ready when it has thickened to your preferred consistency and the color has deepened to a dark, brick red.
7. Taste and Adjust Seasoning
- After simmering, taste the chili carefully and adjust the seasoning to your preference.
- If it needs more salt, add it in small pinches, stir, and taste again.
- If you’d like more heat, add a pinch more cayenne pepper.
- If the chili tastes slightly flat, a tiny squeeze of fresh lime juice or a splash of apple cider vinegar can brighten all the flavors.
- If the chili is too thick, add a splash more beef broth. If it’s too thin, let it simmer uncovered for 10 more minutes.
8. Serve and Garnish
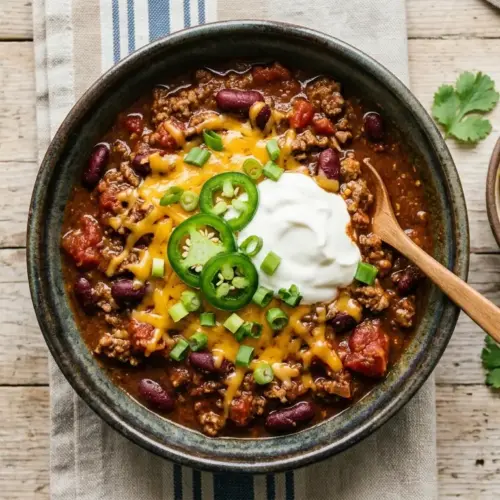
- Ladle the hot chili into deep bowls.
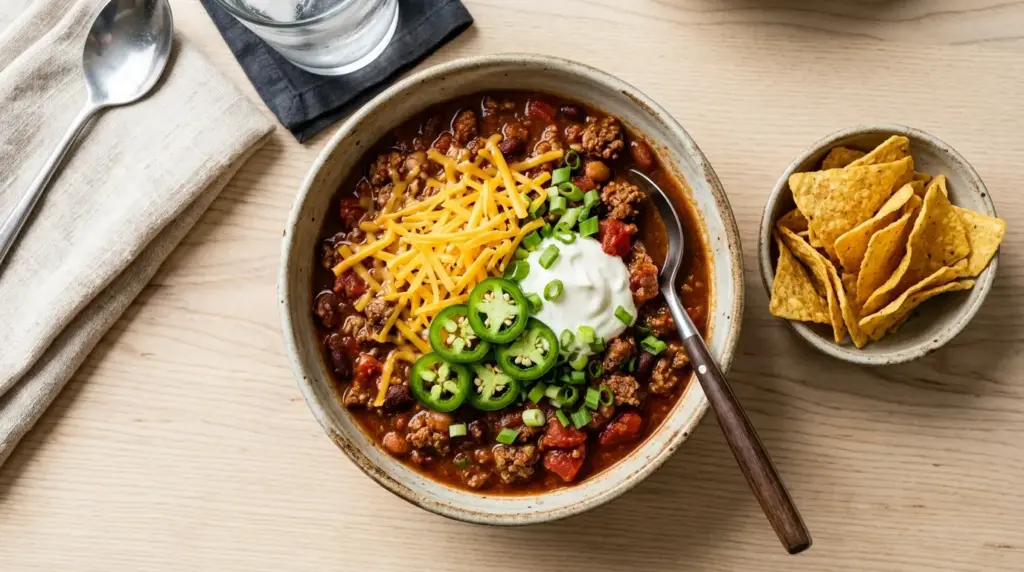
- Top with your preferred garnishes such as shredded cheddar cheese, a dollop of sour cream, sliced jalapeños, chopped green onions, or crushed tortilla chips.
- Serve immediately while hot.
This recipe also works wonderfully in a slow cooker. Follow steps 1-4 on the stovetop, then transfer everything to your slow cooker, add the tomatoes, beans, and broth, and cook on LOW for 6-8 hours or HIGH for 3-4 hours for a deeply rich, hands-off version.
Tips for Success
Making a great chili is all about layering and patience. Each of these tips addresses a common mistake that can make the difference between a good chili and a genuinely exceptional one.
- Don’t skip browning the meat. Properly browned beef adds a depth of flavor through the Maillard reaction that you simply cannot get from just cooked gray meat. Give it space in the pan and let it sear.
- Bloom your spices. Adding the spices before the liquids and letting them toast briefly in the hot fat makes a significant difference in how bold and aromatic your final chili tastes.
- Use tomato paste. That concentrated, briefly caramelized tomato paste adds umami and depth that you won’t get from canned tomatoes alone.
- Simmer low and slow. Rushing the simmering time results in a flat, one-dimensional chili. Give it at least 30 minutes, but 45-60 is better.
- Taste and adjust at the end. Seasoning a big pot of chili is a two-step process: season as you cook and then fine-tune at the end.
- Make it ahead. Chili genuinely improves overnight as the spices continue to meld. Making it a day in advance gives you a noticeably richer, more developed flavor.
- Drain and rinse your beans. This simple step prevents the chili from having a starchy, gluey texture that can come from the canning liquid.
Read Also: Baked Beans Recipe
Serving Suggestions
Chili is incredibly versatile and works as the star of the meal or as the base for something even more fun. Pair it simply with bread or load it up with toppings for a fully interactive dinner spread.
Here are some of the best ways to enjoy it:
- Serve in bowls topped with shredded cheddar, sour cream, pickled jalapeños, and green onions for the classic approach
- Spoon over Baked Potato for a deeply satisfying loaded potato dinner
- Serve alongside Skillet Cornbread for the ultimate chili-and-cornbread combination
- Use as a topping for hot dogs to make classic chili dogs at a cookout
- Ladle over Easy Nachos for a crowd-pleasing game day appetizer
- Spoon over cooked white rice for a chili rice bowl
- Use as the protein base in tacos or burritos with your usual toppings
The same rich, spicy base also pairs really well alongside Easy Deviled Eggs as part of a larger spread.
Variations to Try
Once you’ve mastered the classic version, it’s fun to branch out. These are some of the most popular and well-loved variations that stay true to the spirit of a great chili while switching up one or two elements.
- No-bean chili: Skip the kidney beans entirely for a Texas-style chili that’s all about the beef and the sauce. It’s deeply smoky, rich, and satisfying with just meat and chili sauce.
- Turkey chili: Swap the ground beef for ground turkey for a leaner option. Use 93% lean turkey and add a tablespoon of olive oil since turkey has less natural fat.
- White chicken chili: A completely different flavor profile using chicken, white beans, green chiles, and a creamy broth base.
- Vegetarian chili: Replace the ground beef with extra beans (black beans, pinto beans, chickpeas) and add diced zucchini, corn, or sweet potato for heartiness.
- Slow cooker chili: Follow steps 1-4 on the stovetop, then transfer to a slow cooker with the remaining ingredients on LOW for 6-8 hours.
- Spicier chili: Double the cayenne and add a diced serrano or chipotle chile in adobo sauce for a serious heat upgrade with a smoky, complex kick.
- Cincinnati-style chili: Serve over spaghetti with finely shredded cheddar and a sprinkle of onion for this beloved Midwest variation.
For a leaner weeknight option, try the Bush’s White Chicken Chili Recipe for a completely different but equally satisfying bowl.
Storage and Reheating
One of the best things about chili is how beautifully it stores. It keeps well in the refrigerator and freezer, and the flavor actually continues to improve with time, making leftovers something to genuinely look forward to.
- Refrigerator: Store cooled chili in an airtight container in the fridge for up to 5 days.
- Freezer: Chili freezes exceptionally well. Portion into freezer-safe containers or zip-lock bags and freeze for up to 3 months. Leave a little space at the top of the container as the chili will expand slightly when frozen.
- Thawing: Transfer frozen chili to the refrigerator the night before you plan to eat it, or thaw on the counter for a few hours.
- Reheating on the stovetop: Pour the chili into a saucepan, add a splash of beef broth or water to loosen it, and warm over medium-low heat, stirring occasionally, until heated through.
- Reheating in the microwave: Transfer a serving to a microwave-safe bowl, cover loosely, and heat in 1-minute increments, stirring between each, until hot.
- Do not boil when reheating. Bringing chili to a full boil when reheating can cause the beans to break down and the texture to become grainy. A gentle simmer is all you need.
Another favorite: Hamburger Soup Recipe
Nutritional Facts
The nutritional values below are estimates per serving based on 6 servings per recipe, without optional toppings.
| Nutrient | Amount per Serving |
|---|---|
| Calories | 420 kcal |
| Total Fat | 18g |
| Saturated Fat | 7g |
| Cholesterol | 85mg |
| Sodium | 780mg |
| Total Carbohydrates | 30g |
| Dietary Fiber | 9g |
| Total Sugars | 8g |
| Protein | 35g |
| Iron | 5mg |
| Vitamin C | 18mg |
Note: These values are approximate and will vary depending on the specific brands of ingredients used, the fat content of your ground beef, and any toppings added at serving.
Read Also: Ground Beef and Cabbage Recipe
Health Benefits of Key Ingredients
This chili recipe isn’t just satisfying. It’s actually packed with genuinely nutritious ingredients that support a healthy diet without sacrificing any of the flavor.
Here’s a closer look at what makes this bowl of chili a genuinely nourishing meal:
- Ground beef (80/20): A significant source of complete protein, iron, zinc, and B vitamins including B12, which supports energy metabolism and nervous system function.
- Kidney beans: One of the most nutrient-dense legumes available, kidney beans are high in plant-based protein, dietary fiber, folate, and iron. Their fiber content supports digestive health and helps you feel full longer.
- Crushed and diced tomatoes: Tomatoes are rich in lycopene, a powerful antioxidant linked to reduced risk of certain chronic diseases. They also provide vitamin C and potassium.
- Garlic: A well-documented functional food with antimicrobial and anti-inflammatory properties. Garlic contains allicin, a sulfur compound that supports immune health and cardiovascular function.
- Cumin: Beyond flavor, cumin is a solid source of iron and has been studied for its potential antioxidant and anti-inflammatory effects.
- Bell pepper: A surprisingly high source of vitamin C, providing more per gram than most citrus fruits. Green bell peppers also contain vitamin B6 and folate.
- Smoked paprika: Made from dried red peppers, paprika contains capsaicin (in small amounts) and a range of antioxidants including vitamin A and E.
This recipe also pairs well with Cilantro Lime Rice for a balanced, complete meal.
Frequently Asked Questions
1. Can I make this chili ahead of time?
Absolutely, and it’s actually recommended. Chili tastes significantly better after it sits for 12-24 hours, as the spices continue to bloom and the flavors meld together. Make it the day before your event, store it in the refrigerator overnight, and reheat gently on the stovetop before serving.
2. How do I thicken my chili if it’s too watery?
There are a few easy options. You can simply remove the lid and let the chili simmer uncovered for an additional 10-20 minutes to allow excess liquid to evaporate. Alternatively, mash a portion of the kidney beans against the side of the pot with your spoon to release their starch, which will naturally thicken the broth. A cornmeal slurry (1 tablespoon cornmeal mixed with 2 tablespoons water) stirred in and simmered for 5 minutes also works well.
3. Can I use other types of beans?
Yes, kidney beans are the classic choice but this recipe works well with black beans, pinto beans, navy beans, or a combination. Black beans add a slightly earthier flavor, while pinto beans have a creamier, more buttery texture. Use whatever you have on hand or prefer.
4. How spicy is this chili recipe?
As written, this recipe is mildly spicy, with heat coming primarily from the chili powder and optional cayenne. The level of spice is easy to adjust. Omit the cayenne entirely for a mild chili, keep it as written for a medium heat, or increase it to 1/2 teaspoon and add a diced serrano pepper for a genuinely hot bowl.
5. Can I use ground turkey instead of ground beef?
You can, and it works very well. Ground turkey produces a leaner chili that’s lighter in both fat and calories. Use 93% lean ground turkey for the best flavor. Since turkey has less natural fat than beef, add an extra tablespoon of olive oil when sautéing the vegetables to prevent sticking and ensure the aromatics cook properly.
Read Also: Stuffed Pepper Soup Recipe
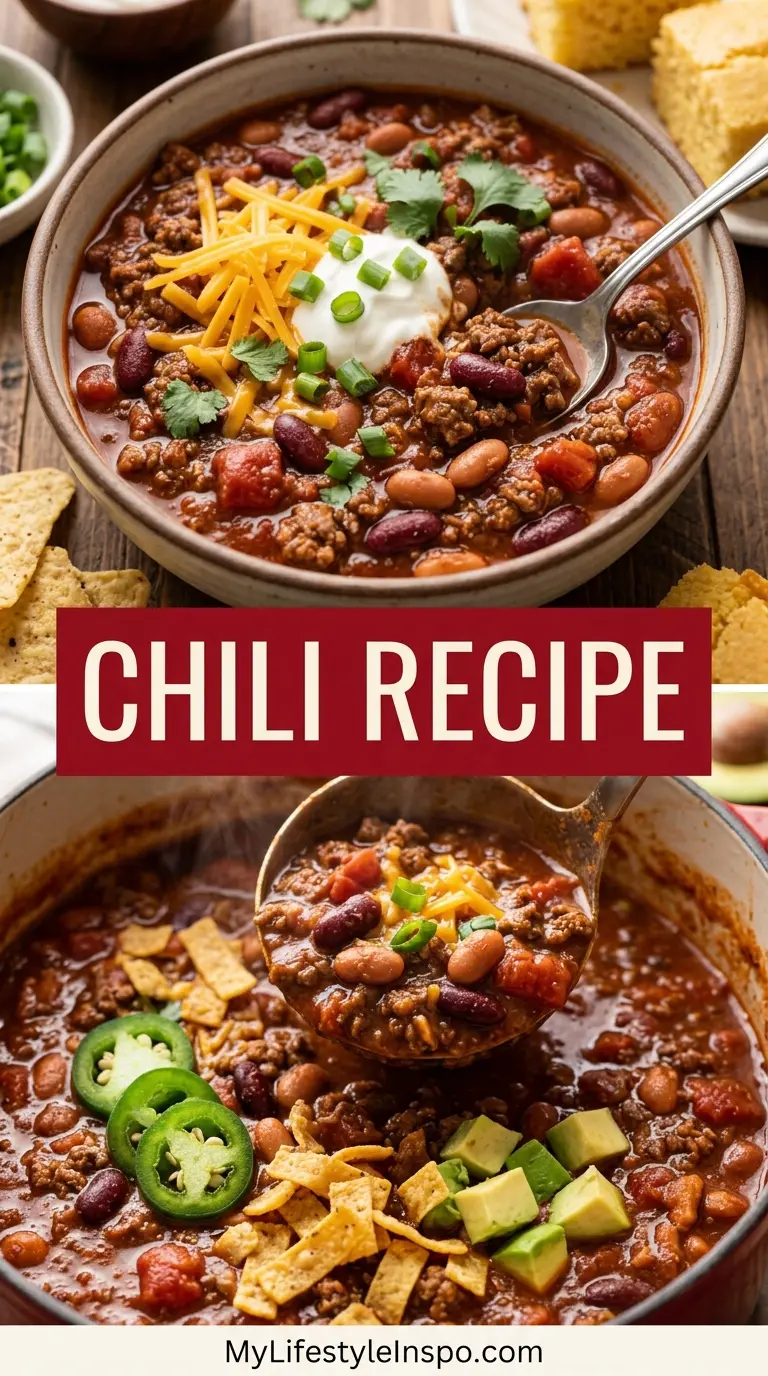
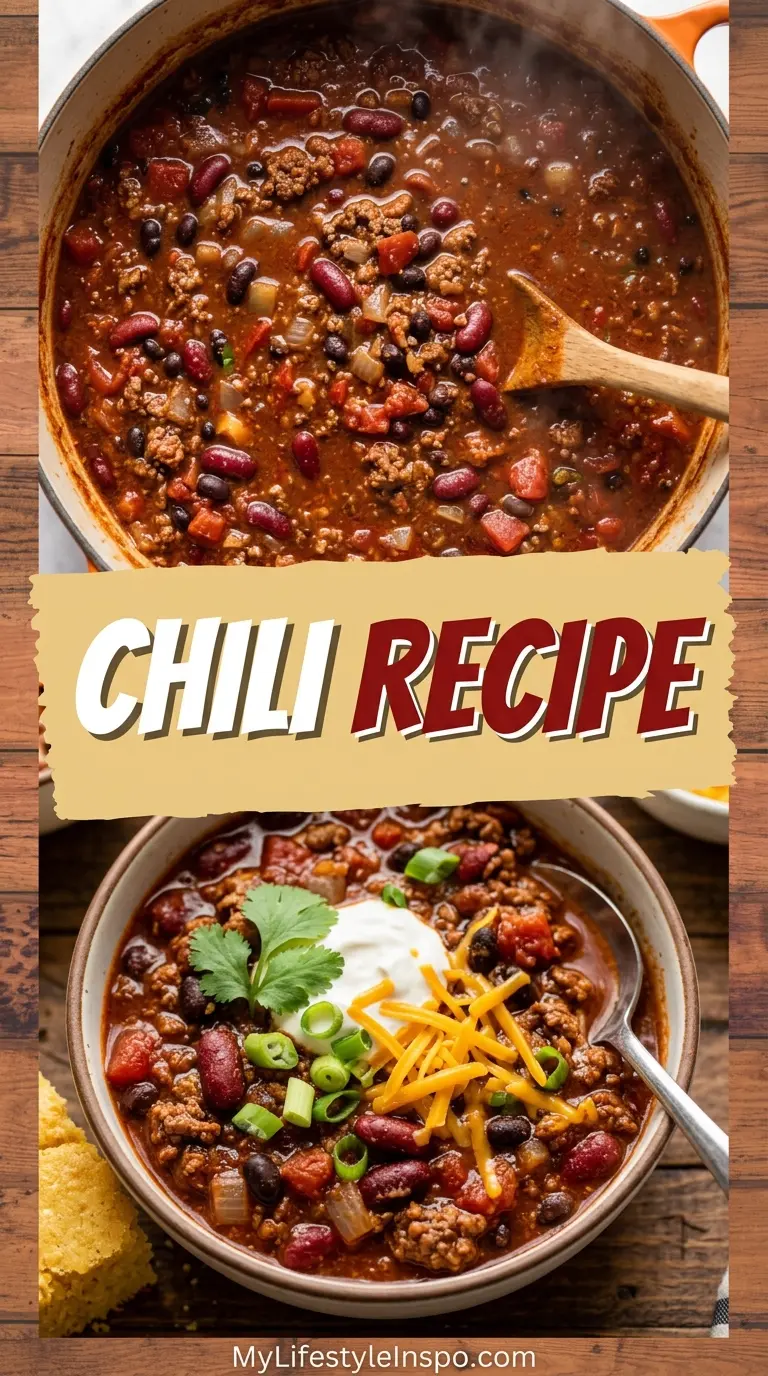
Classic Beef and Kidney Bean Chili
Equipment
- Dutch oven or large heavy-bottomed pot - At least 6-quart capacity
- Wooden spoon or silicone spatula - For stirring and breaking up the meat
- Chef’s knife
- Cutting board
- Measuring spoons
- Measuring cups
- Can opener
- Ladle
- Immersion Blender - Optional, for thickening the chili
Ingredients
- 2 lbs ground beef - 900g, 80/20 blend recommended
- 1 medium yellow onion - finely diced
- 1 green bell pepper - diced
- 4 cloves garlic - minced
- 2 cans kidney beans - 15 oz / 425g each, drained and rinsed
- 1 can crushed tomatoes - 28 oz / 794g
- 1 can diced tomatoes - 14.5 oz / 411g, with juices
- 2 tbsp tomato paste
- 1 cup beef broth - 240ml
- 2 tbsp chili powder
- 1 tsp ground cumin
- 1 tsp smoked paprika
- 1 tsp garlic powder
- 1 tsp onion powder
- 0.5 tsp dried oregano
- 0.5 tsp black pepper
- 1 tsp salt - plus more to taste
- 0.25 tsp cayenne pepper - optional, for heat
- 2 tbsp olive oil - or neutral oil
For Serving (Optional)
- shredded cheddar cheese
- sour cream
- sliced jalapeños
- green onions - chopped
- tortilla chips
- crackers
Instructions
- Dice the onion and bell pepper into small, uniform pieces. Mince the garlic. Drain and rinse the kidney beans. Open all canned tomatoes and measure the broth and tomato paste.
- Heat the oil in a Dutch oven over medium-high heat. Add the ground beef in a single layer and let it sear undisturbed for 2-3 minutes. Break it into chunks and cook until no pink remains, about 5-7 minutes. Drain excess grease if needed.
- Reduce heat to medium. Add the onion and bell pepper and cook for 5-6 minutes until softened. Add the garlic and cook for 30-60 seconds until fragrant.
- Stir in the tomato paste and cook for 1-2 minutes. Add the chili powder, cumin, smoked paprika, garlic powder, onion powder, oregano, black pepper, salt, and cayenne (if using). Cook for 1-2 minutes to bloom the spices.
- Pour in the crushed tomatoes, diced tomatoes with their juices, beef broth, and drained kidney beans. Stir well and scrape the bottom of the pot to release any browned bits.
- Bring the chili to a gentle boil, then reduce the heat to low and partially cover with the lid. Simmer for 30-60 minutes, stirring every 10 minutes, until thickened and dark brick red.
- Taste and adjust seasoning with more salt, cayenne, or a squeeze of fresh lime juice if needed. If too thick, add more broth; if too thin, simmer uncovered.
- Ladle the chili into bowls and top with shredded cheddar, sour cream, jalapeños, green onions, tortilla chips, or crackers. Serve hot.
Notes
- Don’t skip browning the meat—it adds deep flavor through the Maillard reaction. Give the beef space in the pan and let it sear.
- Bloom your spices in the hot fat before adding liquids. This activates their fat-soluble compounds for a bolder, more aromatic chili.
- For the best flavor, simmer for 45-60 minutes rather than the minimum 30 minutes. Low and slow is key.
- Chili tastes even better the next day. Make it a day ahead and refrigerate overnight for deeper, melded flavors.
- To thicken a watery chili, simmer uncovered, mash some beans against the pot, or stir in a cornmeal slurry (1 tbsp cornmeal + 2 tbsp water).
- For a leaner version, substitute 93% lean ground turkey and add an extra tablespoon of olive oil.
- Freeze leftovers in airtight containers for up to 3 months. Thaw overnight in the fridge before reheating gently.
- For a slow cooker version, complete steps 1-4 on the stovetop, then transfer to a slow cooker with remaining ingredients. Cook on LOW for 6-8 hours or HIGH for 3-4 hours.
- Customize the heat level: omit cayenne for mild, keep as written for medium, or double it and add a diced serrano for a spicy version.
- This chili is excellent served over baked potatoes, hot dogs, rice, or alongside cornbread and nachos.
Final Thoughts
A solid chili recipe is one of those foundational dishes that serves you well for years. Once you’ve made this version a couple of times, you’ll have the fundamentals locked in and you can start experimenting with your own twists and personalizations.
This recipe is honest, unfussy, and deeply satisfying. It’s the kind of food that warms you from the inside out, brings people together around the table, and earns requests for seconds without fail.
Give this chili recipe a try and let me know how it turns out in the comments below. I’d love to hear what toppings you go with, any tweaks you made, or how it went over with your family!
Recommended:
- Santa Fe Soup Recipe
- Easy Taco Soup Recipe
- Taco Seasoning Recipe
- Mexican Rice Recipe
- Refried Beans Recipe
- Loaded Nachos
- Classic Smash Burger Recipe
- Pico de Gallo Recipe
- Easy Guacamole Recipe
- Corn Tortilla Recipe


