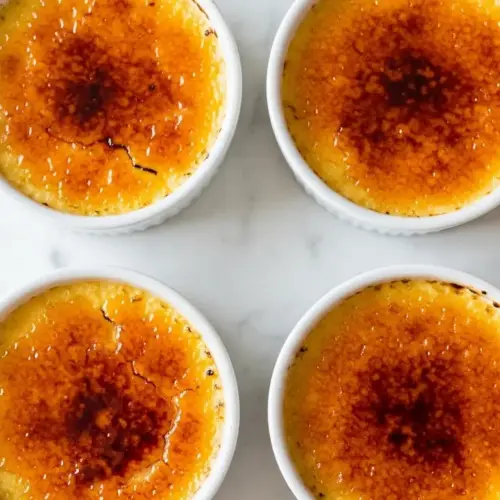
Easy Creme Brulee

This classic French dessert has a reputation for being fancy and intimidating, but the truth is quite the opposite. With just five simple ingredients and straightforward techniques, you can create restaurant-quality creme brulee right in your own kitchen.
Equipment
- Oven - Preheated to 325°F
- Ramekins - 4-6 shallow oven-safe ramekins, 6-8 oz capacity each
- Roasting pan - Large pan or deep baking dish for water bath
- Medium saucepan
- Mixing bowls
- Whisk
- Fine-mesh strainer - Also called a sieve
- Measuring cups and spoons
- Kitchen torch - Or use oven broiler (optional)
- Kettle - For boiling water
Ingredients
- 2 cups heavy cream - 480ml
- 5 large egg yolks - Room temperature
- 1/3 cup granulated sugar - 67g, plus extra for topping
- 1 tablespoon pure vanilla extract - 15ml, or 1 vanilla bean, split and scraped
- 1/4 teaspoon fine sea salt - 1.25ml
- 4-6 tablespoons granulated sugar - 50-75g, or turbinado sugar for caramelizing
Instructions
- Preheat oven to 325°F (163°C) and position rack in center. Place ramekins in a large roasting pan and boil water for the water bath. Set a fine-mesh strainer over a large measuring cup with a pour spout.
- Pour heavy cream into a medium saucepan. If using a vanilla bean, split lengthwise, scrape out seeds, and add both seeds and pod to the cream. Heat over medium-low until hot with small bubbles around the edges, do not boil. Remove from heat and let sit 10-15 minutes if using vanilla bean. Remove and discard pod.
- Separate egg yolks into a medium bowl. Add 1/3 cup sugar and salt. Whisk vigorously for 1-2 minutes until pale yellow and slightly thickened, with sugar mostly dissolved.
- Slowly pour about 1/4 cup of warm cream into the egg yolk mixture while whisking constantly to temper the eggs. Continue adding remaining cream in a slow stream while whisking. If using vanilla extract instead of bean, stir it in now.
- Pour custard mixture through the fine-mesh strainer into the measuring cup. Carefully pour into each ramekin, filling about 3/4 full. Skim off any bubbles from the surface with a spoon or torch.
- Place roasting pan with filled ramekins in the oven. Carefully pour hot water into the pan until it comes halfway up the sides of the ramekins. Bake for 35-45 minutes until edges are set but centers still have a slight wobble when shaken.
- Carefully remove roasting pan from oven. Use tongs to lift each ramekin out and place on a cooling rack. Cool at room temperature for 30 minutes, then cover with plastic wrap and refrigerate for at least 4 hours or up to 3 days.
- Just before serving, remove custards from refrigerator. Blot any condensation with a paper towel. Sprinkle 1-2 teaspoons of sugar evenly over each surface, tilting to distribute and tapping out excess.
- If using a kitchen torch, hold it 2-3 inches from the surface and move in circular motions until sugar melts and turns golden brown, about 1-2 minutes per ramekin. If using broiler, place on top rack 4-5 inches from element and broil 2-4 minutes, watching constantly.
- Let caramelized tops cool for 2-3 minutes to harden into a crispy shell before serving. Enjoy the satisfying crack of the sugar top and the creamy custard beneath.
Notes
- Use room temperature egg yolks: Cold eggs can cool the cream too quickly, making it harder to create a smooth mixture.
- Don't skip the straining step: This removes any cooked egg bits and ensures an ultra-smooth custard texture.
- Watch the water bath carefully: Water should come halfway up the ramekins but not so high that they float.
- Check for doneness by the jiggle: Centers should wobble like set Jell-O, not slosh like liquid.
- Blot surface moisture before caramelizing: Any condensation on cold custards will prevent the sugar from caramelizing properly.
- Use an even layer of sugar: Too much sugar creates a thick, hard crust; too little won't caramelize properly.
- Work quickly with the torch: Keep the torch moving to avoid burning spots and achieve even caramelization.
- Let the caramel cool briefly: Wait 2-3 minutes after torching so the sugar hardens into a crispy shell.
- Make-ahead friendly: Custards can be prepared up to 3 days in advance and refrigerated before caramelizing.
- Freezing not recommended: The custard texture changes when frozen, becoming grainy and separated.