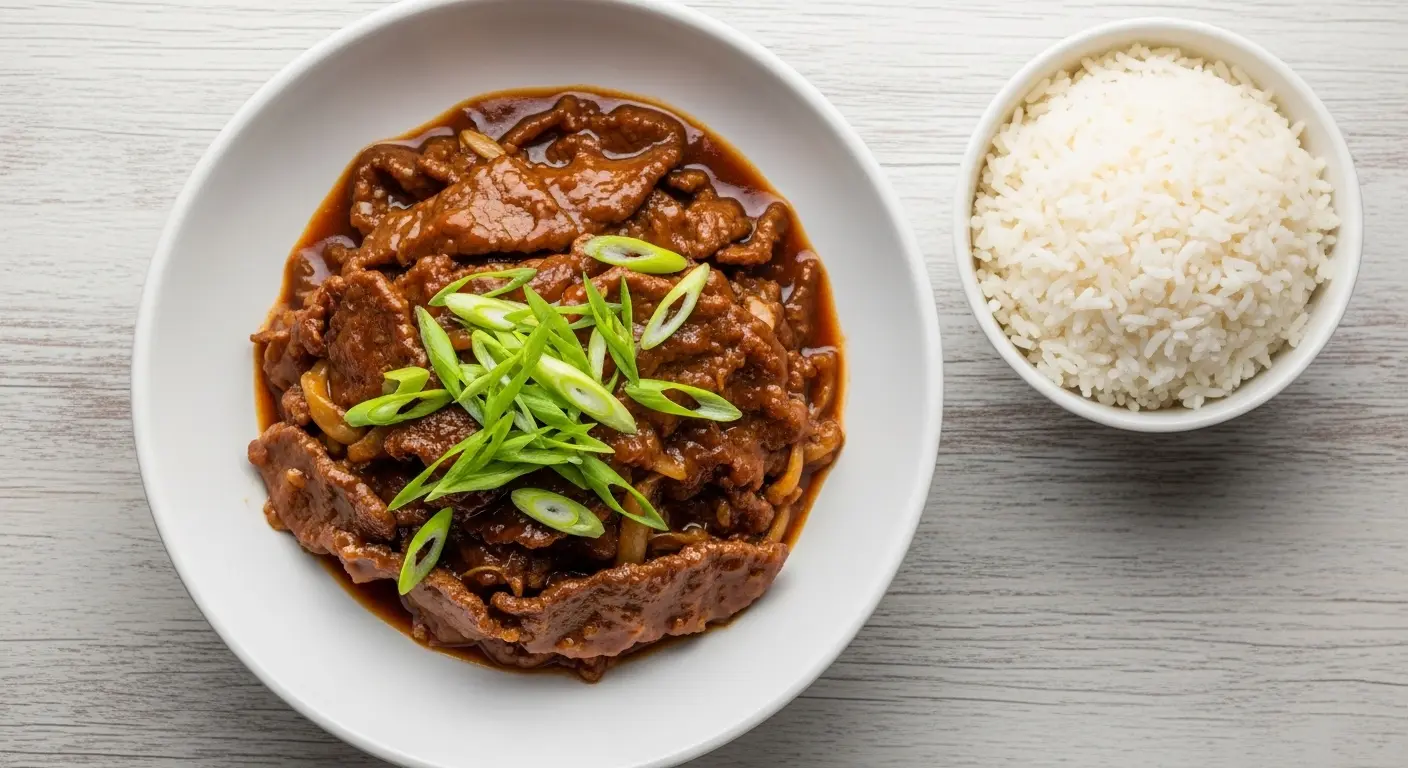
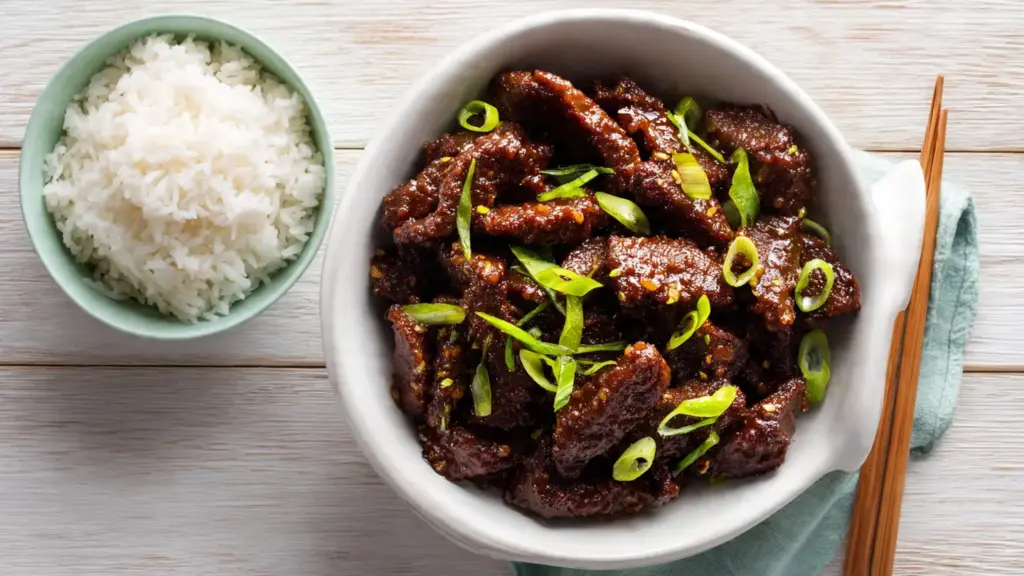
Craving the sweet and savory flavors of your favorite takeout spot? This easy Mongolian beef recipe brings restaurant-quality stir-fry right to your kitchen in under 30 minutes. Tender slices of beef are coated in a glossy sauce made with soy, brown sugar, garlic, and ginger, then served over fluffy rice for a satisfying weeknight dinner that beats delivery every time.
Unlike the overly sweet versions you might find at chain restaurants, this recipe strikes the perfect balance between savory and sweet. The beef stays incredibly tender thanks to a simple cornstarch coating technique, while the sauce clings beautifully to each piece.
You don’t need a wok or any fancy equipment to pull this off. A regular skillet works perfectly fine, and most ingredients are probably already sitting in your pantry.
The best part? While the dish looks impressive enough for company, it comes together so quickly that you can have dinner on the table faster than you could pick up takeout. No more waiting on delivery or settling for soggy restaurant leftovers.
This recipe has become my go-to when I need something quick, delicious, and guaranteed to please everyone at the table. The combination of crispy-edged beef and that sticky, flavorful sauce is downright addictive.
For more flavorful beef dishes, check out this Beef and Broccoli that pairs perfectly with your weeknight dinner rotation.
Why You’ll Love This Easy Mongolian Beef Recipe
This dish delivers big flavor with minimal effort, making it ideal for busy weeknights when you want something better than basic chicken or pasta. The sauce is incredibly flavorful without being cloying, and the beef practically melts in your mouth.
- Quick cooking time: From start to finish, you’ll have dinner ready in 25 minutes or less, making it faster than most delivery options
- Budget-friendly: Flank steak is an affordable cut that becomes incredibly tender when sliced thin and cooked properly
- Restaurant-quality results: The crispy seared edges and glossy sauce rival anything you’d get from your favorite Chinese restaurant
- Simple ingredient list: No hard-to-find ingredients or specialty sauces required, just pantry staples you likely already have
- Family-approved: Even picky eaters love the sweet-savory flavor profile and tender texture of the beef
- Versatile serving options: Serve it over rice, noodles, or even tucked into lettuce wraps for a lighter meal
Another favorite weeknight option: Orange Chicken brings similar flavors with a citrus twist.
Ingredients
This recipe uses simple, accessible ingredients that work together to create tender beef and a perfectly balanced sauce. The cornstarch coating is key to achieving that signature crispy-tender texture, while the sauce ingredients create the sweet-savory glaze Mongolian beef is known for.
- 1 1/2 pounds (680g) flank steak, sliced thinly against the grain
- 1/4 cup (32g) cornstarch, for coating the beef
- 3 tablespoons vegetable oil (or any neutral oil), divided
- 1 teaspoon sesame oil
- 5 cloves garlic, minced
- 1 tablespoon fresh ginger, minced or grated
- 1/2 cup (120ml) low-sodium soy sauce
- 1/2 cup (100g) brown sugar, packed
- 1/4 cup (60ml) water
- 1/4 teaspoon red pepper flakes (optional, for heat)
- 3 green onions, sliced, white and green parts separated
Kitchen Equipment Needed
Having the right tools makes preparing this recipe smooth and efficient. You don’t need anything fancy, just a few basic kitchen items that you probably already own. A sharp knife is essential for slicing the beef thinly, and a large skillet provides enough surface area to sear the beef properly without overcrowding.
- Sharp chef’s knife for slicing the beef thinly
- Cutting board
- Large skillet or wok (12-inch works best)
- Medium mixing bowl for coating the beef
- Small bowl for mixing the sauce
- Tongs or spatula for flipping the beef
- Measuring cups and spoons
Recommended Products for This Recipe
These carefully selected products will help you achieve the best results and make the cooking process even easier. Each recommendation addresses a specific need in this recipe, from quality ingredients to kitchen tools that improve your technique.
1. Lee Kum Kee Premium Soy Sauce
This premium soy sauce adds authentic depth and umami flavor to the sauce without being overly salty. The balanced flavor profile ensures your Mongolian beef tastes restaurant-quality, and a single bottle lasts through many meals.
2. Lodge Cast Iron Skillet
A well-seasoned cast iron skillet holds heat exceptionally well, creating the perfect sear on your beef for those crispy edges. The even heat distribution prevents hot spots and ensures every piece of beef cooks uniformly.
3. Microplane Grater for Ginger
Fresh ginger makes all the difference in this recipe, and a microplane grater turns it into a fine paste that distributes evenly throughout the sauce. This tool eliminates fibrous chunks and ensures smooth, integrated ginger flavor in every bite.
4. Organic Dark Brown Sugar
Dark brown sugar creates a richer, more complex sweetness with deeper molasses notes compared to light brown sugar. This enhances the caramelization in the sauce and provides better flavor balance against the savory elements.
You might also enjoy: Beef Tips for another quick and tasty beef dinner option.
Step-by-Step Instructions
Follow these detailed instructions to achieve perfectly tender beef with crispy edges and a glossy, flavorful sauce. Each step builds on the previous one to ensure success, even if you’re new to stir-frying. Take your time with the prep work, and the actual cooking will be quick and straightforward.
1. Prepare and Slice the Beef
- Place the flank steak in the freezer for 20-30 minutes to firm up, making it much easier to slice thinly and evenly
- Remove the partially frozen beef from the freezer and place it on a cutting board
- Identify the direction of the muscle fibers (the grain) running through the meat
- Using a sharp knife, slice the beef across the grain (perpendicular to the fibers) into strips about 1/4-inch (6mm) thick
- Cut each strip into 2-3 inch (5-7cm) pieces for bite-sized portions
- Pat the beef slices dry with paper towels to remove excess moisture, which helps achieve better browning
2. Coat the Beef with Cornstarch
- Add the sliced beef to a large mixing bowl or gallon-sized ziplock bag
- Sprinkle the cornstarch evenly over the beef pieces
- Toss the beef thoroughly to coat each piece completely with cornstarch, ensuring no dry spots remain
- Shake off any excess cornstarch so you have just a light, even coating on each piece
- Let the coated beef sit for 5 minutes while you prepare the sauce, allowing the cornstarch to adhere properly
3. Make the Sauce
- In a small bowl, whisk together the soy sauce, brown sugar, and water until the sugar dissolves completely
- Continue stirring until no sugar granules remain and the mixture is smooth
- Add the minced ginger and half of the minced garlic to the sauce mixture and stir to combine
- Set the prepared sauce aside, keeping it within easy reach for when you need it during cooking
4. Sear the Beef
- Heat 2 tablespoons of vegetable oil in your large skillet or wok over medium-high heat
- Wait until the oil is shimmering and almost smoking, indicating it’s hot enough for a good sear
- Working in batches to avoid overcrowding (overcrowding creates steam instead of a sear), add about half the beef in a single layer
- Let the beef sit undisturbed for 1-2 minutes until the bottom develops a golden-brown, crispy crust
- Flip each piece using tongs and cook for another 1 minute on the second side
- Transfer the seared beef to a clean plate and repeat the process with the remaining beef, adding a bit more oil if needed
- Once all beef is seared, set it aside while you finish the sauce
5. Cook the Aromatics and Sauce
- Reduce the heat to medium and add the remaining 1 tablespoon of vegetable oil to the same skillet
- Add the remaining minced garlic and the white parts of the sliced green onions
- Stir constantly for 30-40 seconds until fragrant but not browned, as burnt garlic tastes bitter
- Pour the prepared sauce into the skillet, scraping up any browned bits from the bottom of the pan with a wooden spoon
- Add the sesame oil and red pepper flakes if using
- Bring the sauce to a vigorous boil, stirring occasionally
- Let it boil for 2-3 minutes until it reduces slightly and thickens to a glossy, syrupy consistency
6. Combine and Finish
- Return all the seared beef to the skillet with the thickened sauce
- Toss the beef gently to coat each piece evenly with the sauce
- Cook for 1-2 minutes, stirring constantly, until the beef is heated through and the sauce clings to each piece
- Remove the skillet from heat immediately to prevent overcooking the beef
- Stir in most of the green parts of the sliced green onions, reserving a small handful for garnish
- Transfer the Mongolian beef to a serving platter or individual plates
- Garnish with the reserved green onion slices for a fresh pop of color and mild onion flavor
For a complete Asian-inspired meal, pair this with Fried Rice.
Tips for Success
These tips will help you achieve restaurant-quality results every single time you make this recipe. Pay special attention to the beef preparation and cooking temperature, as these factors make the biggest difference in the final dish.
- Freeze the beef briefly: Putting the flank steak in the freezer for 20-30 minutes makes it much easier to slice thinly and evenly, resulting in more tender pieces that cook uniformly
- Slice against the grain: Always cut perpendicular to the muscle fibers to shorten them, which makes each bite significantly more tender and easier to chew
- Don’t skip the cornstarch coating: This step creates a protective barrier that keeps the beef tender while creating crispy edges, and it helps the sauce cling to each piece beautifully
- Use high heat: A hot pan is essential for achieving that crispy sear on the beef without overcooking the interior, so make sure your oil is shimmering before adding the beef
- Cook in batches: Overcrowding the pan lowers the temperature and causes steaming instead of searing, resulting in gray, tough beef instead of caramelized pieces
- Don’t overcook: Flank steak becomes tough when overcooked, so aim for medium-rare to medium for the most tender results
- Adjust sweetness: If you prefer less sweet, reduce the brown sugar to 1/3 cup and add an extra tablespoon of soy sauce for more savory depth
Read Also: Chicken Fried Rice Recipe
Serving Suggestions
Mongolian beef is incredibly versatile and pairs beautifully with various sides and accompaniments. The key is choosing options that complement the sweet-savory sauce without competing with it.
This dish shines brightest when served over:
- Steamed white rice: The classic choice that soaks up the delicious sauce perfectly and provides a neutral backdrop for the bold flavors
- Brown rice or jasmine rice: For a nuttier flavor and additional nutrition
- Lo mein noodles: Create a more substantial meal with tender noodles that catch the sauce beautifully
- Cauliflower rice: A low-carb option that still provides the texture you want without overpowering the beef
- Crispy rice noodles: For an authentic presentation with contrasting textures
Excellent side dishes to round out the meal:
- Steamed Broccoli or bok choy for a healthy green vegetable
- Egg Rolls for a crispy appetizer
- Hot and sour soup or Egg Drop Soup to start
- Asian Cucumber Salad for a cool, refreshing contrast
Another favorite: Sesame Chicken works wonderfully alongside this dish for a feast.
Variations to Try
Once you’ve mastered the basic recipe, these variations let you customize the dish to your preferences or dietary needs. Each option brings something unique while maintaining the essential character of Mongolian beef.
- Spicier version: Double the red pepper flakes or add 1-2 teaspoons of sriracha or sambal oelek to the sauce for serious heat
- Extra vegetables: Stir in sliced bell peppers, snap peas, or sliced onions along with the white parts of the green onions for more color and nutrition
- Mongolian chicken: Substitute boneless, skinless chicken thighs for the beef, cutting them into bite-sized pieces and following the same cooking method
- Lower sodium: Use reduced-sodium soy sauce or coconut aminos, and reduce the amount to 1/3 cup, balancing with extra ginger and garlic for flavor
- Less sweet: Cut the brown sugar in half and add a tablespoon of hoisin sauce for complexity without excessive sweetness
- Crispy beef variation: After coating with cornstarch, deep fry the beef pieces in oil heated to 350°F (175°C) until golden and crispy, then toss with the sauce
- Add sesame seeds: Sprinkle toasted sesame seeds over the finished dish for extra nutty flavor and visual appeal
If you love Asian flavors, try this Teriyaki Chicken for another weeknight winner.
Storage and Reheating
Proper storage keeps your leftover Mongolian beef tasting fresh and delicious for several days. The sauce may thicken as it cools, but gentle reheating brings back the perfect consistency.
- Refrigerator storage: Transfer cooled Mongolian beef to an airtight container and refrigerate for up to 4 days, storing any rice separately to prevent sogginess
- Freezer storage: While fresh is best, you can freeze Mongolian beef in a freezer-safe container for up to 3 months, though the texture of the beef may change slightly
- Reheating on stovetop: Add the beef to a skillet over medium heat with a splash of water or broth to loosen the sauce, stirring gently until heated through
- Reheating in microwave: Place in a microwave-safe dish, cover loosely, and heat in 1-minute intervals, stirring between each interval until hot throughout
- Prevent overcooking: Reheat just until warmed through to avoid making the beef tough, as overcooking is the enemy of tender meat
- Best practice: Let refrigerated Mongolian beef come to room temperature for 10-15 minutes before reheating for more even warming
Read Also: Beef and Broccoli Stir Fry Recipe
Nutritional Facts
Per serving (based on 4 servings):
- Calories: 445
- Total Fat: 16g
- Saturated Fat: 4g
- Cholesterol: 102mg
- Sodium: 1280mg
- Total Carbohydrates: 38g
- Dietary Fiber: 0g
- Sugars: 26g
- Protein: 36g
- Vitamin A: 3% DV
- Vitamin C: 4% DV
- Calcium: 6% DV
- Iron: 18% DV
Nutritional information is approximate and will vary based on specific ingredients used and portion sizes.
For more protein-rich dinners, check out this Chicken Breast that’s equally quick and satisfying.
Health Benefits of Key Ingredients
While Mongolian beef is definitely an indulgent dish, several of its key ingredients offer notable nutritional benefits. Understanding what each component contributes helps you appreciate this meal beyond just taste.
Flank steak provides:
- High-quality protein: Essential for muscle maintenance, repair, and overall body function, with about 36g per serving
- Iron and zinc: Supports healthy blood cells, immune function, and energy production throughout the day
- B vitamins: Particularly B12, which is crucial for nerve function and red blood cell formation
- Lower fat content: Compared to other beef cuts, flank steak is relatively lean, making it a better choice for those watching fat intake
Ginger offers:
- Anti-inflammatory properties: Contains gingerol, a bioactive compound that may help reduce inflammation and muscle soreness
- Digestive support: Has been used for centuries to aid digestion and reduce nausea
- Antioxidants: Helps protect cells from oxidative stress and may support immune health
Garlic brings:
- Immune-boosting compounds: Contains allicin and other sulfur compounds that may enhance immune function
- Heart health support: May help reduce blood pressure and cholesterol levels when consumed regularly
- Antimicrobial properties: Natural compounds that fight bacteria and viruses
You might also enjoy: Beef Tenderloin for a special occasion meal.
Frequently Asked Questions
1. Can I use a different cut of beef for this recipe?
Yes, you can substitute sirloin steak or ribeye, though flank steak is ideal because it becomes incredibly tender when sliced thin and cooked quickly. If using a more expensive cut like ribeye, you’ll get excellent results but at a higher cost.
2. Why is my sauce too thin or too thick?
The sauce should thicken as it boils and reduces. If it’s too thin, let it simmer for an extra 1-2 minutes, or whisk in a slurry of 1 teaspoon cornstarch mixed with 1 tablespoon water. If too thick, simply add water one tablespoon at a time until you reach the desired consistency.
3. Can I make this recipe ahead of time?
You can slice and coat the beef up to a day ahead, storing it covered in the refrigerator, and mix the sauce ingredients in advance. However, the actual cooking should be done just before serving for the best texture and flavor.
4. Is Mongolian beef actually from Mongolia?
No, despite its name, Mongolian beef is an American-Chinese dish created in Chinese-American restaurants. Traditional Mongolian cuisine typically features boiled or grilled meats rather than stir-fries like this one.
5. How do I prevent the beef from becoming tough?
The key is slicing thin against the grain, not overcooking the beef (aim for medium-rare to medium), and using high heat for quick searing. The cornstarch coating also helps protect the beef and keep it tender during cooking.
For another Asian-inspired favorite, try Sweet and Sour Chicken.
Final Thoughts
This easy Mongolian beef recipe proves that restaurant-quality Chinese food is absolutely achievable at home. The combination of crispy-tender beef and that perfectly balanced sweet-savory sauce creates a dish that’s become a weekly staple in my kitchen.
What makes this recipe truly special is how it delivers maximum flavor with minimal fuss. No complicated techniques, no hard-to-find ingredients, just straightforward cooking that produces consistently delicious results.
Give this recipe a try tonight and discover just how simple it is to create takeout-worthy meals in your own kitchen. I’d love to hear how it turns out for you! Drop a comment below with your thoughts, any variations you tried, or share a photo of your finished dish.
Recommended:
- Kung Pao Chicken Recipe
- General Tso Chicken Recipe
- Beef Stir Fry Recipe
- Cashew Chicken Recipe
- Shrimp Fried Rice Recipe
- Honey Garlic Chicken Recipe
- Beef Lo Mein Recipe
- Szechuan Beef Recipe
- Pepper Steak Recipe
- Asian Beef Skillet Recipe


