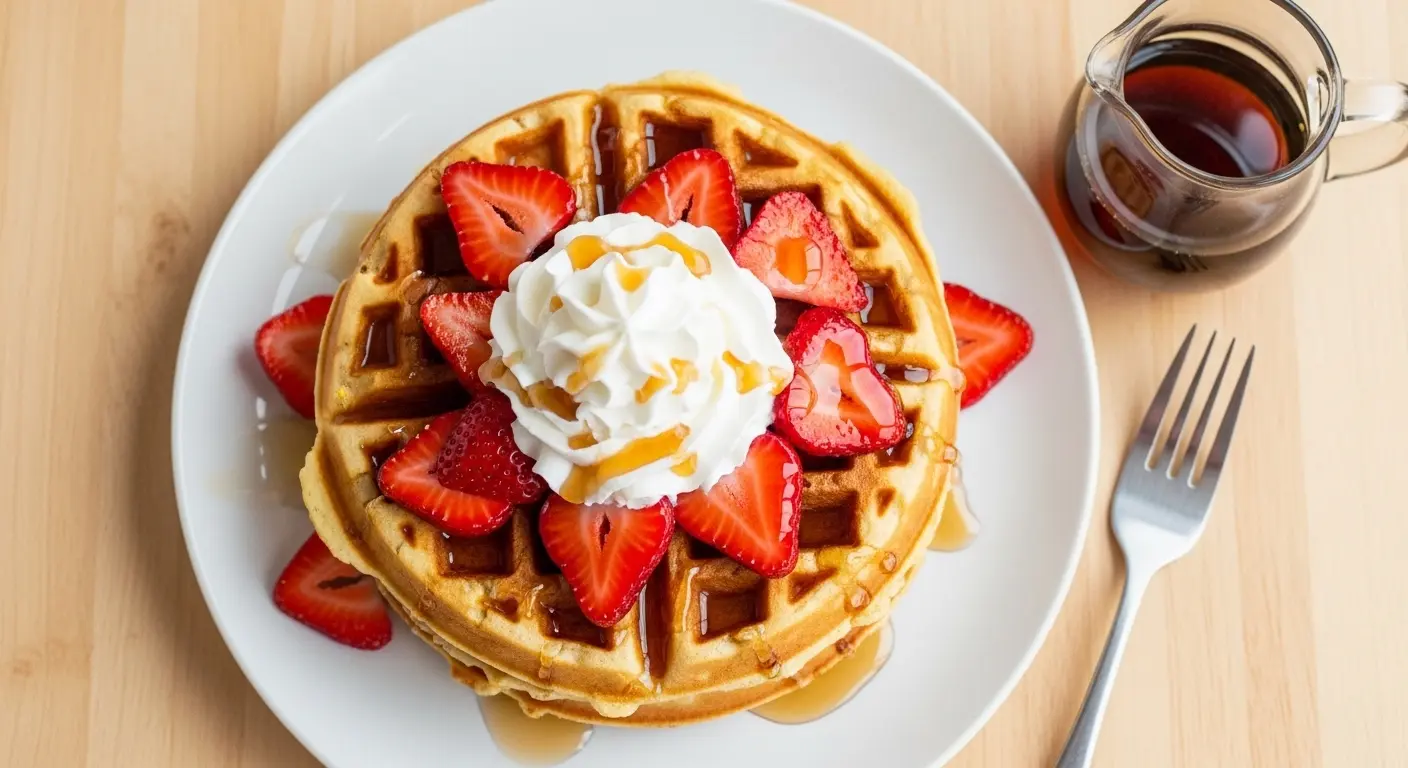
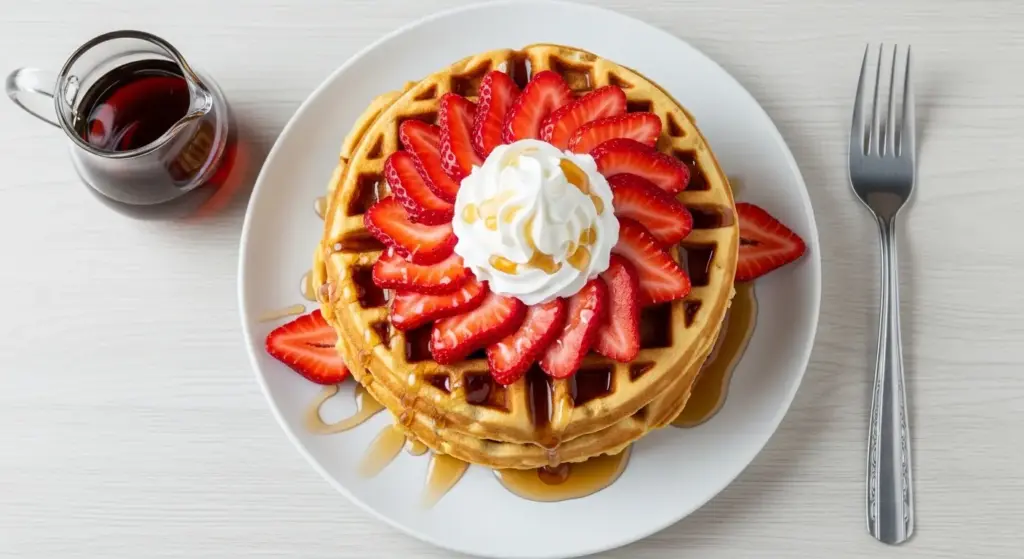
If you’ve been searching for an easy Belgian waffle recipe that actually delivers those deep, golden pockets and a perfectly crispy exterior, you’ve landed in the right place. This recipe skips the fuss and gets straight to the good stuff: a batter that comes together in minutes and produces waffles that are light, airy, and absolutely worth waking up for.
The secret lies in a few simple techniques, including separating the eggs and folding in stiffly beaten egg whites, that make all the difference between a flat, dense waffle and one that practically floats off the iron.
You don’t need a fancy setup or hard-to-find ingredients. Just a Belgian waffle maker, a handful of pantry staples, and about 30 minutes of your morning.
This is the kind of breakfast recipe you’ll keep coming back to every weekend, and one that’s easy enough to pull off even on a busy school morning.
For another classic breakfast the whole family loves, check out this Belgian Waffle Recipe for a slightly more traditional take.
Why You’ll Love This Easy Belgian Waffle Recipe
This recipe has become a weekend staple in so many households, and it’s not hard to see why.
The batter is genuinely simple to put together, using everyday ingredients you likely already have on hand.
The egg white method sounds fancy, but it only takes a couple of extra minutes and transforms the texture dramatically. You get waffles that are crispy on the outside while staying soft and pillowy in the center.
Belgian waffles have deeper pockets than standard waffles, which means more surface area for soaking up maple syrup, fresh berries, or whipped cream.
This recipe is also incredibly flexible. You can go sweet or savory, add mix-ins, or keep it classic.
- Works with most Belgian waffle makers (round or square)
- Ready in about 30 minutes from start to finish
- Yields waffles with that signature crispy shell and airy interior
- Batter can be prepped the night before for faster mornings
- Great for freezing and reheating throughout the week
- Kid-approved and endlessly customizable
You might also enjoy: Homemade Belgian Waffle Recipe
Ingredients
These ingredients are pantry-friendly and easy to find at any grocery store. The baking powder and separated eggs are what give these waffles their signature height and lift, so don’t skip either.
- 2 cups (240g) all-purpose flour
- 2 tablespoons (25g) granulated sugar
- 1 tablespoon (12g) baking powder
- 1/2 teaspoon (3g) salt
- 2 large eggs, separated
- 1 3/4 cups (415ml) whole milk (or 2% milk)
- 1/2 cup (115g) unsalted butter, melted and slightly cooled
- 2 teaspoons (10ml) pure vanilla extract
- Non-stick cooking spray or additional butter for greasing the waffle iron
For serving (optional but recommended):
- Maple syrup
- Fresh strawberries, blueberries, or sliced bananas
- Whipped cream
- Powdered sugar
Read Also: Authentic Belgian Waffle Recipe
Kitchen Equipment Needed
You don’t need much to make great Belgian waffles, but a quality waffle iron really does make a difference. Look for one with deep wells and good heat distribution.
- Belgian waffle maker (round or square, with deep pockets)
- 2 large mixing bowls
- Electric hand mixer or stand mixer (for beating egg whites)
- Whisk
- Rubber spatula
- Ladle or measuring cup (for pouring batter)
- Pastry brush or paper towels (for greasing the iron)
- Cooling rack (to keep waffles crispy while you finish the batch)
Read Also: Buttermilk Belgian Waffle Recipe
Recommended Products for This Recipe
These are products chosen based on quality and performance that will genuinely help you get the best results from this recipe.
1. Cuisinart Belgian Waffle Maker
A reliable Belgian waffle maker with deep pockets is absolutely essential for this recipe. The Cuisinart model features adjustable browning controls and non-stick plates that make cleanup a breeze. Consistent heat distribution means you get evenly golden waffles every single time.
2. Pure Vanilla Extract (High Quality)
The vanilla extract you use matters more than you’d think in a simple batter like this. A high-quality pure vanilla extract brings warmth and depth to the flavor that imitation vanilla just can’t replicate. It’s one small upgrade that makes a noticeable difference.
3. OXO Good Grips Batter Dispenser
Pouring batter evenly into a waffle iron can be messy and imprecise. A batter dispenser gives you clean, consistent pours every time without drips or overflow. It also makes the whole process much faster when you’re making a big batch for the family.
4. Norpro Stainless Steel Ladle
A sturdy, well-sized ladle helps you portion the batter perfectly so you don’t end up with underfilled or overflowing waffles. Stainless steel is easy to clean and won’t absorb odors over time.
5. Silicone Pastry Brush
Greasing your waffle iron properly before each pour is key to getting a crispy, non-stick result. A silicone pastry brush lets you apply melted butter or oil evenly across every groove of the iron plates without damaging the non-stick coating.
The same fluffy egg technique used in this recipe also works beautifully for Air Fryer French Toast if you’re looking to branch out.
Step-by-Step Instructions
Step 1: Preheat Your Waffle Iron
- Turn on your Belgian waffle maker and set it to medium-high heat (or the recommended setting per the manufacturer’s instructions).
- Let it preheat for at least 5 minutes. A properly preheated iron is essential for getting that crispy exterior right from the first waffle.
- While it heats, lightly grease the plates with non-stick cooking spray or brush on a thin layer of melted butter using a pastry brush. Make sure you reach into the grooves.
Step 2: Separate the Eggs
- Crack 2 large eggs carefully, separating the yolks from the whites into two separate bowls.
- Place the egg whites in a clean, grease-free bowl (any trace of fat will prevent them from whipping properly).
- Set the egg yolks aside; you’ll add them to the wet ingredients in a later step.
Step 3: Whip the Egg Whites
- Using an electric hand mixer or stand mixer, beat the egg whites on medium speed until foamy, about 1 minute.
- Increase to high speed and continue beating until stiff peaks form, about 2 to 3 more minutes. Stiff peaks mean the egg whites hold their shape when you lift the beaters and the peak stands straight up without drooping.
- Do not overbeat or the whites will become dry and grainy, which makes folding difficult.
- Set the whipped egg whites aside.
Step 4: Mix the Dry Ingredients
- In a large mixing bowl, whisk together 2 cups (240g) of all-purpose flour, 2 tablespoons (25g) of granulated sugar, 1 tablespoon (12g) of baking powder, and 1/2 teaspoon (3g) of salt.
- Make sure the baking powder is evenly distributed throughout the flour to ensure consistent rise and lift in every waffle.
Step 5: Mix the Wet Ingredients
- In a separate medium bowl, whisk together the 2 egg yolks, 1 3/4 cups (415ml) of whole milk, 1/2 cup (115g) of melted and slightly cooled unsalted butter, and 2 teaspoons (10ml) of pure vanilla extract.
- Make sure the butter is not piping hot before adding it, or it could scramble the egg yolks. Warm to the touch is perfect.
Step 6: Combine Wet and Dry Ingredients
- Pour the wet ingredient mixture into the bowl with the dry ingredients.
- Stir gently with a rubber spatula or wooden spoon until just combined. A few lumps are completely fine and actually desirable. Overmixing develops gluten, which leads to tough, dense waffles.
- Stop mixing as soon as you no longer see dry streaks of flour.
Step 7: Fold in the Egg Whites
- Add the whipped egg whites to the batter in two additions.
- For the first addition, gently stir in about one-third of the egg whites using a rubber spatula. This lightens the batter and makes it easier to fold in the rest.
- For the second addition, use a gentle folding motion: slide the spatula down the side of the bowl, across the bottom, and up the other side, rotating the bowl as you go.
- Fold just until the egg whites are incorporated and no large white streaks remain. It’s okay if a few small streaks are visible. Overfolding will deflate the whites and undo all that work.
Step 8: Cook the Waffles
- Before each waffle, lightly re-grease the iron plates with a quick spray of non-stick cooking spray or a brush of melted butter.
- Ladle or pour the appropriate amount of batter onto the center of the lower iron plate. The exact amount depends on the size of your waffle maker, but typically 3/4 cup (180ml) to 1 cup (240ml) of batter works for most standard Belgian waffle makers. Fill to about 2/3 of the iron’s surface, as the batter will spread when you close the lid.
- Close the lid firmly and cook for 4 to 6 minutes, or until the steam significantly reduces and the indicator light signals the waffle is done (if your iron has one).
- Resist the urge to open the iron too early. Opening before the waffle is set will cause it to tear and stick to the plates.
- The waffle should be deep golden brown and come away from the plates cleanly when done.
Step 9: Keep Waffles Warm and Crispy
- Transfer cooked waffles to a wire cooling rack set over a baking sheet.
- Place in a 200°F (93°C) oven to keep warm while you finish the rest of the batch.
- Do not stack waffles directly on top of each other while warm. Stacking traps steam and makes them soggy.
- Repeat the greasing, pouring, and cooking process for each waffle until all the batter is used.
Step 10: Serve and Enjoy
- Plate the waffles and top with your choice of pure maple syrup, fresh berries, whipped cream, sliced bananas, or a dusting of powdered sugar.
- Serve immediately for the crispiest results.
This recipe also uses the same careful batter technique as the Easy Waffle Recipe on the site, which is a great comparison if you want to see the difference between Belgian and classic waffles.
Tips for Success
A few small adjustments can take your waffles from good to genuinely great. These tips are especially helpful the first few times you make this recipe.
- Don’t skip the egg white step. It’s what separates a truly light and airy Belgian waffle from a heavy, doughy one. The few extra minutes are absolutely worth it.
- Let the batter rest. After combining, letting the batter sit for 5 minutes before cooking allows the baking powder to start activating and gives the flour time to hydrate fully.
- Preheat the iron fully. Starting with a properly hot iron is the key to crispy edges. If the iron isn’t hot enough, the batter steams rather than crisps.
- Use whole milk for best results. The fat content in whole milk gives the waffles a richer flavor and a more tender crumb. Lower-fat milk can make the batter thinner.
- Melt the butter completely but let it cool slightly. Hot butter can cook the egg yolks before they’re incorporated into the batter, which affects texture.
- Don’t overmix the batter. Mix the wet and dry ingredients until just combined. Lumps in the batter are completely normal and won’t affect the finished waffle.
- Grease between each waffle. Even non-stick irons benefit from a light re-greasing between each batch to maintain that clean release and crispy crust.
You might also enjoy: Easy Protein Pancakes for a high-protein breakfast option that uses a similar quick-mix approach.
Serving Suggestions
Belgian waffles are incredibly versatile and work just as well as a savory base as they do loaded with sweet toppings. The deep pockets hold everything beautifully, making each bite satisfying and full of flavor.
Classic sweet toppings like fresh strawberries and maple syrup are always crowd-pleasers, but don’t overlook some of the more creative pairings that can turn a simple waffle into a full meal.
- Fresh sliced strawberries with Strawberry Sauce and whipped cream
- Classic maple syrup and a pat of salted butter
- Blueberry compote with a drizzle of honey
- Banana slices, Caramel Sauce, and chopped pecans
- Crispy Air Fryer Bacon and a fried egg on top for a savory version
- Nutella and sliced bananas for a dessert-style waffle
- Fruit Salad served alongside for a fresh, lighter plate
- Greek yogurt, granola, and fresh berries for a protein-packed morning
Variations to Try
Once you have the base recipe down, it’s fun to experiment with add-ins and flavor changes. These variations use the same core batter, so there’s very little extra work involved.
- Blueberry Belgian Waffles: Fold 1/2 cup (75g) of fresh or frozen blueberries gently into the batter just before cooking. Frozen blueberries work great and can go in straight from the freezer.
- Cinnamon Sugar Waffles: Add 1 teaspoon of ground cinnamon and 1 extra tablespoon of brown sugar to the dry ingredients for a warming, spiced flavor.
- Chocolate Chip Waffles: Stir 1/2 cup (85g) of mini chocolate chips into the finished batter. Mini chips distribute more evenly than regular-sized chips.
- Lemon Poppy Seed Waffles: Add the zest of one lemon and 1 tablespoon of poppy seeds to the batter for a bright, citrusy variation.
- Savory Waffles: Omit the sugar and vanilla, and add 1/2 cup (55g) of shredded cheddar cheese, 1/4 teaspoon of garlic powder, and 2 tablespoons of chopped fresh chives. Top with sour cream or a fried egg.
- Buttermilk Waffles: Swap the whole milk for buttermilk for an extra-tangy flavor and an even lighter crumb. Check out this Buttermilk Belgian Waffle Recipe for a version built specifically around that ingredient.
- Gluten-Free Belgian Waffles: Substitute the all-purpose flour with a 1:1 gluten-free flour blend. This Gluten Free Belgian Waffle Recipe walks through the full process with gluten-free-specific tips.
- Vegan Belgian Waffles: Replace the eggs with flax eggs (1 tablespoon ground flaxseed plus 3 tablespoons water per egg), use oat milk or almond milk, and substitute vegan butter. The Vegan Belgian Waffle Recipe covers all the details.
Read Also: Healthy Belgian Waffle Recipe
Storage and Reheating
Belgian waffles store and reheat remarkably well, making them a great candidate for batch cooking on the weekend. A little prep work now means quick breakfasts all week long.
- Refrigerator: Allow waffles to cool completely on a wire rack before storing. Stack with a piece of parchment paper between each waffle to prevent sticking, then place in an airtight container or zip-lock bag. Store in the refrigerator for up to 3 days.
- Freezer: For longer storage, arrange cooled waffles in a single layer on a baking sheet and freeze for 1 to 2 hours until solid. Once frozen, transfer to a zip-lock freezer bag, pressing out as much air as possible. They’ll keep well for up to 3 months.
- Reheating in a toaster: The toaster is the best method for bringing waffles back to life. Pop them in on a medium setting and toast until crispy again, about 2 to 3 minutes. This restores the exterior crunch beautifully.
- Reheating in the oven: Preheat your oven to 350°F (175°C). Place waffles in a single layer on a baking sheet and heat for 8 to 10 minutes, flipping halfway through. This method works best for reheating multiple waffles at once.
- Avoid the microwave: Microwaving makes waffles soft and soggy. It’s the quickest method but yields the worst texture. Stick to the toaster or oven for the best results.
Read Also: Easy French Toast Recipe
Nutritional Facts
The following values are approximate and based on one Belgian waffle made from this recipe (without toppings). This recipe yields approximately 6 standard Belgian waffles.
| Nutrient | Amount per Waffle |
|---|---|
| Calories | 310 kcal |
| Total Fat | 15g |
| Saturated Fat | 9g |
| Cholesterol | 95mg |
| Sodium | 320mg |
| Total Carbohydrates | 37g |
| Dietary Fiber | 1g |
| Total Sugars | 6g |
| Protein | 7g |
Nutritional values are estimates and will vary based on specific ingredients and brands used.
Another great breakfast to add to your rotation is this Cracker Barrel Pancake Recipe for fluffy, diner-style pancakes at home.
Health Benefits of Key Ingredients
These waffles are made with wholesome, real-food ingredients that each bring something valuable to the table beyond just flavor.
A classic breakfast like Belgian waffles provides a meaningful source of energy, protein, and key nutrients when made with quality ingredients, making them a satisfying and well-rounded morning meal.
- Eggs: A complete source of protein, eggs also provide choline, which supports brain function and liver health. The egg whites specifically provide structure and lift to the waffle batter without added fat.
- Whole milk: Rich in calcium for bone health, whole milk also contributes vitamin D, phosphorus, and high-quality protein. The fat content helps carry fat-soluble vitamins and supports satiety.
- Unsalted butter: Butter provides fat-soluble vitamins A, D, E, and K2, as well as conjugated linoleic acid (CLA) when sourced from grass-fed cows. It also contributes to the tender, rich crumb of the waffle.
- All-purpose flour: While refined flour is not a superfood, it provides carbohydrates as the primary fuel source for energy, as well as small amounts of B vitamins like thiamine and niacin.
- Vanilla extract: Pure vanilla extract contains a small but notable amount of antioxidants, including vanillin, which has been studied for anti-inflammatory properties.
- Baking powder: While used in small quantities, baking powder helps the batter rise, which gives the waffle a lighter texture and reduces overall density.
For a nutrient-denser breakfast option that’s still easy and delicious, this Basic Crepe Recipe is a wonderful lighter alternative.
Frequently Asked Questions
1. Can I make the batter ahead of time?
Yes, with a small caveat. You can mix the dry and wet ingredients separately the night before and refrigerate them. However, it’s best to beat the egg whites and fold them in right before cooking, since they will deflate over time.
If you need to make the full batter ahead, it can be stored covered in the refrigerator for up to 12 hours. Gently stir it before using, but avoid re-whipping since the whites will have lost most of their volume.
2. Why are my waffles not crispy?
The most common culprits are an iron that wasn’t preheated long enough, a batter that was too thin (too much liquid), or opening the iron before the waffle was fully cooked.
Make sure you’re preheating the iron for at least 5 minutes before your first pour, and wait until the steam significantly subsides before opening the lid. Keeping finished waffles on a rack in a 200°F (93°C) oven rather than stacking them also helps maintain crispiness.
3. Can I use a regular waffle maker instead of a Belgian waffle maker?
You can, but the results will be different. A standard waffle iron has shallower grooves, so the waffles will be thinner and won’t have the same deep pockets that Belgian waffles are known for.
The batter itself will work fine in any waffle iron, though cooking times may be shorter. If you use a regular iron, you may want to reduce the amount of batter per pour to avoid overflow.
4. Can I make this recipe dairy-free?
Absolutely. Substitute the whole milk with oat milk, almond milk, or full-fat coconut milk for a similar consistency. Replace the butter with melted coconut oil or a vegan butter substitute.
Oat milk and full-fat coconut milk tend to give the closest texture to dairy milk in this recipe. Thinner milks like almond milk can result in a slightly less rich waffle, though the flavor is still pleasant.
5. How do I know when the waffle is done without a ready indicator?
Watch the steam. When you first pour the batter and close the lid, you’ll see a steady stream of steam escaping from the sides of the iron. As the waffle cooks and the moisture evaporates, the steam will slow down significantly.
When the steam reduces to just wisps or stops almost entirely, that’s your cue that the waffle is done. This typically takes 4 to 6 minutes depending on your iron. If you open the lid and the waffle resists releasing cleanly, close it and cook for another 60 to 90 seconds.
Read Also: Easy Overnight Oats Recipe
Final Thoughts
This easy Belgian waffle recipe is genuinely one of those recipes that earns a permanent spot in your breakfast rotation. It’s simple enough to make on a regular weekday but impressive enough to serve to guests on a slow Sunday morning.
The combination of whipped egg whites, real butter, and vanilla creates a waffle with real character: crispy edges, airy interior, and deep pockets that hold every drop of syrup or dollop of whipped cream perfectly.
Give this recipe a try and let us know how it turned out in the comments below. We’d love to hear what toppings or variations you tried, and any tips you discovered along the way. Sharing a photo on your favorite social platform and tagging us is always welcome too!
Recommended:
- Belgian Waffle Recipe
- Homemade Belgian Waffle Recipe
- Gluten Free Belgian Waffle Recipe
- Vegan Belgian Waffle Recipe
- Easy Waffle Recipe
- Easy French Toast Recipe
- Cracker Barrel Pancake Recipe
- Pumpkin Pancake Recipe
- Scrambled Eggs Recipe
- Breakfast Casserole Recipe


