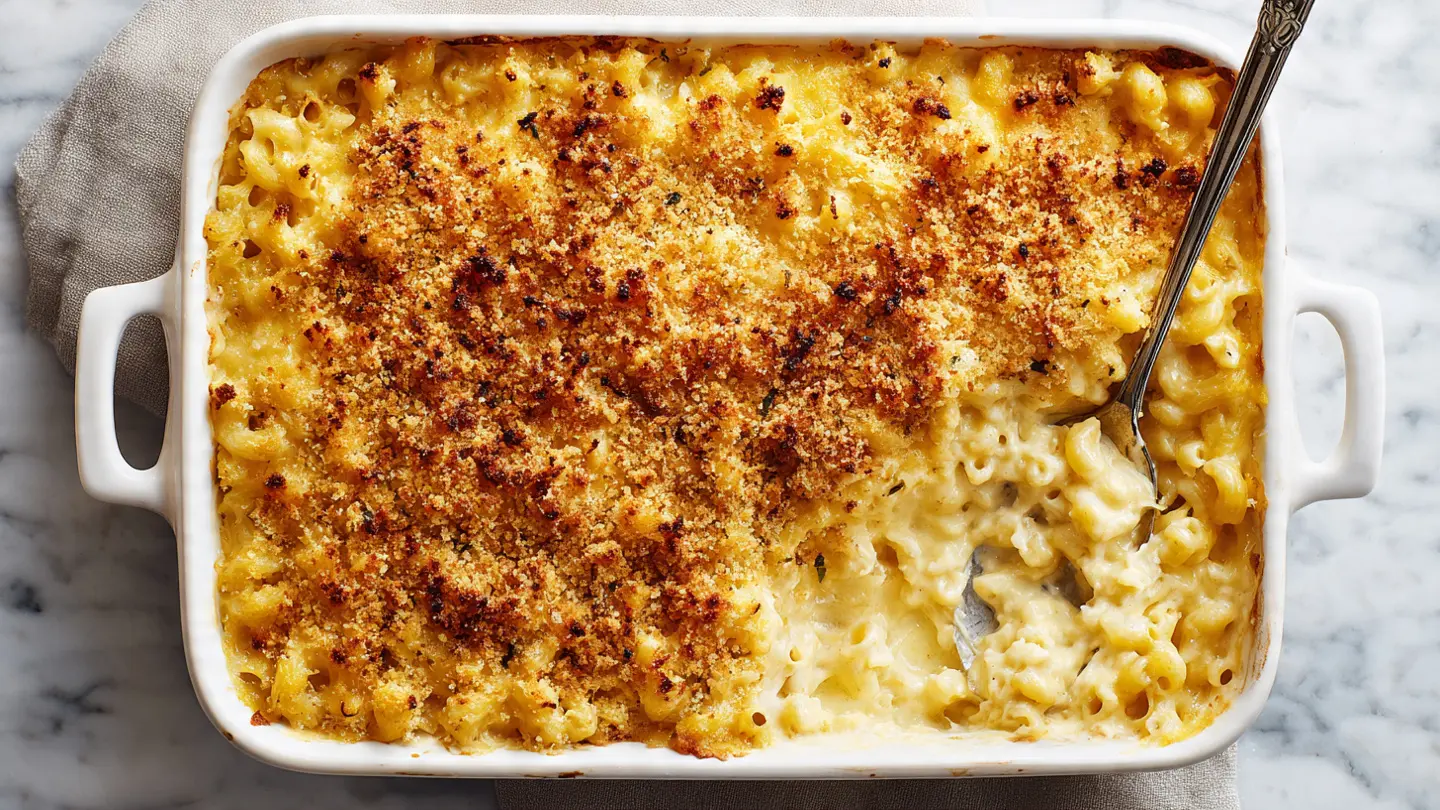
Few dishes evoke the warmth of home quite like this classic baked mac and cheese recipe. This timeless comfort food combines tender elbow macaroni with a rich, velvety cheese sauce that gets beautifully golden and bubbly in the oven.
The magic happens in three simple stages: a silky béchamel sauce, generous amounts of sharp cheddar, and a crispy, buttery top that adds the perfect textural contrast to the creamy interior. Unlike stovetop versions that can turn gluey or boxed mixes that lack depth, this baked approach creates layers of flavor and a texture that keeps everyone coming back for seconds.
One of the secrets to this recipe’s success is the roux-based sauce. By cooking butter and flour together before adding milk, you create a stable base that holds the cheese in suspension, preventing that grainy texture that plagues many homemade attempts. The slow baking process allows the flavors to meld while the top develops that irresistible golden crust that makes baked mac and cheese so beloved.
This recipe feeds a crowd beautifully, making it perfect for Sunday dinners, potlucks, or holiday gatherings. The best part is that it actually tastes better when made in larger quantities, as the extra sauce prevents the pasta from drying out during the baking process.
For meal planning purposes, you can explore other cozy dishes like creamy mashed potatoes or garlic mashed potatoes.
Why You’ll Love This Classic Baked Mac and Cheese Recipe
This recipe delivers everything you want in comfort food without any fussy techniques or hard-to-find ingredients. The method is straightforward enough for beginners, yet the results taste like something from a high-end restaurant.
The cheese sauce stays silky smooth thanks to the roux base, which means you won’t end up with that separated, oily mess that happens when you add cheese directly to milk. The sauce clings to every curve of the pasta, ensuring each bite is packed with cheesy goodness.
Here’s what makes this recipe stand out:
- Perfectly creamy texture that never gets dry or grainy, even after baking
- Golden, crispy top that provides satisfying crunch against the soft pasta
- Deeply savory flavor from sharp cheddar and a touch of dry mustard
- Make-ahead friendly so you can prep the night before and bake when needed
- Feeds a crowd easily with minimal effort and maximum satisfaction
- Versatile base recipe that welcomes add-ins like bacon, lobster, or vegetables
- Holds up well at potlucks and buffets without turning watery or congealed
This pairs wonderfully with simple proteins like air fryer bacon-wrapped chicken breast.
Ingredients
To make this rich and comforting baked mac and cheese, you’ll need quality ingredients that come together to create that signature creamy texture and golden top. Using freshly shredded cheese rather than pre-shredded makes a significant difference in how smoothly your sauce comes together, as pre-shredded varieties contain anti-caking agents that can create a grainy texture.
For the Mac and Cheese:
- 1 pound (450g) elbow macaroni
- 6 tablespoons (85g) unsalted butter, divided
- 1/2 cup (60g) all-purpose flour
- 4 cups (960ml) whole milk, at room temperature
- 1 teaspoon dry mustard powder
- 1/2 teaspoon garlic powder
- 1/2 teaspoon onion powder
- 1 teaspoon salt, plus more for pasta water
- 1/2 teaspoon black pepper
- 1/4 teaspoon cayenne pepper (optional, for subtle heat)
- 4 cups (450g) sharp cheddar cheese, freshly shredded
- 1 1/2 cups (170g) medium cheddar cheese, freshly shredded, divided
For the Topping:
- 1 1/2 cups (150g) panko breadcrumbs
- 3 tablespoons (45g) unsalted butter, melted
- 1/2 cup (50g) grated Parmesan cheese
- 1/2 teaspoon paprika
Another fantastic casserole option is baked ziti.
Kitchen Equipment Needed
Having the right tools makes the cooking process smoother and helps you achieve the best results. A heavy-bottomed pot prevents scorching while you make the cheese sauce, and a large baking dish ensures even cooking throughout.
- Large pot for boiling pasta
- Heavy-bottomed saucepan or Dutch oven for making the cheese sauce
- Whisk for creating smooth sauce
- Box grater for shredding cheese
- Colander for draining pasta
- 9×13-inch baking dish
- Wooden spoon for mixing
- Measuring cups and spoons
- Small bowl for mixing topping
Read Also: Breakfast Casserole Recipe
Recommended Products for This Recipe
These carefully selected products will help you create restaurant-quality mac and cheese at home while making the cooking process easier and more enjoyable.
1. Le Creuset Enameled Cast Iron Baking Dish
This baking dish distributes heat evenly throughout your mac and cheese, ensuring that the center cooks at the same rate as the edges. The enameled surface prevents sticking and makes cleanup remarkably simple, even with baked-on cheese. The generous size accommodates the full recipe with room for that gorgeous bubbly expansion around the edges.
2. OXO Good Grips Box Grater
Freshly grated cheese melts infinitely better than pre-shredded varieties, and this grater makes quick work of even large quantities of cheese. The non-slip base keeps it stable on your counter while the sharp blades glide through hard cheeses without requiring excessive pressure. The comfortable handle reduces hand fatigue when you’re shredding multiple cups of cheese.
3. Lodge Enameled Dutch Oven
This Dutch oven provides the perfect vessel for making your cheese sauce, with thick walls that prevent hot spots and scorching. The wide base gives you plenty of room to whisk without splattering, and the excellent heat retention means your sauce will stay warm while you assemble everything. It transitions from stovetop to oven seamlessly if you want to bake directly in the pot.
4. Tillamook Extra Sharp Cheddar Cheese
Using high-quality cheese transforms this dish from good to extraordinary. This cheese melts beautifully while maintaining its sharp, complex flavor that stands up to the rich cream sauce. The moisture content is ideal for mac and cheese, creating that stretchy, gooey texture everyone loves without turning oily or separated.
5. All-Clad D3 Stainless Steel Whisk
A quality whisk is essential for creating a smooth, lump-free sauce. The tines on this whisk are perfectly spaced to break up any flour clumps and incorporate the cheese evenly throughout the sauce. The balanced weight and comfortable handle make continuous whisking less tiring, which is crucial when you’re building a roux.
You might also enjoy: Creamy Mac and Cheese Recipe
Step-by-Step Instructions
Follow these detailed instructions to create perfectly creamy, golden-topped baked mac and cheese every time. Each step builds on the previous one to develop maximum flavor and ideal texture.
1. Prepare the Pasta and Preheat the Oven
- Preheat your oven to 375°F (190°C) and position a rack in the center
- Bring a large pot of water to a rolling boil over high heat
- Add 1 tablespoon of salt to the boiling water (the water should taste like the ocean)
- Add the elbow macaroni to the boiling water
- Cook the pasta for exactly 2 minutes less than the package directions state for al dente
- This undercooking is crucial because the pasta will continue cooking in the oven, and you want to avoid mushy noodles
- Drain the pasta in a colander but do not rinse it (the starchy coating helps the sauce cling)
- Toss the drained pasta with 1 tablespoon of butter to prevent sticking
- Set aside while you prepare the cheese sauce
2. Make the Roux
- In a heavy-bottomed saucepan or Dutch oven, melt 5 tablespoons of butter over medium heat
- Once the butter is completely melted and begins to foam, add the flour all at once
- Whisk continuously for 2 to 3 minutes, making sure to reach all corners of the pan
- The mixture should bubble gently and turn a light golden color (like the color of peanut butter)
- This cooking time is important because it removes the raw flour taste while creating a nutty, toasted flavor
- If the roux starts to brown too quickly, reduce the heat slightly
- Keep whisking to prevent any burning or sticking to the bottom of the pan
- The roux should have a smooth, paste-like consistency with no lumps
3. Create the Béchamel Sauce
- With the roux still over medium heat, begin adding the room temperature milk very gradually
- Start by adding about 1/2 cup of milk while whisking vigorously
- The mixture will seize up and become very thick at first, but keep whisking
- Once the first addition of milk is fully incorporated and smooth, add another 1/2 cup
- Continue adding milk in 1/2 cup increments, whisking constantly until completely smooth between additions
- After all the milk has been incorporated, increase the heat to medium-high
- Bring the mixture to a gentle simmer, whisking frequently to prevent scorching on the bottom
- Once it reaches a simmer, reduce heat to medium-low and cook for 10 minutes, whisking every minute or so
- The sauce should thicken enough to coat the back of a spoon, and you should see gentle bubbles breaking the surface
- If the sauce seems too thick, whisk in an additional 1/4 cup of milk
4. Season and Add the Cheese
- Remove the saucepan from the heat completely (this prevents the cheese from becoming stringy or grainy)
- Add the dry mustard, garlic powder, onion powder, salt, black pepper, and cayenne pepper if using
- Whisk the seasonings into the hot sauce until evenly distributed
- Add the sharp cheddar cheese about 1 cup at a time, whisking thoroughly after each addition
- Wait until each batch of cheese is completely melted and incorporated before adding the next
- Add 1 cup of the medium cheddar cheese, reserving the remaining 1/2 cup for layering
- Whisk until the cheese sauce is silky smooth with no visible cheese shreds
- Taste the sauce and adjust seasoning if needed (it should taste quite cheesy and well-seasoned)
- The sauce should be thick enough to coat the spoon heavily but still pourable
5. Combine Pasta and Sauce
- Add the cooked, buttered macaroni to the cheese sauce
- Using a wooden spoon or silicone spatula, gently fold the pasta into the sauce
- Make sure every piece of macaroni is coated with the cheese sauce
- Scrape the bottom and sides of the pot to ensure all the sauce is incorporated
- The mixture should look quite saucy at this point, which is exactly what you want
- The pasta will absorb sauce as it bakes, so having extra sauce now prevents dry mac and cheese later
6. Assemble in the Baking Dish
- Butter the 9×13-inch baking dish generously to prevent sticking
- Pour half of the mac and cheese mixture into the prepared baking dish
- Spread it out evenly to create a level layer
- Sprinkle the reserved 1/2 cup of medium cheddar cheese evenly over this first layer
- This middle layer of cheese creates extra pockets of melty goodness throughout the dish
- Pour the remaining mac and cheese over the cheese layer
- Spread gently to create an even top surface, being careful not to mix the layers
- Use the back of your spoon to smooth the top completely
7. Prepare and Add the Topping
- In a small bowl, combine the panko breadcrumbs, melted butter, Parmesan cheese, and paprika
- Stir with a fork until the butter coats all the breadcrumbs evenly
- The mixture should look like wet sand and clump together slightly when pressed
- Sprinkle this topping mixture evenly over the entire surface of the mac and cheese
- Make sure to distribute it all the way to the edges for uniform browning
- Press down very gently on the topping so it adheres to the mac and cheese below
- The paprika adds a beautiful rust-colored hue and subtle smokiness
8. Bake to Golden Perfection
- Place the baking dish on the center rack of your preheated oven
- Bake for 25 to 30 minutes, rotating the pan halfway through for even browning
- Watch for the edges to become bubbly and the top to turn a gorgeous golden brown
- The mac and cheese is ready when the sauce is bubbling around the edges and the breadcrumbs are crispy and deeply golden
- If the top is browning too quickly but the inside isn’t hot enough, cover loosely with aluminum foil for the last 10 minutes
- For an extra-crispy top, turn on the broiler for the final 2 to 3 minutes, watching carefully to prevent burning
- Remove from the oven and let rest for 5 to 10 minutes before serving
- This resting time allows the sauce to thicken slightly and makes serving much easier
Another favorite: French Toast Casserole Recipe
Tips for Success
These professional tips will help you avoid common pitfalls and ensure your baked mac and cheese turns out perfectly creamy and delicious every single time.
- Use room temperature milk in your sauce because cold milk can cause the roux to seize up and form lumps that are difficult to whisk out
- Grate your own cheese rather than buying pre-shredded, as the anti-caking agents in pre-shredded cheese can make your sauce grainy and prevent proper melting
- Don’t skip the undercooking of the pasta because it continues to cook in the oven, and pasta cooked to full al dente before baking will end up mushy
- Remove from heat before adding cheese because excessive heat causes the proteins in cheese to tighten and become stringy or separate into an oily mess
- Whisk constantly when making the roux to prevent burning and ensure even cooking of the flour, which eliminates that raw flour taste
- Make the sauce extra thick because it will thin out as it bakes with the pasta and absorbs liquid, so what seems too thick on the stovetop will be perfect after baking
- Let it rest before serving to allow the sauce to set up slightly, making it much easier to cut clean squares and preventing a soupy presentation
- Don’t overbake or you’ll end up with dried-out edges and a tough top layer instead of creamy mac and cheese with a crispy topping
You can pair this with fried cabbage for a complete meal.
Serving Suggestions
This classic baked mac and cheese shines as both a main dish and a side, adapting beautifully to any meal format. The rich, cheesy flavor pairs wonderfully with dishes that provide textural or flavor contrast.
As a main dish, serve generous portions with a crisp green salad dressed in a bright vinaigrette to cut through the richness. The acidity and freshness of the salad balances the creamy, indulgent mac and cheese perfectly.
Perfect pairings include:
- Roasted vegetables like air fryer zucchini fries or air fryer asparagus for added nutrition and color contrast
- BBQ or grilled meats such as air fryer chicken thighs or air fryer beef ribs for classic comfort food combinations
- Tangy coleslaw like vinegar coleslaw or creamy coleslaw to provide crunchy, acidic contrast
- Simple green beans either steamed with butter or sautéed with garlic to add a fresh vegetable element
- Cornbread such as skillet cornbread or sweet cornbread for a Southern-style feast
- Fresh tomato salad dressed simply with olive oil and basil to add bright, acidic notes
- Garlic bread for those who want to lean fully into carb-heavy comfort
For holidays and gatherings, serve this alongside roasted turkey, glazed ham, or prime rib as part of a larger spread. It holds up beautifully on a buffet table and stays creamy for hours.
Read Also: Potato Casserole Recipe
Variations to Try
Once you’ve mastered the classic version, these variations let you customize the recipe to suit different tastes and occasions while maintaining that signature creamy texture and golden top.
- Lobster mac and cheese by folding in 1 pound of cooked, chopped lobster meat just before baking for an elegant, luxurious twist
- Bacon mac and cheese by stirring in 8 ounces of cooked, crumbled bacon throughout the pasta and sauce mixture
- Buffalo chicken mac by adding 2 cups of shredded rotisserie chicken and 1/3 cup of buffalo sauce to the cheese sauce
- Jalapeño popper mac by mixing in 1/2 cup of diced pickled jalapeños and 8 ounces of cream cheese to the sauce
- Four cheese mac by using a combination of sharp cheddar, Gruyère, fontina, and Parmesan for complex, sophisticated flavor
- Truffle mac and cheese by drizzling with truffle oil and adding sautéed mushrooms before baking
- Southern-style pimento mac by stirring in 4 ounces of diced pimentos and using a mix of sharp white cheddar and pepper jack
- Green chile mac by folding in one 4-ounce can of diced green chiles and using Monterey Jack cheese instead of cheddar
- Caramelized onion mac by topping with deeply caramelized onions mixed into the breadcrumb topping for sweet, savory contrast
- Broccoli cheddar mac by blanching 2 cups of broccoli florets and folding them in with the pasta before baking
Another delicious variation to explore is baked mac and cheese recipe.
Storage and Reheating
Proper storage keeps your mac and cheese tasting fresh and creamy for several days, and the right reheating method prevents it from drying out or becoming grainy.
Store leftover mac and cheese in an airtight container in the refrigerator for up to 4 days. The cheese sauce may thicken as it cools, but it will loosen again when reheated.
Storage and reheating guidelines:
- Refrigerate leftovers within 2 hours of baking by transferring to shallow containers so they cool quickly and evenly
- Add moisture when reheating by stirring in 2 to 3 tablespoons of milk per serving to restore the creamy consistency
- Reheat in the microwave by covering loosely and heating in 1-minute intervals, stirring between each, until heated through
- Oven reheating method by covering with foil and baking at 350°F (175°C) for 20 to 25 minutes until hot in the center
- Make ahead completely by assembling the mac and cheese, covering tightly with plastic wrap and foil, and refrigerating for up to 2 days before baking
- Freeze for longer storage by wrapping the unbaked assembled dish tightly in plastic wrap and then foil, freezing for up to 3 months
- Thaw frozen mac and cheese in the refrigerator overnight, then bake as directed, adding an extra 10 to 15 minutes to the baking time
- Individual portions freeze well when stored in freezer-safe containers, making for quick single servings later
You might also enjoy: Cowboy Casserole Recipe
Nutritional Facts
Per serving (based on 10 servings):
- Calories: 512
- Total Fat: 28g
- Saturated Fat: 17g
- Cholesterol: 82mg
- Sodium: 618mg
- Total Carbohydrates: 43g
- Dietary Fiber: 2g
- Sugars: 6g
- Protein: 22g
- Calcium: 518mg
- Iron: 2mg
Read Also: Chicken Casserole Recipe
Health Benefits of Key Ingredients
While baked mac and cheese is undeniably an indulgent comfort food, several of its core ingredients offer nutritional benefits that make it more than just empty calories.
Cheese provides an excellent source of calcium, which supports bone health and muscle function. A single serving of this recipe delivers nearly half of your daily calcium needs. The protein content from both the cheese and milk helps with satiety, keeping you fuller longer than carbohydrate-only dishes would.
Key nutritional highlights:
- Sharp cheddar cheese contains vitamin K2, which works synergistically with calcium to support bone density and cardiovascular health
- Whole milk provides vitamin D, which aids calcium absorption and supports immune function throughout the year
- Butter offers vitamin A in its most bioavailable form, supporting vision health, immune function, and skin integrity
- Pasta provides complex carbohydrates that fuel your body with sustained energy, especially important for active individuals
- Parmesan cheese is naturally lower in lactose than other cheeses, making it easier to digest for those with mild lactose sensitivity
- Garlic powder contains compounds with antimicrobial and anti-inflammatory properties, though the amounts are small
- Cayenne pepper may boost metabolism slightly and contains capsaicin, which has been studied for pain relief properties
- B vitamins from enriched pasta support energy metabolism and nervous system function
For a lighter option, consider healthy chicken salad.
Frequently Asked Questions
1. Can I use different types of cheese in this mac and cheese?
Absolutely, and experimenting with different cheeses is one of the best ways to customize this recipe to your taste preferences. Sharp cheddar provides the classic flavor most people expect, but you can replace up to half of it with Gruyère for a more sophisticated, nutty flavor, or use fontina for extra creaminess. Smoked gouda adds a wonderful depth, while pepper jack brings heat. Just avoid using all mozzarella, as it can become stringy and lacks the sharp flavor that makes mac and cheese so satisfying.
2. Why did my cheese sauce turn grainy or separated?
Grainy or separated cheese sauce typically happens when cheese is added to liquid that’s too hot, causing the proteins to tighten and squeeze out the fat. Always remove your béchamel from the heat before adding cheese, and add it gradually while whisking constantly. Using pre-shredded cheese can also cause graininess due to the anti-caking agents they contain. Finally, make sure you’re not using low-fat cheese, as the reduced fat content makes it more prone to breaking.
3. Can I make this mac and cheese ahead of time?
Yes, this recipe is excellent for making ahead, which is perfect for entertaining or meal prep. You can assemble the entire dish up to 2 days in advance, cover tightly with plastic wrap and foil, and refrigerate until ready to bake. When you’re ready to serve, let it sit at room temperature for 30 minutes, then bake as directed, adding an extra 10 to 15 minutes to the baking time. You can also freeze the unbaked mac and cheese for up to 3 months.
4. How do I prevent the top from burning before the inside is heated through?
If your breadcrumb topping is browning too quickly, tent the dish loosely with aluminum foil for the first 15 to 20 minutes of baking, then remove the foil for the final 10 minutes to allow the top to crisp and brown. Make sure your oven temperature is accurate by using an oven thermometer, as ovens that run hot are a common culprit. Also, position your rack in the center of the oven rather than near the top, which exposes the surface to more direct heat.
5. What’s the best way to reheat leftover mac and cheese without drying it out?
The key to reheating mac and cheese successfully is adding moisture back into the dish, as the pasta continues to absorb sauce even after cooking. Stir 2 to 3 tablespoons of milk or cream into each serving before reheating. In the microwave, cover loosely and heat in 1-minute intervals, stirring between each, until heated through. For oven reheating, add the milk, cover tightly with foil, and bake at 350°F (175°C) for 20 to 25 minutes until bubbling.
Another comforting dish to try: Easy Lasagna Recipe
Final Thoughts
This classic baked mac and cheese recipe represents everything that comfort food should be: rich, satisfying, and deeply nostalgic. The combination of creamy cheese sauce, perfectly cooked pasta, and golden-brown topping creates a dish that brings smiles to faces of all ages.
The beauty of this recipe lies in its versatility and reliability. Once you master the basic technique, you can adapt it endlessly to suit your mood, dietary needs, or what you have on hand. The roux-based sauce ensures consistent, smooth results every time, while the generous amount of cheese delivers that indulgent flavor everyone craves.
This mac and cheese works equally well as a weeknight family dinner or as the star side dish at your next holiday gathering. Make a batch this weekend and experience why this timeless classic has been bringing people together around the dinner table for generations. Don’t forget to share your results in the comments below and let us know which variation you tried first!
Recommended:
- Breakfast Potatoes Recipe
- Funeral Potatoes Recipe
- Cheesy Potatoes Recipe
- Au Gratin Potatoes Recipe
- Twice Baked Potato Recipe
- Corn Casserole Recipe
- Squash Casserole Recipe
- Tuna Noodle Casserole Recipe
- Lasagna Recipe with Ricotta
- Tuna Casserole Recipe


