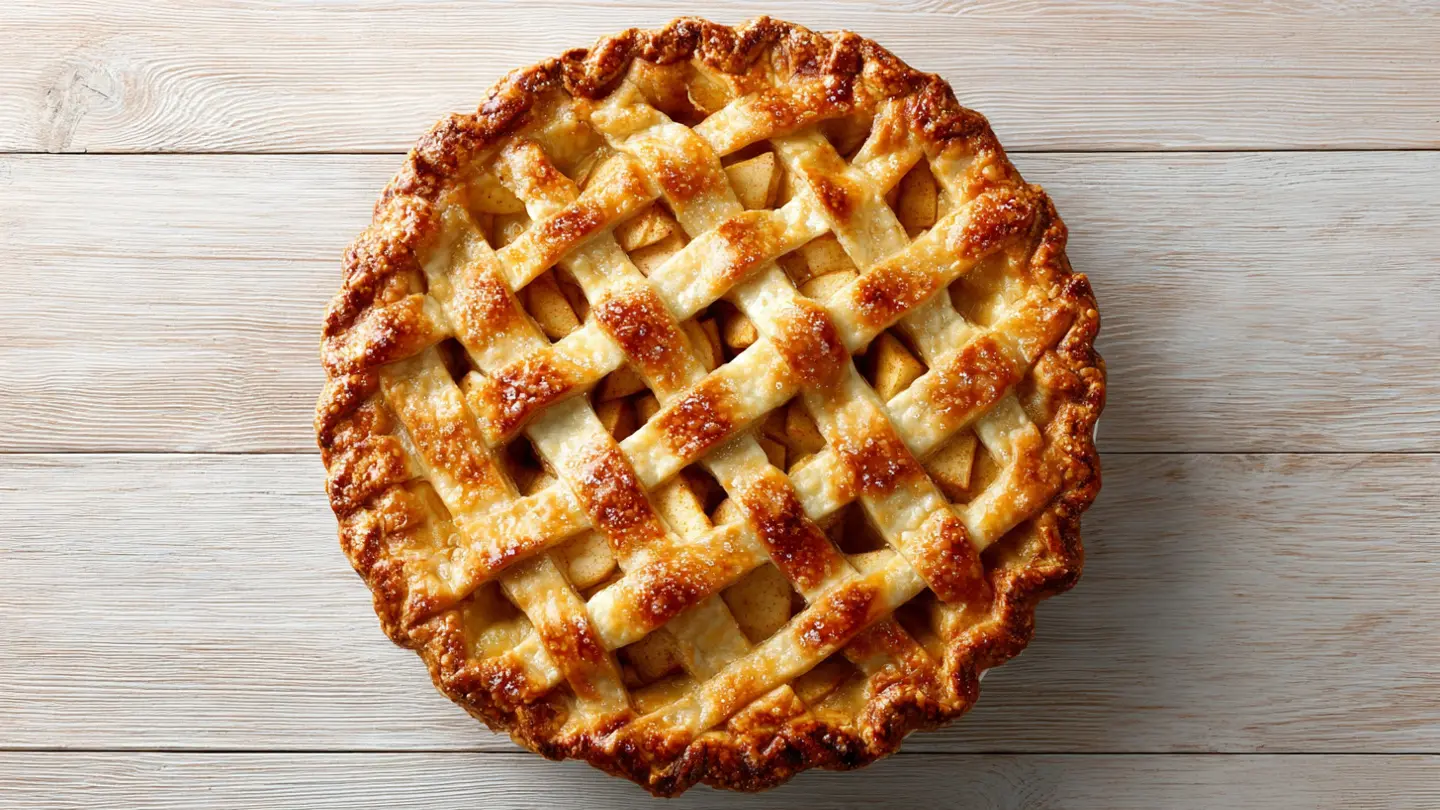
Nothing says home quite like the aroma of a freshly baked classic apple pie wafting through your kitchen. This timeless dessert features tender, cinnamon-spiced apples nestled in a buttery, flaky double crust that bakes up golden and perfect every single time.
With its sweet-tart filling and perfectly crisp crust, this recipe delivers all the comfort and nostalgia you crave in every bite. The combination of apples, warm spices, and a hint of lemon creates layers of flavor that have made apple pie an American favorite for generations.
This classic apple pie recipe is surprisingly easy to make with simple pantry ingredients and fresh apples. The secret lies in choosing the right apples, achieving the perfect balance of sweetness, and ensuring your crust stays flaky while your filling cooks to tender perfection.
Each slice reveals generous amounts of tender apple filling that holds its shape beautifully, never turning mushy. The filling is sweetened just right, allowing the natural apple flavor to shine through while warm cinnamon and nutmeg add depth.
Why You’ll Love This Classic Apple Pie Recipe
This recipe transforms simple ingredients into an unforgettable dessert that brings people together. The tried-and-true technique ensures consistent results, making it perfect for both novice bakers and seasoned pie makers.
- Perfectly balanced sweetness: The combination of granulated and brown sugar complements the apples without overwhelming their natural flavor
- Tender but structured filling: The apples cook down to tender perfection while maintaining their shape, creating that ideal pie texture
- Flaky, buttery crust: The double crust provides the perfect contrast to the soft filling, with golden edges that shatter at first bite
- Make-ahead friendly: You can prepare this pie a day in advance, making it ideal for holiday gatherings and dinner parties
- Versatile serving options: Delicious warm or at room temperature, plain or topped with ice cream or whipped cream
You might also enjoy: Dutch Apple Pie Recipe
Ingredients
This classic apple pie calls for straightforward ingredients you likely already have in your kitchen. The key is using fresh, firm apples and quality butter for the best results.
- For the Pie Crust:
- 2 ½ cups (315g) all-purpose flour, plus extra for rolling
- 1 tablespoon (12g) granulated sugar
- 1 teaspoon (6g) salt
- 1 cup (226g) unsalted butter, cold and cubed
- 6-8 tablespoons (90-120ml) ice water
- For the Apple Filling:
- 7 cups (about 900g) apples, peeled, cored, and sliced ¼-inch thick (about 6-7 medium apples)
- ¾ cup (150g) granulated sugar
- ¼ cup (55g) packed light brown sugar
- 3 tablespoons (24g) all-purpose flour
- 1 ½ teaspoons (4g) ground cinnamon
- ¼ teaspoon (0.5g) ground nutmeg
- 2 tablespoons (30ml) fresh lemon juice
- 1 teaspoon (2g) lemon zest
- 2 tablespoons (28g) unsalted butter, cut into small pieces
- For the Egg Wash:
- 1 large egg
- 1 tablespoon (15ml) water
- 1 tablespoon (12g) coarse sugar for sprinkling
Read Also: From Scratch Pumpkin Pie Recipe
Kitchen Equipment Needed
Having the right tools makes pie-baking much easier and ensures better results. Here are the essentials for creating your perfect apple pie.
- 9-inch pie dish (glass or ceramic)
- Large mixing bowls
- Rolling pin
- Measuring cups and spoons
- Pastry cutter or fork
- Sharp knife or apple peeler
- Plastic wrap
- Pastry brush
- Baking sheet (to catch drips)
- Cooling rack
Read Also: Classic Pumpkin Pie Recipe
Recommended Products for This Recipe
These carefully selected products will help you achieve bakery-quality results and make the pie-baking process more enjoyable.
1. Emile Henry Modern Classics Pie Dish
This ceramic pie dish distributes heat evenly for a perfectly golden crust every time. The deep design accommodates generous amounts of filling, and the beautiful presentation means you can serve directly from dish to table.
2. OXO Good Grips Apple Corer and Slicer
This tool cuts your prep time in half by coring and slicing apples in one motion. The sharp stainless steel blades create uniform slices that cook evenly, and the comfortable handles make processing multiple apples effortless.
3. French Rolling Pin
A quality French rolling pin gives you better control when rolling out pie dough. The tapered design allows for precision work on the edges, helping you achieve an even thickness throughout for a perfectly flaky crust.
4. Granny Smith Apples
Fresh, crisp Granny Smith apples provide the ideal tart flavor and firm texture for pie baking. These apples hold their shape during baking and balance beautifully with the sweetness of the sugar, creating that perfect sweet-tart combination.
This pairs beautifully with best carrot cake recipe for a complete dessert spread.
Step-by-Step Instructions
Follow these detailed steps to create a flawless apple pie from scratch. Taking your time with each phase ensures a beautiful, delicious result.
1. Prepare the Pie Crust
- In a large mixing bowl, whisk together 2 ½ cups flour, 1 tablespoon granulated sugar, and 1 teaspoon salt until well combined
- Add the cold, cubed butter to the flour mixture
- Using a pastry cutter or two forks, cut the butter into the flour until the mixture resembles coarse crumbs with pea-sized pieces of butter throughout (this takes about 3-4 minutes of cutting)
- Drizzle 6 tablespoons of ice water over the mixture, one tablespoon at a time
- Gently mix with a fork after each addition, adding more water if needed until the dough just begins to come together (the dough should hold together when pressed but not be wet or sticky)
- Divide the dough into two portions, one slightly larger than the other (about 60/40 split)
- Shape each portion into a flat disc, wrap tightly in plastic wrap, and refrigerate for at least 1 hour or up to 2 days
2. Prepare the Apple Filling
- Peel, core, and slice the apples into ¼-inch thick slices (uniform thickness ensures even cooking)
- Place the sliced apples in a large bowl
- Add the lemon juice and lemon zest to the apples and toss to coat (this prevents browning and adds brightness to the flavor)
- In a separate small bowl, whisk together ¾ cup granulated sugar, ¼ cup brown sugar, 3 tablespoons flour, cinnamon, and nutmeg until no lumps remain
- Pour the sugar mixture over the apples
- Toss everything together until every apple slice is evenly coated with the spice mixture
- Set aside while you roll out the crust (this allows the apples to release some juice and the flavors to meld)
3. Roll Out the Bottom Crust
- Remove the larger disc of dough from the refrigerator and let it sit at room temperature for 5-10 minutes (this makes it easier to roll without cracking)
- Lightly flour your work surface and rolling pin
- Place the dough disc in the center of the floured surface
- Starting from the center, roll outward in all directions, rotating the dough quarter-turns to maintain a circular shape
- Continue rolling until you have a circle about 12 inches in diameter and ⅛-inch thick
- Carefully transfer the dough to your 9-inch pie dish by rolling it onto your rolling pin, then unrolling it over the dish
- Gently press the dough into the bottom and sides of the dish, being careful not to stretch it (stretching causes shrinkage during baking)
- Trim any excess dough hanging over the edge, leaving about ½ inch of overhang
- Return the crust-lined dish to the refrigerator while you roll out the top crust
4. Roll Out the Top Crust
- Remove the second disc of dough from the refrigerator and let it rest for 5-10 minutes
- On a lightly floured surface, roll out the dough to a 12-inch circle, ⅛-inch thick, using the same technique as the bottom crust
- If desired, use a sharp knife or pastry wheel to cut decorative shapes from the dough, or cut the dough into 1-inch wide strips for a lattice top
- Place the rolled-out dough or strips on a parchment-lined baking sheet and refrigerate until ready to use
5. Assemble the Pie
- Preheat your oven to 400°F (204°C) and position a rack in the lower third of the oven
- Place a baking sheet on the rack below where your pie will bake (this catches any drips and helps with even bottom crust browning)
- Remove the crust-lined pie dish from the refrigerator
- Pour the apple filling into the prepared crust, arranging it in an even layer
- Dot the top of the filling with the 2 tablespoons of butter pieces (this adds richness and helps create a glossy filling)
- Mound the apples slightly higher in the center, as they will settle during baking
- Remove the top crust from the refrigerator
- If using a solid top crust, drape it over the filling, centering it carefully
- Trim the edges of both crusts together, leaving about 1 inch of overhang
- Fold the overhanging dough under itself to create a thick edge that sits on the rim of the pie dish
- Crimp or flute the edges decoratively by pinching with your fingers or pressing with a fork
- If using a solid top crust, cut 4-5 small vents in the center to allow steam to escape during baking
6. Apply Egg Wash and Bake
- In a small bowl, whisk together the egg and 1 tablespoon water until well combined
- Using a pastry brush, gently brush the egg wash over the entire top crust and edges (this creates a beautiful golden color)
- Sprinkle the coarse sugar evenly over the egg-washed surface for a sparkly, crunchy finish
- Place the pie on the baking sheet in the lower third of the oven
- Bake for 20 minutes at 400°F (204°C)
- Reduce the oven temperature to 375°F (190°C) and continue baking for 35-45 minutes
- The pie is done when the crust is deep golden brown and you can see the filling bubbling through the vents
- If the edges brown too quickly, tent them with aluminum foil strips about halfway through baking
7. Cool and Serve
- Remove the pie from the oven and place it on a cooling rack
- Allow the pie to cool for at least 3-4 hours before slicing (this allows the filling to set properly so the slices hold their shape)
- For best results, let the pie cool completely, then serve at room temperature or gently rewarm individual slices
Another favorite: Best Chocolate Chip Cookies Recipe
Tips for Success
These tried-and-true tips will help you avoid common pitfalls and ensure your apple pie turns out perfectly every time.
Keep your ingredients cold when making pie crust, as cold butter creates steam pockets during baking that make the crust flaky. If your kitchen is warm, chill your mixing bowl and even your flour for extra insurance.
- Choose the right apples: Use firm, tart apples like Granny Smith, or combine them with sweeter varieties like Honeycrisp or Golden Delicious for a more complex flavor
- Slice apples uniformly: Consistent ¼-inch slices ensure all the apples cook at the same rate
- Don’t skip the chill time: Refrigerating the dough prevents shrinking and makes it easier to work with
- Prevent a soggy bottom: Baking on the lower oven rack and using a preheated baking sheet underneath helps crisp the bottom crust
- Let it cool completely: Patience is key; cutting into a hot pie results in runny filling that won’t hold its shape
- Cover edges if needed: If the crust edges brown too quickly, create foil shields by cutting strips of foil and gently wrapping them around the rim
- Use a pie shield: Alternatively, invest in a reusable silicone or metal pie crust shield for even browning
- Brush on egg wash evenly: A thin, even coat of egg wash creates the most beautiful golden finish without any streaks
For a lighter option, try: Healthy Chicken Salad Recipe
Serving Suggestions
Classic apple pie is incredibly versatile and pairs wonderfully with both simple and creative accompaniments that enhance its warm, spiced flavors.
- Serve warm with a generous scoop of vanilla ice cream melting over the top
- Add a dollop of freshly whipped cream sweetened with a touch of vanilla extract
- Drizzle with homemade caramel sauce for extra decadence
- Pair with a slice of sharp cheddar cheese for a traditional savory-sweet combination
- Serve alongside hot coffee or spiced apple cider for a cozy autumn dessert experience
- Top with cinnamon whipped cream for an extra layer of spice
- Present with a side of Classic Deviled Eggs for a complete holiday spread
This technique works wonderfully in easy shepherds pie recipe as well.
Variations to Try
Once you’ve mastered the classic version, these creative twists add new dimensions to the traditional apple pie while maintaining its comforting essence.
- Lattice Top: Cut the top crust into 1-inch strips and weave them over the filling for a beautiful bakery-style presentation
- Crumb Topping: Skip the top crust and add a buttery streusel topping made from flour, butter, brown sugar, and oats for a Dutch apple pie variation
- Maple Apple Pie: Replace half the granulated sugar with pure maple syrup for a deeper, more complex sweetness
- Caramel Apple Pie: Drizzle caramel sauce between layers of apples before adding the top crust
- Spiced Variation: Add ¼ teaspoon ground ginger, cardamom, or allspice to the filling for a more complex spice profile
- Mixed Fruit: Combine apples with pears or cranberries for a seasonal twist
- Bourbon Apple Pie: Add 2 tablespoons of bourbon to the filling for a sophisticated, adult version
- Mini Apple Pies: Divide the dough and filling among individual ramekins or a muffin tin for personal-sized portions
Read Also: Chewy Chocolate Chip Cookies Recipe
Storage and Reheating
Proper storage keeps your apple pie fresh and delicious for several days, while the right reheating method brings back that just-baked warmth.
Store leftover pie at room temperature, covered loosely with aluminum foil or plastic wrap, for up to 2 days. For longer storage, refrigerate the pie for up to 5 days in an airtight container.
- Freezing baked pie: Wrap cooled pie tightly in plastic wrap, then in aluminum foil, and freeze for up to 3 months; thaw overnight in the refrigerator before serving
- Freezing unbaked pie: Assemble the pie completely but don’t brush with egg wash; wrap well and freeze for up to 2 months; bake from frozen, adding 15-20 extra minutes to the baking time
- Reheating individual slices: Place a slice on a microwave-safe plate and heat for 20-30 seconds, or reheat in a 350°F (175°C) oven for 10 minutes
- Reheating whole pie: Cover the pie loosely with foil and warm in a 350°F (175°C) oven for 15-20 minutes until heated through
- Maintaining crispness: For the crispest crust, always reheat in the oven rather than the microwave
- Avoiding sogginess: Store pie uncovered in the refrigerator for the first hour to allow steam to escape, then cover for continued storage
You might also enjoy: Classic Tiramisu Recipe
Nutritional Facts
Per serving (1 slice, based on 8 servings):
- Calories: 410
- Total Fat: 18g
- Saturated Fat: 11g
- Cholesterol: 50mg
- Sodium: 320mg
- Total Carbohydrates: 61g
- Dietary Fiber: 3g
- Sugars: 32g
- Protein: 4g
Note: Nutritional information is approximate and will vary based on specific ingredients used and portion sizes.
The same cheese blend works great in baked mac and cheese recipe too.
Health Benefits of Key Ingredients
While apple pie is certainly a treat, many of its ingredients offer nutritional benefits that make it a more wholesome dessert choice.
Apples provide dietary fiber, particularly pectin, which supports digestive health and helps regulate blood sugar levels. They’re also rich in vitamin C and various antioxidants that support immune function and may reduce the risk of chronic diseases.
- Apples: High in soluble fiber and antioxidants, particularly quercetin, which has anti-inflammatory properties and may support heart health
- Cinnamon: Contains powerful antioxidants and may help regulate blood sugar levels, reduce inflammation, and support brain health
- Nutmeg: Offers antibacterial properties and contains compounds that may improve digestion and promote better sleep
- Lemon juice: Provides vitamin C and helps enhance iron absorption from other foods in the meal
- Butter: Contains fat-soluble vitamins A, E, and K2, plus beneficial fatty acids when consumed in moderation
For a lighter option, try: Easy Tiramisu Recipe
Frequently Asked Questions
1. What are the best apples for apple pie?
Granny Smith apples are the gold standard for pie baking because they’re firm, tart, and hold their shape beautifully during baking. For more complex flavor, combine Granny Smith with sweeter varieties like Honeycrisp, Golden Delicious, or Braeburn in a 50/50 ratio.
2. How do I prevent my pie crust from getting soggy?
Bake your pie on the lower oven rack so the bottom gets direct heat, which helps it crisp up. You can also brush the bottom crust with a beaten egg white before adding the filling, or sprinkle a thin layer of breadcrumbs or ground nuts to create a moisture barrier.
3. Can I make apple pie ahead of time?
Absolutely! You can assemble the entire pie up to 24 hours in advance, cover it tightly, and refrigerate until ready to bake. You can also bake the pie completely, let it cool, and store it covered at room temperature for up to 2 days before serving.
4. Why is my apple pie filling runny?
Runny filling usually happens when the pie is cut before it has cooled completely. The filling needs 3-4 hours to cool and set properly. Using the right amount of thickener (flour or cornstarch) and choosing firm apples also helps create the perfect consistency.
5. How do I know when my apple pie is done baking?
Your pie is ready when the crust is deep golden brown all over and you can see the filling actively bubbling through the vents or lattice. The internal temperature should reach 195°F (90°C). If the crust is browning too quickly, tent it with foil and continue baking until the filling bubbles.
Read Also: Classic Chicken Parmesan Recipe
Final Thoughts
This classic apple pie recipe brings together everything you love about traditional American baking in one beautiful, delicious package. The combination of tender, spiced apples and flaky, buttery crust creates a dessert that’s both comforting and impressive.
The beauty of this recipe lies in its simplicity and reliability. With just a handful of quality ingredients and careful attention to technique, you’ll create a pie that rivals anything from a professional bakery. So gather your apples, roll out that dough, and fill your home with the irresistible aroma of fresh-baked apple pie!
Recommended:
- Classic Chicken Pot Pie Recipe
- Easy Chicken Pot Pie Recipe
- Classic Shepherds Pie Recipe
- Old Fashioned Pancake Recipe
- Buttermilk Pancake Recipe
- Carrot Cake with Cream Cheese Frosting Recipe
- Classic Egg Salad Recipe
- Easy Egg Salad Recipe
- Creamy Mashed Potatoes Recipe
- Garlic Mashed Potatoes Recipe


