Fall calls for comfort food that warms the soul, and nothing delivers quite like a perfectly baked acorn squash recipe. This simple yet impressive side dish transforms the humble winter squash into a buttery, sweet masterpiece that belongs on every autumn dinner table.
I’ve made countless variations over the years, but this classic version remains my favorite. The natural sweetness of acorn squash pairs beautifully with brown sugar, butter, and maple syrup, creating a dish that’s both nutritious and indulgent. Best of all, it requires minimal prep work and lets the oven do most of the heavy lifting.
The beauty of baked acorn squash lies in its versatility. Serve it alongside roasted chicken for a weeknight dinner, or present it at Thanksgiving as an alternative to sweet potato casserole. The tender flesh practically melts in your mouth, while the caramelized edges add just the right amount of texture.
Why You’ll Love This Baked Acorn Squash Recipe
This recipe strikes the perfect balance between simplicity and elegance. With just five core ingredients, you’ll create a side dish that looks and tastes like you spent hours in the kitchen.
The hands-off cooking method makes it ideal for busy home cooks. Once you prep the squash and add the toppings, it bakes unattended while you focus on other dishes.
Here’s what makes this recipe special:
- Naturally sweet and nutritious: Acorn squash provides vitamins A and C, fiber, and potassium without any guilt
- Minimal ingredients: You likely have everything you need in your pantry already
- Impressive presentation: The halved squash serves as its own edible bowl, making plating effortless
- Versatile flavor profile: Works equally well as a savory or sweet side dish depending on your seasoning choices
- Make-ahead friendly: You can prep the squash hours in advance and pop it in the oven when needed
This squash casserole recipe offers another delicious way to enjoy winter squash.
Ingredients
This baked acorn squash recipe calls for simple, wholesome ingredients that come together to create something truly special. The combination of butter, brown sugar, and maple syrup transforms the squash into a caramelized delight.
For the Baked Acorn Squash:
- 2 medium acorn squash (about 1.5 pounds each)
- 4 tablespoons (56g) unsalted butter, divided
- 4 tablespoons (50g) brown sugar, divided
- 4 tablespoons (60ml) pure maple syrup, divided
- 1/2 teaspoon sea salt, divided
- 2 cups (475ml) water
Optional Garnishes:
- Fresh thyme or sage leaves
- Chopped pecans or walnuts
- Ground cinnamon or nutmeg
- Extra pat of butter
Kitchen Equipment Needed
Having the right tools makes preparing baked acorn squash much easier and safer. A sharp knife is essential for cutting through the thick skin, while a sturdy baking dish ensures even cooking.
Essential Equipment:
- Sharp chef’s knife or heavy-duty kitchen knife
- Large baking dish or rimmed baking sheet
- Aluminum foil
- Large spoon for scooping seeds
- Cutting board
- Measuring spoons and cups
Recommended Products for This Recipe
These carefully selected products will help you create the best baked acorn squash possible. Each item has been chosen based on quality, performance, and value.
1. Le Creuset Enameled Cast Iron Baking Dish
This baking dish distributes heat evenly, ensuring your acorn squash cooks perfectly without any hot spots or burnt edges. The enameled interior makes cleanup simple, even when the butter and sugar mixture caramelizes. It’s a durable investment that will serve you well for countless fall dinners.
2. Wusthof Classic Chef’s Knife
Cutting through acorn squash requires a sharp, heavy-duty blade. This professional-grade chef’s knife makes quick work of even the toughest winter squash. The weight and balance give you better control, reducing the risk of slipping.
3. Pure Vermont Maple Syrup
The quality of your maple syrup directly impacts the final flavor of your baked acorn squash. Pure Vermont maple syrup adds rich, complex sweetness that imitation syrups simply can’t match. This Grade A Dark Amber syrup has robust flavor that stands up beautifully to roasting.
4. Reynolds Wrap Heavy Duty Aluminum Foil
Heavy-duty foil is crucial for the initial covered baking phase. Regular foil tends to tear and doesn’t seal as well, allowing too much moisture to escape. This professional-strength foil creates a perfect seal while withstanding high oven temperatures.
For more fall-inspired sides, check out this roasted butternut squash soup recipe.
Step-by-Step Instructions
Follow these detailed instructions for perfectly baked acorn squash every time. Taking care during the prep stage ensures even cooking and the best possible presentation.
1. Preheat the Oven and Prepare Your Workspace
- Preheat your oven to 400°F (204°C)
- Line your baking dish or rimmed baking sheet with parchment paper if desired (this makes cleanup easier but isn’t essential)
- Gather all your ingredients and equipment within easy reach
- Clear a stable workspace on your countertop for safely cutting the squash
2. Cut and Clean the Acorn Squash
- Wash the acorn squash under cool running water and pat dry with a clean kitchen towel
- Place the squash on a cutting board with the stem side up for stability
- Using a sharp chef’s knife, carefully cut straight down through the center from stem to tip to create two equal halves (pro tip: if the squash is very hard, microwave it whole for 30-60 seconds to soften slightly)
- Use a large spoon to scoop out all the seeds and stringy fibers from the center cavity of each half
- Discard the seeds and fibers, or save the seeds for roasting separately if desired
- Check the cavity one more time to ensure all stringy bits are removed for the cleanest presentation
3. Season the Squash Halves
- Place the squash halves cut-side up in your prepared baking dish
- Sprinkle each half with a pinch of sea salt (about 1/8 teaspoon per half)
- Add 1 tablespoon of butter to the center cavity of each squash half
- Sprinkle 1 tablespoon of brown sugar over the butter in each cavity
- Drizzle 1 tablespoon of maple syrup over the brown sugar and butter mixture in each half
- The ingredients should pool in the natural hollow of the squash, creating a sweet, buttery mixture
4. Add Water and Cover
- Pour 2 cups of water into the bottom of the baking dish around the squash halves (not directly on top)
- This water creates steam during baking, which helps the squash cook evenly and stay moist
- Cover the entire baking dish tightly with aluminum foil
- Make sure the foil is sealed well around the edges but leave a small gap at one corner to allow some steam to escape
- This prevents the squash from becoming waterlogged while maintaining moisture
5. Bake Covered
- Place the covered baking dish on the center rack of your preheated 400°F (204°C) oven
- Bake for 30 minutes without opening the oven door
- During this time, the squash will steam and begin to soften from the moist heat
- The steam helps break down the tough fibers while the butter and sugar begin to melt and combine
6. Uncover and Continue Baking
- After 30 minutes, carefully remove the foil (watch out for hot steam)
- Return the uncovered dish to the oven
- Continue baking for an additional 30-45 minutes, depending on the size of your squash
- The squash is done when a fork easily pierces through the flesh to the skin with minimal resistance
- Check for doneness starting at the 30-minute mark for smaller squash
7. Broil for Caramelization
- Once the squash is tender, turn your oven to broil on high
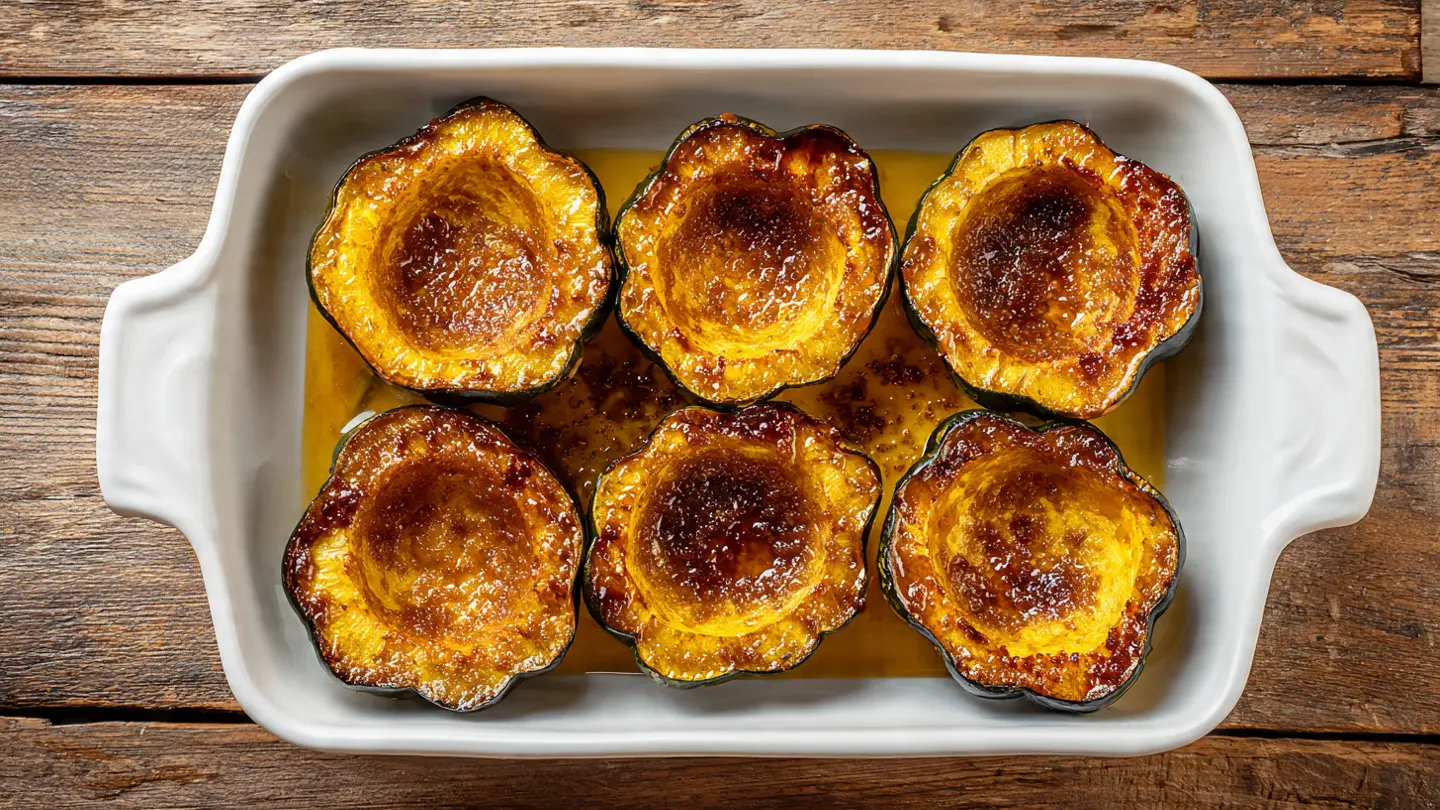
- Watch carefully and broil for the last 3-5 minutes until the tops turn golden brown and the butter-sugar mixture bubbles vigorously
- This step caramelizes the sugars and creates those delicious crispy, sweet edges
- Stay near the oven during broiling as the sugars can burn quickly
- Remove from the oven as soon as you see deep golden-brown color and active bubbling
8. Rest and Serve
- Remove the baking dish from the oven and let the squash rest for 5 minutes before serving
- This allows the sweet syrup to thicken slightly and makes the squash easier to handle
- Use a large spatula to transfer each half to individual serving plates
- Spoon any extra buttery syrup from the baking dish over the top of each serving
- Garnish with fresh herbs, chopped nuts, or a sprinkle of cinnamon if desired
Another favorite fall side: sweet potato casserole.
Tips for Success
These tried-and-true tips will help you achieve perfect baked acorn squash every single time. Pay special attention to selecting quality squash and monitoring the broiling stage.
Expert Tips:
- Choose the right squash: Look for acorn squash that feels heavy for its size with dull, dark green skin and no soft spots or blemishes. Shiny skin indicates the squash was picked too early.
- Make cutting easier: If your squash is extremely hard, microwave it whole for 1-2 minutes before cutting. This softens the skin just enough to make cutting safer without pre-cooking the flesh.
- Watch the broiler closely: Sugar burns quickly under high heat. Set a timer for 2 minutes and check frequently during the broiling stage.
- Test for doneness properly: Insert a fork into the thickest part of the squash flesh. It should slide in easily with minimal resistance when fully cooked.
- Adjust sweetness to taste: If you prefer less sweet squash, reduce the brown sugar to 2 teaspoons per half or omit it entirely and rely on the natural sweetness and maple syrup.
- Prevent burning: If the edges start browning too quickly during the uncovered baking phase, tent loosely with foil and continue baking.
- Size matters: Cooking time varies significantly based on squash size. Smaller squash (1-1.5 pounds) need less time, while larger ones (2+ pounds) may need up to 60 minutes total uncovered baking time.
- Keep the skin on: The skin becomes tender during baking and is completely edible, though many people prefer to scoop out just the flesh when eating.
Read Also: Roasted Brussels Sprouts Recipe
Serving Suggestions

Baked acorn squash pairs beautifully with a wide range of main dishes and other sides. The sweet, buttery flavor complements both rich proteins and lighter fare.
This versatile side dish works wonderfully alongside roasted meats, from simple weeknight chicken to elaborate holiday spreads. The natural sweetness also balances savory, herb-heavy dishes perfectly.
Perfect Pairings:
- Roasted proteins: Serve with herb-roasted chicken, roasted turkey breast, or pork tenderloin
- Thanksgiving table: Replace or complement traditional sweet potato casserole
- Hearty grain bowls: Scoop the flesh into bowls with wild rice, quinoa, and roasted vegetables
- Fresh salads: Dice the cooked squash and add to fall harvest salad with cranberries and pecans
- Breakfast twist: Top with Greek yogurt, granola, and a drizzle of additional maple syrup for a sweet breakfast treat
- Classic sides: Pair with garlic green beans, creamy mashed potatoes, or roasted carrots
Variations to Try
Once you master the classic version, these creative variations will keep your baked acorn squash exciting and adaptable to different occasions. Each variation offers a completely different flavor profile while maintaining the same simple preparation method.
Delicious Variations:
- Savory herb version: Skip the brown sugar and maple syrup. Instead, brush with olive oil and season with minced garlic, fresh thyme, rosemary, and grated Parmesan cheese before baking.
- Spiced maple pecan: Add 1/4 teaspoon cinnamon and a pinch of nutmeg to the brown sugar mixture. Top with chopped pecans during the last 10 minutes of baking for a crunchy garnish.
- Bacon and sage: Replace butter with bacon fat and sprinkle crumbled cooked bacon and crispy fried sage leaves over the top before serving.
- Orange honey glaze: Substitute maple syrup with honey and add 1 tablespoon fresh orange juice plus 1 teaspoon orange zest to each cavity.
- Stuffed version: Fill the roasted squash cavities with a mixture of cooked wild rice, dried cranberries, chopped walnuts, and crumbled goat cheese.
- Coconut curry: Replace butter with coconut oil and add a sprinkle of curry powder and a drizzle of coconut milk instead of maple syrup.
- Apple cider reduction: Use apple cider in place of water in the pan and reduce it on the stovetop after baking to create a glaze.
You might also enjoy: Roasted Spaghetti Squash Recipe
Storage and Reheating
Proper storage ensures your baked acorn squash maintains its flavor and texture for several days. Cooled squash keeps well in the refrigerator and reheats beautifully.
Storage Instructions:
- Refrigerator: Let the squash cool completely to room temperature. Transfer to an airtight container and refrigerate for up to 4 days. You can store the halves whole or scoop out the flesh into a container.
- Freezer: Scoop the cooked flesh from the skin and mash or puree it. Store in freezer-safe containers or bags for up to 3 months. Label with the date. Note that whole halves don’t freeze well as the texture becomes watery.
- Meal prep tip: Bake multiple squash at once and store separately for easy grab-and-go sides throughout the week.
Reheating Instructions:
- Oven method: Place squash halves in a baking dish, cover with foil, and reheat at 350°F (175°C) for 15-20 minutes until warmed through.
- Microwave method: Place squash in a microwave-safe dish, cover loosely, and heat on high for 2-3 minutes, checking and stirring halfway through.
- Stovetop method: For scooped flesh, reheat gently in a saucepan over medium-low heat with a splash of water or broth, stirring occasionally.
Read Also: Honey Roasted Carrots Recipe
Nutritional Facts
Per serving (1/2 medium acorn squash, prepared as directed):
- Calories: 180
- Total Fat: 6g
- Saturated Fat: 4g
- Trans Fat: 0g
- Cholesterol: 15mg
- Sodium: 150mg
- Total Carbohydrates: 34g
- Dietary Fiber: 3g
- Sugars: 15g (includes 12g added sugars from brown sugar and maple syrup)
- Protein: 2g
- Vitamin A: 20% Daily Value
- Vitamin C: 35% Daily Value
- Calcium: 6% Daily Value
- Iron: 8% Daily Value
- Potassium: 450mg
Note: Nutritional information is approximate and will vary based on exact squash size and ingredient measurements used.
For a lighter option, try this roasted cauliflower soup.
Health Benefits of Key Ingredients
Baked acorn squash offers impressive nutritional value beyond its delicious taste. This colorful winter vegetable packs vitamins, minerals, and antioxidants that support overall health.
The natural sweetness means you can enjoy a satisfying side dish while still nourishing your body with essential nutrients. Each ingredient contributes specific health benefits.
Nutritional Highlights:
- Acorn squash: Excellent source of vitamin A (supports eye health and immune function), vitamin C (boosts immunity and collagen production), potassium (regulates blood pressure), and dietary fiber (promotes digestive health and helps maintain stable blood sugar)
- Maple syrup: Contains beneficial minerals like manganese and zinc, plus antioxidants that may reduce inflammation (in moderation)
- Brown sugar: Provides quick energy and contains trace minerals from molasses, though should be enjoyed in moderation
- Butter: Supplies fat-soluble vitamins A, D, E, and K, which support hormone production and nutrient absorption
- Sea salt: Provides essential electrolytes and trace minerals not found in refined table salt
Frequently Asked Questions
1. Can I eat the skin of baked acorn squash?
Yes, acorn squash skin becomes tender and edible when fully baked. Many people enjoy eating it as it adds extra fiber and nutrients. However, the skin has a slightly tougher texture than the flesh, so you can easily scoop out just the flesh if you prefer.
2. How do I know when my acorn squash is ripe and ready to buy?
Look for squash with dull, dark green skin that feels heavy for its size. Avoid squash with shiny skin (indicates it was picked too early), soft spots, or significant orange coloring all over (means it’s overripe). A small patch of orange is normal and acceptable.
3. Can I make this recipe ahead of time for Thanksgiving?
You can cut and clean the squash up to 24 hours in advance and store it covered in the refrigerator. However, baked acorn squash tastes best when served fresh from the oven. If you must prepare it completely ahead, bake it fully, cool and refrigerate, then reheat covered at 350°F for 15-20 minutes before serving.
4. Why did my squash turn out watery instead of caramelized?
Watery squash usually results from too much liquid in the baking dish or not baking long enough uncovered. Make sure to bake uncovered for the full 30-45 minutes after removing the foil, and don’t skip the broiling step. This allows excess moisture to evaporate while the sugars caramelize properly.
5. Can I use other types of squash with this recipe?
Absolutely! This recipe works wonderfully with butternut squash, delicata squash, or kabocha squash. Cooking times may vary slightly based on size and variety. Butternut squash typically needs 5-10 minutes less cooking time, while denser kabocha squash may need slightly longer.
Another crowd-pleaser: Scalloped Potatoes Recipe
Final Thoughts
This baked acorn squash recipe proves that simple ingredients can create something truly special. The combination of natural sweetness, butter, and maple syrup transforms humble winter squash into a memorable side dish.
From weeknight dinners to holiday gatherings, this versatile recipe deserves a regular spot in your fall and winter cooking rotation. The hands-off preparation and stunning presentation make it a winner every time.
I hope you’ll give this baked acorn squash recipe a try at your next meal. Share your results in the comments below, and let me know if you tried any of the suggested variations!
Recommended:
- Butternut Squash Soup Recipe
- Roasted Brussels Sprouts Recipe
- Sweet Potato Casserole Recipe
- Creamy Mashed Potatoes Recipe
- Roasted Carrots Recipe
- Wild Rice Recipe
- Honey Roasted Carrots Recipe
- Garlic Green Beans Recipe
- Scalloped Potatoes Recipe
- Roasted Cauliflower Soup Recipe


