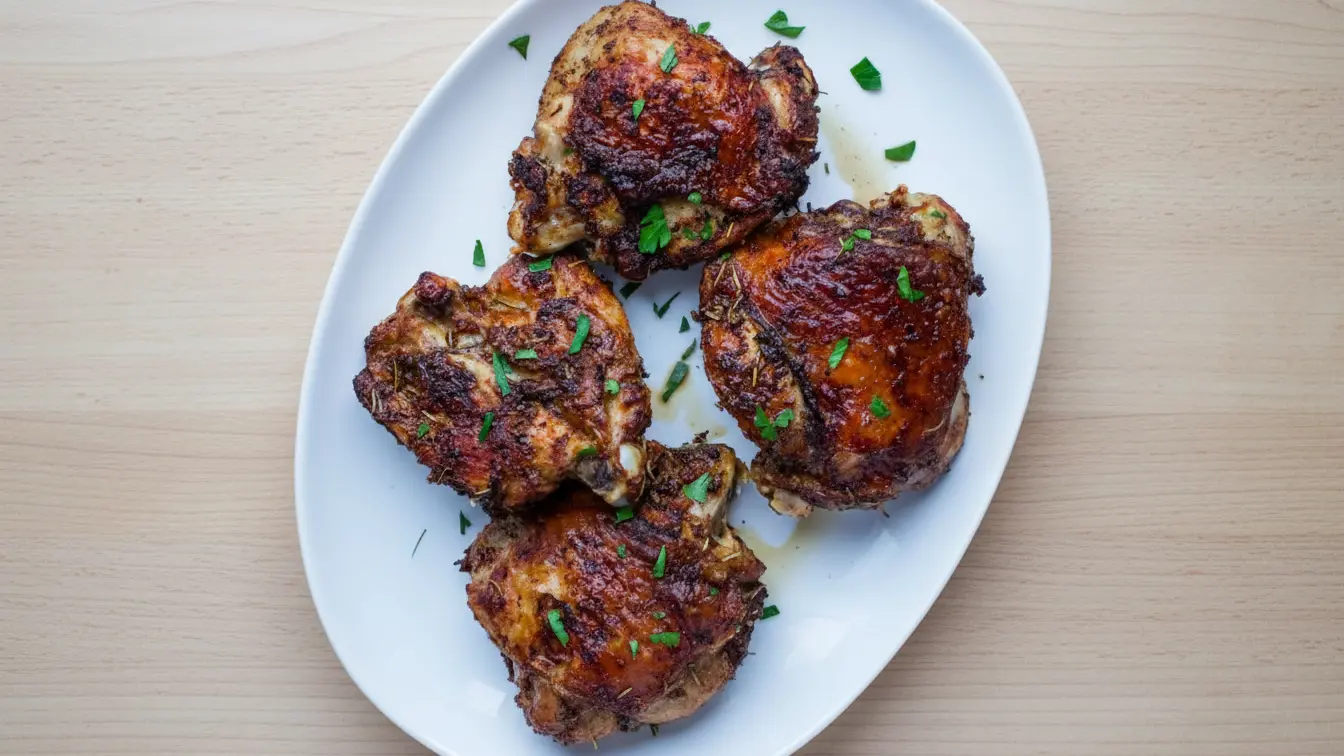
Crispy skin, juicy meat, and minimal cleanup—that’s exactly what you get when you make Air Fryer Turkey Thighs.
I’m always looking for ways to cook turkey that don’t involve heating up my entire oven for hours. That’s when I discovered the magic of using my air fryer for turkey thighs, and I haven’t looked back since.
The air fryer gives you that perfect golden-brown, crackling skin on the outside while keeping the meat incredibly tender and juicy on the inside. Plus, the whole thing takes less than an hour from start to finish, which is pretty incredible for turkey.
This recipe works beautifully for weeknight dinners, meal prep, or even when you’re craving that holiday turkey flavor without all the fuss. I’ll walk you through everything you need to know to make perfectly cooked turkey thighs every single time.
For another simple poultry option, try my Air Fryer Chicken Thighs Recipe using similar techniques.
Why You’ll Love This Air Fryer Turkey Thighs Recipe
This recipe transforms an often-overlooked cut of turkey into something absolutely delicious. The air fryer circulates hot air around the meat, creating that restaurant-quality crispy skin without deep frying.
Here’s what makes this recipe so special:
- Crispy skin every time: The air fryer creates the perfect environment for golden, crackling skin
- Juicy, tender meat: The quick cooking method locks in all the natural juices
- Minimal prep work: Just season and cook—no complicated steps
- Versatile seasoning options: Works with everything from simple salt and pepper to bold spice rubs
- Budget-friendly: Turkey thighs are one of the most affordable cuts of poultry
- Hands-off cooking: The air fryer does all the work while you prep side dishes
Ingredients
This recipe uses simple, accessible ingredients that you probably already have in your kitchen. The focus is on letting the turkey’s natural flavor shine through.
- 2 turkey thighs (about 1.5-2 pounds each): Look for bone-in, skin-on turkey thighs for the best results
- 2 tablespoons olive oil: Helps the seasonings stick and promotes crispy skin
- 2 teaspoons garlic powder: Adds savory depth
- 2 teaspoons onion powder: Brings sweet, aromatic notes
- 1 teaspoon smoked paprika: Creates a subtle smoky flavor and beautiful color
- 1 teaspoon dried thyme: Classic poultry herb
- 1 teaspoon salt: Enhances all the flavors
- ½ teaspoon black pepper: Adds a gentle kick
- ½ teaspoon dried rosemary: Optional, but adds a lovely earthy note
Kitchen Equipment Needed
You don’t need any fancy equipment for this recipe. Just a few basic tools and your trusty air fryer.
- Air fryer (at least 5.8-quart capacity): Larger models work best for fitting two turkey thighs
- Meat thermometer: Essential for checking doneness
- Tongs: For safely handling the hot turkey
- Small bowl: For mixing the seasoning blend
- Paper towels: For patting the turkey dry
Recommended Products for This Recipe
After making this recipe countless times, I’ve found a few products that really make a difference in the final result.
1. COSORI Pro II Air Fryer
This larger capacity air fryer has been my go-to for turkey thighs because it can easily fit two at once without crowding. The square basket gives you more usable space than round models, and the temperature control is super accurate.
2. ThermoPro Digital Meat Thermometer
Getting turkey to the perfect temperature is crucial, and this instant-read thermometer takes the guesswork out of it. It gives you a reading in just 3 seconds, so you’re not standing there with the air fryer drawer open losing heat.
3. McCormick Gourmet Smoked Paprika
The quality of your smoked paprika really affects the depth of flavor in this recipe. McCormick’s version has a rich, authentic smokiness that doesn’t taste artificial or bitter.
Step-by-Step Instructions
Follow these detailed steps for perfectly cooked turkey thighs every time. The key is proper prep and not rushing the process.
1. Prepare the Turkey Thighs
- Remove the turkey thighs from the refrigerator and let them sit at room temperature for 20-30 minutes
- Pat them completely dry with paper towels, paying special attention to the skin
- Drying the skin thoroughly is crucial for getting it crispy
- Check for any remaining pin feathers and remove them with tweezers if needed
2. Make the Seasoning Blend
- In a small bowl, combine the garlic powder, onion powder, smoked paprika, thyme, salt, black pepper, and rosemary if using
- Mix everything together until well combined
- This creates your flavor base that will coat the turkey evenly
3. Season the Turkey
- Drizzle the olive oil over both turkey thighs, coating all sides
- Rub the oil into the skin and meat to create an even coating
- Sprinkle the seasoning blend generously over all surfaces of the turkey thighs
- Use your hands to rub the seasonings into the skin, making sure to get into all the crevices
- Don’t forget to season underneath the skin as well for maximum flavor
4. Preheat the Air Fryer
- Set your air fryer to 380°F (193°C)
- Let it preheat for 3-5 minutes
- Preheating ensures even cooking from the moment you put the turkey in
5. Arrange Turkey in Air Fryer
- Place the turkey thighs skin-side down in the air fryer basket
- Leave at least an inch of space between the thighs for proper air circulation
- If your air fryer is smaller, you may need to cook them one at a time
6. Initial Cooking Phase
- Cook at 380°F (193°C) for 15 minutes with the skin side down
- This helps render some of the fat and start the cooking process
- Don’t open the air fryer during this time to maintain consistent temperature
7. Flip and Continue Cooking
- After 15 minutes, carefully flip the turkey thighs skin-side up using tongs
- Cook for an additional 20-25 minutes at the same temperature
- The skin should start to turn a beautiful golden brown
8. Check for Doneness
- Insert a meat thermometer into the thickest part of the thigh, avoiding the bone
- The internal temperature should read 165°F (74°C)
- If it hasn’t reached temperature yet, cook in 5-minute increments until it does
- The juices should run clear when pierced
9. Crisp the Skin (Optional)
- If you want extra crispy skin, increase the temperature to 400°F (204°C)
- Cook for an additional 3-5 minutes
- Watch carefully to prevent burning
10. Rest Before Serving
- Remove the turkey thighs from the air fryer and transfer to a cutting board
- Tent loosely with aluminum foil
- Let rest for 5-10 minutes before slicing
- This allows the juices to redistribute throughout the meat
Tips for Success
These tips will help you avoid common mistakes and achieve perfect results every time. I’ve learned these through trial and error so you don’t have to.
Pat the skin completely dry: This is the single most important step for crispy skin. Any moisture will steam instead of crisp.
Don’t overcrowd the basket: Proper air circulation is essential. Cook in batches if necessary rather than cramming everything in.
Use a meat thermometer: Guessing doneness by time alone is risky. Turkey is safe at 165°F, no higher, no lower.
Let it rest: Cutting into the turkey immediately causes all those delicious juices to run out onto the cutting board instead of staying in the meat.
Adjust cooking time for size: Smaller thighs (under 1.5 pounds) may cook faster, while larger ones need more time. Always check with a thermometer.
Season under the skin too: Gently loosen the skin and rub some seasoning directly on the meat for even more flavor.
You might also enjoy: Air Fryer Turkey Breast Recipe
Serving Suggestions

These turkey thighs pair beautifully with both classic comfort foods and lighter fare. The rich, savory flavor is incredibly versatile.
Turkey thighs are hearty enough to be the star of a full dinner spread, but they’re also perfect sliced up for salads, sandwiches, or grain bowls throughout the week.
- Serve with Potato Casserole and roasted vegetables for a traditional dinner
- Pair with creamy Cauliflower Soup for a cozy meal
- Slice and serve over mixed greens with cranberry vinaigrette
- Shred the meat for turkey tacos or burritos
- Serve alongside Corn Casserole for a Southern-inspired feast
- Add to grain bowls with quinoa, roasted vegetables, and tahini dressing
- Use in place of chicken in your favorite curry recipes
- Pair with Roasted Carrot Soup for an elegant autumn dinner
Read Also: Air Fryer Turkey Tenderloin Recipe
Variations to Try
Once you’ve mastered the basic recipe, these variations will keep things interesting. Each one brings a completely different flavor profile to the table.
Herb-Crusted Turkey Thighs: Mix fresh chopped herbs like sage, thyme, and rosemary with butter and spread under the skin before cooking.
Spicy Cajun Style: Replace the seasoning blend with Cajun seasoning and add cayenne pepper for heat.
Asian-Inspired: Use a mixture of soy sauce, ginger, garlic, and sesame oil instead of the herb blend.
Maple Glazed: Brush with a mixture of maple syrup, Dijon mustard, and apple cider vinegar during the last 10 minutes of cooking.
Lemon Herb: Add lemon zest to the seasoning and stuff lemon slices under the skin.
Garlic Parmesan: Mix grated Parmesan cheese with the seasonings and add extra minced fresh garlic.
BBQ Turkey Thighs: Coat with your favorite BBQ rub and brush with BBQ sauce in the last few minutes.
Another favorite: Air Fryer Turkey Wings Recipe
Storage and Reheating
Proper storage keeps your turkey thighs delicious for several days. They actually taste even better the next day once the flavors have melded.
Refrigerator Storage: Let the turkey cool completely, then store in an airtight container for up to 4 days.
Freezer Storage: Wrap tightly in plastic wrap, then aluminum foil, and freeze for up to 3 months. Thaw overnight in the refrigerator before reheating.
Reheating in Air Fryer: Place turkey in the air fryer at 350°F for 5-7 minutes until heated through. This helps maintain the crispy skin.
Reheating in Oven: Bake at 350°F for 15-20 minutes, covered with foil to prevent drying out.
Microwave Reheating: While convenient, this will make the skin soft rather than crispy. Heat in 30-second intervals until warm.
Nutritional Facts
Per serving (1 turkey thigh, approximately 8 oz cooked):
- Calories: 380
- Protein: 42g
- Fat: 22g
- Saturated Fat: 6g
- Carbohydrates: 2g
- Fiber: 0g
- Sugar: 0g
- Cholesterol: 155mg
- Sodium: 650mg
- Potassium: 420mg
Note: Nutritional values are approximate and will vary based on the exact size of your turkey thighs and specific ingredients used.
Health Benefits of Key Ingredients
Turkey thighs offer impressive nutritional value beyond just being delicious. They’re packed with nutrients that support overall health and wellness.
Turkey is an excellent source of high-quality protein, which helps build and repair muscle tissue, keeps you feeling full longer, and supports immune function. Dark meat like thighs contains more iron and zinc than white meat, making it particularly beneficial for maintaining energy levels and supporting immune health.
- Rich in B vitamins: Especially B6 and B12, which support brain function and energy metabolism
- High in selenium: A powerful antioxidant that supports thyroid function
- Good source of phosphorus: Essential for strong bones and teeth
- Contains tryptophan: An amino acid that may help improve mood and sleep quality
- Provides iron: Particularly important for preventing anemia and maintaining energy
- Lower in saturated fat than beef: Makes it a heart-healthier protein choice
Read Also: Air Fryer Turkey Legs Recipe
Frequently Asked Questions
1. Do I need to thaw frozen turkey thighs before air frying?
Yes, you should always thaw turkey thighs completely before cooking them in the air fryer. Frozen turkey won’t cook evenly and could end up with a raw interior even if the outside looks done. Thaw in the refrigerator for 24 hours or use the cold water method, changing the water every 30 minutes.
2. Why is my turkey skin not getting crispy?
The most common culprit is moisture on the skin. Make sure to pat the turkey completely dry with paper towels before seasoning. Also ensure you’re not overcrowding the air fryer basket, which can trap steam and prevent crisping.
3. Can I cook boneless turkey thighs in the air fryer?
Absolutely! Boneless turkey thighs will cook faster, usually in about 20-25 minutes total at 380°F. Check for an internal temperature of 165°F to ensure they’re done.
4. How do I know when the turkey is done without a thermometer?
While a thermometer is the most reliable method, you can check by piercing the thickest part with a knife—the juices should run clear, not pink. The meat should also feel firm to the touch, not squishy.
5. Can I use this recipe for a whole turkey?
An air fryer isn’t large enough for a whole turkey, but you can use this method for turkey parts like breasts, drumsticks, and wings. Each cut will have slightly different cooking times, so always use a thermometer to check doneness.
Final Thoughts
Air Fryer Turkey Thighs have become one of my most-requested recipes, and I think you’ll see why once you try them. The combination of crispy skin and juicy meat is just unbeatable, and the ease of preparation makes this a winner for busy weeknights or special occasions.
I love how this recipe gives you all the satisfaction of a traditional roasted turkey dinner without heating up the whole kitchen or spending hours on prep work. Plus, dark meat stays so much more forgiving than white meat, so even if you’re new to cooking turkey, you’ll get great results.
I’d love to hear how your turkey thighs turn out! Drop a comment below with your favorite seasoning variations or how you served them. And if you try this recipe, please share a photo—I always enjoy seeing your creations!
Recommended:
- Air Fryer Turkey Meatloaf Recipe
- Air Fryer Turkey Bacon Recipe
- Air Fryer Turkey Burgers Recipe
- Air Fryer Chicken Drumsticks Recipe
- Air Fryer Chicken Wings Recipe
- Air Fryer Beef Roast Recipe
- Turkey Skillet Recipe
- Turkey Soup Recipe
- Turkey Tetrazzini Recipe
- Turkey Barley Soup Recipe


