If you’ve never tried a cloud eggs recipe before, you’re in for a real treat. This whimsical breakfast has been trending for good reason, and one bite will tell you exactly why.
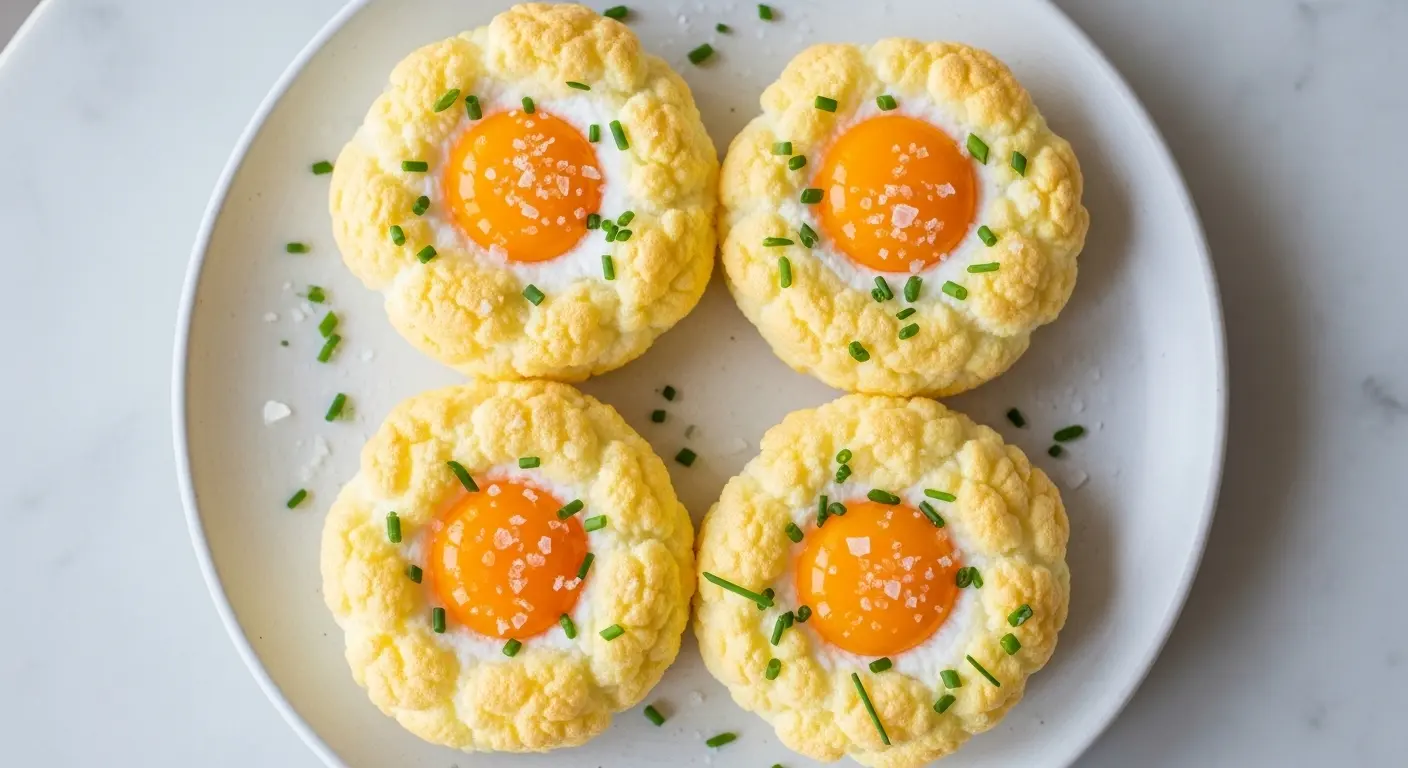
Cloud eggs are made by whipping egg whites into stiff, glossy peaks, then baking them into pillowy nests before nestling a bright yolk right in the center. The result is part soufflé, part baked egg, and entirely magical.
The technique traces back to 17th century France, where it was known as “oeufs à la neige” in savory form. Today, it’s had a major modern revival thanks to food blogs and social media, and it’s easy to see why it keeps coming back.
The best part? This recipe takes under 20 minutes from start to finish. No fancy cooking experience required, just a hand mixer, a baking sheet, and a few good eggs.
The version you’ll find here is the classic, most popular take: whipped egg whites folded with crispy bacon, Parmesan cheese, and chives, then baked until lightly golden with a runny, jammy yolk right in the middle. It’s simple, stunning, and completely delicious.
You might also enjoy: Air Fryer Cloud Eggs
Why You’ll Love This Cloud Eggs Recipe
This dish hits a rare combination of impressive and easy. It looks like something you’d order at a high-end brunch spot, but it comes together in your home oven with almost no effort.
The whipped whites create an incredibly light, airy texture that you simply can’t get with any other cooking method. It’s a completely different experience from scrambled, fried, or poached eggs.
The bacon-Parmesan-chive combo inside the whites is a classic for a reason. Salty, savory, and creamy, these mix-ins complement the delicate egg without overwhelming it.
It’s also naturally low-carb and gluten-free, making it a great option for people watching their macros without sacrificing flavor or satisfaction.
The runny yolk is the crowning touch. When you pierce it, it flows out over the fluffy whites and creates a built-in sauce that ties everything together beautifully.
- Incredibly light and fluffy texture from whipped egg whites
- Ready in under 20 minutes from start to finish
- Uses only a handful of simple, everyday ingredients
- Naturally low-carb and gluten-free
- Stunning presentation that impresses without the effort
- Endlessly customizable with different mix-ins and toppings
- Perfect for solo breakfasts, weekend brunches, or impressing guests
For another fun egg dish to add to your rotation, check out this Egg Bake.
Ingredients
For this classic cloud eggs recipe, you’ll want to use the freshest eggs you can find. Fresh egg whites whip up more voluminously, giving you taller, fluffier clouds. Room temperature whites also whip better than cold ones, so pull your eggs out of the fridge about 15 minutes before you start.
- 4 large eggs, at room temperature
- 4 strips bacon, cooked and crumbled
- 3 tablespoons (15g) finely grated Parmesan cheese
- 2 tablespoons fresh chives, finely sliced
- 1/4 teaspoon fine sea salt
- 1/8 teaspoon freshly cracked black pepper
- Cooking spray or a small amount of neutral oil, for greasing the baking sheet
Optional garnishes:
- Extra chives for topping
- Flaky sea salt
- Freshly cracked black pepper
For serving:
- Toasted bread or sourdough (optional but highly recommended)
This recipe makes 4 cloud eggs and serves 2 to 4 people depending on appetite and whether you’re serving them with toast.
Read Also: Scrambled Eggs Recipe
Kitchen Equipment Needed
You don’t need much to make cloud eggs, but a few key pieces of equipment make the process significantly easier. The most important is a good electric mixer. You can whip egg whites by hand with a whisk, but it takes much longer and is hard work. An electric hand mixer or a stand mixer with the whisk attachment gets the job done in 2 to 3 minutes flat.
- Electric hand mixer or stand mixer with whisk attachment
- Rimmed baking sheet (half-sheet pan, approximately 18 x 13 inches / 46 x 33cm)
- Parchment paper
- Large mixing bowl
- 4 small bowls or ramekins (to hold the separated yolks)
- Rubber spatula or large spoon
- Large spoon or ice cream scoop (for dolloping the whites)
- Oven mitts
Read Also: Air Fryer Quiche Recipe
Recommended Products for This Recipe
These are products that genuinely make a difference when making cloud eggs. Each one is chosen based on quality, performance, and how much it improves the final result.
1. KitchenAid Hand Mixer
Whipping egg whites to stiff peaks requires consistent, high-speed beating. A quality hand mixer like the KitchenAid gets the whites to the perfect stiff peak stage in under 3 minutes without burning out. The multiple speed settings give you control, especially useful when you’re finishing up and don’t want to over-beat.
2. Nordic Ware Half-Sheet Baking Pan
A sturdy, heavy-gauge baking sheet ensures even heat distribution, which is important when you’re baking for just 3 to 4 minutes and need precise, controlled heat. Warped or thin pans can cause the egg whites to brown unevenly. This is a baking staple that serves you well beyond cloud eggs.
3. Reynolds Kitchens Parchment Paper
Non-stick parchment paper is essential here. Cloud eggs stick to ungreased surfaces and can tear apart when you try to remove them. Pre-cut sheets make setup even faster and cleanup completely effortless.
4. Ramekins Set (4-piece)
Keeping each yolk in its own small ramekin until it’s time to drop it into the nest prevents breakage and makes the handoff seamless. Broken yolks can still work, but a whole, runny yolk is the visual and culinary centerpiece of this dish.
5. Microplane Fine Grater
Freshly grated Parmesan melts far better into the egg whites than pre-shredded cheese, which often contains anti-caking agents that can make the whites clump. A Microplane produces light, feathery shreds that fold in without deflating your beautiful peaks.
This recipe also works beautifully as inspiration for Air Fryer Egg Bites if you love creative egg preparations.
Step-by-Step Instructions
Step 1: Preheat Your Oven and Prepare the Baking Sheet
- Set your oven to 450°F (230°C). This high heat is intentional: it creates a beautiful golden exterior on the whites quickly, while still leaving time to add the yolk without overcooking it.
- Line a rimmed baking sheet with parchment paper, making sure the paper lies flat without curling up at the edges.
- Lightly coat the parchment with cooking spray or brush it with a thin layer of neutral oil. Even parchment can stick slightly with egg whites, so don’t skip this step.
- Position your oven rack in the upper-middle position, which allows the tops of the egg white clouds to brown lightly without the bottoms burning.
Step 2: Cook the Bacon
- Cook your 4 strips of bacon in a skillet over medium heat until crispy, turning occasionally, about 6 to 8 minutes.
- Transfer the cooked bacon to a paper towel-lined plate to drain and cool.
- Once cool enough to handle, crumble or chop the bacon into small bits. Aim for pieces no larger than 1/4 inch (6mm) so they fold into the whites easily without tearing them.
- Set the crumbled bacon aside.
Step 3: Separate the Eggs
- Working with one egg at a time, carefully crack the egg over a small bowl and separate the white from the yolk. The best method is to pass the yolk back and forth between the two halves of the shell, letting the white fall into the bowl.
- Gently transfer each yolk into its own individual small bowl or ramekin. Handle them gently to avoid breaking the yolk membrane.
- Transfer each egg white from the small bowl into your large mixing bowl as you go. This two-bowl method protects you: if a yolk breaks and gets into one white, it won’t ruin the entire batch.
- Make absolutely certain no yolk gets into the whites. Even a tiny amount of yolk, or any grease or water in the bowl, will prevent the whites from whipping properly.
Step 4: Whip the Egg Whites to Stiff Peaks
- Add the 1/4 teaspoon of salt to the bowl of egg whites. The salt helps stabilize the foam and adds flavor.
- Using your electric hand mixer or stand mixer fitted with the whisk attachment, begin beating on low speed for about 30 seconds until the whites become foamy.
- Increase the speed to medium, then high, and continue beating for 2 to 3 minutes. Watch the mixture carefully as it transforms from loose foam into soft peaks (when the beaters are lifted, the peaks gently curl over), and then into stiff peaks (when the beaters are lifted, the peaks stand straight up without drooping).
- Stop as soon as you reach stiff peaks. Over-beaten whites turn grainy, dry, and difficult to work with. The mixture should look glossy and white, like a firm meringue.
Step 5: Fold in the Mix-ins
- Add the crumbled bacon, 3 tablespoons of finely grated Parmesan, and 2 tablespoons of sliced chives to the bowl of stiff whites.
- Add the 1/8 teaspoon of black pepper.
- Using a rubber spatula, gently fold everything together using a slow, sweeping motion: run the spatula down the side of the bowl, under the mixture, and fold it up and over. Rotate the bowl a quarter turn with each fold.
- Fold just until the mix-ins are incorporated, about 6 to 8 folds. The goal is to distribute the bacon, cheese, and chives evenly without deflating all the air you just whipped in. Some white streaks are fine.
Step 6: Form the Clouds on the Baking Sheet
- Using a large spoon or ice cream scoop, drop 4 large mounds of the egg white mixture onto the prepared baking sheet. Space them at least 2 inches (5cm) apart as they can spread slightly in the oven.
- Use the back of a spoon to gently shape each mound into a round, nest-like shape, about 3 to 4 inches (8 to 10cm) wide and 2 inches (5cm) tall.
- Create a shallow indentation in the center of each mound large enough to hold a yolk. The well should be about 1.5 inches (4cm) wide and deep enough that the yolk won’t roll out, but don’t press all the way through the whites.
Step 7: First Bake – Set the Whites
- Place the baking sheet in the preheated oven and bake for 3 minutes.
- At the 3-minute mark, the whites should be set and just beginning to turn golden at the tips. They will have puffed up beautifully and look like little snow-capped clouds.
- Remove the baking sheet from the oven. If the indentations have closed or filled in slightly during baking, use the back of a clean spoon to gently re-create each well.
Step 8: Add the Yolks and Finish Baking
- Working quickly and carefully, slide one yolk from its individual bowl into the center well of each egg white cloud. Tilt the ramekin to the edge of the well and let the yolk slip in gently to avoid breaking it.
- Return the baking sheet to the oven and bake for an additional 2 to 3 minutes.
- At 2 minutes, the yolks will be very soft and runny. At 3 minutes, they’ll be slightly more set but still jammy in the center. Check at 2 minutes and decide based on your preference.
- The whites should be lightly golden around the edges, and the yolks should look glossy and just barely set on the surface.
Step 9: Season and Serve
- Remove the baking sheet from the oven.
- Sprinkle the finished cloud eggs with a pinch of flaky sea salt, extra freshly cracked black pepper, and a few more sliced chives for freshness and color.
- Use a flat spatula to carefully transfer each cloud egg to a plate. They’re delicate, so slide the spatula underneath completely before lifting.
- Serve immediately. Cloud eggs are best enjoyed the moment they come out of the oven, while the whites are still puffy and the yolk is perfectly runny.
For another baked egg dish with equally impressive results, try this Quiche Lorraine.
Tips for Success
Getting cloud eggs right comes down to a few key techniques. Most problems people run into, like flat whites, deflated nests, or overcooked yolks, are completely avoidable with a little know-how.
- Use room temperature eggs. Cold egg whites don’t whip as easily or as voluminously. Let your eggs sit at room temperature for 15 minutes before starting.
- Make sure your bowl and beaters are completely clean and grease-free. Even a small trace of fat or water will prevent the whites from whipping properly. Wipe your bowl with a paper towel dipped in a little white vinegar as a precaution.
- Don’t skip the salt. Adding salt to the whites before whipping helps stabilize the foam and improves flavor.
- Fold gently and minimally. The more you stir the mix-ins in, the more you deflate your whites. Less is more: fold just until combined.
- Create deep wells. If the indentation isn’t deep enough, the yolk will slide off the cloud instead of sitting in it. Make it wider and deeper than you think you need.
- Work fast after the first bake. Once you take the pan out of the oven, add the yolks quickly and get it back in the oven. The whites will start to deflate if left out too long.
- Don’t over-bake the yolks. Check at 2 minutes. A fully set yolk eliminates what makes this dish special, so err on the side of slightly underdone.
- Serve immediately. Cloud eggs will begin to deflate and weep liquid within minutes of coming out of the oven, so don’t plate them in advance.
If you love egg-based breakfasts, you’ll also enjoy this Egg Skillet.
Serving Suggestions

Cloud eggs are stunning on their own, but serving them with the right accompaniments takes the whole meal to the next level.
The most popular way to serve them is over thick-cut toasted bread, like sourdough or brioche. The toast catches the runny yolk and provides a satisfying contrast to the airy whites. Toast the bread while the egg whites are baking to time it perfectly.
- Avocado toast: Serve cloud eggs over a thick slice of toast topped with smashed avocado from this Avocado Toast for a creamy, rich base that plays beautifully against the fluffy whites.
- Breakfast Potatoes: Crispy, seasoned potatoes on the side make this a complete and hearty brunch plate.
- Fresh fruit salad: A bright, lightly dressed fruit salad cuts the richness of the eggs and bacon and keeps the plate feeling fresh.
- A simple green salad: Light mixed greens with lemon vinaigrette make cloud eggs feel like a sophisticated lunch.
- Crispy air fryer bacon: Add extra strips alongside for bacon lovers.
- Hot sauce: A drizzle of your favorite hot sauce over the yolk right before serving adds heat and acidity that balances the richness.
- Smoked salmon: Swap the bacon in the whites for smoked salmon and serve over cream cheese toast for an elevated brunch option.
Variations to Try
One of the best things about this recipe is how easy it is to customize. The basic method stays the same; all you change are the mix-ins in the whites or what you serve them with.
The classic bacon-Parmesan-chive version is an excellent starting point, but these variations are all worth exploring:
- Plain cloud eggs: For the purest version, fold nothing into the whites except a pinch of salt and pepper. Season heavily after baking and let the texture speak for itself.
- Herbed cloud eggs: Fold in 2 tablespoons each of finely minced fresh thyme, rosemary, and parsley. Use a light hand with woody herbs like rosemary.
- Smoked salmon cloud eggs: Replace the bacon with 2 ounces (55g) of chopped smoked salmon. Serve with capers and cream cheese on the side.
- Gruyère and ham cloud eggs: Swap Parmesan for an equal amount of finely grated Gruyère cheese and use diced cooked ham instead of bacon.
- Truffle cloud eggs: Omit the mix-ins entirely and finish the baked eggs with a drizzle of high-quality truffle oil and shaved Parmesan right after they come out of the oven.
- Spicy cloud eggs: Add a pinch of cayenne pepper and a teaspoon of finely minced jalapeño to the whites. Finish with hot sauce.
- Vegetarian cloud eggs: Skip the bacon entirely and fold in finely chopped sun-dried tomatoes, fresh basil, and a good amount of Parmesan.
Read Also: Air Fryer Egg Toast Recipe
Storage and Reheating
Cloud eggs are one of those dishes best enjoyed the moment they come out of the oven. Like a soufflé, the whipped whites will begin to deflate and lose their structure as they cool, and reheating doesn’t fully restore that original fluffy texture.
That said, if you have leftovers, here’s how to handle them:
- Refrigerate: Let leftover cloud eggs cool completely, then transfer to an airtight container. Refrigerate for up to 1 day.
- Reheat in the oven: Place on a parchment-lined baking sheet and reheat at 350°F (175°C) for 5 to 6 minutes. They won’t puff back up to their original height, but they’ll still be tasty.
- Avoid the microwave: Microwaving cloud eggs makes the whites rubbery and the texture unpleasant.
- Do not freeze: The whipped egg white structure doesn’t survive freezing and thawing.
- Make-ahead tips: You can cook and crumble the bacon and grate the Parmesan up to 3 days in advance. Separate the eggs up to 2 days in advance and store whites and yolks in separate covered containers in the fridge. Bring everything to room temperature before using.
For another satisfying breakfast that reheats well, try this Breakfast Casserole.
Nutritional Facts
The following values are approximate per serving (1 cloud egg, made with bacon, Parmesan, and chives). This recipe makes 4 cloud eggs total.
| Nutrient | Amount Per Cloud Egg |
|---|---|
| Calories | 130 kcal |
| Total Fat | 9g |
| Saturated Fat | 3.5g |
| Cholesterol | 195mg |
| Sodium | 310mg |
| Total Carbohydrates | 0.5g |
| Dietary Fiber | 0g |
| Total Sugars | 0g |
| Protein | 12g |
Note: Nutritional values will vary based on specific ingredients used, egg size, and any additional toppings or serving accompaniments.
This recipe makes cloud eggs one of the most protein-dense, low-carb breakfast options you can prepare in under 20 minutes.
If you’re looking for another high-protein breakfast, check out these Air Fryer Egg Cups.
Health Benefits of Key Ingredients
Cloud eggs are more than just a pretty breakfast. The main ingredients are genuinely nutritious and offer real health value when eaten as part of a balanced diet.
Eggs are often called one of nature’s most complete foods, and for good reason.
- Eggs: Whole eggs provide high-quality complete protein containing all essential amino acids. They’re also one of the best dietary sources of choline, a nutrient essential for brain health and liver function. Egg yolks contain lutein and zeaxanthin, two antioxidants linked to eye health.
- Egg whites: Egg whites are pure protein with virtually no fat or carbohydrates. Whipping them adds no calories but dramatically increases volume, making cloud eggs incredibly satisfying for a relatively low calorie count.
- Bacon: While it should be enjoyed in moderation, bacon provides protein and fat-soluble vitamins like B12 and zinc. Using just one strip per cloud egg keeps the sodium manageable.
- Parmesan cheese: Parmesan is a hard aged cheese that is naturally low in lactose and rich in calcium and phosphorus, both of which are important for bone health. A small amount goes a long way in terms of flavor.
- Chives: These bright green herbs aren’t just for garnish. Chives contain vitamin K, vitamin C, and small amounts of folate. They also contain quercetin, a plant compound with antioxidant and anti-inflammatory properties.
For another nutrient-rich breakfast option, you might love this Shakshuka.
Frequently Asked Questions
1. Why won’t my egg whites form stiff peaks?
This almost always comes down to one of two issues: fat contamination or egg temperature.
Even a tiny trace of egg yolk, oil, or water in your mixing bowl or on your beaters will prevent the whites from whipping properly. Clean your bowl by wiping it with a paper towel dipped in white vinegar before you start. Cold whites also take longer to whip and may not reach full volume, so make sure your eggs are at room temperature before you begin.
2. Can I make cloud eggs without a mixer?
You can, but it requires significantly more effort.
You’ll need a large balloon whisk and a lot of arm strength. Whisk the whites rapidly in a large bowl, using a circular motion and lifting as you go to incorporate as much air as possible. It can take 8 to 12 minutes by hand to reach stiff peaks versus 2 to 3 minutes with a mixer.
3. What temperature should I bake cloud eggs at?
The most popular temperatures are 350°F (175°C) for a gentler bake or 450°F (230°C) for a faster, more golden result.
The version in this recipe uses 450°F because it sets the whites quickly and produces a prettier, lightly browned exterior. At 350°F, you’ll need to bake the whites for 4 to 5 minutes before adding the yolk, rather than just 3 minutes.
4. How do I keep the egg yolk runny?
Time is everything here.
After adding the yolk, check the eggs at exactly 2 minutes. The yolk is done when the outer surface looks just set and no longer translucent, but still wobbles gently when you shake the pan. Remove them immediately and serve right away, since residual heat from the pan and whites will continue cooking the yolk for another 30 to 60 seconds after leaving the oven.
5. Can I add mix-ins other than bacon and cheese?
Absolutely, and the variations are nearly endless.
The key rule is to use dry or well-drained ingredients. Wet ingredients like fresh tomatoes or cooked mushrooms will release moisture during baking and make the whites weep and flatten. Always pat wet ingredients dry, or cook and drain them first before folding into the whites.
Final Thoughts
Making a cloud eggs recipe for the first time feels a little like magic. You start with just a few humble ingredients, and within 20 minutes you have something that looks genuinely spectacular sitting on your plate.
Once you master the basic technique, you’ll find yourself coming back to it again and again, both for easy weekday mornings and for those weekend brunches when you want to make something that feels a little special.
Don’t be intimidated by the whipping step. It’s truly straightforward once you’ve done it once, and the payoff is absolutely worth it.
If you try this recipe, leave a comment below to let us know how it went! We’d love to hear which mix-ins you used and what you thought. Sharing this post with a friend who loves a creative breakfast is always appreciated too.
Recommended:
- Cloud Eggs Recipe
- Egg Bites Recipe
- Egg Souffle Recipe
- Dutch Baby Recipe
- French Toast Casserole Recipe
- Cracker Barrel Pancake Recipe
- Breakfast Skillet Recipe
- Classic Deviled Eggs
- Easy Egg Salad
- Air Fryer French Toast Recipe


