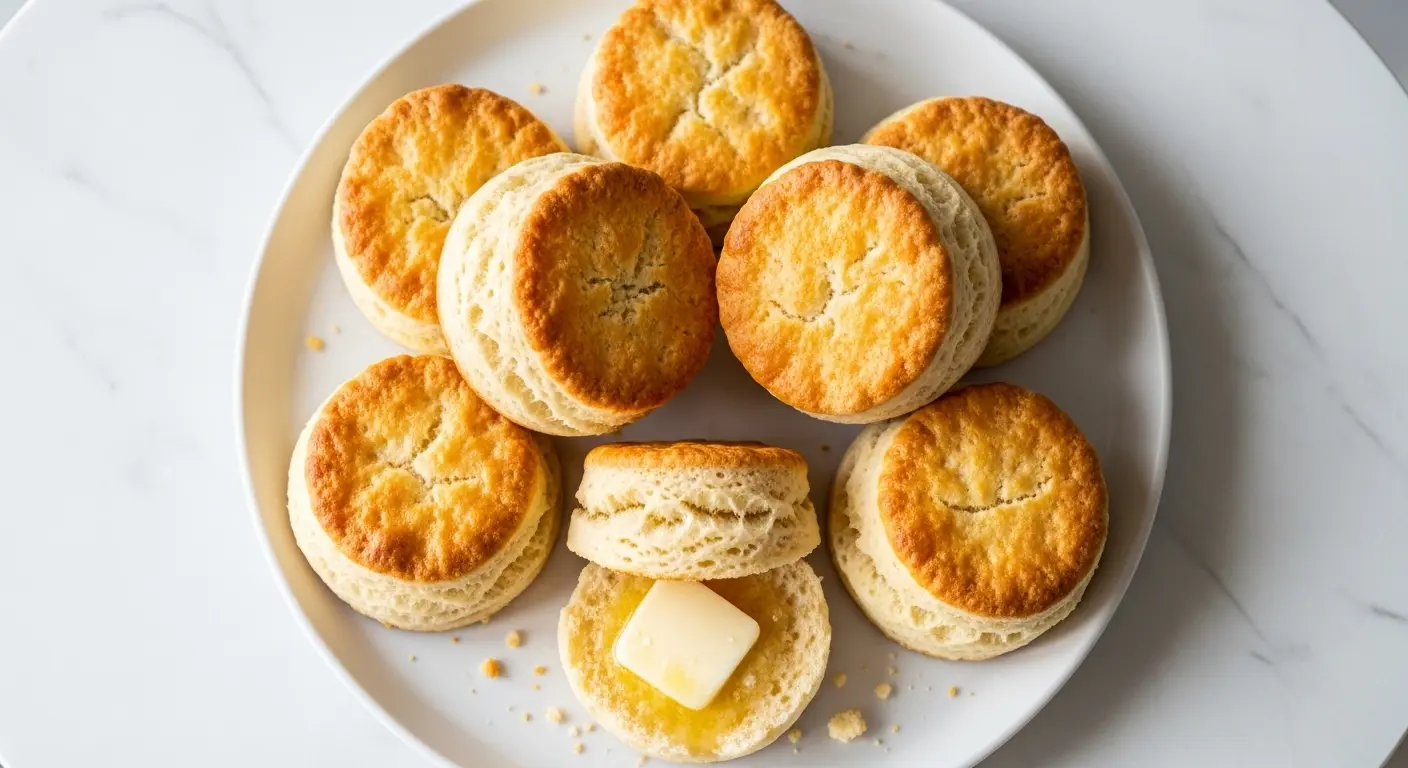
A good homemade biscuit recipe is one of the most rewarding things you can make in the kitchen.
Pull one apart fresh from the oven, and you get that signature flaky pull, the gentle steam, and that rich buttery smell that fills the whole house. These biscuits use just a handful of pantry staples, come together in under 30 minutes, and deliver bakery-quality results without any fuss.
The secret is all in the technique. Cold butter, minimal mixing, and a hot oven are the three pillars of a perfect biscuit. Skip any one of those, and you end up with something dense and flat instead of tall and tender.
This recipe follows the classic Southern-style method that generations of home bakers have relied on. It uses all-purpose flour, cold butter, and buttermilk for that slight tang, producing biscuits that are crispy on the outside and pillowy soft on the inside.
Once you see how easy it is to make biscuits from scratch, you will never reach for a tube again.
For a fun twist on this classic, check out this Apple Pie Biscuits Recipe that takes the same base dough in a sweet, spiced direction.
Why You’ll Love This Homemade Biscuit Recipe
This recipe checks every box for a reliable, crowd-pleasing biscuit.
There are no special techniques to master, and every ingredient is something you likely already have on hand.
- Fast from start to finish. You can have warm biscuits on the table in about 25 minutes, making them ideal for weeknight dinners, lazy weekend mornings, or last-minute holiday spreads.
- Perfectly flaky layers. The cold butter method creates steam pockets during baking that puff up into those beautiful, pull-apart layers.
- Made with real ingredients. No preservatives, no mystery additives, just simple food made from scratch.
- Customizable. The base dough is endlessly adaptable for sweet or savory variations.
- Beginner friendly. Even if you have never made biscuits before, this step-by-step method makes the process approachable and straightforward.
- Consistent results. Follow the tips here and you will get tall, golden biscuits every single time.
You might also enjoy: Buttermilk Biscuit Recipe
Ingredients
These simple ingredients work together to create the lightest, most tender biscuits. The key is using full-fat dairy and keeping everything cold from the moment you start.
- 2 cups (240g) all-purpose flour, plus more for dusting
- 1 tablespoon baking powder
- 1 teaspoon fine salt
- 1 teaspoon granulated sugar
- 6 tablespoons (85g) unsalted butter, very cold, cut into small cubes
- 3/4 cup (180ml) buttermilk, cold, plus a splash for brushing
Read Also: Sausage Gravy Recipe
Kitchen Equipment Needed
Having the right tools on hand makes the process smoother and helps you avoid overworking the dough, which is the most common biscuit mistake.
- Large mixing bowl
- Pastry cutter or box grater (for cutting in cold butter)
- Biscuit cutter, 2.5-inch round
- Rimmed baking sheet
- Parchment paper
- Measuring cups and spoons
- Bench scraper or knife (optional, for folding dough)
- Pastry brush (for brushing tops)
This technique works wonderfully alongside Dinner Rolls if you are baking a bread basket for a crowd.
Recommended Products for This Recipe
These are products I genuinely recommend based on quality and performance to help you get the best results with this biscuit recipe.
1. KitchenAid Pastry Cutter
A quality pastry cutter makes quick work of cutting cold butter into flour without warming it with your hands. The more evenly the butter is distributed, the more consistent your flaky layers will be. This is a worthwhile investment if you bake biscuits, pie crusts, or scones regularly.
2. Nordic Ware Half Sheet Baking Pan
This heavy-gauge aluminum pan heats evenly and prevents hot spots, which is critical for getting an even golden bottom on your biscuits. Thin, flimsy pans can cause uneven browning or burnt bases, which this pan eliminates entirely.
3. Cultured Buttermilk Powder
If you do not always have fresh buttermilk on hand, cultured buttermilk powder is a fantastic pantry staple that delivers the same tangy flavor and tenderizing acidity. Simply mix it with water when needed so you are never without this essential biscuit ingredient.
4. Ateco Round Biscuit Cutter Set
A sharp-edged cutter is essential for clean cuts that do not seal the dough’s edges. Sealed edges prevent the biscuits from rising properly, resulting in shorter, denser biscuits. This stainless steel set comes in multiple sizes and is a kitchen workhorse.
Read Also: Easy Scone Recipe
Step-by-Step Instructions
1. Preheat Your Oven and Prep Your Pan
- Preheat your oven to 450°F (230°C). A high heat is key: it creates rapid steam from the butter, which is what lifts the biscuit layers.
- Line a rimmed baking sheet with parchment paper and set it aside.
- Make sure your butter is cut into small cubes and placed back in the freezer for 5 minutes before you start mixing. Even slightly soft butter will produce flat biscuits.
2. Whisk the Dry Ingredients
- In a large mixing bowl, combine 2 cups (240g) of all-purpose flour, 1 tablespoon of baking powder, 1 teaspoon of fine salt, and 1 teaspoon of granulated sugar.
- Whisk everything together until evenly blended. This ensures the leavening is distributed throughout the flour so your biscuits rise evenly.
3. Cut in the Cold Butter
- Add the 6 tablespoons (85g) of cold, cubed butter to the flour mixture.
- Using a pastry cutter (or your fingertips if you work quickly), press and cut the butter into the flour until the mixture looks like coarse, uneven crumbs with some pea-sized pieces still visible.
- Do not overwork this step. You want visible chunks of butter remaining, as these are what create steam and layers in the oven.
- Alternatively, you can freeze the butter and grate it directly into the flour using a box grater, which is an even faster and more foolproof method.
- Toss the grated butter gently into the flour with a fork to coat before adding the buttermilk.
4. Add the Buttermilk
- Make a well in the center of the flour-butter mixture.
- Pour in 3/4 cup (180ml) of cold buttermilk all at once.
- Stir with a fork or rubber spatula just until the dough starts to come together. It will look shaggy and rough, and that is exactly what you want.
- Stop mixing the moment no dry flour remains at the bottom of the bowl. Overmixing develops gluten and makes the biscuits tough.
5. Turn Out and Fold the Dough
- Lightly flour a clean work surface. Turn the dough out onto it and gently press it into a rough rectangle about 3/4 inch (2cm) thick.
- Fold the dough in half (like folding a letter), then rotate it 90 degrees and press it out again to about 3/4 inch thick.
- Repeat this fold and press process 2 more times for a total of 3 folds. Each fold creates distinct layers in your finished biscuit.
- Work quickly and handle the dough as little as possible to keep the butter cold.
6. Cut the Biscuits
- After the final fold, press the dough out to a 3/4 inch (2cm) thickness.
- Press your biscuit cutter straight down into the dough. Do not twist the cutter, as twisting seals the edges and prevents the biscuit from rising fully.
- Lift the cutter straight up and place the cut biscuit on the prepared baking sheet.
- Repeat with the remaining dough, placing the biscuits so they are just barely touching on the pan. Biscuits that touch each other rise taller because they support each other as they climb.
- Gather the scraps, press them gently back together without additional folding, and cut out a few more biscuits. These last biscuits will not be quite as layered but will still taste delicious.
7. Brush and Bake
- Brush the tops of the biscuits lightly with a small splash of buttermilk for a golden, slightly tangy crust.
- Place the baking sheet in the fully preheated oven on the middle rack.
- Bake for 12 to 14 minutes, until the tops are deep golden brown and the sides have puffed up and look set.
- Remove from the oven and let the biscuits rest on the pan for 2 to 3 minutes before serving. They will firm up slightly as they cool just enough to handle.
For a complete Southern breakfast, these biscuits pair beautifully with Shrimp and Grits for an impressive brunch spread.
Tips for Success
Small details make a big difference when it comes to biscuits. Keep these in mind every time you bake a batch.
- Keep everything cold. Warm butter melts into the flour before hitting the oven, which eliminates the steam that creates layers. If at any point your dough starts feeling greasy or warm, refrigerate it for 10 minutes before continuing.
- Do not overwork the dough. Mix only until the dough comes together. This is the single most important rule. Overworked dough develops too much gluten, giving you a dense, bready texture instead of a flaky one.
- Use a sharp cutter. A dull-edged cutter or using a glass to cut biscuits compresses the edges and prevents a full rise. A sharp, straight-down cut is essential.
- Bake biscuits touching. Nestling the biscuits close together on the pan encourages upward rise instead of spreading outward.
- Preheat fully. Your oven must be at full temperature before the biscuits go in. An under-heated oven means the butter melts and spreads before the crust sets, leading to flat biscuits.
- Measure flour correctly. Spoon the flour into your measuring cup and level it off with a straight edge rather than scooping directly from the bag. Scooping packs in too much flour, making biscuits dry and heavy.
Read Also: Classic Scone Recipe
Serving Suggestions
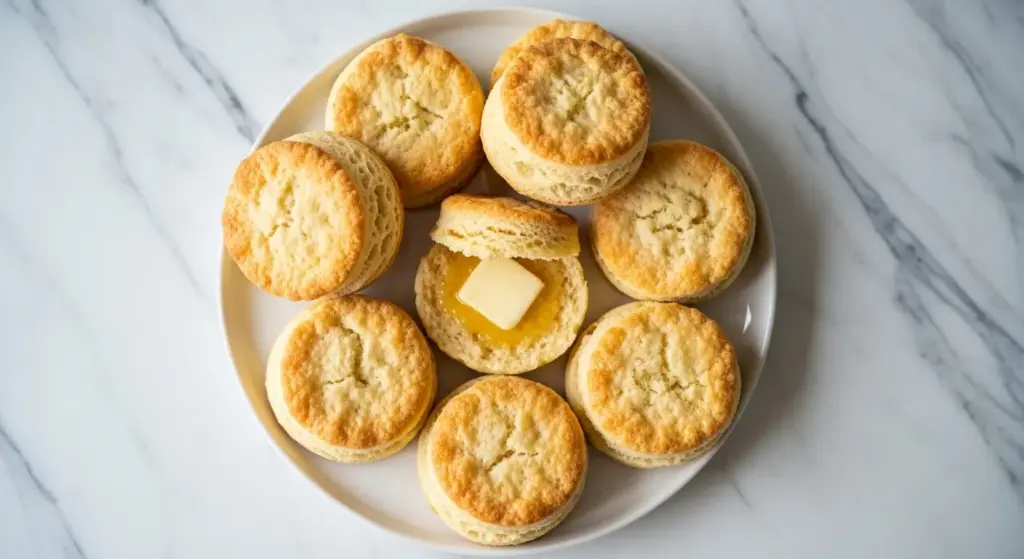
Homemade biscuits are incredibly versatile and work at any meal of the day.
The warm, buttery flavor makes them a natural match for both savory and sweet pairings, and they shine as part of a bigger spread or simply eaten on their own with a pat of butter.
- Serve warm with Honey Butter and a drizzle of good honey for a simple, classic breakfast.
- Split and topped with creamy Sausage Gravy for the ultimate Southern-style biscuits and gravy.
- Pair with Chicken and Dumplings for a hearty, comforting meal that feels like a warm hug.
- Use as the base for Breakfast Casserole or layered in a breakfast sandwich with eggs, cheese, and bacon.
- Serve alongside a bowl of Chicken Soup or a rich stew to soak up the broth.
- Crumble over a bowl of Peach Cobbler for a rustic, drop-biscuit-style topping.
- Enjoy warm, straight from the pan, with a generous smear of softened salted butter and nothing else.
Another favorite to serve alongside: Collard Greens
Variations to Try
Once you have mastered the classic version, the base dough is a great canvas for creative twists.
These variations all start with the same recipe but use small additions to create entirely new flavor profiles.
- Buttermilk Biscuits: Double down on the buttermilk for extra tang and tenderness, using a slightly higher ratio for an even softer crumb.
- Cheddar and chive biscuits: Fold in 1/2 cup (50g) of shredded sharp cheddar cheese and 2 tablespoons of chopped fresh chives with the buttermilk for a savory, cheesy biscuit perfect with soups or barbecue.
- Herb biscuits: Add 1 tablespoon of fresh rosemary, thyme, or sage to the dry ingredients for an aromatic, savory biscuit that pairs beautifully with roasted meats.
- Honey butter biscuits: Substitute 1 tablespoon of the regular butter with honey butter and add a teaspoon of honey to the buttermilk for a lightly sweet, golden biscuit.
- Apple Pie Biscuits: Use this dough as the base and top with a cinnamon-spiced apple filling for a simple, sweet dessert biscuit.
- Drop biscuits: Skip the rolling and folding entirely. Drop heaping spoonfuls of the slightly wetter dough directly onto the baking sheet for a more rustic, free-form biscuit with craggy, crispy edges.
- Cream biscuits: Replace the cold butter with cold heavy cream for an ultra-rich, tender biscuit that requires even less mixing and handling.
Read Also: Easy Zucchini Bread Recipe
Storage and Reheating
Homemade biscuits are always best the day they are made, but they store and reheat well with a little care.
Keep these tips in mind to preserve their texture and flavor after baking.
- Room temperature: Store cooled biscuits in an airtight container or zip-top bag at room temperature for up to 2 days. Avoid the refrigerator for short-term storage as it dries them out faster.
- Freezer (baked): Place cooled biscuits in a single layer in a zip-top freezer bag. Freeze for up to 3 months.
- Freezer (unbaked): Arrange cut, unbaked biscuits on a parchment-lined baking sheet and freeze solid, then transfer to a bag. Bake straight from frozen at 450°F (230°C) for 15 to 17 minutes. This is the best method for always having fresh biscuits ready.
- Reheating: Wrap biscuits in foil and warm in a 350°F (175°C) oven for 8 to 10 minutes. Avoid the microwave, which makes biscuits rubbery. Splitting and toasting in a skillet over medium heat is also excellent for getting a crispy edge.
This technique works great for meal-prepping alongside Baked Oatmeal for easy make-ahead breakfasts all week.
Nutritional Facts
The following values are approximate, based on one biscuit when the recipe yields 8 biscuits.
| Nutrient | Amount Per Biscuit |
|---|---|
| Calories | 185 kcal |
| Total Fat | 9g |
| Saturated Fat | 5.5g |
| Cholesterol | 24mg |
| Sodium | 290mg |
| Total Carbohydrates | 23g |
| Dietary Fiber | 0.7g |
| Total Sugars | 1.5g |
| Protein | 3.5g |
Nutritional values are estimates and will vary based on exact ingredient brands and portion sizes.
You might also enjoy: Easy Waffle Recipe
Health Benefits of Key Ingredients
While biscuits are an indulgent treat, the core ingredients do offer some genuine nutritional value when enjoyed as part of a balanced diet.
Understanding what each ingredient brings to the recipe can help you make thoughtful choices about when and how to serve them.
- All-purpose flour: Provides carbohydrates for energy and a small amount of plant-based protein. Using a blend of all-purpose and whole wheat flour can add fiber and additional nutrients to the biscuit without significantly changing the texture.
- Buttermilk: Rich in calcium and phosphorus for bone health, buttermilk is also lower in fat than regular whole milk. Its natural lactic acid content aids in digestion and is what makes biscuits so tender by breaking down gluten strands in the dough.
- Butter: Provides fat-soluble vitamins A, D, E, and K2, which are important for bone health and immune function. Butter from grass-fed cows tends to be higher in conjugated linoleic acid (CLA), a beneficial fatty acid.
- Baking powder: A leavening agent that helps the biscuits rise, it contains a small amount of calcium. Most baking powders are double-acting, meaning they produce lift twice: once when mixed with liquid and again in the heat of the oven.
Read Also: Buttermilk Pancake Recipe
Frequently Asked Questions
1. Why did my biscuits not rise?
The most common reason biscuits do not rise is that the butter was not cold enough, or the dough was overworked.
Warm butter melts into the flour during mixing rather than staying in chunks, and those chunks are what create the steam pockets that push the layers apart in the oven. Make sure your butter goes back in the freezer for 5 minutes after cutting it, and handle the dough as little as possible.
2. Can I make biscuits without buttermilk?
Yes, you can make a quick substitute by adding 1 tablespoon of white vinegar or lemon juice to 3/4 cup (180ml) of regular whole milk.
Stir and let it sit for 5 minutes until it curdles slightly. This replicates the acidity of buttermilk that activates the baking powder and tenderizes the dough, though the flavor will be very slightly less tangy than with real buttermilk.
3. Should I use salted or unsalted butter?
Unsalted butter is the standard choice for baking because it gives you complete control over the sodium level.
If you only have salted butter on hand, reduce the added salt in the recipe to 1/2 teaspoon to compensate. The flavor difference is minimal in a recipe as simply flavored as biscuits.
4. How do I get biscuits to be tall and layered?
The layering comes from three things: cold butter left in large pieces, the folding technique, and a hot oven.
Each fold creates new alternating layers of dough and butter. When the butter hits the heat of the oven, it releases steam that pushes those layers apart. Make sure you are doing at least 3 folds before your final roll-out, and avoid compressing the dough thinner than 3/4 inch (2cm) before cutting.
5. Can I make the dough ahead of time?
You can prepare the dough up to 24 hours in advance and refrigerate it tightly wrapped in plastic wrap.
Alternatively, cut the biscuits and freeze them unbaked on a baking sheet, then transfer to a freezer bag once solid. Bake them straight from frozen at 450°F (230°C), adding a few extra minutes to the baking time. This is actually a preferred method by many bakers because the very cold fat produces even flakier results.
For more make-ahead breakfast ideas, try this Breakfast Burrito Recipe that you can prep and freeze in batches.
Final Thoughts
A good homemade biscuit is one of those simple things that brings a lot of joy to the table.
Once you get comfortable with the cold-butter method and the light-handed folding technique, this recipe becomes second nature. You will find yourself making it on Tuesday mornings, for holiday brunches, and every time someone needs a little comfort food.
Give this recipe a try and let me know how your biscuits turn out in the comments below. I would love to hear your tips, your variations, and any questions you have along the way. And if you share your biscuits on social media, tag me so I can see those gorgeous golden layers.
Recommended:
- Apple Pie Biscuits Recipe
- Sausage Balls Recipe
- French Toast Casserole Recipe
- Hashbrown Casserole Recipe
- Scrambled Eggs Recipe
- Old Fashioned Pancake Recipe
- Easy French Toast Recipe
- Cracker Barrel Pancake Recipe
- Loaded Breakfast Skillet Recipe
- Avocado Toast Recipe


