If you’re looking for a quick, filling, and genuinely delicious drink to power your mornings, this peanut butter banana smoothie recipe is exactly what you need.
It comes together in under five minutes with just a handful of pantry staples. No fancy ingredients, no complicated techniques, just a creamy, naturally sweet, protein-packed smoothie that tastes like a dessert but works perfectly as a nutritious breakfast or post-workout drink.
The combination of ripe banana and peanut butter is one of those flavor pairings that just works. The banana brings natural sweetness and a thick, velvety texture, while the peanut butter adds depth, richness, and enough protein to keep you satisfied for hours.
Using a frozen banana takes things up a notch. It creates a thick, almost milkshake-like consistency without needing ice, which can water things down. If your bananas are browning on the counter, peel them, toss them in a zip-lock bag, and freeze overnight. You’ll thank yourself the next morning.
This recipe is endlessly customizable, budget-friendly, and comes together in one blender. Read on for tips, variations, and everything you need to make the best version every time.
You might also enjoy this Chocolate Peanut Butter Banana Smoothie for a richer, dessert-style twist on this same base.
Why You’ll Love This Peanut Butter Banana Smoothie Recipe
This smoothie checks every box you want for a go-to morning drink.
It’s genuinely filling. Between the fiber from the banana and the protein and healthy fats from the peanut butter, this smoothie keeps hunger at bay in a way that most breakfast drinks simply don’t.
It takes less than five minutes from start to finish. There’s no cooking, no prepping the night before, and barely any cleanup.
The flavor is rich and satisfying without being heavy. It tastes indulgent enough to feel like a treat, but the ingredients are wholesome and nourishing.
It’s also incredibly flexible. Add protein powder for a gym-focused boost, swap dairy milk for almond milk to keep it plant-based, or throw in a handful of spinach for extra nutrients without affecting the taste.
Kids love it too, which makes it a brilliant way to sneak in some nutrition on busy school mornings.
- Naturally sweet with no added sugar needed
- High in protein and healthy fats from peanut butter
- Thick and creamy thanks to frozen banana
- Dairy-free adaptable with any non-dairy milk
- Ready in under 5 minutes with minimal cleanup
- Family-friendly and kid-approved
For another fruity banana blend, check out this Banana Mango Smoothie that’s equally quick and satisfying.
Ingredients
This smoothie uses a short list of simple, readily available ingredients. The key is using a ripe, preferably frozen banana for the best texture and sweetness.
Here are the ingredients and their Amazon affiliate links where applicable:
- 1 large ripe banana, frozen (about 4.5 oz / 130g)
- 2 tablespoons natural peanut butter (creamy or chunky, your preference)
- 1 cup (240ml) milk of choice (dairy, almond, oat, or soy)
- 1/2 cup (120ml) plain Greek yogurt (optional, for extra creaminess and protein)
- 1 tablespoon honey or maple syrup (optional, adjust to taste)
- 1/2 teaspoon pure vanilla extract
- Pinch of cinnamon (optional but recommended)
- 3-4 ice cubes (only if using a fresh, unfrozen banana)
Read Also: Peanut Butter Jelly Smoothie Recipe
Kitchen Equipment Needed
You don’t need much to pull this together. A good blender makes all the difference, though, especially when working with frozen banana.
- High-speed blender (a Vitamix or NutriBullet style blender works best)
- Measuring cups and spoons
- Knife and cutting board (to slice banana before freezing, if needed)
- A tall glass for serving
- A reusable straw (optional)
Another favorite for easy mornings: Banana Protein Smoothie Recipe
Recommended Products for This Recipe
These are recommended products that genuinely improve the blending experience and the quality of your smoothie.
1. Vitamix E310 Explorian Blender
A powerful high-speed blender is the single most important tool for a smooth, lump-free result. The Vitamix E310 crushes frozen banana effortlessly and blends peanut butter into a perfectly silky consistency in seconds. It’s a durable, long-term investment that will serve you through thousands of smoothies.
2. Natural Creamy Peanut Butter (No Added Sugar)
The quality of your peanut butter matters more than you’d think. A natural peanut butter with just peanuts and salt gives a purer, richer flavor and blends more smoothly than processed varieties with added stabilizers and sugar. Look for one with minimal ingredients for the best result.
3. Reusable Smoothie Straws
Thick smoothies are always better with a wide-bore straw. Reusable stainless steel or glass straws are eco-friendly and make drinking this thick, creamy blend much easier than a standard straw.
4. Vanilla Protein Powder
If you want to turn this smoothie into a post-workout meal, a high-quality vanilla protein powder blends beautifully with the banana and peanut butter base. It adds 20-25g of extra protein without altering the flavor significantly.
Another great morning option to try alongside this smoothie: Avocado Smoothie Recipe
Step-by-Step Instructions
Step 1: Prepare Your Banana
- Peel your banana before freezing. Never try to peel a fully frozen banana, as the skin becomes almost impossible to remove.
- If your banana is already frozen and unpeeled, run it briefly under lukewarm water for 20-30 seconds to loosen the skin.
- Break or slice the frozen banana into 3-4 chunks before adding to the blender. Smaller pieces are much easier on the motor, especially if you’re using a standard household blender rather than a high-powered model.
- If you’re using a fresh, room-temperature banana, add 3-4 ice cubes to the blender to compensate for the chilled texture that a frozen banana naturally provides.
Step 2: Add All Ingredients to the Blender
- Add the frozen banana chunks directly into the blender first. Starting with the banana at the bottom helps anchor the other ingredients and creates a better blending vortex.
- Add the 2 tablespoons of peanut butter. Scrape it off the spoon fully so none gets wasted on the sides.
- Pour in 1 cup (240ml) of your chosen milk. Dairy milk gives the creamiest result, but unsweetened almond milk and oat milk both work wonderfully and keep the smoothie dairy-free.
- If you’re using Greek yogurt, add the 1/2 cup (120ml) now. It thickens the smoothie and adds a slight tang that balances the sweetness of the banana beautifully.
- Add the 1/2 teaspoon of vanilla extract. This small addition rounds out the flavor and gives the smoothie a bakery-style aroma.
- Sprinkle in your pinch of cinnamon if using. Cinnamon pairs naturally with both banana and peanut butter and adds a subtle warmth that elevates the whole drink.
- If you’re adding honey or maple syrup for extra sweetness, add 1 tablespoon now. Ripe, well-frozen bananas are usually sweet enough on their own, so taste first before adding any sweetener.
Step 3: Blend Until Completely Smooth
- Secure the blender lid tightly before starting. Frozen banana can cause pressure to build inside the blender, especially when you first turn it on.
- Start on a low speed setting for the first 10-15 seconds. This breaks down the frozen banana into smaller pieces before the motor is asked to fully process it.
- Increase to high speed and blend for 30-45 seconds, or until the smoothie is completely smooth with no visible chunks of banana or peanut butter.
- Stop the blender and use a spatula or spoon to scrape down the sides if needed, then blend for another 10-15 seconds to catch anything that wasn’t fully incorporated.
- If the smoothie seems too thick to blend properly, add a small splash of milk, about 2 tablespoons at a time, and blend again. Add milk gradually rather than all at once so you don’t end up with a smoothie that’s too thin.
Step 4: Taste and Adjust
- Once blended, remove the lid and taste the smoothie with a clean spoon.
- If it needs more sweetness, add a drizzle of honey or maple syrup and blend for a few more seconds.
- If it’s too thick for your preference, add a little more milk and blend briefly.
- If you want a stronger peanut butter flavor, add another half tablespoon of peanut butter and re-blend.
- A small squeeze of lemon juice, about 1/4 teaspoon, can also brighten the whole flavor if the banana is very sweet and the smoothie feels a little flat.
Step 5: Pour and Serve Immediately
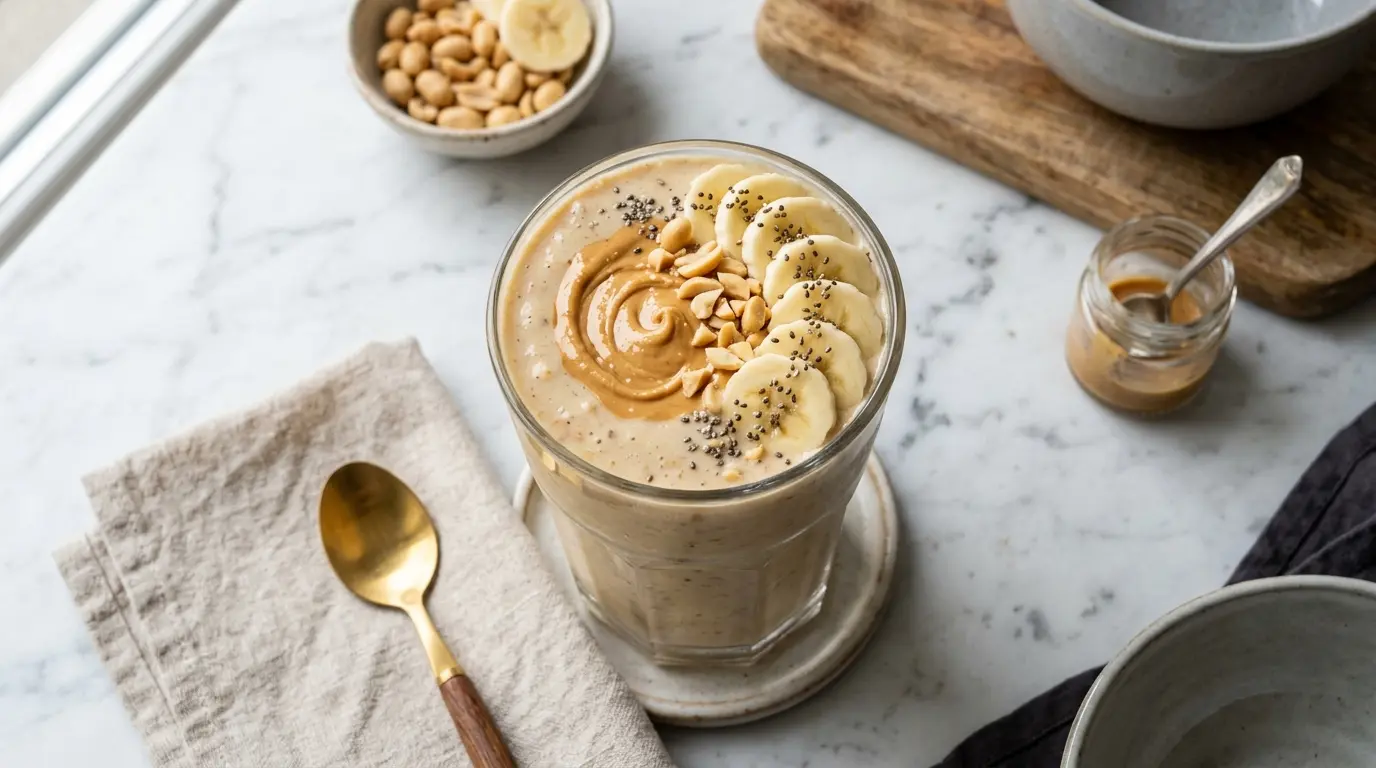
- Pour the finished smoothie into a tall glass right away. This smoothie is best served fresh when it’s thick and cold.
- For an extra touch, drizzle a small swirl of peanut butter over the top and add a sprinkle of cinnamon or a few banana slices to the rim of the glass.
- If you need to make it ahead, pour into a sealed mason jar and refrigerate for up to 12 hours. Shake or stir well before drinking, as natural separation will occur.
You might also love this Strawberry Banana Smoothie Recipe Without Yogurt for another quick, fruity morning blend.
Tips for Success
A few simple habits will consistently give you the best results with this smoothie.
The most important tip is to always use a frozen banana. Fresh bananas work, but the frozen version creates a thick, creamy texture that more closely resembles a milkshake. It also means you don’t need ice, which dilutes flavor.
Use natural peanut butter when possible. Processed peanut butter with added sugars and hydrogenated oils tastes less authentic and blends with a slightly gummy texture. Natural peanut butter blends more cleanly and has a bolder, nuttier flavor.
- Freeze ripe bananas in advance: The riper the banana, the sweeter and more flavorful the smoothie. Bananas with lots of brown spots are perfect for this recipe.
- Stir your peanut butter before measuring: Natural peanut butter tends to separate. Stir it thoroughly before scooping so you get the right balance of oil and solids in every spoonful.
- Add liquid before solids in most blenders: If your blender struggles with frozen fruit, try pouring the milk in first to help the blades get moving more easily.
- Layer ingredients intentionally: Softer, liquid ingredients go in first, frozen banana on top. This layering helps create a proper blending vortex.
- Don’t over-blend: 45 to 60 seconds on high is usually plenty. Over-blending warms up the smoothie and makes it less thick and cold.
- Use a chilled glass: Pop your glass in the freezer for 5 minutes before pouring. It keeps the smoothie colder for longer, especially on warm days.
For another satisfying peanut butter treat, try this Peanut Butter Fudge Recipe.
Serving Suggestions
This smoothie is incredibly versatile and pairs beautifully with a variety of morning or midday foods.
It works as a standalone breakfast that’s filling enough to carry you through a few hours, especially when made with Greek yogurt and natural peanut butter. It’s also a great post-workout drink, a satisfying afternoon snack, or a healthier dessert alternative when you’re craving something sweet.
- Serve alongside Easy French Toast for a complete, indulgent weekend brunch
- Pair with Easy Overnight Oats for a double-dose of make-ahead convenience
- Enjoy next to Baked Oatmeal on cold mornings for a warming, balanced start
- Serve with Easy Granola on the side for added crunch and fiber
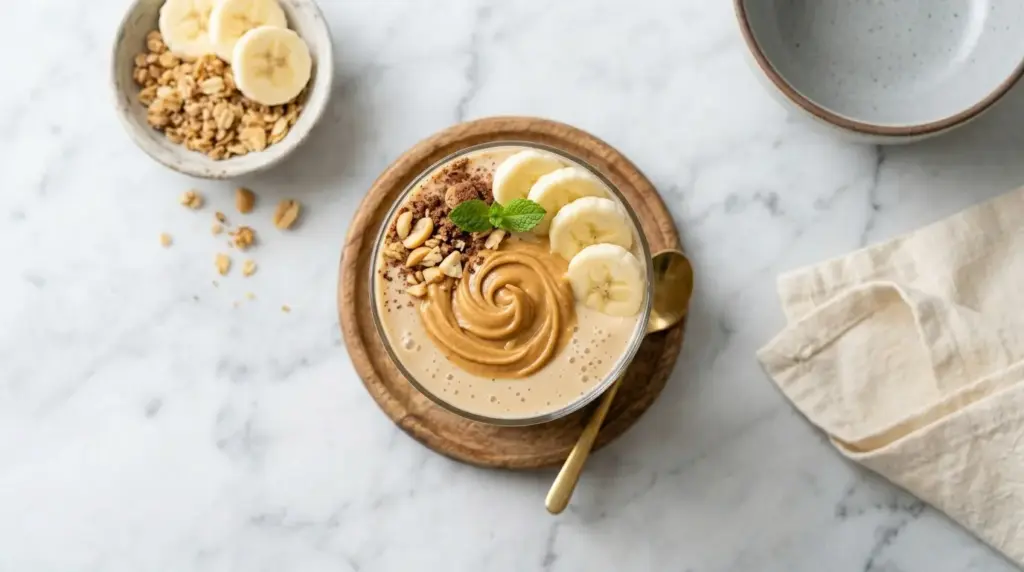
- Add a scoop of granola directly on top of the smoothie and serve in a wide bowl as a smoothie bowl
- Top with sliced fresh banana, a drizzle of honey, and a pinch of flaky salt for a more elevated presentation
Read Also: Easy Acai Bowl Recipe
Variations to Try
Once you’ve mastered the base recipe, it’s easy to riff on it in a hundred different directions.
The basic structure, frozen banana, peanut butter, and milk, is a perfect canvas for adding extra flavors and nutritional boosts.
- Chocolate Peanut Butter Banana Smoothie: Add 1 tablespoon of unsweetened cocoa powder or a handful of dark chocolate chips. This is the dessert version and it’s absolutely worth trying. The full chocolate version is available here: Chocolate Peanut Butter Banana Smoothie.
- Protein-Packed Version: Add one scoop of your favorite vanilla or chocolate protein powder. Great for post-workout recovery.
- Green Smoothie Variation: Toss in a large handful of fresh baby spinach before blending. The banana and peanut butter completely mask the taste of spinach, and you’d never know it was there from the flavor. Try the Green Smoothie Recipe for more inspiration.
- Almond Butter Version: Swap peanut butter for almond butter or cashew butter for a slightly different nutty note.
- Oatmeal Smoothie: Add 2 tablespoons of rolled oats before blending for extra fiber and staying power. The oats break down completely and thicken the smoothie nicely.
- Coffee Banana Smoothie: Add 1/4 cup of cold brew coffee concentrate to the base recipe for a caffeine kick that pairs brilliantly with banana and peanut butter.
- Tropical Twist: Add 1/2 cup of frozen mango or pineapple alongside the banana. The tropical fruit brightens the flavor beautifully.
For another delicious fruity blend, the Peach Smoothie Recipe With Yogurt is a wonderful option.
Storage and Reheating
This smoothie is best consumed fresh, but it can absolutely be made ahead with a few simple tricks.
The texture is always best right out of the blender when it’s thick, cold, and fully emulsified. After a few hours in the fridge, it will separate slightly and the banana may oxidize, giving it a slightly browner color. This doesn’t affect the flavor, but it does affect appearance.
- Refrigerator: Pour leftover smoothie into an airtight mason jar or sealed container and refrigerate for up to 24 hours. Shake or stir vigorously before drinking.
- Add a squeeze of lemon juice: A tiny squeeze (about 1/4 teaspoon) stirred in before storing helps slow oxidation and keeps the color brighter.
- Freezer option: Pour into ice cube trays and freeze. When ready to use, blend the frozen smoothie cubes with a small splash of milk to revive the original texture.
- Meal prep tip: Pre-portion the ingredients (frozen banana chunks, measured peanut butter, measured milk) into individual zip-lock bags or containers for a grab-and-blend approach each morning.
- Do not freeze in a glass jar: Liquids expand when frozen. Always use freezer-safe containers with some headroom left at the top.
Read Also: Banana Smoothie Recipe Without Yogurt
Nutritional Facts
The following values are approximate and based on the standard recipe using 2% dairy milk, 2 tablespoons of natural peanut butter, one medium frozen banana, and 1/2 cup of Greek yogurt. Values will vary based on specific brands and substitutions.
| Nutrient | Amount Per Serving |
|---|---|
| Calories | 380 kcal |
| Total Fat | 14g |
| Saturated Fat | 3g |
| Carbohydrates | 48g |
| Dietary Fiber | 5g |
| Sugars | 28g (naturally occurring) |
| Protein | 18g |
| Sodium | 180mg |
| Potassium | 720mg |
| Calcium | 250mg |
| Vitamin B6 | 0.6mg |
Note: Values are estimated for one full serving and do not include optional honey or sweetener.
Another banana-forward recipe worth trying: Banana Pudding Recipe
Health Benefits of Key Ingredients
The ingredients in this smoothie aren’t just delicious. They’re genuinely good for you, and each one brings something meaningful to the table.
This is a smoothie you can feel good about drinking regularly, not just because it tastes great, but because it’s built from whole, minimally processed ingredients with real nutritional value.
- Bananas are one of the best natural sources of potassium, a mineral that supports heart health, muscle function, and healthy blood pressure. They also provide vitamin B6, which plays a role in mood regulation and brain function, and quick-digesting carbohydrates that make them a great source of natural energy.
- Peanut butter delivers a powerful combination of protein and heart-healthy monounsaturated fats. It also contains magnesium, which supports bone health and energy metabolism, and niacin, a B vitamin that aids in converting food into usable energy.
- Greek yogurt (when included) provides a significant protein boost alongside live probiotic cultures that support gut health and digestive function. It’s also a reliable source of calcium.
- Milk contributes calcium for bone strength and vitamin D when fortified, along with complete protein containing all essential amino acids.
- Cinnamon contains antioxidants and has been studied for its potential to help regulate blood sugar levels. Even a small pinch adds meaningful antioxidant activity.
- Vanilla extract adds flavor with minimal calories and contains trace amounts of antioxidant compounds called vanilloids.
Read Also: Chia Seed Pudding Recipe
Frequently Asked Questions
1. Can I make this smoothie without a frozen banana?
Yes, you can. If you only have fresh bananas, simply add 3-4 ice cubes to the blender to compensate for the chilled texture. The result won’t be quite as thick or creamy as the frozen banana version, but it will still taste great. Alternatively, slice and freeze your bananas the night before so you’re always prepared.
2. Is peanut butter banana smoothie good for weight loss?
This smoothie can absolutely fit into a weight-loss-friendly eating plan. It’s filling, made from whole ingredients, and contains a good balance of protein, fiber, and healthy fats that help control appetite. Just keep an eye on portion size and avoid adding extra sweeteners. The calories are mainly coming from nutritious whole foods, not empty sources.
3. Can I use peanut butter powder instead of regular peanut butter?
Yes, peanut butter powder is a great lower-calorie substitute that blends seamlessly into smoothies. Use about 2-3 tablespoons of peanut butter powder in place of 2 tablespoons of regular peanut butter. The flavor is slightly less rich, but the peanutty taste comes through well. It’s a popular option for anyone tracking macros closely.
4. What milk works best for this smoothie?
Dairy whole milk creates the creamiest, richest result. For a lighter option, 2% milk works very well. Non-dairy options like oat milk and unsweetened almond milk both blend beautifully and give slightly different flavor profiles. Oat milk adds a subtle sweetness, while almond milk keeps things more neutral. Coconut milk gives a tropical richness that pairs surprisingly well with banana and peanut butter.
5. How can I make this smoothie thicker?
The main key is using a fully frozen banana rather than a fresh one. Beyond that, you can add 1/2 cup of Greek yogurt, reduce the milk slightly, or blend in 2 tablespoons of rolled oats. You can also add a tablespoon of chia seeds and let the blended smoothie sit for 5 minutes before drinking. The chia seeds absorb liquid and thicken the smoothie noticeably.
Read Also: Yogurt Smoothie Recipe
Final Thoughts
This peanut butter banana smoothie recipe is one of those keeper recipes you’ll return to again and again.
It’s fast, nutritious, genuinely delicious, and adaptable to suit just about any dietary preference or lifestyle. Whether you blend it up for a quick weekday breakfast or use it as a post-workout refuel, it delivers on flavor and nutrition every single time.
If you make this recipe, leave a comment below and let me know how it turned out. I’d love to hear your favorite variations too, whether you added protein powder, swapped the milk, or threw in some spinach.
Tag a friend who needs a better morning routine, and share this recipe with anyone who loves a good smoothie!
Recommended:
- Chocolate Peanut Butter Banana Smoothie Recipe
- Banana Protein Smoothie Recipe
- Green Smoothie Recipe
- Dragon Fruit Smoothie Recipe
- Watermelon Smoothie Recipe
- Pineapple Smoothie Recipe
- Passion Fruit Smoothie Recipe
- Strawberry Banana Blueberry Smoothie Recipe
- Papaya Smoothie Recipe
- Mango Smoothie Recipe Without Yogurt


