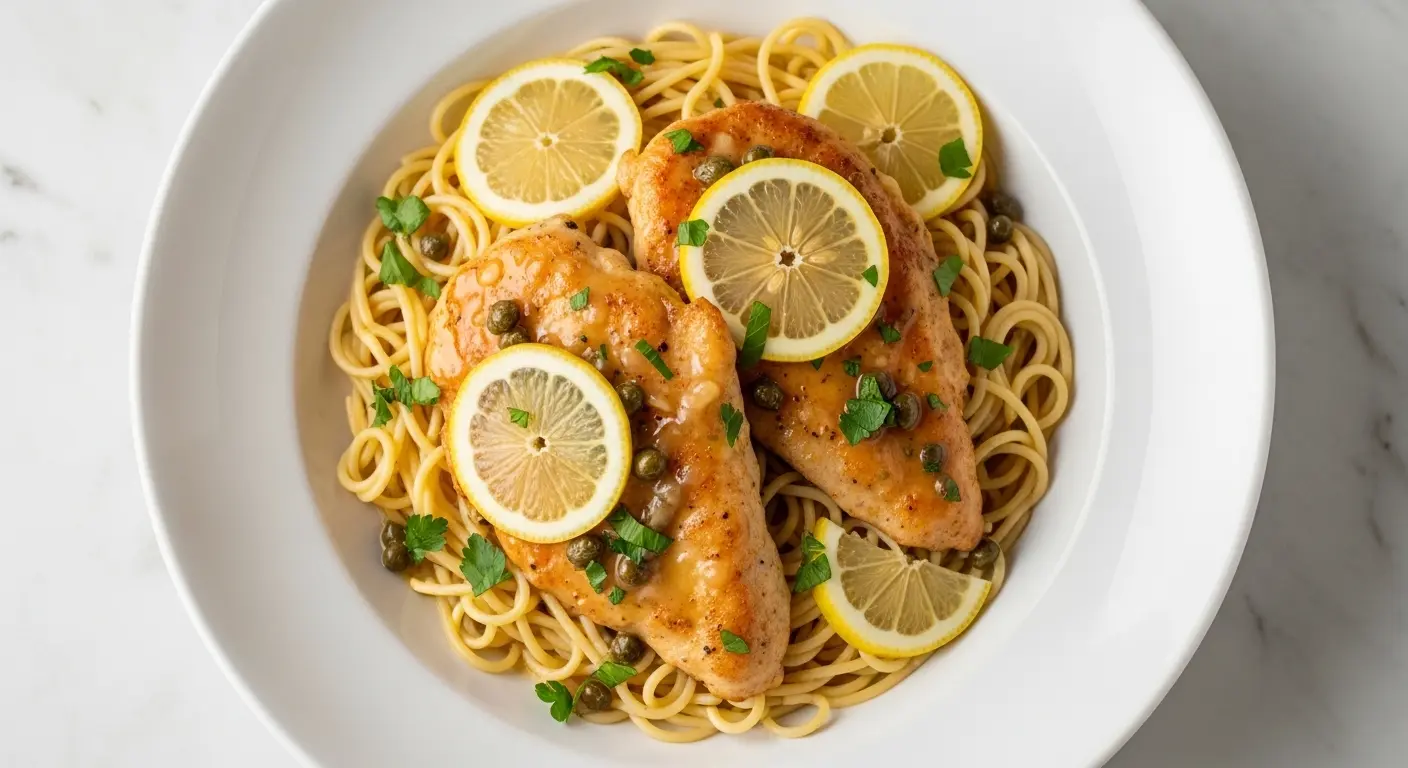
If you’ve ever ordered the copycat CPK chicken piccata recipe at California Pizza Kitchen, you know exactly why people keep going back for it. That perfectly golden, flour-dusted chicken cutlet swimming in a bright, buttery lemon-caper sauce is the kind of dish that makes you close your eyes after the first bite.
The good news? You can absolutely nail it at home — and honestly, it might taste even better than the original.
CPK’s take on chicken piccata is rooted in the classic Italian-American preparation, but it adds a restaurant-polish that makes it feel extra special. The sauce gets its depth from dry white wine, shallots, and garlic simmered together, while cold butter gets whisked in at the end to give it that silky, restaurant-quality finish.
This recipe walks you through every step so even if you’ve never made pan sauces before, you’ll end up with something spectacular.
For another elegant Italian-American chicken dish, you’ll also love this Copycat Cheesecake Factory Chicken Piccata — it’s another fantastic restaurant recreation worth bookmarking.
Why You’ll Love This Copycat CPK Chicken Piccata Recipe
This dish delivers that perfect balance of flavors that restaurants charge a lot for — bright lemon, briny capers, rich butter, and savory chicken — all in one pan.
It comes together in under 35 minutes, which makes it just as weeknight-friendly as it is impressive for company.
The sauce is incredibly versatile. You’ll want to spoon it over pasta, potatoes, and honestly, anything else on your plate.
Using cold butter to finish the sauce (a classic French technique called “mounting”) creates a smooth, glossy consistency that you just can’t get by any other method.
The chicken stays moist and tender every time because pounding it to an even thickness ensures it cooks quickly and evenly without drying out.
- Quick cook time: Ready in about 30-35 minutes from start to finish
- One-pan sauce: Everything comes together in the same skillet you sear the chicken in, which means maximum flavor and minimal cleanup
- Bright, balanced flavor: The combination of fresh lemon juice, dry white wine, and capers creates a sauce that is tangy without being overpowering
- Beginner-friendly technique: The steps are straightforward and the method is forgiving for home cooks at any skill level
- Restaurant quality results: The butter-mounted sauce and properly pounded chicken are the two techniques that make this taste like it came from a professional kitchen
You might also enjoy: White Wine Chicken Piccata
Ingredients
This recipe uses simple, fresh ingredients that work together to create the signature CPK piccata flavor. The most important things to get right are fresh lemon juice (not bottled — it makes a huge difference) and cold butter for finishing the sauce.
- 4 boneless, skinless chicken breasts (about 6-8 oz / 170-225g each)
- 1/2 cup (60g) all-purpose flour, for dredging
- 1 teaspoon salt, plus more to taste
- 1/2 teaspoon freshly ground black pepper, plus more to taste
- 1/2 teaspoon garlic powder
- 4 tablespoons (60ml) light olive oil, divided
- 2 medium shallots, finely minced
- 4 garlic cloves, minced
- 1/2 cup (120ml) dry white wine (such as Pinot Grigio or Sauvignon Blanc)
- 1 cup (240ml) low-sodium chicken broth
- 1/4 cup (60ml) freshly squeezed lemon juice (about 2 large lemons)
- 3 tablespoons capers, drained and rinsed
- 5 tablespoons (70g) cold unsalted butter, cut into cubes
- 2 tablespoons fresh flat-leaf parsley, roughly chopped
- Lemon slices, for garnish
- Cooked angel hair pasta or linguine, for serving
Read Also: Creamy Chicken Piccata Recipe
Kitchen Equipment Needed
Having the right tools makes this recipe much easier. A meat mallet is especially important here — pounding the chicken to an even 1/2 inch (1.25cm) thickness is the key to getting it cooked through quickly while staying juicy.
- Large stainless steel or cast iron skillet (12-inch / 30cm recommended)
- Meat mallet or meat tenderizer
- Plastic wrap or zip-lock bags (for pounding the chicken)
- Cutting board
- Sharp chef’s knife
- Shallow dish or plate (for dredging)
- Measuring cups and spoons
- Citrus juicer or reamer
- Tongs
- Wooden spoon or silicone spatula
- Microplane or fine grater (optional, for lemon zest)
- Fine mesh strainer (optional, for a silky-smooth sauce)
This technique works wonderfully for other pan-sauce dishes too — it’s the same foundation used in a classic Chicken Marsala Recipe.
Recommended Products for This Recipe
These products are recommended based on quality and real performance improvements in this recipe. They’re the items that will make the biggest difference in your results.
1. Stainless Steel 12-Inch Skillet
A quality stainless steel skillet is the single most important tool for this recipe. It creates a proper golden sear on the chicken and allows you to build a rich fond (the browned bits) that becomes the backbone of your piccata sauce. Non-stick pans don’t develop fond the same way, which means less flavor in the final sauce.
2. High-Quality Capers in Brine
The capers you choose matter more than you’d think. Salt-packed capers tend to be flavorless after rinsing, while capers packed in brine retain a bright, briny punch that gives the CPK piccata sauce its signature character. Look for small nonpareil capers for the best texture and flavor.
3. Meat Mallet with Tenderizer Side
Pounding the chicken to an even 1/2-inch thickness is non-negotiable for this recipe. A two-sided meat mallet with both a flat and textured face gives you maximum control. The flat side creates the perfect even cutlet without tearing the meat.
4. Fresh Lemon Squeezer / Citrus Juicer
Fresh lemon juice is the star of chicken piccata, and a good handheld citrus juicer makes extracting it effortless while keeping seeds out of the sauce. This small investment pays off in every lemon-forward dish you make from here on out.
5. Fine Mesh Strainer
If you want a perfectly silky, restaurant-smooth sauce, a fine mesh strainer lets you strain out the shallot and garlic solids after the sauce has simmered. CPK’s version of piccata has that polished, clean-flavored sauce — and this is how you get it at home.
For a completely different but equally elegant Italian-inspired preparation, check out the Copycat Giada Chicken Piccata Recipe for another classic take.
Step-by-Step Instructions
Step 1: Prepare the Chicken Cutlets
- Place one chicken breast on your cutting board. If it’s particularly thick (over 1 inch / 2.5cm), slice it in half horizontally to create two thinner cutlets. Repeat with all four breasts.
- Lay a piece of plastic wrap on your cutting board. Place one chicken piece on top, then cover with another sheet of plastic wrap. This prevents the meat from tearing and keeps splatter contained.
- Using the flat side of your meat mallet, pound the chicken firmly and evenly from the center outward. You’re aiming for a uniform thickness of about 1/2 inch (1.25cm) all the way across. Uneven thickness means some parts will be overcooked before others are done.
- Repeat with all chicken pieces and set them aside on a clean plate.
Step 2: Season and Dredge the Chicken
- In a shallow dish or on a large plate, combine the all-purpose flour, 1 teaspoon salt, 1/2 teaspoon black pepper, and 1/2 teaspoon garlic powder. Whisk or stir these together until evenly mixed.
- Season the pounded chicken breasts lightly with a pinch of additional salt and pepper on both sides. This extra seasoning directly on the meat (before the flour) is what gives the chicken itself flavor rather than just the coating.
- One at a time, press each chicken piece firmly into the flour mixture on both sides, making sure to coat the edges too. Shake off any excess flour — you want a thin, even coating, not a thick crust. Too much flour will turn pasty in the pan and muddy your sauce.
- Set the dredged chicken aside on a clean plate or rack while you heat the oil.
Step 3: Sear the Chicken
- Place your large skillet over medium-high heat. Add 3 tablespoons of the olive oil and let it heat until it shimmers. You can test it by dropping a tiny pinch of flour in — if it sizzles immediately, the oil is ready.
- Carefully place 2-3 chicken cutlets in the pan, making sure not to crowd them. Crowding drops the temperature of the oil and causes the chicken to steam rather than sear, which means you’ll lose that golden crust.
- Cook the chicken without moving it for 3 to 4 minutes until the bottom is deeply golden brown. Resist the urge to peek or move it — letting it sit undisturbed is what creates that beautiful crust.
- Flip the chicken with tongs and cook the other side for another 2 to 3 minutes until golden and cooked through. The internal temperature should reach 165°F (74°C). The thin cutlets cook quickly, so watch carefully.
- Transfer the cooked chicken to a clean plate and tent loosely with foil to keep warm. Add the remaining 1 tablespoon of oil to the pan if needed, then sear the remaining chicken in the same way.
Step 4: Build the Piccata Sauce Base
- With the heat still on medium, add the minced shallots to the same skillet (with all those beautiful browned bits still in it). Sauté for about 1 to 2 minutes, stirring frequently, until they soften and become translucent. The moisture from the shallots will help lift some of the fond off the bottom.
- Add the minced garlic to the pan and stir continuously for about 30 seconds. Garlic burns quickly, especially in a hot pan, so keep it moving and watch it carefully. It should smell fragrant and golden, not dark or bitter.
- Pour in the dry white wine. It will bubble up dramatically — this is normal. Using your wooden spoon, scrape up all of the browned bits stuck to the bottom of the pan. Those bits are pure concentrated flavor and they’re what makes a restaurant-quality sauce taste so much deeper than a simple sautéed version.
- Let the wine simmer for about 3 to 4 minutes until it reduces by roughly half. You’ll notice the sharpness of the alcohol smell fading as it cooks off.
Step 5: Finish the Sauce
- Pour in the chicken broth and fresh lemon juice. Stir everything together, then bring the liquid up to a gentle simmer.
- Let the sauce simmer for 5 to 7 minutes until it reduces slightly and becomes just a little more concentrated. It won’t be super thick at this stage — that’s fine. The butter will take care of the body.
- Add the drained capers and stir them in. Let them warm through in the sauce for about 1 minute. Their brininess will balance the richness of the butter you’re about to add.
- Turn the heat down to its lowest setting. Take your cold cubed butter and add it one or two pieces at a time, swirling the pan constantly or stirring vigorously with a spoon. This process, called “mounting” the sauce with butter, emulsifies the fat into the liquid and creates a glossy, smooth, velvety sauce. Adding the butter all at once or over high heat will cause the sauce to break and become greasy rather than silky. Cold butter is essential here.
- Once all the butter is incorporated, taste the sauce and adjust with more salt, pepper, or lemon juice as needed. If you prefer a very smooth sauce, strain it through a fine mesh strainer now — this removes the shallots and garlic solids and gives it that elegant restaurant finish.
Step 6: Return the Chicken and Serve
- Nestle the seared chicken breasts back into the sauce in the skillet. Tilt the pan slightly to spoon the sauce over the top of each piece. Let the chicken warm through in the sauce for about 1 to 2 minutes over the lowest heat — just enough to heat it through without overcooking it.
- Sprinkle fresh flat-leaf parsley over the chicken and sauce. Add a few thin lemon slices for garnish and an extra pop of brightness.
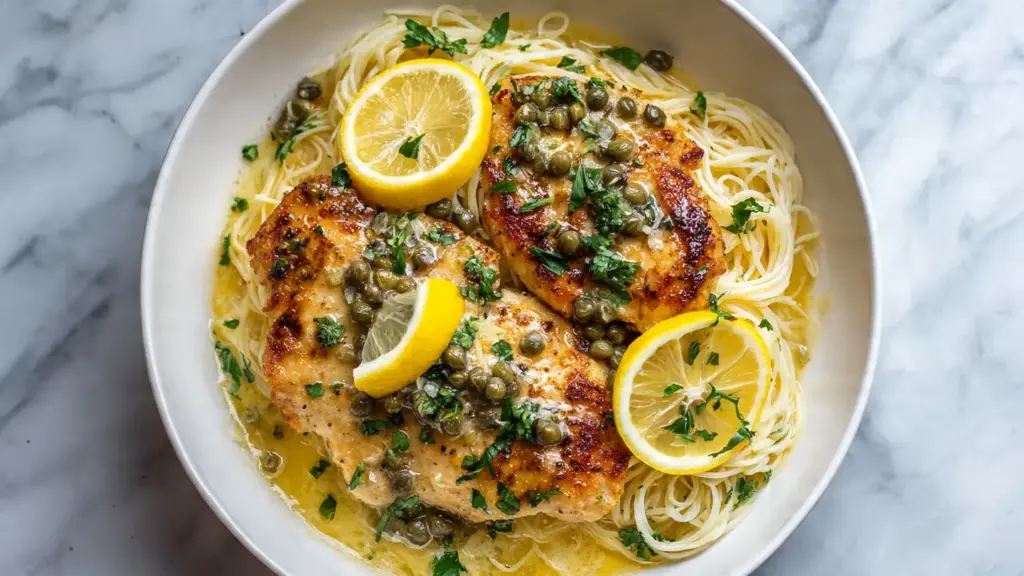
- Plate immediately over cooked angel hair pasta or linguine. Spoon plenty of that golden sauce over the top — don’t be shy. The pasta absorbs the piccata sauce beautifully and becomes just as good as the chicken itself.
Read Also: Authentic Italian Chicken Piccata Recipe
Tips for Success
Getting this recipe right comes down to a few key techniques. The most important is the butter-mounting step at the end — rush it or do it over high heat and the sauce will break. Keep the heat low and your patience high.
- Pound the chicken evenly: Uneven cutlets cook unevenly. Take the extra two minutes to pound them properly — this is the most important prep step in the whole recipe.
- Don’t skip the shallots and garlic: CPK’s version of piccata has a more complex, savory sauce than the bare-bones version. Shallots and garlic are what gives it that depth.
- Use dry white wine: Avoid cooking wines (they’re loaded with sodium) and sweet wines. A dry Pinot Grigio or Sauvignon Blanc works perfectly.
- Squeeze fresh lemons: Bottled lemon juice has a flatter, slightly bitter flavor compared to fresh. For a sauce this simple, fresh juice makes a real difference.
- Cold butter is non-negotiable: Warm or room-temperature butter won’t emulsify properly into the sauce. Keep it in the fridge right until you’re ready to use it.
- Don’t crowd the pan: Sear in batches. Crowding drops the oil temperature and steams the chicken rather than searing it, and you’ll lose the golden crust.
- Taste and adjust: Every lemon is different in acidity and every caper is different in saltiness. Always taste the sauce before serving and tweak with more lemon, salt, or a pinch of sugar if needed.
For a fun twist on the classic technique, the Copycat Ina Garten Chicken Piccata Recipe also offers some fantastic insights into making piccata shine.
Serving Suggestions
CPK serves their chicken piccata over pasta, and that’s the classic pairing for a reason. Angel hair pasta is traditional because its delicate texture doesn’t compete with the bright sauce.
Pair this chicken with sides that complement rather than compete with the lemon-butter sauce. Here are some of the best ways to round out the meal:
- Angel hair pasta or linguine: Toss the cooked pasta in a little of the piccata sauce before plating — it soaks in beautifully
- Roasted Broccoli: The slight char and bitterness of roasted broccoli is a perfect contrast to the bright, buttery sauce
- Garlic Mashed Potatoes: Creamy, buttery mashed potatoes are a luxurious base that soaks up every drop of the lemon-caper sauce
- Creamed Spinach: A rich, velvety spinach side makes the whole plate feel very restaurant-worthy
- Classic Broccoli Salad: A fresh, crunchy salad with a tangy dressing brightens the plate
- Easy Garlic Bread: Crusty garlic bread is ideal for mopping up any remaining piccata sauce — and there will always be sauce worth mopping up
- Light arugula salad: A simple undressed arugula salad with shaved Parmesan and a squeeze of lemon is a classic Italian accompaniment
Variations to Try
Once you’ve mastered this base recipe, there are some great directions you can take it. CPK’s version is the starting point — these tweaks make it your own.
- Creamy CPK piccata: Stir 2 to 3 tablespoons of heavy cream into the sauce after reducing it and before adding the butter. This produces a richer, more velvety sauce that clings even more beautifully to the pasta.
- Add mushrooms: Slice 8 oz (225g) of cremini mushrooms and sauté them in butter before starting the sauce. They add earthiness and make the dish heartier.
- Sun-dried tomatoes: Chop 2 tablespoons of oil-packed sun-dried tomatoes and stir them into the sauce with the capers for a sweet-tangy depth.
- Gluten-free version: Swap the all-purpose flour for a 1:1 gluten-free flour blend or rice flour. The chicken still gets a great sear and the sauce is naturally gluten-free.
- Shrimp piccata: Use 1.5 lbs (680g) of large peeled shrimp instead of chicken. They cook in about 2 minutes per side, so the whole dish comes together even faster.
- Add artichoke hearts: Quarter a 14 oz (400g) can of drained artichoke hearts and add them with the capers. This is a popular variation that adds texture and a nutty flavor to the sauce.
For a dedicated gluten-free version, the Gluten Free Chicken Piccata Recipe has all the details on getting the best results with alternative flours.
Storage and Reheating
This chicken piccata stores well and reheats beautifully if you do it gently. The most important thing is to avoid high heat when reheating, which can cause the butter sauce to break and the chicken to dry out.
- Refrigerator storage: Store the chicken and sauce together in an airtight container. It will keep well for up to 3 days. If you’ve already tossed it with pasta, store that separately to prevent the pasta from absorbing all the sauce.
- Freezing: The chicken itself freezes well (up to 2 months), but the butter-based sauce doesn’t freeze particularly well — the emulsion can break upon thawing. If you plan to freeze, freeze the chicken separately and make a fresh sauce when you’re ready to serve.
- Reheating on the stovetop (best method): Place the chicken and sauce in a skillet over very low heat. Add a splash of chicken broth (2 to 3 tablespoons) to help loosen the sauce and prevent sticking. Cover the pan and heat gently for 5 to 7 minutes, turning the chicken halfway through, until warmed through.
- Reheating in the microwave: Place the chicken in a microwave-safe dish, spoon sauce over it, and cover loosely with a microwave-safe lid or damp paper towel. Heat on 50% power in 90-second intervals until warmed through. Using lower power prevents the sauce from separating and the chicken from getting rubbery.
- Make-ahead tip: You can pound and dredge the chicken up to 4 hours in advance and store it uncovered in the refrigerator. This actually helps the flour coating adhere better and produces an even crisper sear.
Read Also: The Best Easy Chicken Piccata Recipe
Nutritional Facts
The following estimates are per serving (1 chicken breast with sauce), without pasta, based on 4 servings total.
| Nutrient | Amount Per Serving |
|---|---|
| Calories | ~380 kcal |
| Total Fat | 24g |
| Saturated Fat | 9g |
| Cholesterol | 115mg |
| Sodium | 620mg |
| Total Carbohydrates | 10g |
| Dietary Fiber | 0.5g |
| Sugars | 1g |
| Protein | 34g |
Note: Nutritional values are estimates and will vary depending on exact ingredient brands, portion sizes, and any modifications made to the recipe. For precise nutritional data, use a nutritional calculator with your specific ingredients.
For another elegantly-portioned chicken dish, the Healthy Chicken Piccata Recipe is a great option if you’re watching calories or looking for a lighter preparation.
Health Benefits of Key Ingredients
This dish isn’t just delicious — it’s actually built around some genuinely nutritious ingredients. Here’s a closer look at why the key components are doing your body a favor.
Chicken breast is one of the leanest, most protein-dense foods available. A single serving delivers around 34 grams of complete protein, making this a fantastic muscle-supporting meal that keeps you full for hours.
Lemon juice is loaded with vitamin C, an antioxidant that supports immune function, skin health, and iron absorption. Beyond nutrition, the citric acid in lemon juice also acts as a natural tenderizer, which is part of why chicken piccata is so incredibly tender.
- Olive oil: Rich in monounsaturated fats and polyphenols, olive oil has well-documented benefits for cardiovascular health and inflammation. Using light-tasting olive oil for searing and finishing gives you all those benefits without an overpowering flavor.
- Capers: These tiny flavor bombs are a source of quercetin and rutin, antioxidant compounds that support heart health and have anti-inflammatory properties. They’re extremely low in calories while delivering huge flavor impact.
- Garlic: Fresh garlic contains allicin, a sulfur compound associated with reduced blood pressure, improved cholesterol levels, and antimicrobial properties. It’s one of the most studied functional foods in nutrition science.
- Parsley: Fresh flat-leaf parsley is a surprisingly rich source of vitamins K and C, as well as folate. It’s not just a garnish — it adds a genuine nutritional boost to the final dish.
- Dry white wine: Used in moderate cooking quantities, white wine contributes flavanoids and resveratrol. Most of the alcohol cooks off, leaving behind complex flavor compounds that deepen the sauce.
For another lean, bright, and nutritious chicken recipe, the Lemon Chicken Recipe is another excellent option.
Frequently Asked Questions
1. What makes CPK chicken piccata different from regular chicken piccata?
CPK’s version of chicken piccata has a few distinguishing features compared to the most basic home-cook piccata. Their sauce tends to be more refined and deeply layered, using shallots and garlic as a sauce base before the wine and broth are added. The balance of acidity to richness is also slightly more restrained than the very sharp, heavy-capered versions you sometimes see. The end result is a sauce that feels sophisticated rather than punchy.
2. Can I make this recipe without wine?
Absolutely. Simply replace the 1/2 cup of white wine with an equal amount of additional chicken broth, plus an extra tablespoon of fresh lemon juice to compensate for the brightness the wine would have provided. The sauce will be slightly less complex but still delicious and perfectly balanced.
3. How do I know when the chicken is fully cooked?
The most reliable method is an instant-read thermometer — the internal temperature should reach 165°F (74°C) at the thickest part. If you don’t have a thermometer, cut into the thickest part of a cutlet: the juices should run clear and the meat should be white all the way through with no translucent pink areas.
4. My sauce broke and looks greasy. How do I fix it?
A broken sauce almost always happens because the butter was added over heat that was too high, or was added all at once. To fix it, remove the pan from heat entirely and let it cool for a minute. Add a small splash (about 1 tablespoon) of cold water or cold chicken broth and whisk vigorously. Then slowly add 1 to 2 additional cubes of cold butter while whisking off the heat. This often brings the emulsion back together.
5. What pasta goes best with CPK chicken piccata?
Angel hair pasta (capellini) is the traditional pairing and what CPK uses in their restaurant. Its fine, delicate strands don’t compete with the bright sauce and cook in under 3 minutes. Linguine or thin spaghetti are also excellent alternatives if you prefer a pasta with a bit more body and chew. Whichever you choose, toss a portion of the hot cooked pasta directly in the pan with the sauce before plating — it makes a huge difference in how the flavors marry.
Read Also: Chicken Piccata Recipe With Pasta
Final Thoughts
Making a copycat CPK chicken piccata recipe at home is one of those kitchen wins that makes you feel genuinely accomplished. The technique is approachable, the ingredient list is short, and the results are jaw-droppingly good.
The key is trusting the process — pound the chicken properly, sear it to a real golden brown, and take your time with the butter-mounted sauce. Those three things are what separate a good piccata from a great one.
Give this recipe a try this week and let it become one of your regular weeknight showstoppers. If you make it, drop a comment below and let me know how it turned out — I always love hearing how these recipes land in your kitchen. Share it with someone who loves CPK and save this page for the next time you need a dinner idea that impresses without stressing you out.
Recommended:
- Copycat Geoffrey Zakarian Chicken Piccata
- Copycat Ina Garten Chicken Piccata
- The Best Easy Chicken Piccata
- Healthy Chicken Piccata
- White Wine Chicken Piccata
- Classic Chicken Parmesan
- Chicken Cacciatore
- Classic Shrimp Scampi
- Homemade Alfredo Sauce
- Chicken Piccata With Pasta


