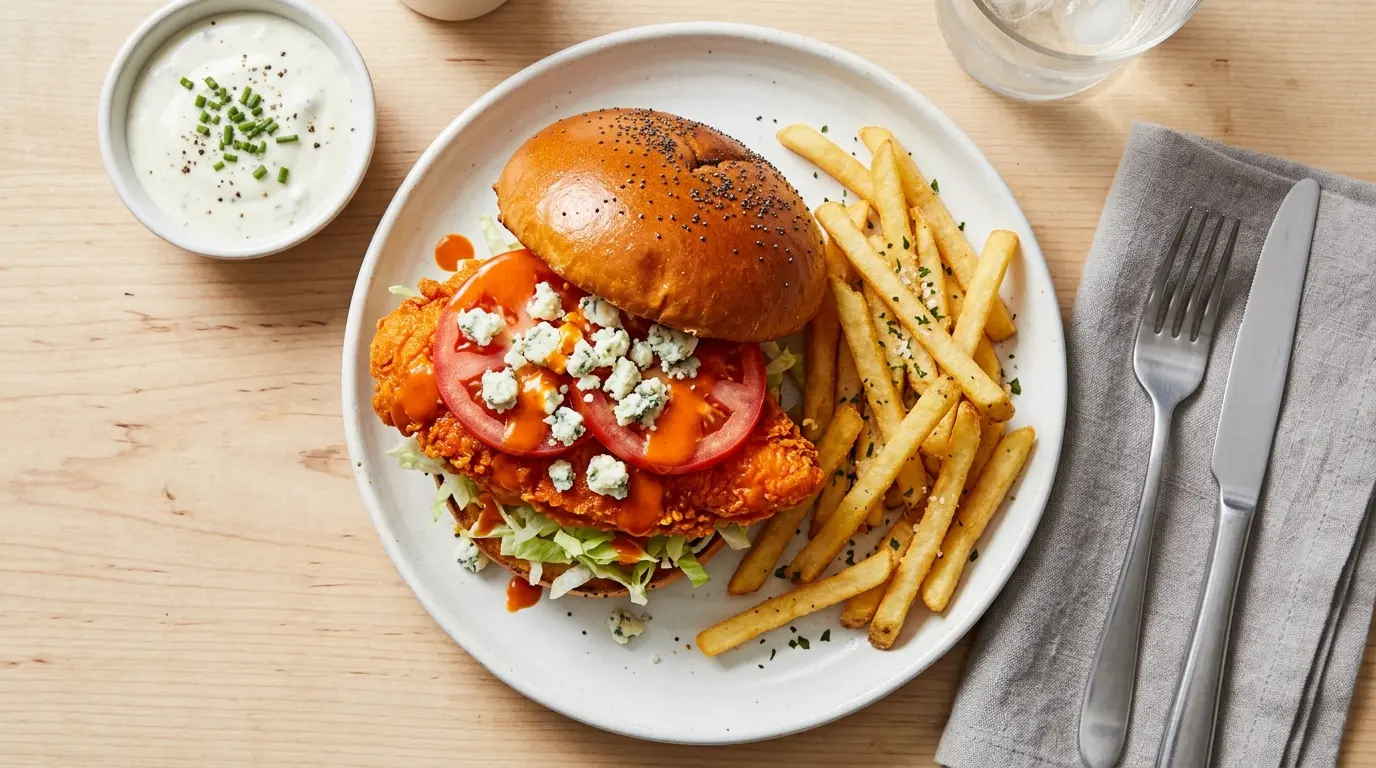
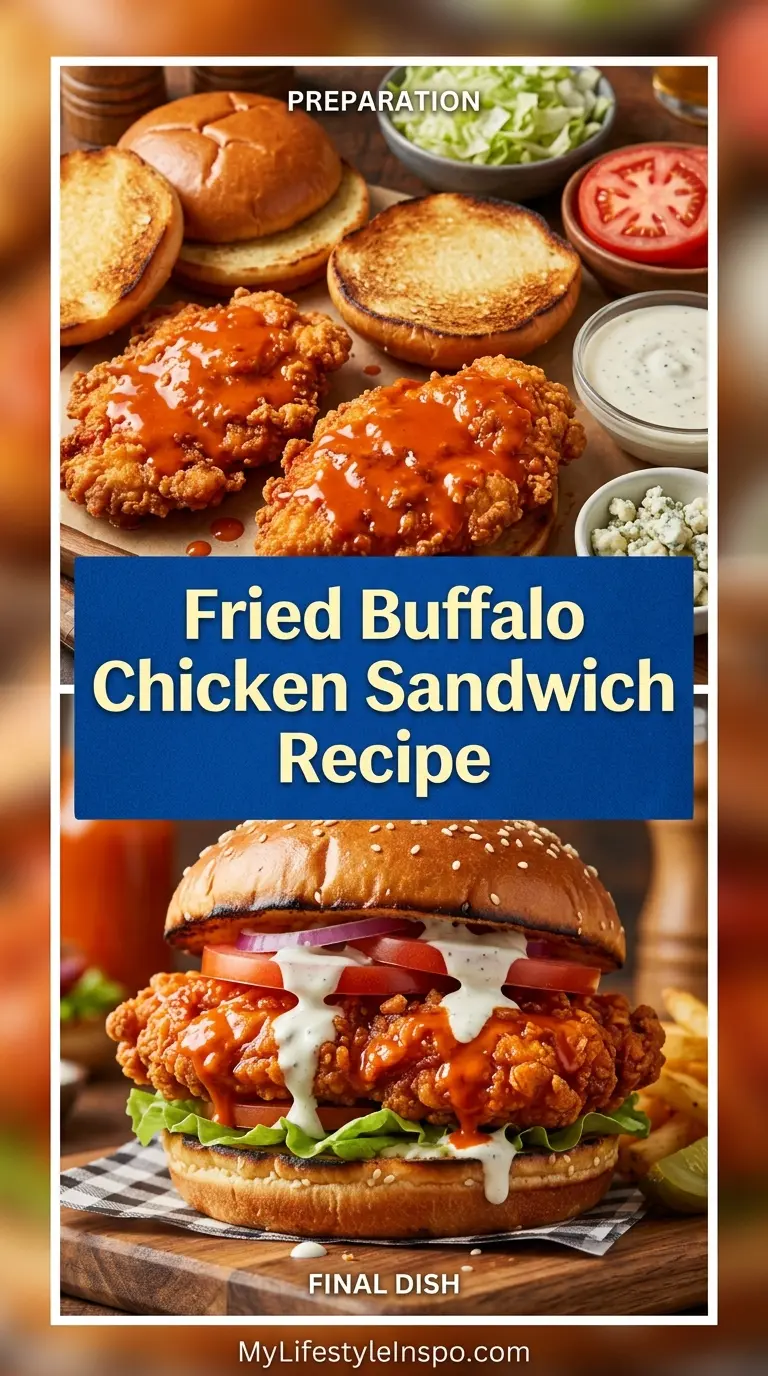
If you’ve ever craved that perfect combination of crispy, golden-fried chicken drenched in tangy, buttery buffalo sauce all stacked on a soft brioche bun, this fried buffalo chicken sandwich recipe is exactly what you’ve been looking for.
This is the kind of sandwich that makes you close your eyes on the first bite. The outside is shatteringly crispy, the inside is juicy and tender, and that buffalo sauce hits with just the right amount of heat and richness.
The secret to making this work at home comes down to a few non-negotiable techniques: a buttermilk marinade that tenderizes the chicken overnight, a properly seasoned dredge with cornstarch for extra crunch, and a buttery buffalo sauce that clings to every nook and cranny without turning the breading soggy.
Once you nail this recipe, you’ll stop paying restaurant prices for something you can absolutely make better at home. This is a weekend project well worth your time.
For a lighter, weeknight-friendly version, you might also love the Buffalo Chicken Sandwich Recipe on this site.

Why You’ll Love This Fried Buffalo Chicken Sandwich Recipe
This fried buffalo chicken sandwich recipe has earned a permanent spot in our regular dinner rotation, and for good reason.
Every single component is designed to complement the others. The crispy, golden crust gives way to juicy, well-seasoned chicken, and the buttery buffalo sauce adds that bold, tangy kick that makes every bite memorable.
Here’s why this one stands out:
- Restaurant-quality crunch at home – The buttermilk soak combined with a flour-and-cornstarch dredge creates a thick, shaggy crust that fries up beautifully golden with maximum surface area for the sauce to cling to.
- Perfectly balanced heat – The buffalo sauce is mixed with melted butter, which tones down the raw fire of the hot sauce and gives it that signature rich, glossy finish you expect from the best buffalo recipes.
- Incredibly juicy chicken – Marinating in seasoned buttermilk breaks down the proteins in the chicken breast and seasons it all the way through, so you never end up with a dry, bland interior.
- Easy to customize – Swap the blue cheese for ranch, pile on extra toppings, or adjust the heat level to your preference without sacrificing any of the flavor.
- Crowd-pleasing every time – This sandwich works just as well for a casual weeknight dinner as it does for game day spreads or casual entertaining.
You might also enjoy: Grilled Buffalo Chicken Sandwich Recipe
Ingredients
You don’t need anything fancy to pull this off. Most of these ingredients are pantry staples, and the ones that aren’t are easy to find at any grocery store.
- 2 large boneless, skinless chicken breasts (about 8 oz / 225g each)
- 1 cup (240ml) buttermilk
- 2 tablespoons hot sauce (Frank’s RedHot recommended), for the marinade
- 1 teaspoon garlic powder
- 1 teaspoon onion powder
- 1 teaspoon smoked paprika
- 1 teaspoon salt
- ½ teaspoon black pepper
- 1 cup (125g) all-purpose flour
- ¼ cup (30g) cornstarch
- 1 teaspoon baking powder
- 1 teaspoon garlic powder (for dredge)
- 1 teaspoon onion powder (for dredge)
- 1 teaspoon smoked paprika (for dredge)
- ½ teaspoon cayenne pepper
- 1 teaspoon salt (for dredge)
- ½ teaspoon black pepper (for dredge)
- 2 tablespoons buttermilk (for dredge)
- Vegetable or canola oil, for frying (enough for 2–3 inches / 5–7.5cm deep)
- ½ cup (120ml) buffalo sauce (store-bought or homemade)
- 2 tablespoons unsalted butter, melted
- 4 brioche sandwich buns
- 1 cup shredded iceberg lettuce
- 1 medium tomato, sliced
- ½ cup blue cheese dressing or ranch dressing
- Blue cheese crumbles, for topping (optional)
- Dill pickle slices, for topping (optional)
This recipe makes 4 sandwiches. If you want to go the extra mile, homemade Buffalo Sauce Recipe takes this sandwich from great to absolutely unforgettable.
Kitchen Equipment Needed
You don’t need professional kitchen equipment for this one. A few key tools will make the process much smoother and safer.
- Large cutting board and sharp knife
- Meat mallet or rolling pin (for pounding chicken)
- 2–3 large mixing bowls
- Shallow baking dish or rimmed plate (for dredging)
- Dutch oven or large, deep heavy-bottomed pot (for frying)
- Instant-read thermometer (for checking oil temperature and chicken doneness)
- Wire rack set over a rimmed baking sheet
- Tongs or spider strainer
- Paper towels
- Small saucepan (for warming the buffalo sauce and butter)
- Basting brush
- Resealable plastic bag or covered container (for marinating)
Read Also: Easy Fried Chicken Recipe
Recommended Products for This Recipe
These are products that genuinely make a difference in the final result, chosen based on quality and how well they perform in recipes like this one.
1. Frank’s RedHot Original Buffalo Wings Sauce
Frank’s is the gold standard for buffalo sauce, and for good reason. It has the right balance of heat, vinegar tang, and flavor that makes buffalo dishes taste like the real thing. Using a quality buffalo sauce here ensures the final glaze on your fried chicken is bold and authentic.
2. Lodge Cast Iron Dutch Oven
A heavy-bottomed Dutch oven maintains a consistent frying temperature far better than thinner pots. Consistent oil temp is the number one factor in getting evenly golden, non-greasy fried chicken. Lodge’s cast iron construction heats evenly and retains heat beautifully throughout the entire fry.
3. ThermoPro Instant Read Thermometer
Guessing oil temperature is the fastest way to ruin fried chicken. An instant-read thermometer takes the guesswork out completely, ensuring your oil stays at the ideal 350°F (175°C) for that perfect crust without any greasy, underdone chicken.
4. Brioche Hamburger Buns
Brioche buns have the ideal texture for a fried buffalo chicken sandwich. They’re soft enough to compress slightly with each bite without falling apart, and they toast up with a subtle buttery richness that pairs perfectly with the spicy buffalo sauce. Look for bakery-style brioche buns for the best result.
5. OXO Good Grips Spider Strainer
Safely transferring fried chicken in and out of hot oil is critical. A spider strainer lets you lower the chicken gently, move it as needed, and lift it out cleanly to drain, all without your hands anywhere near the hot oil.
Another favorite: Buffalo Chicken Dip Recipe
Step-by-Step Instructions
1. Prepare and Pound the Chicken
- Place your chicken breasts on a cutting board and, using a sharp knife held parallel to the board, carefully slice each breast in half horizontally to create two thinner cutlets from each breast. You’ll end up with 4 cutlets total.
- Place one cutlet inside a resealable plastic bag or between two sheets of plastic wrap.
- Using a meat mallet (flat side) or the bottom of a heavy skillet, pound the cutlet to an even ¼-inch (6mm) thickness across the entire piece. This ensures even cooking so you don’t end up with parts that are overcooked on the edges and undercooked in the center.
- Repeat with the remaining cutlets.
- Pat each cutlet dry with paper towels before proceeding to the marinade. Dry chicken allows the marinade to penetrate more effectively.
2. Make the Buttermilk Marinade and Marinate
- In a large bowl or shallow baking dish, combine 1 cup (240ml) buttermilk, 2 tablespoons hot sauce, 1 teaspoon garlic powder, 1 teaspoon onion powder, 1 teaspoon smoked paprika, 1 teaspoon salt, and ½ teaspoon black pepper.
- Whisk everything together until fully combined.
- Add the pounded chicken cutlets to the marinade, turning each piece to ensure it’s fully coated on all sides.
- Cover the bowl with plastic wrap or transfer the chicken and marinade to a resealable bag.
- Refrigerate for a minimum of 2 hours, but ideally overnight (up to 24 hours). The buttermilk’s lactic acid gently tenderizes the muscle fibers in the chicken, resulting in noticeably juicier, more flavorful meat.
3. Make the Seasoned Dredge
- In a wide, shallow bowl, combine 1 cup (125g) all-purpose flour, ¼ cup (30g) cornstarch, 1 teaspoon baking powder, 1 teaspoon garlic powder, 1 teaspoon onion powder, 1 teaspoon smoked paprika, ½ teaspoon cayenne pepper, 1 teaspoon salt, and ½ teaspoon black pepper.
- Whisk the dry ingredients together until evenly distributed. This is important because uneven spice distribution can lead to some parts of the crust being bland.
- Drizzle the 2 tablespoons of buttermilk over the flour mixture and use your fingers to work it in. This step creates small, shaggy clumps in the dredge that catch more surface area on the chicken and result in a crunchier, more textured crust rather than a smooth, uniform coating.
- Set the dredge bowl near your workstation.
4. Dredge the Chicken
- Remove the marinated chicken cutlets from the refrigerator.
- Working with one piece at a time, lift a cutlet from the marinade and let any excess drip back into the bowl. You don’t want to wipe it completely clean as the coating of marinade helps the dredge stick.
- Lay the cutlet into the flour mixture and press firmly on both sides, making sure the crust adheres to every part of the surface. Use your hands to press the coating into the chicken and create a thick, uneven crust.
- Lift the dredged cutlet and gently shake off any loose excess flour.
- Place the coated cutlet on a wire rack set over a baking sheet.
- Repeat with all four cutlets.
- Allow the dredged chicken to rest on the wire rack for at least 15 to 20 minutes at room temperature, or up to 2 hours in the refrigerator uncovered. This resting time is critical because it allows the coating to dry slightly and adhere more firmly to the chicken, which significantly reduces the risk of the crust falling off during frying.
5. Heat the Frying Oil
- Pour vegetable or canola oil into a Dutch oven or large, deep heavy-bottomed pot until the oil is about 2 to 3 inches (5–7.5cm) deep.
- Place the pot over medium-high heat and clip an instant-read thermometer to the side, or use a probe thermometer to monitor the temperature continuously.
- Heat the oil to 350°F (175°C). This specific temperature is the sweet spot for fried chicken: hot enough to cook the chicken through and create a golden crust, but not so hot that the outside burns before the inside is done.
- While the oil heats, prepare a clean wire rack set over a paper towel-lined baking sheet to receive the fried chicken after cooking.
6. Fry the Chicken
- Once the oil reaches 350°F (175°C), carefully lower one chicken cutlet into the oil using tongs or a spider strainer. Lower it away from you, moving from the near side of the pot toward the far side, to avoid hot oil splashing toward you.
- Fry for 3 to 4 minutes on the first side without moving it. You want the crust to form and set before you attempt to flip.
- Carefully flip the chicken using tongs and fry for another 3 to 4 minutes on the second side, until the coating is deep golden brown and the internal temperature reaches 165°F (74°C) when checked with an instant-read thermometer.
- Transfer the fried cutlet to the wire rack (not directly onto paper towels, which trap steam and make the crust go soggy) and let it rest for 2 to 3 minutes.
- Return the oil to 350°F (175°C) before frying the next piece. The oil temperature drops each time you add cold chicken, so check it between batches.
- Repeat with the remaining cutlets. Avoid crowding the pot, frying no more than one or two pieces at a time.
7. Make the Buffalo Sauce Glaze
- While the chicken fries, combine ½ cup (120ml) buffalo sauce and 2 tablespoons melted unsalted butter in a small saucepan over low heat.
- Whisk together and heat until warmed through and cohesive, about 2 minutes. The butter is not optional here: it transforms sharp hot sauce into the rich, glossy, rounded buffalo flavor you recognize from great wing joints.
- Pour the warmed buffalo sauce into a wide, shallow bowl large enough to coat the chicken.
8. Coat the Fried Chicken in Buffalo Sauce
- Working with one piece at a time, gently dip each fried cutlet into the buffalo sauce mixture, turning to coat both sides evenly.
- Set the sauced cutlet back on the wire rack. The wire rack allows any excess sauce to drip off while the crust stays intact.
- For extra sauce, use a pastry brush to add another coat of buffalo glaze on top.
- Repeat with all four cutlets.
9. Toast the Buns and Assemble the Sandwiches
- Heat a large skillet or griddle over medium heat and add a small amount of butter or cooking spray.
- Place the brioche buns cut-side down in the skillet and toast for 1 to 2 minutes until lightly golden. Toasting the buns is an important step because it adds flavor and, critically, creates a barrier that prevents the bun from becoming soggy from the saucy chicken.
- To assemble each sandwich: spread blue cheese dressing or ranch dressing generously on the bottom half of the toasted bun.
- Add a handful of shredded iceberg lettuce.
- Place a buffalo-glazed fried chicken cutlet on top of the lettuce.
- Layer on tomato slices, pickle slices, and a sprinkle of blue cheese crumbles if using.
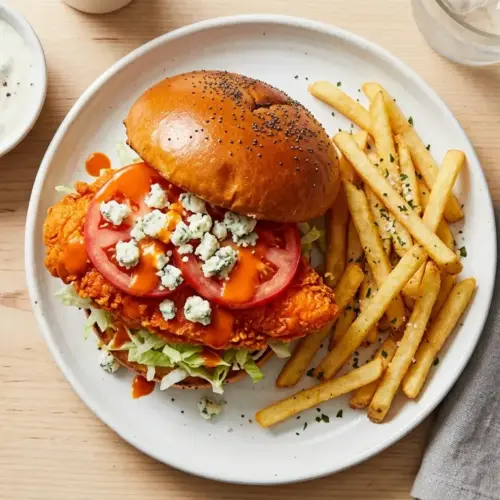
- Spread a little more dressing on the top bun, press it down onto the sandwich, and serve immediately.
For another incredible chicken sandwich variation, check out the Southern Fried Chicken Recipe for classic inspiration.
Tips for Success
A few smart techniques make the difference between a good fried buffalo chicken sandwich and a truly excellent one.
- Marinate as long as possible. Two hours is the minimum, but overnight marinating produces noticeably juicier, more tender chicken. The acid in the buttermilk works slowly and gently, so more time is always better.
- Rest the dredged chicken. Never skip the 15 to 20 minute rest after coating. This step allows the moisture in the marinade to hydrate the flour coating slightly, which makes it stick to the chicken much more firmly during frying.
- Use a thermometer. Guessing oil temperature leads to greasy chicken (too low) or burnt chicken (too high). A consistent 350°F (175°C) is the target throughout the entire fry.
- Don’t crowd the pot. Adding too much cold chicken at once drops the oil temperature dramatically, which leads to oily, soggy breading. Fry in batches of one or two.
- Rest on a wire rack, not paper towels. Paper towels trap steam underneath the crust, turning it soft. A wire rack allows air to circulate and keeps the chicken crispy.
- Add butter to the buffalo sauce. This step is the difference between a sharp, one-dimensional hot sauce coating and a rich, buttery buffalo glaze. Don’t skip it.
- Toast the buns. This takes about 90 seconds and makes a huge textural and flavor difference. A toasted bun adds a subtle nuttiness and holds up to the saucy chicken without turning to mush.
Read Also: Buffalo Chicken Salad Recipe
Serving Suggestions

This sandwich is hearty and satisfying on its own, but the right side dishes turn it into a truly complete meal.
Pair your fried buffalo chicken sandwich with classic, crowd-pleasing sides that can handle the bold flavors of the buffalo sauce:
- Creamy Coleslaw – Cool and creamy slaw is the classic pairing for anything fried and spicy. The richness of the dressing cuts the heat beautifully.
- Fried Pickles – Double down on the fried goodness with crispy dill pickle chips. They also work great as a sandwich topping if you want extra crunch.
- Onion Rings – Golden, crunchy onion rings are a natural partner to any fried chicken sandwich.
- Air Fryer French Fries – Light and crispy fries made in the air fryer keep things a little less heavy than deep-fried versions.
- Baked Beans – Smoky, slightly sweet baked beans are a Southern classic that pairs really well with spicy fried chicken.
- Broccoli Salad – A cool, crunchy broccoli salad balances out the heat and richness of the sandwich with freshness and texture.
- Corn on the Cob – Buttery, sweet corn is a simple, classic side that always works with fried chicken.
For a refreshing contrast to the spice, serve with a side of Vinegar Coleslaw instead of the classic creamy version.
Variations to Try
Once you have the base recipe down, there are so many fun directions you can take this sandwich.
- Honey Buffalo Sandwich: Stir 1 to 2 tablespoons of honey into the buffalo sauce glaze before coating the chicken. The honey adds sweetness that tames the heat and gives the sauce a beautifully sticky, glossy finish.
- Ranch Version: Replace the blue cheese dressing with ranch dressing and use ranch slaw made with shredded cabbage, carrot, and ranch dressing as the topping. This is a milder, kid-friendly version that still packs great flavor.
- Nashville Hot Style: Instead of classic buffalo sauce, coat the fried chicken in a cayenne-laced hot oil glaze (cayenne, brown sugar, smoked paprika, and garlic mixed with frying oil) for a smoky, fiery Nashville Hot twist.
- Air Fryer Version: Skip the frying entirely. After dredging, spray both sides of the breaded chicken generously with cooking spray and air fry at 400°F (200°C) for 12 to 14 minutes, flipping halfway, until golden and cooked through. Then coat in the buffalo sauce glaze as directed.
- Spicy Blue Cheese Topping: Mix 2 tablespoons of your favorite hot sauce directly into the blue cheese dressing for a tangy, spicy spread that turns up the heat on every bite.
- Chicken Thigh Version: Swap breasts for boneless, skinless chicken thighs. Thighs are naturally juicier and more forgiving to cook than breasts, and they produce an even more tender bite.
For a fun twist on buffalo chicken flavor, try the Chicken Tenders Recipe and toss the cooked tenders in buffalo sauce.
Storage and Reheating
Proper storage keeps your fried chicken just as good the next day.
- Refrigerating: Store fried chicken cutlets (unassembled and unsauced if possible) in an airtight container in the refrigerator for up to 4 days.
- Freezing: Fried chicken freezes very well. Place cooled, unsauced cutlets on a baking sheet and freeze until solid, then transfer to a freezer-safe bag or container. Store for up to 2 months.
- Thawing: Thaw frozen fried chicken in the refrigerator overnight before reheating.
- Oven Reheating: Place fried chicken on a wire rack set over a baking sheet and reheat in a 375°F (190°C) oven for 12 to 15 minutes until heated through and the crust has crisped back up.
- Air Fryer Reheating: This is the best method for restoring crispiness. Air fry at 375°F (190°C) for 5 to 7 minutes until hot and crispy throughout.
- What to Avoid: Never microwave fried chicken. The microwave steams the crust from the inside, turning it completely soft and rubbery.
- Store Components Separately: Keep the chicken, slaw, sauce, and buns all separate in the refrigerator. Assemble fresh for each serving so the buns don’t get soggy.
Read Also: Crack Burger Recipe
Nutritional Facts
Based on 1 sandwich (with blue cheese dressing and standard toppings), approximately:
| Nutrient | Amount |
|---|---|
| Calories | ~680–750 kcal |
| Protein | ~42–46g |
| Total Fat | ~30–35g |
| Saturated Fat | ~10–12g |
| Carbohydrates | ~55–60g |
| Fiber | ~2–3g |
| Sodium | ~1,200–1,400mg |
| Cholesterol | ~160–190mg |
Note: Nutritional values are estimates and will vary depending on specific brands, portion sizes, and toppings used.
For a lighter version of this sandwich, swap the blue cheese for a lighter ranch dressing and serve on a whole wheat bun. The Air Fryer Chicken Wings Recipe is another great way to enjoy buffalo flavor with less added fat.
Health Benefits of Key Ingredients
This sandwich is an indulgence, but several of the key ingredients bring genuine nutritional value to the table.
The main components offer more than just great flavor:
- Chicken Breast – Chicken breast is one of the leanest, highest-protein cuts of meat available. A single serving provides between 25 and 35 grams of protein depending on the size, supporting muscle maintenance, satiety, and metabolic function.
- Buttermilk – Buttermilk contains probiotics (live bacterial cultures) that support gut health and digestive function. It’s also a source of calcium, phosphorus, and vitamin B12.
- Hot Sauce / Buffalo Sauce – Many hot sauces are made primarily from cayenne pepper, which contains capsaicin. Capsaicin has been studied for its potential to support metabolism and reduce inflammation in the body.
- Smoked Paprika – Paprika is rich in antioxidants, particularly carotenoids like beta-carotene, lutein, and zeaxanthin, which support eye health and help protect cells from oxidative stress.
- Garlic Powder – Garlic has long been recognized for its antimicrobial and cardiovascular-supportive properties, including modest blood pressure and cholesterol benefits.
- Iceberg Lettuce – While not the most nutrient-dense green, iceberg lettuce is a good source of water, vitamin K, and folate, and adds a refreshing crunch that balances the richness of the sandwich.
- Tomatoes – Tomatoes are one of the best dietary sources of lycopene, a powerful antioxidant associated with reduced risk of certain chronic diseases, as well as vitamin C and potassium.
This sandwich pairs well with the Air Fryer Chicken Wings Recipe for a complete buffalo-themed spread that satisfies without going overboard.
Frequently Asked Questions
1. Can I use chicken thighs instead of chicken breasts?
Absolutely. Boneless, skinless chicken thighs are an excellent choice for this sandwich and many cooks actually prefer them.
Thighs have a higher fat content than breasts, which keeps them moist and juicy even if they cook a minute or two longer than intended. The tradeoff is that thighs are thicker and uneven in shape, so pounding them to an even thickness is especially important for consistent cooking.
2. How do I keep the breading from falling off during frying?
The resting step is your best defense. After dredging the chicken, let it rest on a wire rack for at least 15 to 20 minutes before frying.
This allows the moisture in the marinade to partially hydrate the coating, essentially gluing it to the surface of the chicken. Frying at the right temperature (350°F / 175°C) also helps, since properly hot oil sets the crust almost immediately on contact.
3. What’s the best buffalo sauce to use?
Frank’s RedHot Original Buffalo Wings Sauce is widely considered the gold standard for buffalo-flavored dishes, and for good reason.
It has the right ratio of heat to vinegar tang that makes it versatile and balanced. For a spicier sandwich, you can mix in a small amount of pure hot sauce or cayenne. For a milder version, a small amount of honey stirred into the sauce brings the heat down significantly.
4. Can I make this ahead of time?
Yes, with some caveats. The chicken can be marinated for up to 24 hours in advance, which is actually recommended.
The dredged, unfried chicken can also rest in the refrigerator on a wire rack for up to 8 hours before frying, which is a great way to prep ahead. The fried chicken itself can be stored in the refrigerator for up to 4 days and reheated in the oven or air fryer before serving.
5. Can I use store-bought fried chicken to save time?
You can, and it works reasonably well if you’re short on time. Look for a high-quality fresh or frozen crispy chicken sandwich fillet at your grocery store.
Heat it according to package directions until crispy and hot all the way through, then toss it in the warmed buffalo butter sauce as directed and assemble the sandwich with your preferred toppings. It won’t be quite the same as fresh-fried homemade chicken, but it’s a solid shortcut on busy weeknights.
For another bold, saucy sandwich idea, try this BBQ Chicken Wrap Recipe.
Fried Buffalo Chicken Sandwich
Equipment
- Large cutting board
- Sharp chef's knife
- Meat mallet or rolling pin
- Resealable plastic bag or covered container - for marinating
- 2-3 large mixing bowls
- Shallow baking dish or rimmed plate - for dredging
- Dutch oven or large, deep heavy-bottomed pot
- Instant-read thermometer
- Wire rack - set over a rimmed baking sheet
- Tongs or spider strainer
- Paper towels
- Small saucepan - for warming the buffalo sauce and butter
- Basting brush
- Large skillet or griddle - for toasting buns
- Rimmed Baking Sheet
Ingredients
- 2 boneless, skinless chicken breasts - about 8 oz or 225g each
- 1 cup buttermilk - 240ml
- 2 tablespoons hot sauce - Frank’s RedHot recommended, for the marinade
- 1 teaspoon garlic powder - for the marinade
- 1 teaspoon onion powder - for the marinade
- 1 teaspoon smoked paprika - for the marinade
- 1 teaspoon salt - for the marinade
- 0.5 teaspoon black pepper - for the marinade
For the Seasoned Dredge
- 1 cup all-purpose flour - 125g
- 0.25 cup cornstarch - 30g
- 1 teaspoon baking powder
- 1 teaspoon garlic powder - for the dredge
- 1 teaspoon onion powder - for the dredge
- 1 teaspoon smoked paprika - for the dredge
- 0.5 teaspoon cayenne pepper
- 1 teaspoon salt - for the dredge
- 0.5 teaspoon black pepper - for the dredge
- 2 tablespoons buttermilk - for the dredge
For Frying and Sauce
- Vegetable or canola oil - enough for 2–3 inches or 5–7.5cm deep in the pot
- 0.5 cup buffalo sauce - 120ml, store-bought or homemade
- 2 tablespoons unsalted butter - melted
For the Sandwiches
- 4 brioche sandwich buns
- 1 cup iceberg lettuce - shredded
- 1 tomato - medium, sliced
- 0.5 cup blue cheese dressing or ranch dressing
- Blue cheese crumbles - for topping, optional
- Dill pickle slices - for topping, optional
Instructions
- Slice each chicken breast in half horizontally to create 4 cutlets total. Place each cutlet in a resealable bag and pound to an even ¼-inch (6mm) thickness with a meat mallet.
- Whisk together buttermilk, hot sauce, garlic powder, onion powder, smoked paprika, salt, and pepper in a bowl. Add the pounded chicken and refrigerate for at least 2 hours or up to 24 hours.
- Combine flour, cornstarch, baking powder, garlic powder, onion powder, smoked paprika, cayenne, salt, and pepper in a shallow bowl. Drizzle in 2 tablespoons buttermilk and work it in with your fingers to create small, shaggy clumps.
- Remove chicken from marinade, letting excess drip off. Press firmly into the flour mixture on both sides, then place on a wire rack. Rest for 15-20 minutes at room temperature.
- Heat 2-3 inches (5-7.5cm) of vegetable oil in a Dutch oven to 350°F (175°C). Prepare a wire rack over a paper towel-lined baking sheet for draining.
- Fry cutlets one at a time for 3-4 minutes per side until deep golden brown and internal temperature reaches 165°F (74°C). Transfer to a wire rack to drain and rest for 2-3 minutes.
- Combine buffalo sauce and melted butter in a small saucepan over low heat. Whisk until warm and cohesive, about 2 minutes.
- Dip each fried cutlet into the warm buffalo sauce mixture, turning to coat both sides evenly. Set back on the wire rack to let excess sauce drip off.
- Toast brioche buns cut-side down in a skillet over medium heat for 1-2 minutes until lightly golden. Spread blue cheese or ranch dressing on the bottom bun, add lettuce, chicken, tomato, pickles, and blue cheese crumbles.
Notes
- Marinate as long as possible: 2 hours is the minimum, but overnight marinating produces noticeably juicier, more tender chicken.
- Don’t skip the resting step: Resting the dredged chicken for 15-20 minutes helps the coating adhere firmly to the chicken during frying.
- Use a thermometer: Maintaining oil at a consistent 350°F (175°C) is crucial for a golden, non-greasy crust.
- Fry in batches: Avoid crowding the pot. Adding too much cold chicken drops the oil temperature and leads to soggy breading.
- Always rest on a wire rack: Paper towels trap steam and make the crust go soft. A wire rack allows air to circulate and keeps the chicken crispy.
- Don’t skip the butter in the sauce: Butter transforms sharp hot sauce into a rich, glossy buffalo glaze. This step is essential for authentic flavor.
- Toast the buns: This adds flavor and creates a barrier that prevents the bun from becoming soggy from the saucy chicken.
- Storage tip: Store fried chicken cutlets (unsauced) in an airtight container in the refrigerator for up to 4 days. Reheat in a 375°F (190°C) oven for 12-15 minutes to restore crispiness.
- Never microwave: Microwave reheating turns the crust soft and rubbery. Always use the oven or air fryer for the best results.
- Make it your own: Try honey buffalo, Nashville hot, or ranch variations by adjusting the sauce or toppings to your preference.
Final Thoughts
This fried buffalo chicken sandwich recipe delivers everything you’d want from a great sandwich: a shatteringly crispy crust, juicy and well-seasoned chicken, and that unmistakable tangy, buttery buffalo kick.
It takes a bit of planning with the overnight marinade, but the actual cooking process is very manageable once everything is prepped and ready to go. The results are genuinely restaurant-worthy.
Give this recipe a try the next time you’re craving something bold and satisfying. Once you make it at home, the takeout version will never quite measure up.
If you do make it, we’d love to hear how it turned out. Leave a comment below with your experience, any tweaks you made, or share a photo. Your feedback helps other readers and genuinely makes this community better.
Recommended:
- Buffalo Chicken Sandwich Recipe
- Grilled Buffalo Chicken Sandwich Recipe
- Buffalo Sauce Recipe
- Creamy Coleslaw Recipe
- Air Fryer Chicken Wings Recipe
- Onion Rings Recipe
- Bang Bang Sauce Recipe
- Burger Sauce Recipe
- Vinegar Coleslaw Recipe
- Air Fryer French Fries Recipe


