If you’ve been searching for a healthy Belgian waffle recipe that doesn’t compromise on taste or texture, you’ve landed in the right place. These waffles are crispy on the outside, pillowy on the inside, and made with wholesome ingredients that make breakfast feel a little less guilty.
The secret here isn’t cutting everything out. It’s swapping smartly. Using white whole wheat flour instead of refined all-purpose flour adds fiber and nutrients without making the waffles dense or dry. Greek yogurt replaces a portion of the fat and keeps the batter incredibly moist. And a touch of pure maple syrup in the batter means you won’t feel the need to drench your plate at the table.
These aren’t diet waffles that taste like cardboard. They’re genuinely delicious waffles that happen to be better for you.
You might also enjoy: Belgian Waffle Recipe
Why You’ll Love This Healthy Belgian Waffle Recipe
This healthy Belgian waffle recipe has earned its place in our regular breakfast rotation for so many reasons.
The ingredient swaps are thoughtful and purposeful, not gimmicky. Every change serves a function, from boosting protein to improving texture to reducing unnecessary sugar.
- Whole grain goodness – White whole wheat flour delivers all the fiber benefits of whole grain without the heavy, dense texture that turns people off.
- High in protein – Between the eggs and the Greek yogurt, each waffle packs a solid protein punch that keeps you full longer.
- Lower in fat than traditional versions – Greek yogurt replaces most of the butter, significantly cutting saturated fat without sacrificing moisture.
- Naturally sweetened – A small amount of pure maple syrup in the batter means no refined sugar and no artificial sweeteners.
- Deep, airy pockets – The Belgian waffle iron creates those signature deep pockets that hold toppings beautifully, making every bite more satisfying.
- Freezer-friendly – Make a big batch on Sunday and have breakfast ready for the whole week.
- Customizable – The base batter is versatile and takes well to mix-ins like blueberries, cinnamon, or lemon zest.
Read Also: Easy Waffle Recipe
Ingredients
This recipe uses simple, real-food ingredients you can find at any grocery store. Nothing fancy, nothing hard to source.
Here’s everything you’ll need to make 4 large Belgian waffles:
- 1 1/2 cups (180g) white whole wheat flour
- 2 teaspoons baking powder
- 1/2 teaspoon baking soda
- 1/4 teaspoon fine sea salt
- 1 teaspoon ground cinnamon
- 2 large eggs, separated
- 1 cup (240ml) low-fat buttermilk (or regular milk with 1 tablespoon lemon juice)
- 1/2 cup (120g) plain Greek yogurt (full-fat or 2%)
- 2 tablespoons pure maple syrup
- 2 tablespoons coconut oil, melted and cooled (or light olive oil)
- 1 teaspoon pure vanilla extract
- Cooking spray or a small amount of oil for the waffle iron
This combination of baking powder and baking soda is intentional. The baking powder gives the batter its lift, while the baking soda reacts with the buttermilk and yogurt to add extra tenderness and a slight tang.
For a dairy-free version, use unsweetened oat milk with a tablespoon of apple cider vinegar in place of buttermilk, and swap the Greek yogurt for a plain dairy-free yogurt like coconut or almond-based. The texture will be slightly less fluffy but still very good.
For a gluten-free version, check out this gluten-free Belgian waffle recipe for a tailored approach.
Kitchen Equipment Needed
You don’t need a lot of gadgets for this recipe, but a few key tools make the process smoother.
- Belgian waffle iron – A deep-pocket Belgian waffle maker is essential for those tall, airy squares. The deep grid creates the signature texture that separates Belgian waffles from regular ones.
- Large mixing bowl – For combining the wet ingredients and folding in the dry.
- Medium mixing bowl – For whisking together the dry ingredients separately.
- Electric hand mixer or stand mixer – For beating the egg whites to stiff peaks, which is the key to extra-fluffy waffles.
- Whisk – For mixing the wet ingredients smoothly before combining.
- Silicone spatula – For gently folding the egg whites into the batter without deflating them.
- Measuring cups and spoons – Accuracy matters in baking; eyeballing the flour can lead to dense waffles.
- Ladle or 1/2-cup measuring cup – For portioning batter into the waffle iron consistently.
- Cooling rack – Keeping cooked waffles on a wire rack (not stacked) prevents steam from making them soggy.
You might also enjoy: Homemade Belgian Waffle Recipe
Recommended Products for This Recipe
These are products I genuinely recommend based on quality and performance. They’ll make this recipe easier and the results even better.
1. Cuisinart Belgian Waffle Maker
A deep-grid Belgian waffle iron is non-negotiable for getting those tall, fluffy squares with crispy edges. The Cuisinart model heats evenly and has indicator lights so you know exactly when to pour and when your waffle is done. It’s a reliable, mid-range option that consistently produces restaurant-quality results.
2. White Whole Wheat Flour
White whole wheat flour is milled from a lighter variety of whole wheat and has a milder flavor than traditional whole wheat, making it perfect for waffles and pancakes. Bob’s Red Mill makes a great one that’s widely available and consistent in texture.
3. Pure Maple Syrup, Grade A Dark
Not all maple syrups are equal. Grade A Dark Amber has a richer, more complex flavor than light amber, meaning you use less for the same level of sweetness. A good quality maple syrup transforms both the batter and your toppings.
4. Organic Unrefined Coconut Oil
Using unrefined (virgin) coconut oil adds a subtle warmth to the batter that refined oils don’t. It’s a clean, heart-healthy fat that replaces butter beautifully without leaving any heavy residue on the waffle iron.
5. OXO Good Grips Silicone Spatula
Folding egg whites is a technique that requires a gentle touch, and a good silicone spatula makes all the difference. This OXO version is flexible enough to get under the egg whites without tearing them, keeping your batter as airy as possible.
Read Also: Buttermilk Belgian Waffle Recipe
Step-by-Step Instructions
Follow these steps carefully and you’ll have the fluffiest, most satisfying healthy Belgian waffles you’ve ever made. Read through everything once before starting so there are no surprises.
Step 1: Preheat Your Waffle Iron
- Turn on your Belgian waffle iron and set it to medium-high heat, or follow the manufacturer’s settings for your specific model.
- Allow it to preheat fully before you pour in any batter. Most models have an indicator light that tells you when it’s ready.
- Lightly coat the top and bottom grids with cooking spray or brush on a thin layer of melted coconut oil using a pastry brush. Do this before every waffle to prevent sticking.
Step 2: Separate the Eggs
- Crack the 2 large eggs, carefully separating the yolks from the whites.
- Place the egg yolks in a large mixing bowl. Place the egg whites in a separate clean, dry medium bowl. Any trace of yolk or grease in the whites bowl will prevent them from whipping properly, so make sure your bowls are clean.
- Set the bowl of egg whites aside at room temperature while you prepare the rest of the batter. Room temperature whites whip faster and to greater volume than cold ones.
Step 3: Mix the Dry Ingredients
- In a separate medium bowl, add the 1 1/2 cups (180g) white whole wheat flour, 2 teaspoons baking powder, 1/2 teaspoon baking soda, 1/4 teaspoon fine sea salt, and 1 teaspoon ground cinnamon.
- Whisk these together until evenly combined. Whisking aerates the flour slightly and ensures the leavening agents are distributed evenly, so you don’t get any pockets of baking soda in the finished waffles.
- Set this bowl aside.
Step 4: Whisk the Wet Ingredients
- To the large bowl with the egg yolks, add the 1 cup (240ml) buttermilk, 1/2 cup (120g) plain Greek yogurt, 2 tablespoons pure maple syrup, 2 tablespoons melted and cooled coconut oil, and 1 teaspoon pure vanilla extract.
- Whisk everything together until smooth and well combined. Make sure the coconut oil is fully cooled before adding it to the bowl, otherwise it could slightly cook the egg yolks.
- The mixture should look smooth and slightly thick from the yogurt.
Step 5: Combine Wet and Dry Ingredients
- Pour the dry ingredient mixture into the bowl with the wet ingredients.
- Using a silicone spatula or wooden spoon, gently stir until just combined. A few small lumps are completely fine and actually desirable. Overmixing at this stage develops the gluten in the flour and leads to tough, chewy waffles instead of tender ones.
- Stop mixing the moment you no longer see streaks of dry flour. The batter will look thick. Set it aside.
Step 6: Beat the Egg Whites
- Using an electric hand mixer or a stand mixer fitted with the whisk attachment, beat the egg whites on medium-high speed until stiff peaks form.
- You’ll know you’ve reached stiff peaks when the whites hold their shape when you lift the beaters. The tips should stand straight up, not flop over.
- This step takes approximately 2 to 3 minutes with an electric mixer. Do not skip this step. The whipped whites are what give these waffles their signature light, airy interior.
Step 7: Fold Egg Whites Into the Batter
- Add about one-third of the beaten egg whites to the batter and stir gently with your spatula. This first addition doesn’t need to be careful. It’s just loosening the thick batter to make the next fold easier.
- Add the remaining egg whites and fold them in using a gentle, sweeping motion. Slide the spatula under the batter, fold it over the egg whites, and rotate the bowl as you go.
- Continue folding just until the white streaks disappear. The batter should look light, slightly lumpy, and airy. Resist the urge to stir it smooth.
Step 8: Cook the Waffles
- Pour approximately 3/4 cup (180ml) of batter onto the center of the preheated waffle iron. The exact amount depends on your waffle iron’s size, so start with slightly less than you think you need on the first round.
- Gently spread the batter toward the edges using the back of a spoon if needed, but don’t press down. The iron will distribute it when you close the lid.
- Close the lid and cook for approximately 4 to 5 minutes, or until the steam has significantly reduced and the waffle is golden brown and crisp.
- Do not open the waffle iron before 4 minutes, as the waffle may still be raw inside and will tear apart. Wait until the steam slows down.
Step 9: Rest and Serve
- Use a fork or tongs to carefully remove the finished waffle from the iron and place it directly on a wire cooling rack in a single layer.
- Do not stack waffles on top of each other. Stacking traps steam and makes the bottoms soggy.
- If you’re making multiple waffles and want to keep them warm, place the cooling rack on a baking sheet and put it in a 200°F (93°C) oven while you cook the remaining waffles.
- Repeat with the remaining batter, re-oiling the iron before each waffle.
- Serve immediately with your favorite healthy toppings.
This same careful technique works beautifully in our vegan Belgian waffle recipe if you want a completely plant-based option.
Tips for Success
A few extra pointers to make sure your waffles come out perfectly every single time.
- Don’t skip separating the eggs. Beating the whites separately and folding them in is the single most important technique in this recipe. It’s what makes Belgian waffles light and airy rather than dense and heavy.
- Use room temperature ingredients. Cold buttermilk and yogurt can cause the melted coconut oil to solidify into tiny lumps. Take your dairy ingredients out of the fridge about 15 minutes before starting.
- Let the batter rest for 2 to 3 minutes after combining before cooking. This gives the flour time to hydrate and the baking powder time to start working.
- Don’t peek too early. Opening the waffle iron prematurely is the number one cause of torn waffles. Wait until the steam significantly slows before lifting the lid.
- Keep the heat consistent. If your waffles are pale and soft, your iron isn’t hot enough. If they’re burning before cooking through, reduce the heat slightly.
- Measure flour correctly. Spoon the flour into your measuring cup and level it off with a straight edge. Scooping directly from the bag packs the flour and can add 20% more than the recipe calls for, resulting in dense waffles.
For another fantastic breakfast option, check out this easy French toast recipe for a similarly crowd-pleasing morning meal.
Serving Suggestions

These healthy Belgian waffles are versatile enough to go in any direction you want for breakfast.
The deep pockets are practically designed for holding toppings, and the subtle sweetness of the waffle itself pairs well with both fresh fruit and warm, savory additions.
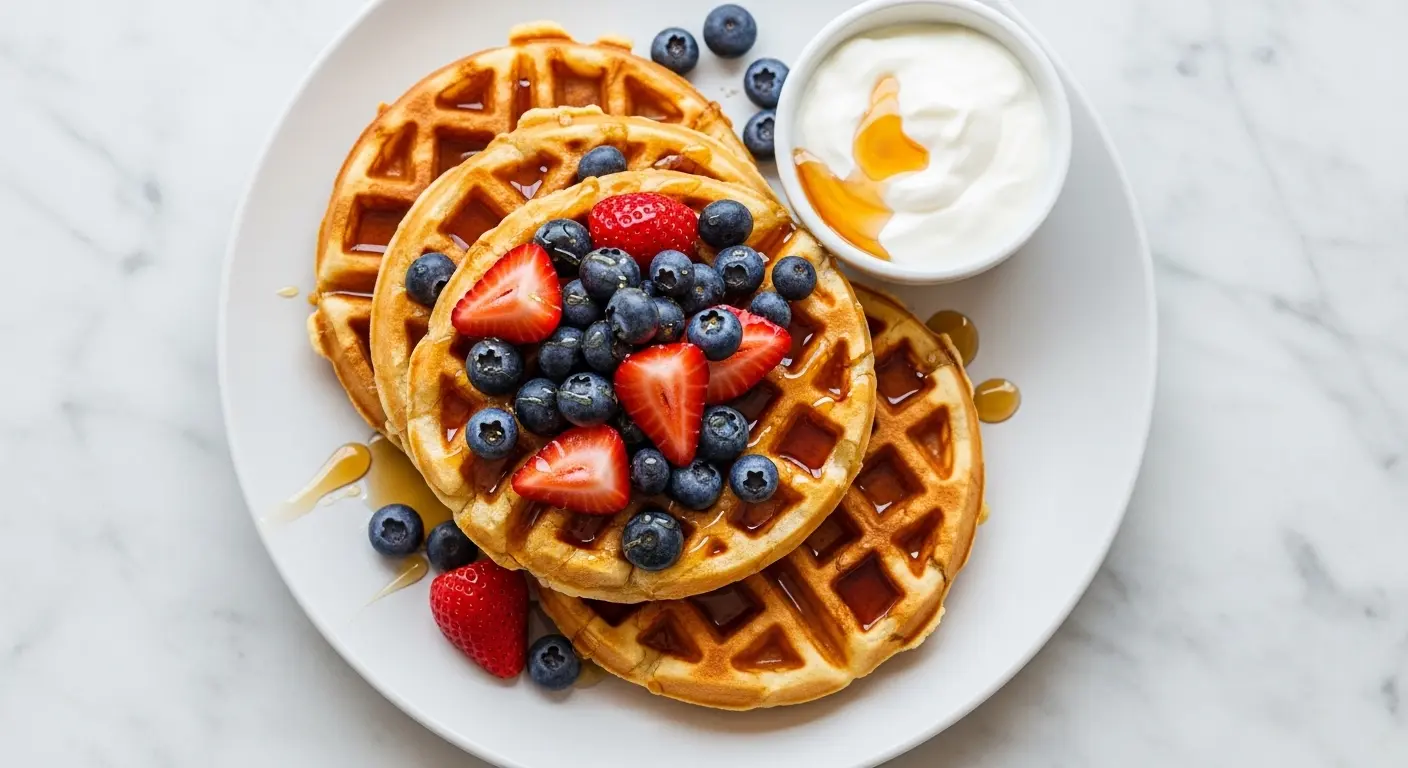
- Fresh berry compote – Warm blueberries, strawberries, or raspberries with a splash of lemon juice over low heat until they release their juices. No added sugar needed.
- Sliced bananas and natural peanut butter – A protein-rich topping that makes these waffles feel like a complete meal.
- Greek yogurt and honey – Dollop plain Greek yogurt on top and drizzle with a little raw honey for a creamy, tangy contrast.
- Pure maple syrup and fresh fruit – The classic combo. A small drizzle of real maple syrup goes a long way here.
- Almond butter and sliced strawberries – Light, satisfying, and naturally sweet without any refined sugar.
- Savory version – Top with a fried or poached egg, sliced avocado, and a sprinkle of flaky salt for a protein-packed savory breakfast.
For an equally wholesome morning option that’s great alongside these waffles, try these Air Fryer Cloud Eggs for a fun, protein-rich addition.
Variations to Try
Once you’ve mastered the base recipe, these variations are easy to pull off without changing the method at all.
- Blueberry Belgian Waffles – Fold 3/4 cup (110g) of fresh or frozen blueberries into the batter just before cooking. Frozen work great and don’t need to be thawed first.
- Banana Oat Waffles – Replace 1/2 cup (60g) of the white whole wheat flour with rolled oats and mash one ripe banana into the wet ingredients. Adds natural sweetness and extra fiber.
- Cinnamon Apple Waffles – Fold in 1/2 cup (75g) of finely diced apple and increase the cinnamon to 1 1/2 teaspoons. Pairs wonderfully with a drizzle of warm honey.
- Chocolate Chip Protein Waffles – Add 2 tablespoons of chocolate protein powder and a handful of dark chocolate chips to the batter for a more indulgent but still nutritious option.
- Lemon Poppy Seed Waffles – Add the zest of one lemon and 1 tablespoon of poppy seeds to the dry ingredients. Bright, fresh, and unexpected.
- Pumpkin Spice Waffles – Swap 1/4 cup (60g) of the Greek yogurt for canned pure pumpkin puree and add 1/2 teaspoon of pumpkin spice mix.
For a completely from-scratch approach, take a look at this authentic Belgian waffle recipe for the traditional, full-butter version.
Storage and Reheating
These waffles store and reheat exceptionally well, making them ideal for meal prep.
Here’s how to keep them tasting fresh:
- Refrigerator – Store cooled waffles in an airtight container or zip-top bag with parchment paper between layers. They’ll keep for up to 4 days in the fridge.
- Freezer – Freeze completely cooled waffles in a single layer on a baking sheet for 1 hour, then transfer to a freezer-safe bag. They keep well for up to 3 months. No need to thaw before reheating.
- Toaster (best method) – Pop refrigerated or frozen waffles directly into the toaster on medium-high. This method restores the crispy exterior better than any other option and takes about 2 to 3 minutes.
- Oven method – Preheat oven to 350°F (175°C). Place waffles directly on the oven rack or on a baking sheet and heat for 8 to 10 minutes until crispy and heated through.
- Avoid the microwave – Microwaving makes waffles soft and steamy rather than crisp. It’s fine if you genuinely don’t mind a softer texture, but it won’t replicate the fresh-cooked experience.
If you love batch cooking breakfast, you’ll want to bookmark this breakfast casserole recipe for another make-ahead option.
Nutritional Facts
Per waffle (makes 4 total), based on the recipe as written. Values are estimates.
| Nutrient | Amount Per Waffle |
|---|---|
| Calories | ~285 |
| Total Fat | 9g |
| Saturated Fat | 6g |
| Cholesterol | 95mg |
| Sodium | 310mg |
| Total Carbohydrates | 38g |
| Dietary Fiber | 4g |
| Total Sugars | 8g |
| Added Sugars | 6g |
| Protein | 12g |
Note: Nutritional values do not include toppings. Using full-fat Greek yogurt versus 2% will slightly increase calories and fat.
These numbers compare very favorably to traditional Belgian waffles made with white flour and butter, which typically clock in at 400+ calories and 16+ grams of fat per waffle with significantly less protein and fiber.
Read Also: Easy Protein Pancakes Recipe
Health Benefits of Key Ingredients
The ingredients in this recipe aren’t just healthier swaps. Each one brings something meaningful to the table.
Here’s a closer look at what you’re actually getting with every bite:
- White whole wheat flour contains all three parts of the wheat kernel (bran, germ, and endosperm), providing B vitamins, iron, magnesium, and fiber that refined white flour lacks entirely. The fiber helps slow the digestion of carbohydrates, leading to steadier blood sugar levels after eating.
- Greek yogurt is one of the most protein-dense dairy foods available. A half cup delivers roughly 10 to 12 grams of protein, and it also contains probiotics that support gut health and calcium for bone strength.
- Eggs are among the most complete protein sources in the food world. They contain all nine essential amino acids, along with choline, which is critical for brain health, and lutein and zeaxanthin, which support eye health. Separating and whipping the whites here also extracts maximum functional value from this ingredient.
- Pure maple syrup contains zinc, manganese, and over 24 antioxidants, making it a genuinely nutritious choice compared to refined white sugar or corn syrup. Because it’s sweeter in flavor, you tend to use less of it overall.
- Coconut oil provides medium-chain triglycerides (MCTs), a form of fat that the body processes differently than long-chain fats. MCTs are converted into energy more quickly and are less likely to be stored as body fat.
- Buttermilk adds tenderness and a light tang that complements whole wheat flour well. It also contains potassium and phosphorus and is lower in fat than regular milk while still providing calcium.
For a similarly nutrition-forward breakfast, check out this baked oatmeal recipe that’s just as batch-friendly.
Frequently Asked Questions
1. Can I make this recipe without a Belgian waffle iron?
Yes, you can use a standard waffle iron and the batter will work just fine. The waffles won’t have the deep pockets that make Belgian waffles distinctive, but the flavor and texture will be equally good.
The cooking time may be slightly shorter on a standard iron, so start checking at 3 minutes.
2. Can I use regular all-purpose flour instead of white whole wheat?
You can substitute all-purpose flour in a 1:1 ratio without changing anything else in the recipe. The waffles will have a slightly lighter color and less fiber, but the taste and texture will be excellent.
For a full whole grain flavor and maximum nutrition, stick with white whole wheat or traditional whole wheat (though traditional whole wheat may produce slightly denser waffles).
3. Can I make the batter ahead of time?
The batter is best used immediately after mixing, since the egg whites lose their volume over time. However, you can pre-mix the dry ingredients and the wet ingredients (minus the egg whites) the night before and store them separately in the fridge.
In the morning, all you need to do is whip the egg whites and fold everything together.
4. Why are my waffles not crispy?
There are three common causes: the waffle iron wasn’t fully preheated, the batter was too wet, or the waffles were stacked while cooling. Make sure the iron reaches full temperature before pouring the batter, and always rest cooked waffles on a wire rack in a single layer.
Putting them in a 200°F (93°C) oven on the rack while you finish cooking the rest also helps maintain crispness.
5. Can I make these waffles vegan?
To make vegan Belgian waffles, you’ll need to replace the eggs, buttermilk, and Greek yogurt. Use flax eggs (1 tablespoon ground flaxseed plus 3 tablespoons water per egg, rested 5 minutes), unsweetened oat milk with apple cider vinegar for the buttermilk, and a plain coconut or almond yogurt.
The egg white technique won’t be replicable, so the vegan version will be slightly less airy. For a fully optimized vegan version with tested ratios, the vegan Belgian waffle recipe covers all the bases.
Read Also: Easy Acai Bowl Recipe
Final Thoughts
This healthy Belgian waffle recipe proves that eating well doesn’t mean eating boring. With a few intentional swaps, you get all the crispy, golden, deep-pocketed satisfaction of a classic Belgian waffle, plus a real nutritional boost that keeps you energized well past breakfast.
If you’ve been hesitant to try a healthier waffle, this is the one to start with. It’s straightforward enough for a weekday morning and impressive enough to make for guests.
Give it a try this weekend and let me know how it goes. Drop a comment below with your favorite toppings or any creative variations you tried. I love hearing what people do with this recipe!
Recommended:
- Easy Belgian Waffle Recipe
- Gluten Free Belgian Waffle Recipe
- Pumpkin Pancake Recipe
- Cracker Barrel Pancake Recipe
- Gluten Free Pancake Recipe
- Buttermilk Pancake Recipe
- Air Fryer French Toast Recipe
- Basic Crepe Recipe
- Baked Oatmeal Recipe
- Easy Overnight Oats Recipe


